
Introduction
This manual provides instructions for the assembly, installation, and maintenance of your HSPLXYT Outdoor Privacy Screen. Constructed from durable PE-coated galvanized steel, this slatted panel offers privacy and can enhance your outdoor living areas such as patios, backyards, and gardens. It is designed for easy installation and versatility.
Setup and Installation
The HSPLXYT Outdoor Privacy Screen is designed for straightforward assembly. Follow these steps for proper installation:
- Unpack Components: Carefully remove all parts from the packaging and verify that all components are present according to the packing list.
- Assemble Base Supports: Attach the base supports (labeled '1' in the diagram) to the bottom sections of the vertical posts. Ensure they are securely fastened.
- Connect Lower Vertical Posts: Insert the lower vertical posts (labeled '2') into the assembled base supports.
- Attach Slatted Panels: Begin attaching the slatted panels to the vertical posts. The panels slide into designated slots on the posts. Work from bottom to top, ensuring each panel is fully seated.
- Connect Middle Vertical Posts: Once the lower panels are in place, connect the middle vertical posts (labeled '3') to extend the height.
- Continue Attaching Panels: Continue sliding the remaining slatted panels into the vertical posts.
- Attach Upper Vertical Posts: Connect the upper vertical posts (labeled '4') to complete the frame.
- Secure Connections: Ensure all connections (labeled '5') between panels and posts are firm and stable.
- Choose Fixing Method:
- Ground Insertion Model: For soft ground (soil, garden beds, large pots), insert the vertical posts directly into the ground to a sufficient depth for stability.
- A1 Hard Ground Fixing Base: For hard surfaces (patios, concrete), use the A1 support accessories. These bases allow the screen to be placed directly or bolted down for stability.
- A2 Multiple Fence Link Base: When connecting multiple screens on hard ground, use A2 accessories to create smooth, stable connections between panels.
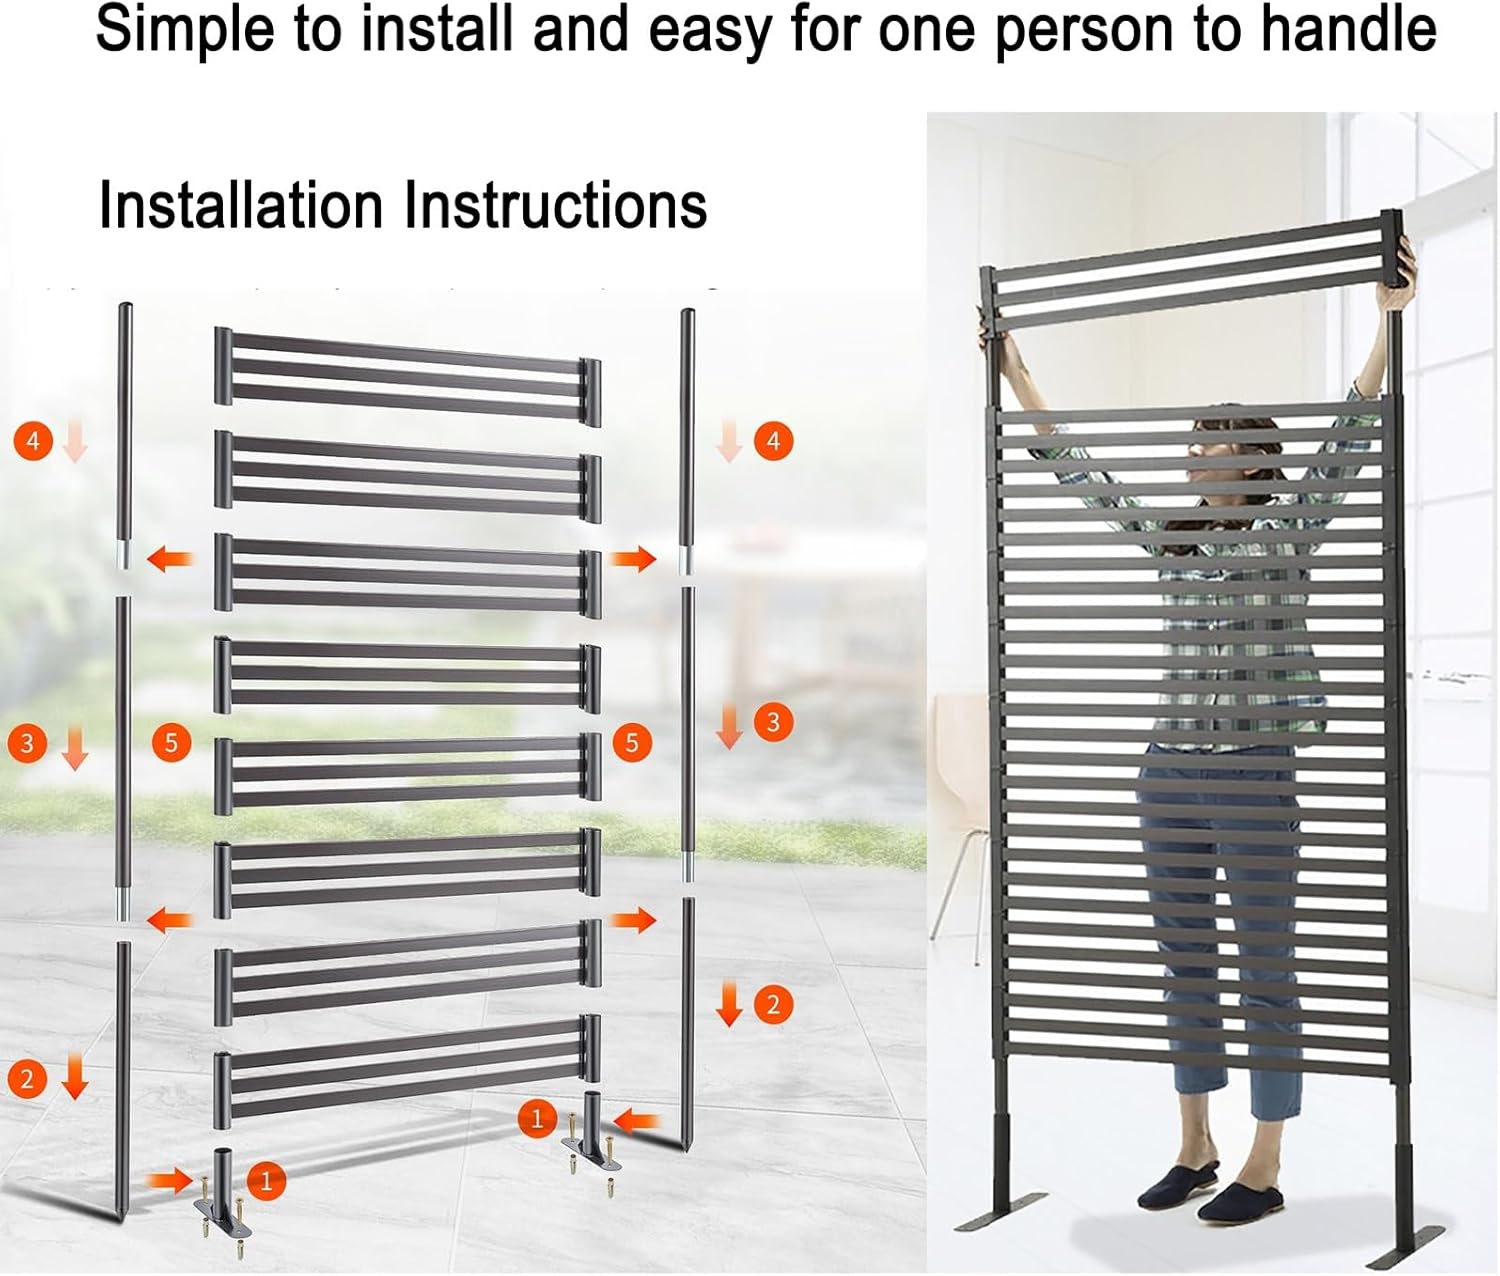
Image: Step-by-step assembly instructions for the privacy screen, demonstrating how components connect and a person handling the assembled screen.
Operating and Usage
Your HSPLXYT Outdoor Privacy Screen serves multiple functions to enhance your outdoor living space:
- Privacy Barrier: Position the screen to block unwanted views from neighbors or public areas, creating a secluded environment for relaxation. The narrow horizontal slats provide significant privacy without completely obstructing light or airflow.
- Decorative Element: Use the screen to define areas within your garden or patio, adding a modern and stylish touch. Its dark brown panel and black frame complement various outdoor aesthetics.
- Plant Trellis: The slatted design allows for climbing plants to grow and intertwine, transforming the screen into a living green wall.
- Potted Plant Display: Hang potted flowers or small planters directly onto the slats to create a vertical garden display.

Image: Privacy screen used as a vertical garden, with various potted plants hanging from its slats.
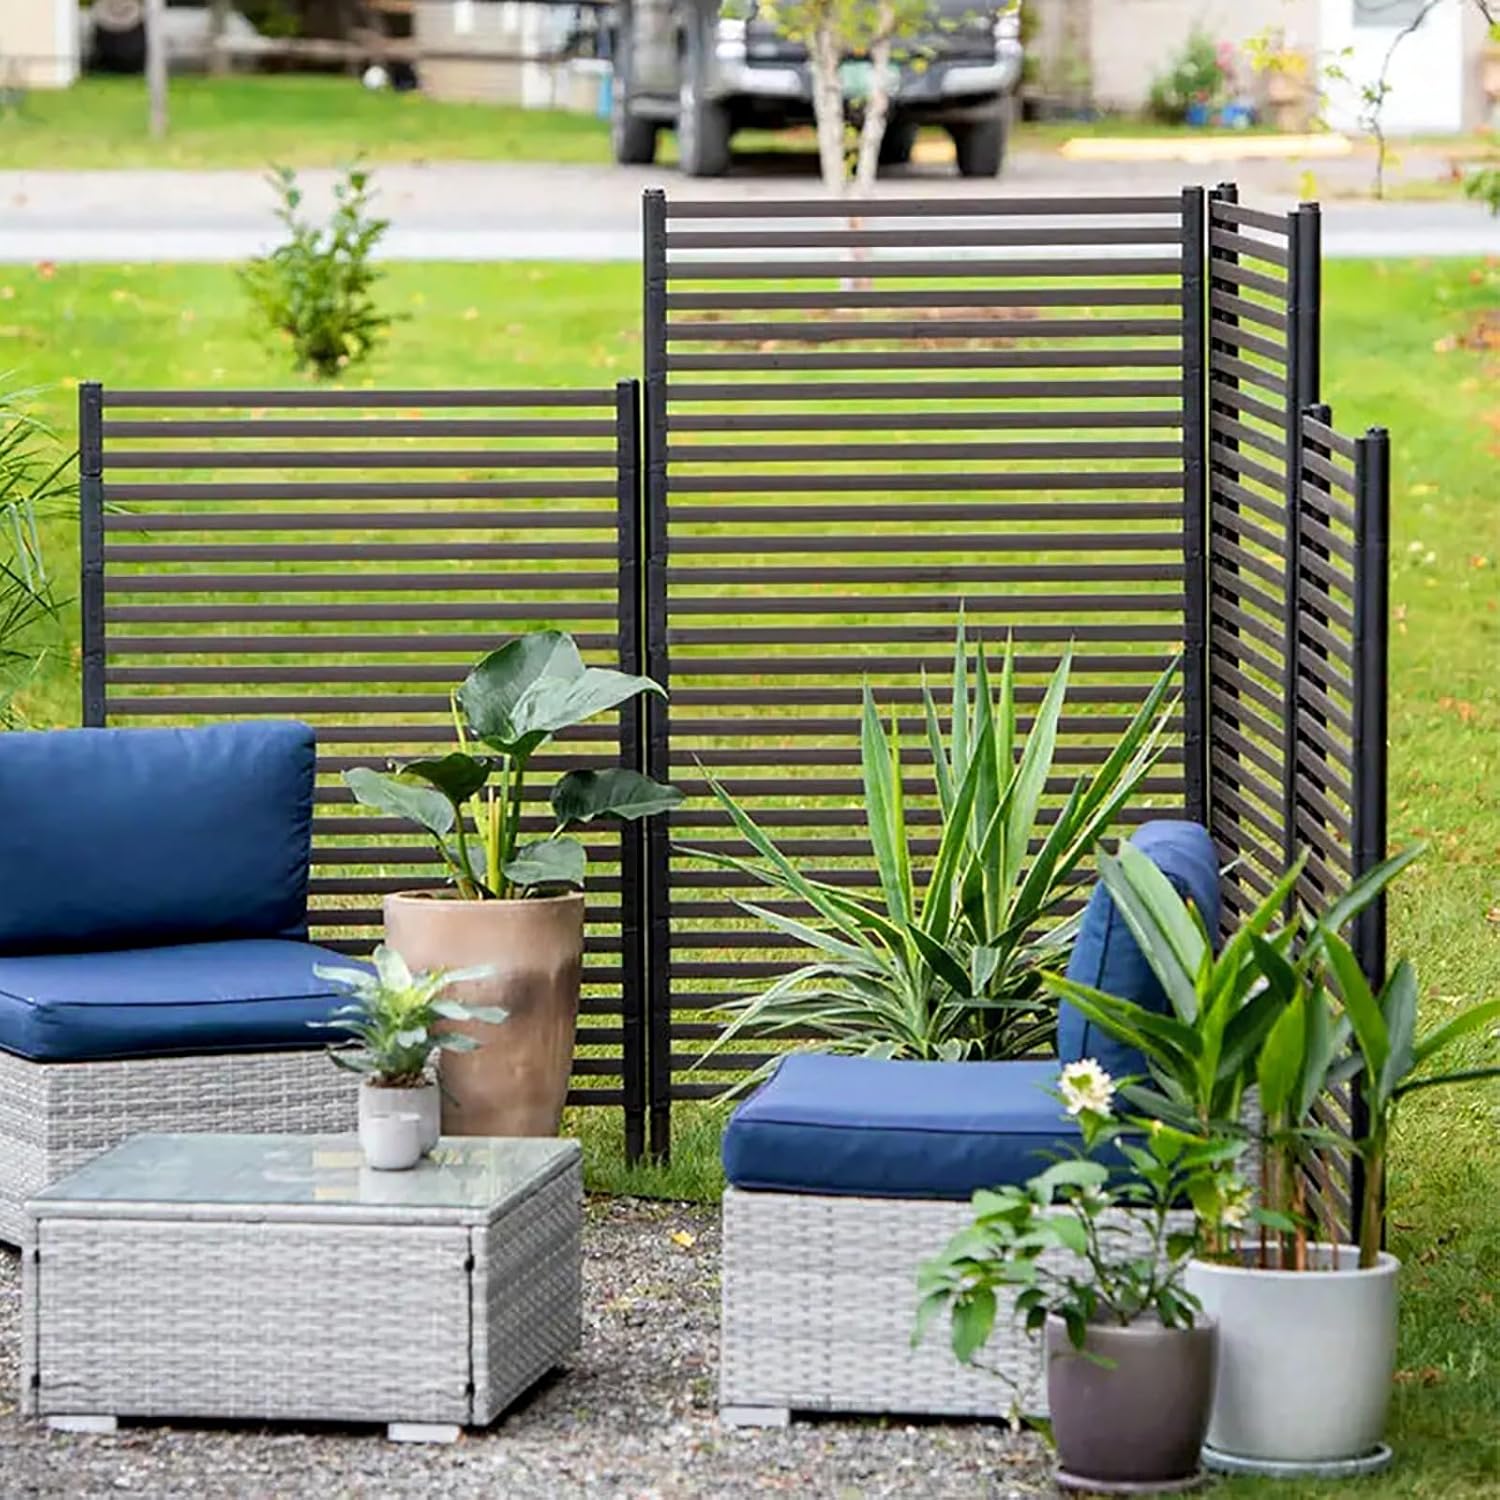
Image: Several privacy screens installed in a garden, creating distinct zones around patio furniture.
Maintenance
The PE-coated galvanized steel construction of your privacy screen is designed for durability and weather resistance. To maintain its appearance and prolong its lifespan, follow these simple maintenance guidelines:
- Regular Cleaning: Periodically clean the screen with a mild soap solution and water. Use a soft cloth or sponge to wipe down the surfaces.
- Rinsing: After cleaning, rinse the screen thoroughly with clean water to remove any soap residue.
- Drying: Allow the screen to air dry or wipe it dry with a clean cloth to prevent water spots.
- Avoid Harsh Cleaners: Do not use abrasive cleaners, solvents, or harsh chemicals, as these can damage the PE coating.
- Inspect for Damage: Occasionally inspect the screen for any signs of wear, rust, or damage to the coating. Address any issues promptly to prevent further deterioration.
Troubleshooting
If you encounter any issues with your privacy screen, consider the following common solutions:
- Screen Instability: If the screen feels wobbly or unstable after installation, ensure all connections between panels and posts are fully secured. For ground insertion models, verify that the posts are inserted deep enough into stable soil. For hard ground bases (A1/A2), confirm that the bases are properly placed or bolted down.
- Difficulty Assembling Panels: Ensure that the slatted panels are aligned correctly with the grooves in the vertical posts. Apply gentle, even pressure to slide them into place. Do not force components.
- Damaged Coating: Minor scratches on the PE coating can be touched up with appropriate outdoor-grade paint if desired. For significant damage, contact customer support.
- Rust Formation: While PE-coated galvanized steel is rust-resistant, prolonged exposure to harsh conditions or damage to the coating can lead to rust. Clean any rust spots immediately and apply a rust-inhibiting primer and paint.
Specifications
| Feature | Detail |
|---|---|
| Model | 90x180cm (35.43x70.86in) |
| Material | PE-Coated Galvanized Steel |
| Color | Dark Brown Panel, Black Frames |
| Assembly Required | Yes |
| Number of Pieces | 1 (main screen unit) |
| Item Weight | 6500 Grams |
| Fixing Methods | Ground Insertion, A1 Hard Ground Fixing Base (optional), A2 Multiple Fence Link Base (optional) |

Image: Dimensional overview of the privacy screen, highlighting the 90cm width and various height options.
Customer Support
Your satisfaction is our top priority. If you have any questions, concerns, or require assistance with your HSPLXYT Outdoor Privacy Screen, please do not hesitate to contact our customer service team. We are ready to help and will promptly address any issues that may arise.
Please refer to your purchase documentation for specific contact information or visit the official HSPLXYT website for support resources.