1. Introduction and Overview
This manual provides essential information for the safe and efficient operation, maintenance, and troubleshooting of your MechMaxx Industrial Wet/Dry Vacuum Cleaner, Model IVA3M. This industrial-grade vacuum is designed for diverse cleaning tasks in non-continuous manufacturing areas and for industrial dust extraction. It is capable of handling both dry dust, such as industrial, metal, and concrete dust, and wet liquids like sewage.
Key features include a powerful 3.3 HP motor system, a 16-gallon detachable collection tank, and an H-Class HEPA filter for superior filtration efficiency (>99% at 0.3 µm). The unit also features an external Jet Pulse Filter Cleaning System to maintain filter clarity and 4 casters (2 with brakes) for mobility and secure positioning.
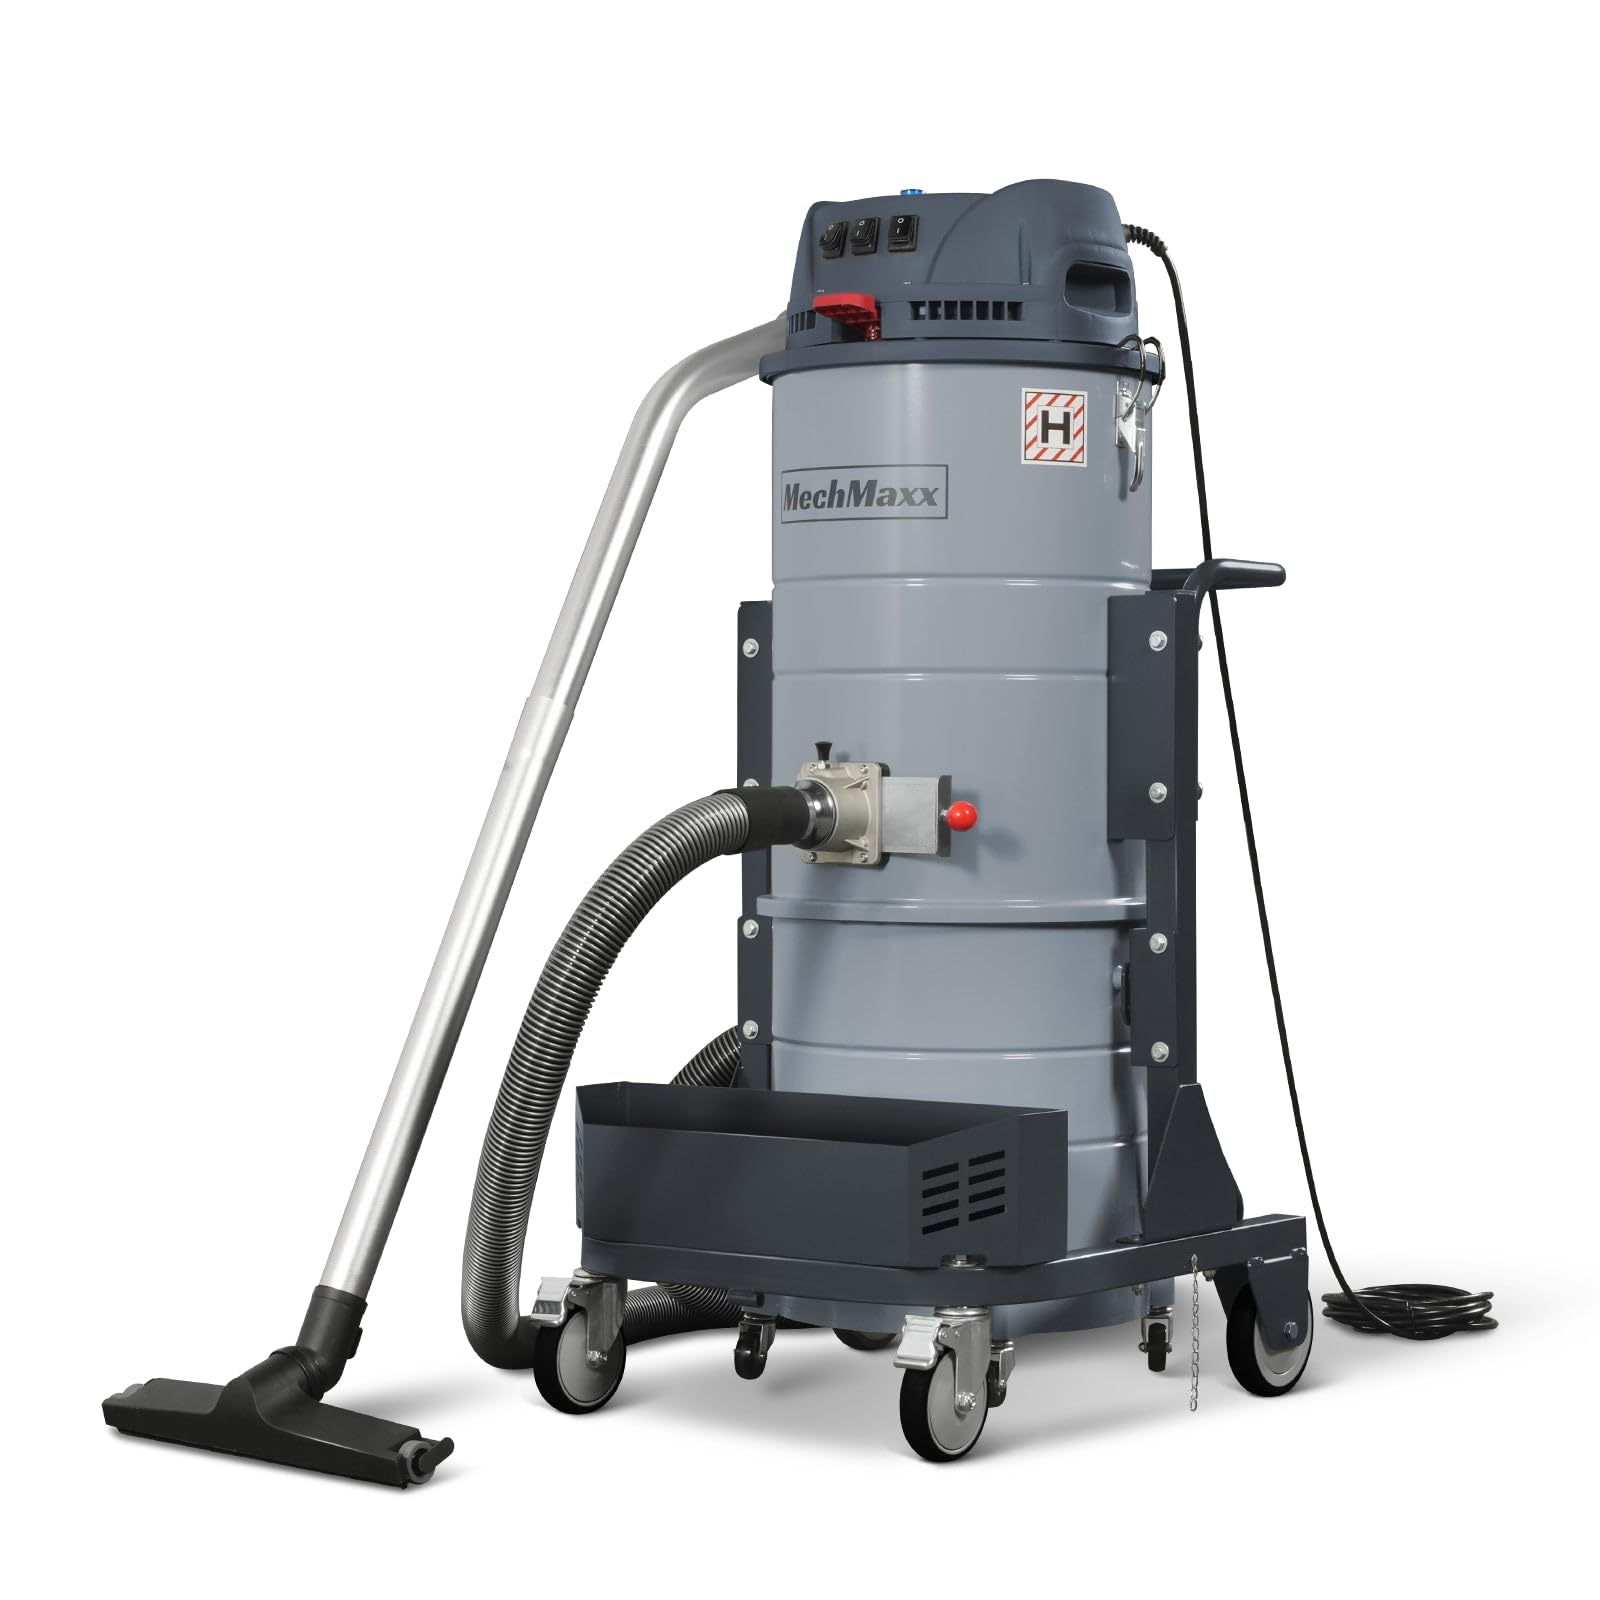
Image 1.1: MechMaxx Industrial Wet/Dry Vacuum Cleaner (Model IVA3M) with key dimensions: 52.2 inches height, 26.4 inches length, and 24 inches width. Also highlights 3.3 HP power, 32 sq ft filter area, 285 CFM airflow, and 15.9 gallon capacity.
2. Safety Information
WARNING: To reduce the risk of fire, electric shock, or injury, read and understand all instructions before using this appliance. Always follow basic safety precautions.
- Electrical Safety: Ensure the power supply matches the vacuum's requirements (110V, 60Hz, 1 Phase, 18 Amps). Do not operate with a damaged cord or plug. Keep the power cord away from heated surfaces.
- Flammable Materials: Do not use this vacuum to pick up flammable or combustible liquids or gases, or in explosive environments. This includes gasoline, solvents, thinners, or any other highly volatile substances.
- Explosive Dust: Do not use to pick up explosive materials or dusts that can create an explosive atmosphere.
- Personal Protection: Wear appropriate personal protective equipment (PPE) such as safety glasses and dust masks, especially when dealing with fine dust.
- Supervision: Do not leave the vacuum unattended when plugged in. Unplug from outlet when not in use and before servicing.
- Maintenance: Perform maintenance only when the unit is unplugged. Refer to the Maintenance section for detailed instructions.

Image 2.1: Close-up of the vacuum's control panel and warning labels, emphasizing the importance of adhering to safety guidelines.
3. Package Contents
Before assembly, verify that all components and hardware quantities are correct. The package includes the main vacuum unit and an accessory kit.
Main Unit Components:
- Vacuum Head with Motors and Controls
- Collection Tank (15.9 Gallons)
- Mobile Cart with 4 Casters (2 with Brakes)
- Tool Basket
- Power Cord (26 FT)
- H-Class HEPA Filter (pre-installed)
Accessory Kit:
- Flexible Suction Hose
- Floor Tool
- Extension Wands (2 pieces)
- Crevice Tool
- Dusting Brush
- Hose Connector

Image 3.1: The complete accessory kit, including the flexible hose, floor tool, extension wands, crevice tool, dusting brush, and hose connector.
4. Setup and Assembly
Follow these steps to assemble your MechMaxx Industrial Wet/Dry Vacuum Cleaner.
4.1 Unpacking the Machine
- Carefully cut the straps securing the cardboard box to the pallet.
- Lift the cardboard box upwards to reveal the main vacuum unit.
- Remove any plastic wrapping and protective packaging from the main unit.
4.2 Removing Parts from the Main Body
- Unlatch the clamps securing the vacuum head to the collection tank.
- Carefully lift the vacuum head off the collection tank and set it aside.
- Remove the collection tank from the mobile cart.
- Inside the collection tank, you will find the accessory kit. Remove all accessories and verify against the package contents list.
4.3 Assembling the Floor Tool Set and Connecting to the Device
- Connect the two extension wands together.
- Attach the floor tool to one end of the assembled extension wands.
- Connect the flexible suction hose to the other end of the assembled extension wands.
- Insert the hose connector into the dust suction port on the side of the vacuum cleaner. Secure it by turning the knob.
- Connect the flexible suction hose (with assembled floor tool) to the hose connector on the vacuum.
For a visual guide, please refer to the assembly video below:
Video 4.1: This video demonstrates the complete assembly process for the MechMaxx Industrial Wet/Dry Vacuum Cleaner IVA3M, from unpacking to connecting the floor tool set.
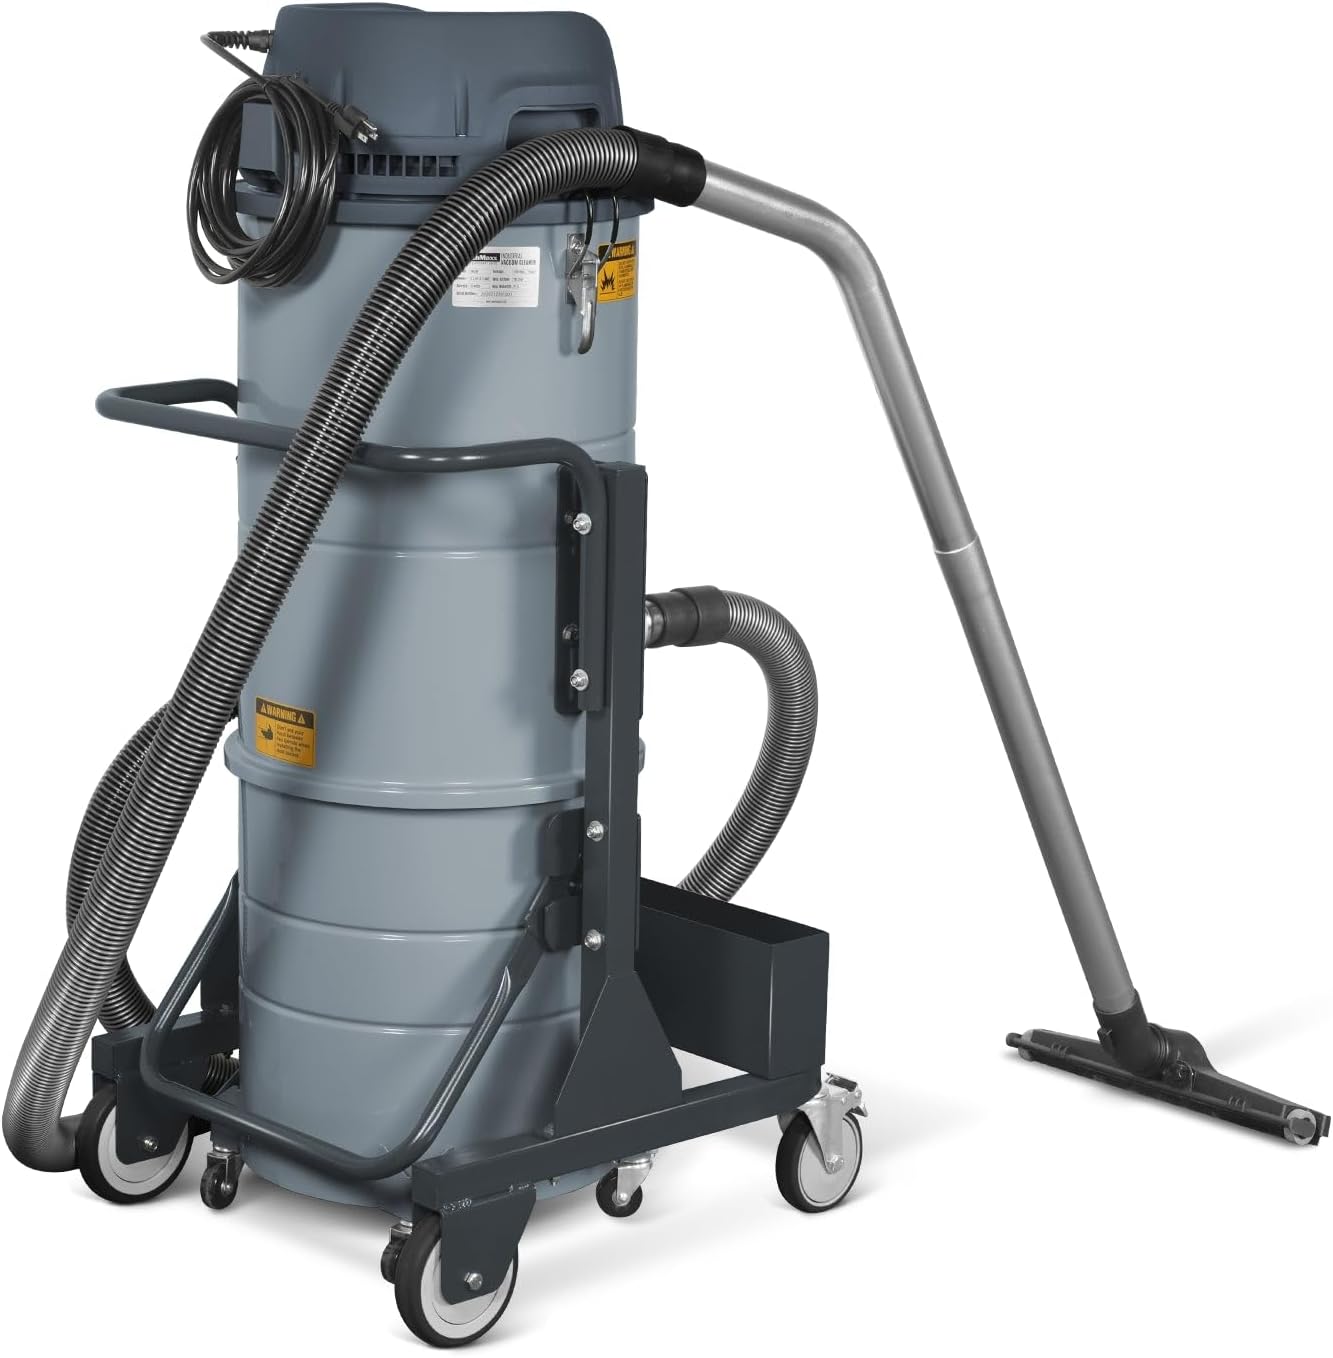
Image 4.2: The MechMaxx Industrial Wet/Dry Vacuum Cleaner fully assembled and ready for operation, showing the hose and floor tool attached.
5. Operating Instructions
This section details how to operate your industrial vacuum cleaner for both wet and dry applications.
5.1 Powering On and Off
- Ensure the vacuum is properly assembled and connected to a 110V power outlet.
- The vacuum features three independent motors. Use the individual switches on the control panel to activate one, two, or all three motors depending on the required suction power.
- To turn off, switch off all motors and unplug the unit from the power source.

Image 5.1: Detail of the three individual motor switches on the control panel, allowing for variable suction power.
5.2 Dry Vacuuming
- Ensure the HEPA filter is clean and properly installed for dry dust collection.
- Select the appropriate accessory (e.g., floor tool for large areas, crevice tool for tight spaces, dusting brush for delicate surfaces).
- Turn on the desired number of motors and begin vacuuming.
5.3 Wet Vacuuming
- For wet vacuuming, the HEPA filter should be removed to prevent damage and maintain suction. Consult the Maintenance section for filter removal.
- Ensure the collection tank is empty before starting wet vacuuming.
- Use appropriate accessories for liquid pickup.
- Monitor the liquid level in the tank to prevent overfilling. The vacuum has a float mechanism that will shut off suction when the tank is full.
6. Maintenance
Regular maintenance ensures optimal performance and extends the lifespan of your vacuum cleaner.
6.1 Emptying the Collection Tank
- Unplug the vacuum cleaner from the power source.
- Unlatch the clamps and remove the vacuum head.
- Detach the collection tank from the mobile cart. The 15.9-gallon tank is designed for easy dumping.
- Dispose of collected debris or liquids responsibly.
- Clean the inside of the tank if necessary before reassembling.

Image 6.1: The detachable 15.9-gallon collection tank, designed for easy removal and emptying.
6.2 HEPA Filter Maintenance
The H-Class HEPA filter provides superior filtration. Regular cleaning is crucial for maintaining suction power and filter efficiency.
- Jet Pulse Filter Cleaning System: This vacuum is equipped with an external Jet Pulse Filter Cleaning System. To activate, ensure the vacuum is off and unplugged. Follow the instructions on the control panel (usually involves pressing a button or lever multiple times) to pulse clean the filter.
- Manual Cleaning/Replacement: If suction remains low after pulse cleaning, the filter may need manual cleaning or replacement. Carefully remove the filter (refer to diagrams on the vacuum head) and clean it according to manufacturer guidelines. Replace the filter if it is damaged or excessively clogged.

Image 6.2: A diagram illustrating the operation of the external Jet Pulse Filter Cleaning System.

Image 6.3: An illustration highlighting the H-Class HEPA filter and its role in superior air filtration.
6.3 General Cleaning
- Wipe down the exterior of the vacuum with a damp cloth.
- Inspect the hose and accessories for blockages or damage. Clean as needed.
- Check the casters for debris and ensure smooth movement.
7. Troubleshooting
This section addresses common issues you might encounter with your vacuum cleaner.
| Problem | Possible Cause | Solution |
|---|---|---|
| Vacuum does not turn on | No power supply; Damaged power cord/plug; Motor switch off | Check power outlet; Inspect cord/plug for damage; Ensure motor switches are in the 'ON' position. |
| Loss of suction | Clogged hose/accessories; Full collection tank; Clogged HEPA filter; Improperly sealed tank/head | Clear blockages; Empty collection tank; Clean HEPA filter using Jet Pulse system or manually; Ensure tank and head are securely latched. |
| Water shut-off during wet vacuuming | Collection tank is full | Empty the collection tank. The float mechanism has activated to prevent overfilling. |
| Unusual noise during operation | Foreign object in hose/motor; Damaged motor | Turn off and unplug the unit. Inspect hose and accessories for obstructions. If noise persists, contact customer support. |
8. Specifications
| Feature | Specification |
|---|---|
| Brand | MechMaxx |
| Model Number | IVA3M |
| Power Source | Corded Electric |
| Input Power | 110V, 60Hz, 1 Phase, 18 Amps |
| Motor Horsepower | 3.3 HP (Three heavy-duty bypass motors) |
| Airflow | 285 CFM |
| Waterlift | 72 inches |
| Capacity | 15.9 Gallons (detachable collection tank) |
| Filter Type | H-Class HEPA Filter |
| Filter Area | 32 ft² |
| Filtration Efficiency | >99% @ 0.3 µm |
| Cord Length | 26 FT |
| Mobility | 4 Casters (2 with Brakes) |
| Item Weight | 121 Pounds |
| Item Dimensions (L x W x H) | 26.4"L x 24"W x 52.2"H |
| Included Components | Accessory Kit |
| Indoor/Outdoor Usage | Indoor, Outdoor |
9. Warranty and Support
MechMaxx products are designed for durability and performance. For any questions or assistance, please contact customer support.
9.1 Returns Policy
This product is eligible for a 30-day easy return policy. Please refer to your purchase documentation for specific terms and conditions.
9.2 Protection Plans
Extended protection plans are available for purchase to cover your investment beyond the standard return period. Options include:
- 2-Year Protection Plan
- 3-Year Protection Plan
- Complete Protect (monthly billing)
For details on coverage and pricing, please consult the retailer or MechMaxx customer service.
9.3 Customer Support
For technical support, parts, or warranty claims, please contact MechMaxx customer support through the official website or the contact information provided with your purchase.