Introduction
This manual provides detailed instructions for the assembly, operation, and maintenance of your DWVO 10'x10' Outdoor Dog Enclosure with Roof. Please read all instructions carefully before beginning assembly and retain this manual for future reference.

Image: The fully assembled DWVO 10'x10' Outdoor Dog Enclosure with its roof, situated in a grassy yard. A dog is inside the enclosure, and a person is interacting with another dog outside, demonstrating the product's use.
Safety Information
- Always ensure all connections are secure before allowing pets into the enclosure.
- Regularly inspect the enclosure for any signs of wear, damage, or loose components.
- Do not climb on or lean heavily against the enclosure walls or roof.
- Ensure the enclosure is placed on a level surface to prevent instability.
- Keep children supervised when near the enclosure.
- This enclosure is designed for pets. Do not use it for purposes other than its intended use.
Package Contents
Verify that all components listed below are present before beginning assembly. If any parts are missing or damaged, contact customer support.
- Galvanized Steel Frame Pipes (various lengths and shapes)
- Chain Link Mesh Panels
- Door Panel with Latch Mechanism
- Waterproof and UV-Resistant Roof Cover
- Connecting Clamps/Hardware
- Ground Stakes (if included)
- Assembly Gloves
- Instruction Manual
Setup and Assembly Instructions
Assembly typically requires two people. Wear the provided gloves during assembly to protect your hands.
Step 1: Prepare the Area
Choose a flat, level outdoor area for the enclosure. Clear any debris or obstacles from the chosen site.
Step 2: Assemble the Base Frame
Connect the horizontal and vertical galvanized steel pipes to form the rectangular base of the enclosure. Ensure all connections are snug but do not fully tighten bolts until the entire frame is assembled.
Step 3: Install Wall Panels
Attach the chain link mesh panels to the vertical frame pipes using the provided clamps. Ensure the mesh is taut and securely fastened to prevent gaps.
Step 4: Install the Door Panel
Integrate the door panel into the designated opening in the frame. Secure the hinges and ensure the door swings freely. Install the upgraded door lock mechanism as shown in the image below, ensuring it latches securely.

Image: A detailed view of the upgraded door lock, featuring a robust metal latch and bolt mechanism, designed to prevent accidental opening of the enclosure door.
Step 5: Assemble the Roof Frame
Construct the slanted roof frame using the appropriate galvanized steel pipes. This design helps prevent the buildup of rainwater or snow.

Image: A close-up of the enclosure's slanted roof during rainfall, highlighting its design for effective water runoff and protection against elements.
Step 6: Attach the Roof Cover
Drape the waterproof and UV-resistant roof cover over the assembled roof frame. Secure it firmly to the frame using the provided bungee cords or ties, ensuring it is taut to prevent sagging and water pooling.

Image: A split image demonstrating the anti-UV sun protection and waterproofing capabilities of the enclosure's roof cover, showing its effectiveness against sun and rain.
Step 7: Final Tightening and Inspection
Once all components are in place, go back and fully tighten all bolts and connections. Perform a final inspection to ensure the enclosure is stable, all panels are secure, and the door operates correctly.
Operating Instructions
- Access: Use the metal gate for entry and exit. Always ensure the gate is securely latched when a pet is inside.
- Placement: Position the enclosure in a shaded area if possible, especially during hot weather, even with the roof cover.
- Supervision: While the enclosure provides a secure space, always supervise your pets, especially during initial use or extreme weather conditions.
- Multi-purpose Use: This enclosure is suitable for various small to large animals, including dogs, chickens, ducks, and rabbits, providing a safe outdoor space.
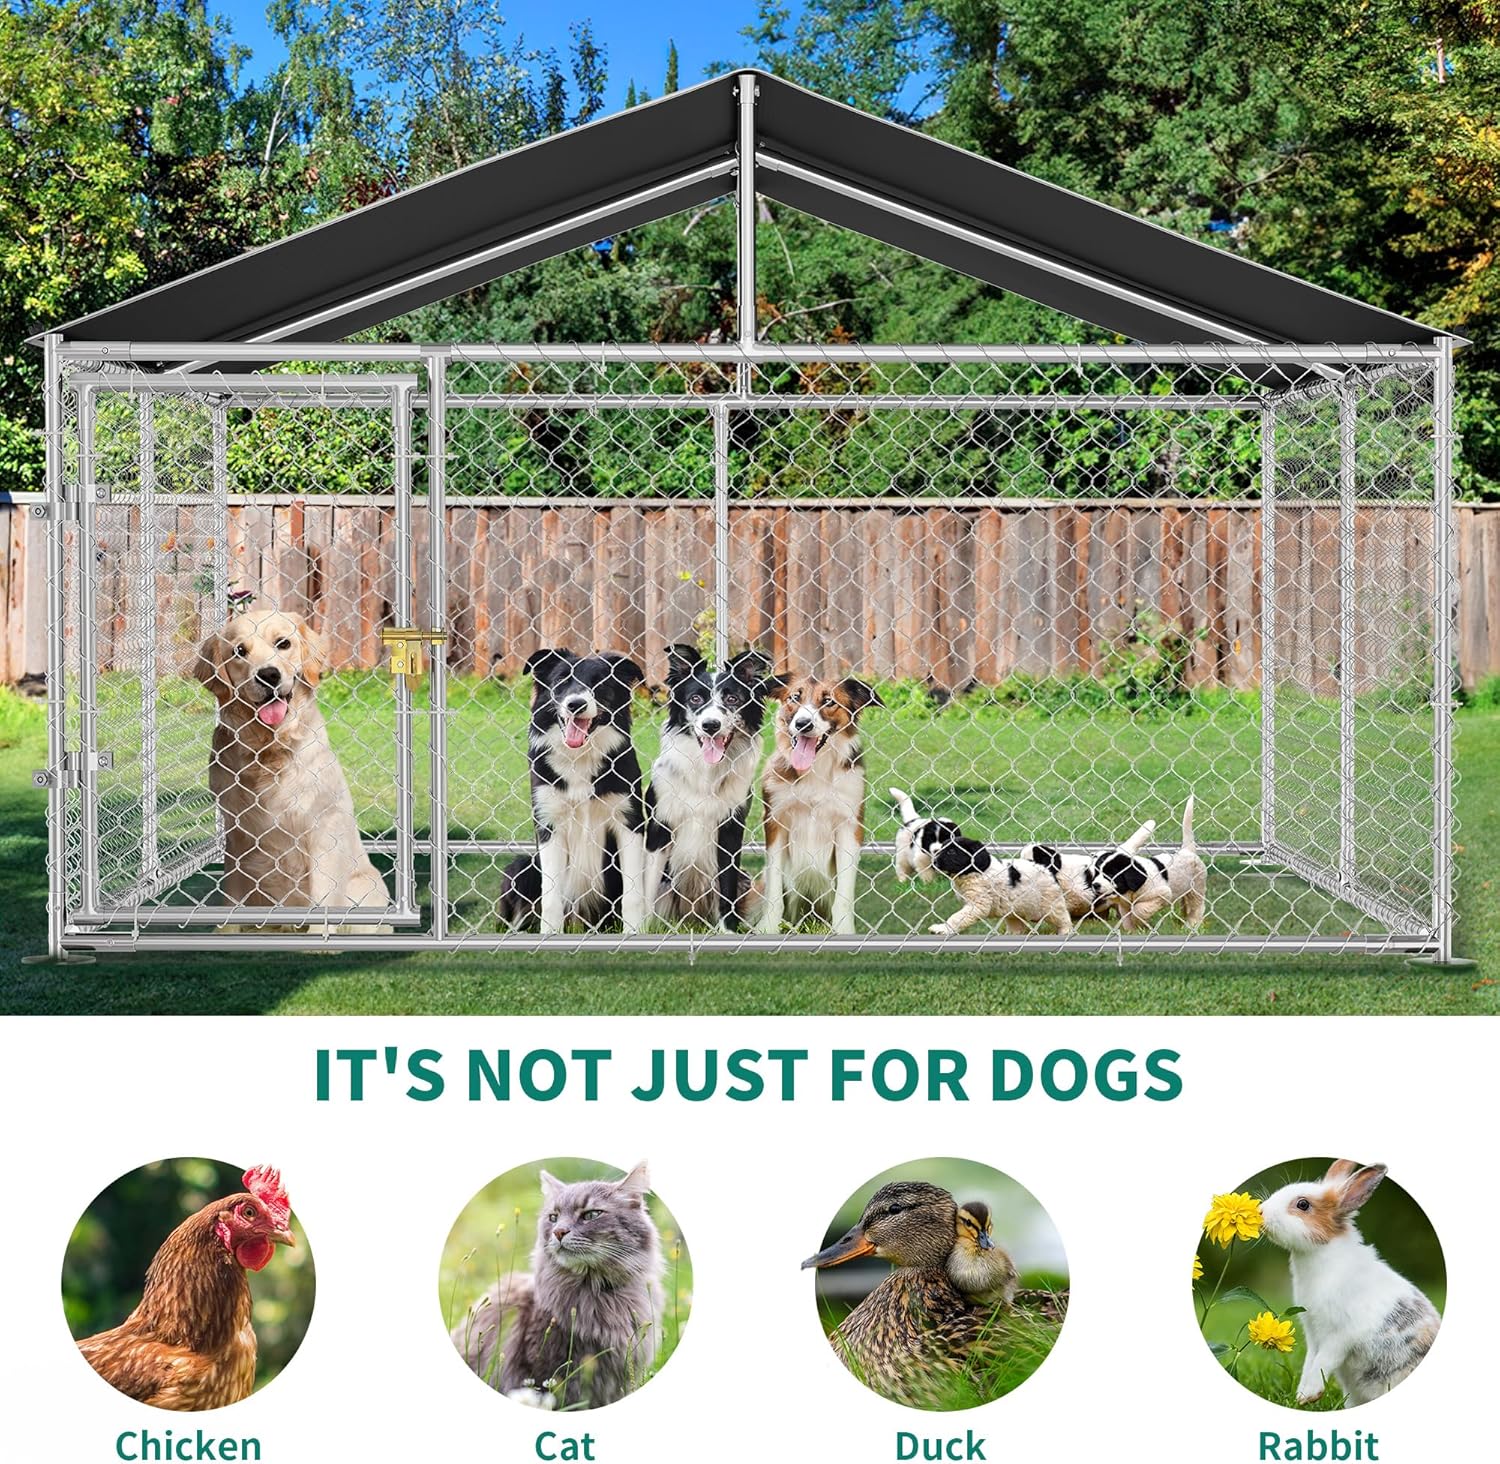
Image: An illustration showing different types of animals such as dogs, chickens, ducks, and rabbits, highlighting the enclosure's suitability for various pets.
Maintenance
- Cleaning: Regularly clean the enclosure floor and mesh panels with pet-safe cleaning solutions and water. Rinse thoroughly.
- Roof Cover Care: Periodically check the roof cover for tears or damage. Clean off any accumulated leaves or debris to maintain its waterproof and UV-resistant properties.
- Hardware Check: Annually, or more frequently if needed, inspect all bolts, clamps, and the door latch for tightness and corrosion. Tighten any loose hardware.
- Galvanized Steel: The galvanized steel pipes are designed for durability. Clean them with a damp cloth as needed.

Image: A detailed view of the galvanized steel pipe and the chain link mesh, emphasizing their robust construction and long-lasting durability.
Troubleshooting
- Enclosure feels wobbly: Ensure all bolts and clamps are fully tightened. Verify the enclosure is on a level surface.
- Door not latching properly: Check for any obstructions around the latch mechanism. Ensure the door frame is aligned correctly. Adjust hinges if necessary.
- Roof cover sagging/collecting water: Re-tighten the bungee cords or ties securing the roof cover. Ensure the roof frame is correctly assembled with the intended slant.
- Rust spots appearing: While galvanized steel is rust-resistant, minor surface rust can occur in harsh conditions. Clean with a wire brush and apply a rust-inhibiting primer if necessary.
Specifications
| Product Dimensions (L x W x H) | 118.1" x 118.1" x 70.8" (10' x 10' x 5.9') |
| Material | Galvanized Steel Frame, Chain Link Mesh, PE Roof Cover |
| Color | Silver |
| Item Weight | Approximately 115.5 Pounds |
| Model Number | MADWVK67FV |
| UPC | 197839558571 |

Image: A diagram illustrating the key dimensions of the DWVO 10'x10' Outdoor Dog Enclosure, including length, width, and height measurements.
Warranty and Support
For warranty information or technical support, please refer to the product packaging or contact DWVO customer service directly. Keep your purchase receipt for warranty claims.