1. Introduction
The Lindby LED Siana outdoor wall light is designed to provide efficient and modern illumination for outdoor areas. Featuring an integrated motion sensor and a high protection rating of IP65, it is suitable for balconies, patios, and other outdoor environments. The energy-efficient LED light source ensures durable and reliable lighting.
This manual provides essential information for the safe installation, operation, and maintenance of your Lindby LED Siana wall light.
2. Safety Instructions
- Always disconnect the main power supply before attempting any installation, maintenance, or cleaning.
- Installation should be performed by a qualified electrician in accordance with local wiring regulations.
- Ensure proper grounding of the fixture.
- Do not modify the product in any way, as this may void the warranty and pose safety risks.
- Do not look directly into the LED light source when it is illuminated.
- Keep packaging materials out of reach of children.
3. Package Contents
Please check that all components are present and undamaged:
- Lindby LED Siana Outdoor Wall Light with integrated LED and motion sensor
- Mounting hardware (screws, wall plugs)
- Instruction Manual
4. Setup and Installation
Follow these steps for safe and correct installation:
- Preparation: Turn off the main power supply at the circuit breaker before starting.
- Choose Location: Select a suitable outdoor location for the wall light. The optimal installation height for the motion sensor is between 1.5 meters and 2 meters from the ground.
- Mark Drilling Points: Use the mounting bracket of the fixture to mark the drilling points on the wall.
- Drill Holes: Drill holes at the marked points and insert the appropriate wall plugs.
- Secure Mounting Bracket: Attach the mounting bracket securely to the wall using the provided screws.
- Wiring: Connect the electrical wires (Live, Neutral, Earth) from your mains supply to the corresponding terminals on the fixture. Ensure all connections are secure and properly insulated.
- Attach Fixture: Carefully attach the light fixture to the mounting bracket, ensuring it is securely fastened.
- Restore Power: Once installation is complete and all connections are secure, restore power at the circuit breaker.

5. Operating Instructions
The Lindby LED Siana wall light features an integrated motion sensor for automatic operation.
Motion Sensor Functionality
- The sensor detects movement within its specified range and angle.
- Upon detection, the light will automatically switch on.
- The light will remain on for a set duration and then switch off automatically if no further movement is detected.
Sensor Settings (Adjustment)
The motion sensor typically includes adjustable settings for detection range, sensitivity, and the duration the light stays on. Refer to the specific controls on your fixture for adjustment. The switch-on time can usually be set between 7 seconds and 8 minutes.

6. Maintenance
To ensure the longevity and optimal performance of your Lindby LED Siana wall light, follow these maintenance guidelines:
- Cleaning: Clean the fixture regularly with a soft, damp cloth. Do not use abrasive cleaners, solvents, or harsh chemicals, as these can damage the finish or plastic components.
- Sensor Check: Periodically check that the motion sensor lens is clean and free from obstructions (e.g., dirt, leaves, spiderwebs) that could impair its functionality.
- No User-Serviceable Parts: The LED light source is integrated and not user-replaceable. Do not attempt to open or repair the fixture yourself.
7. Troubleshooting
If you encounter issues with your Lindby LED Siana wall light, refer to the following common problems and solutions:
- Light does not turn on:
- Check if the main power supply is on.
- Verify electrical connections are secure.
- Ensure the motion sensor is clean and unobstructed.
- Check sensor settings (e.g., sensitivity, ambient light level).
- Light stays on continuously:
- Check if there is continuous movement within the sensor's detection range.
- Adjust the sensor's time-on setting to a shorter duration.
- Ensure the sensor is not faulty or stuck in an 'on' position.
- Light flashes or flickers:
- Check for loose wiring connections.
- Ensure stable power supply.
If the problem persists after attempting these solutions, contact your retailer or a qualified electrician.
8. Specifications
| Brand | Lindby |
| Model Number | 10025749 |
| Material | ABS, Polycarbonate |
| Color | Black (RAL 9005) |
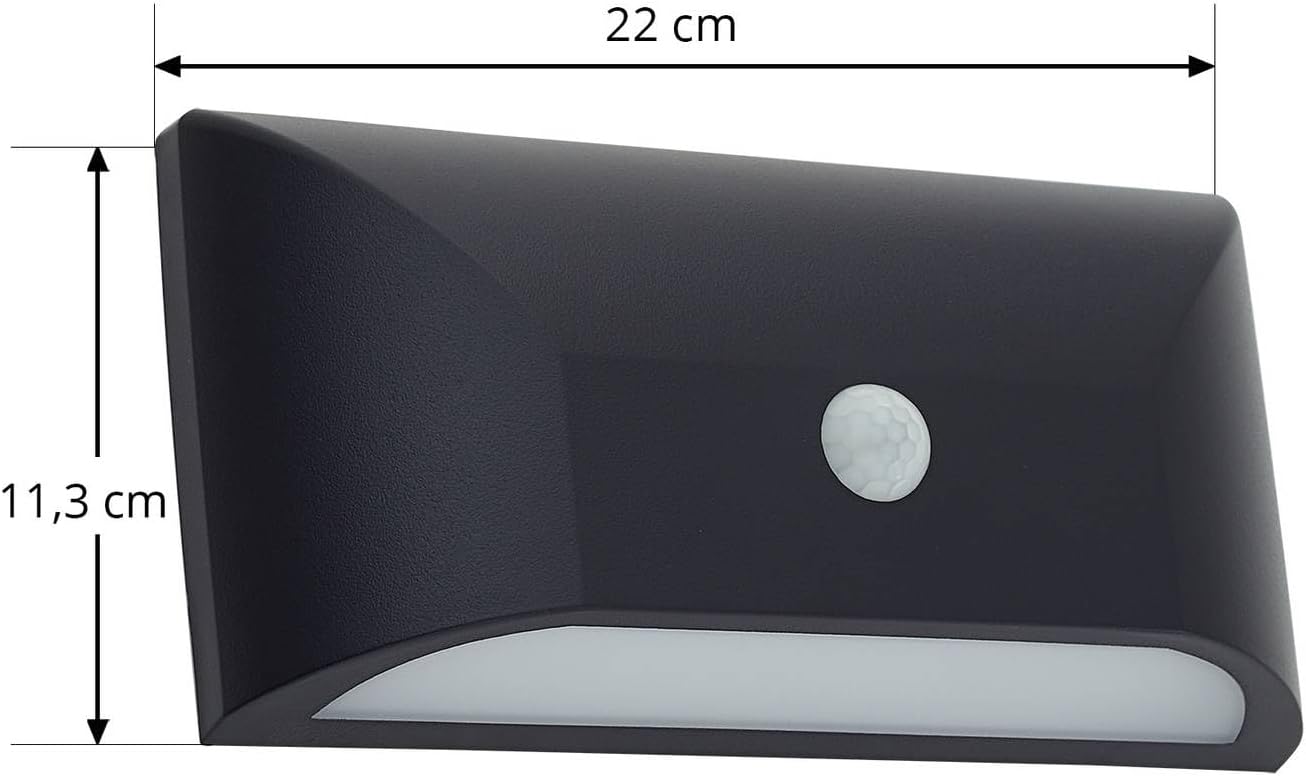
| Dimensions (L x W x H) | 5.8 x 22 x 11.3 cm |
| Weight | 300 g |
| Light Source | 1 x 6 W LED (integrated) |
| Voltage | 230 V |
| Luminous Flux | 750 Lumen |
| Color Temperature | 3000 Kelvin |
| Protection Class | II |
| IP Rating | IP65 (Dust-tight, protected against water jets) |
| Sensor Detection Angle | 160° |
| Sensor Detection Range | 8m |
| Sensor Switch-on Time | 7s - 8min (adjustable) |
| Energy Efficiency Class | E |
| Specific Use | Outdoor |

9. Warranty and Support
For warranty information, please refer to the terms and conditions provided by your retailer at the time of purchase. In case of technical issues or questions not covered in this manual, please contact your retailer or the manufacturer's customer support.