1. Product Overview
This manual provides instructions for the WENMENGDE 10-inch IPS Full Touch Double Din Car Radio. This unit features an Android operating system, wireless CarPlay and Android Auto compatibility, Bluetooth 4.1, GPS navigation, Wi-Fi connectivity, and support for a backup camera. It is designed to enhance your in-car entertainment and navigation experience.

Image 1.1: Front view of the WENMENGDE 10-inch car radio displaying the CarPlay interface, along with included accessories like a microphone and backup camera.
2. What's in the Box
Verify that all components are present in the packaging:
- 1x Head Unit
- 1x Power Adaptor
- 1x RCA Cable
- 2x USB Cables
- 1x Reverse Camera Cable
- 1x GPS Antenna
- 1x User Manual
- 2x Metal Brackets
- 1x 4LED Reverse Camera
- 1x Prying Tools
- 1x Warranty Card

Image 2.1: Visual representation of the items included in the product package, such as the head unit, cables, antenna, and camera.
3. Key Features
- Display: 10-inch capacitive 2.5D tempered glass IPS touch screen with 1024*600 resolution.
- Operating System: Android system (Quad Core 1.1GHz CPU, 2GB RAM, 32GB ROM).
- Connectivity: Wireless and wired Apple CarPlay & Android Auto, Bluetooth 4.1 (A2DP), Wi-Fi, USB.
- Navigation: Built-in GPS module with pre-installed offline maps. Supports online maps via Wi-Fi.
- Audio: DSP (Digital Sound Processor) for enhanced audio quality, Stereo audio output.
- Camera Support: Includes waterproof night vision reversing camera. Supports USB dash cam input.
- Control: Steering Wheel Control (SWC) compatibility for analog systems.
- Multitasking: Split-screen function (PIP - Picture-in-Picture) for simultaneous app usage.
- Radio: MT6625LN Radio Module for stable signal reception.

Image 3.1: Overview of the car radio's core features, including its Android operating system, processor, display type, and connectivity options.
4. Installation Guide
Installation of the car radio requires technical knowledge. If you are unsure, consult a professional installer. Ensure the vehicle's power is disconnected before beginning installation.
4.1. General Installation (2-Din Universal)
This head unit is designed to fit most general-purpose 2-Din car center consoles. Use the provided metal brackets for secure mounting.

Image 4.1: Illustration of how the head unit can be installed as a universal 2-Din unit using metal brackets, showing before and after views in a car dashboard.
4.2. Specialized Panel Installation
For certain vehicle models, the unit can be paired with a 9-inch or 10-inch specialized panel for a more integrated look. These panels are typically vehicle-specific and may need to be purchased separately.

Image 4.2: Depiction of installing the head unit with a specialized 9-inch or 10-inch panel for a custom fit in specific vehicle types.
4.3. Wiring Diagram
Carefully connect the power adapter, RCA cables, USB cables, reverse camera cable, and GPS antenna to the corresponding ports on the back of the head unit. Refer to the detailed wiring diagram below.

Image 4.3: Rear view of the head unit, highlighting the various input and output ports for power, audio, video, and accessories.

Image 4.4: Comprehensive wiring diagram illustrating connections for the 16-pin power connector, RCA cables, USB ports, reverse camera, and GPS antenna.
5. Setup and Initial Configuration
5.1. Power On and Initial Boot
After successful installation, turn on your vehicle's ignition. The head unit should power on automatically. The initial boot may take a moment.
5.2. Wi-Fi Connection
- Access the Settings menu on the head unit.
- Navigate to Network & Internet or Wi-Fi.
- Enable Wi-Fi and select your desired network from the list.
- Enter the password if prompted and connect.
A stable Wi-Fi connection is required for online maps, app downloads, and certain features of CarPlay/Android Auto.
5.3. GPS Navigation
The unit comes with a pre-installed "Maps" application for offline navigation. For real-time traffic and updated maps, ensure a Wi-Fi connection is active. The external GPS antenna should be mounted in a location with a clear view of the sky for optimal signal reception.
5.4. Bluetooth Pairing
- On the head unit, open the Bluetooth application.
- Ensure Bluetooth is enabled on your mobile phone.
- Search for available devices on your phone and select the head unit's Bluetooth name (e.g., "CarBT").
- Confirm the pairing code on both devices if prompted.
- Once paired, you can make hands-free calls, synchronize your phone book, and stream music.
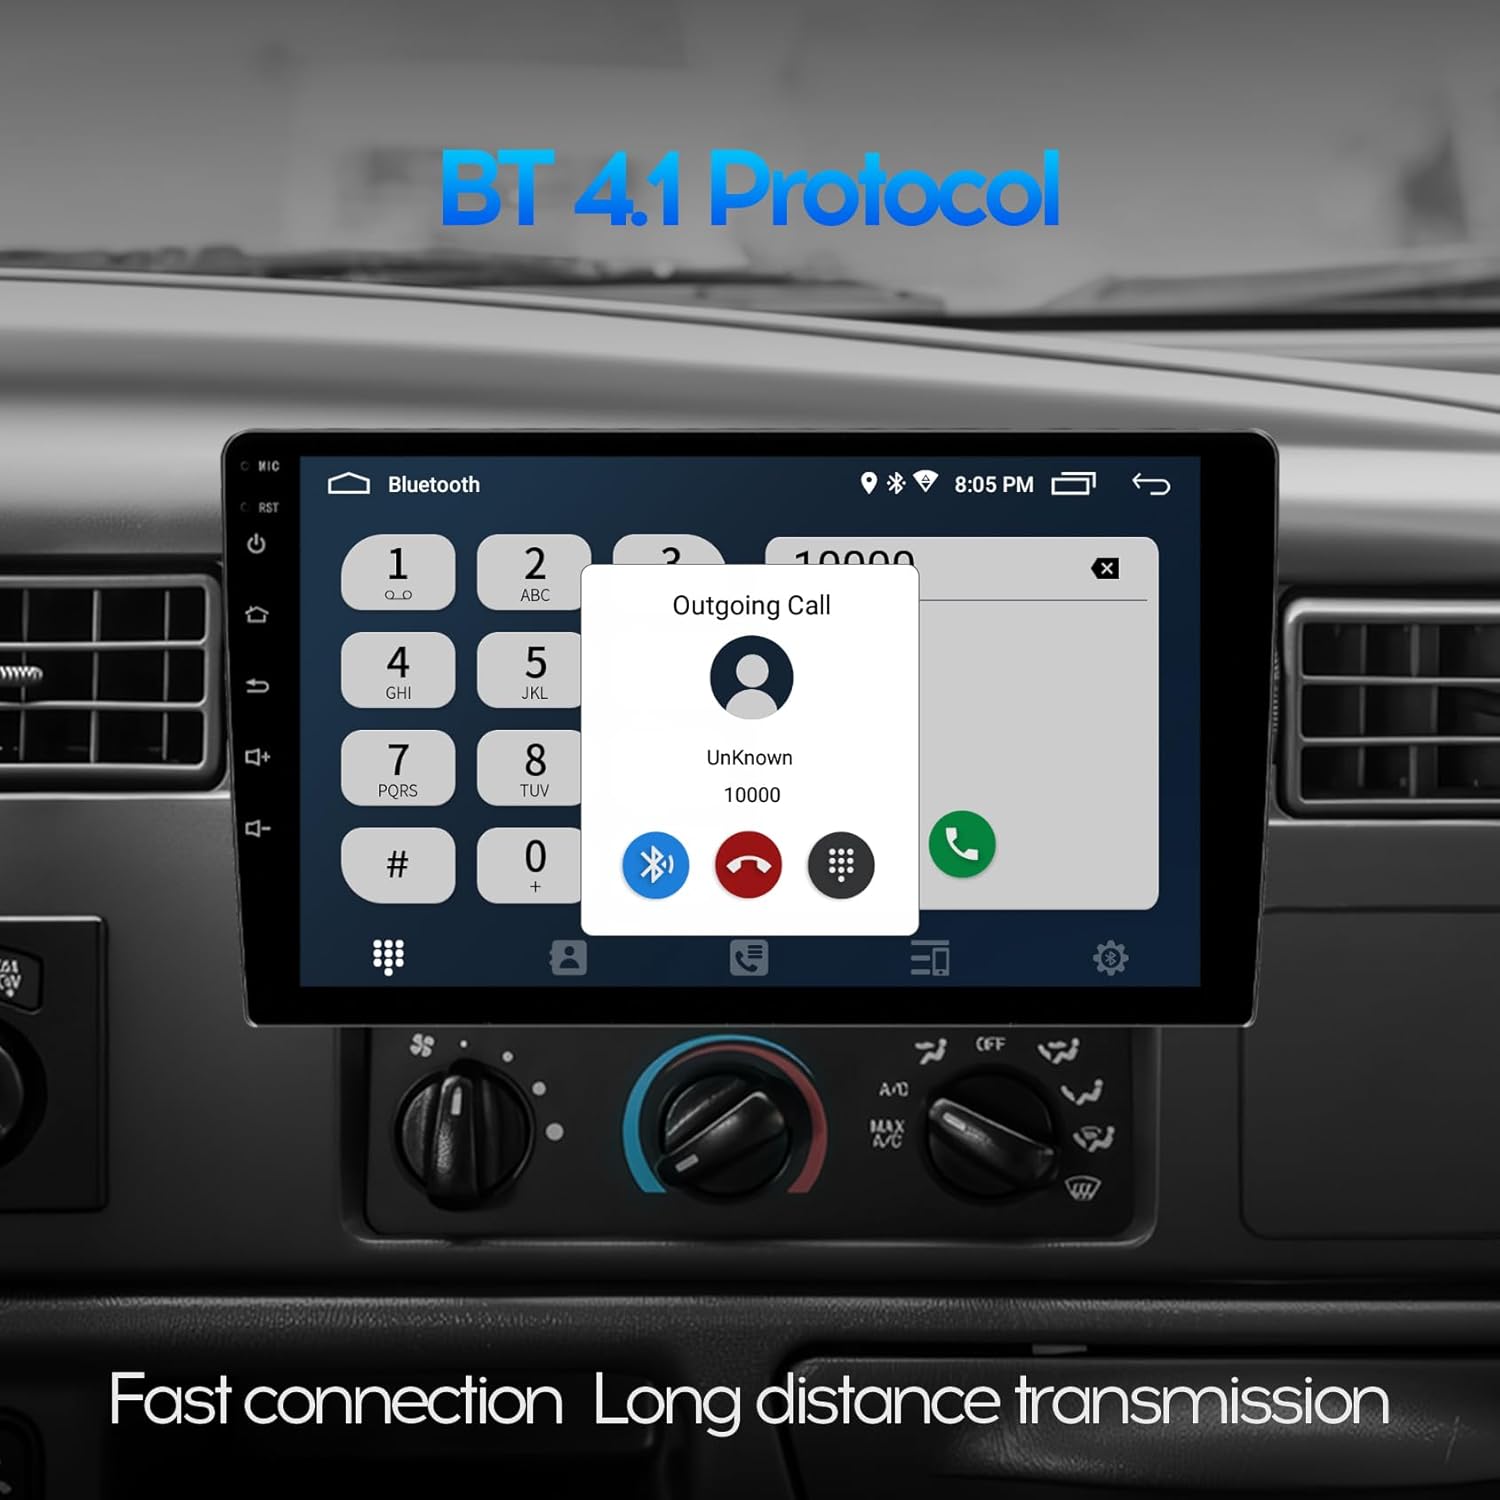
Image 5.1: The Bluetooth interface displaying an outgoing call, demonstrating the hands-free calling capability.
5.5. Wireless CarPlay & Android Auto
The unit supports both wireless and wired connections for Apple CarPlay and Android Auto.
- Wireless Connection:
- Connect your mobile phone to the head unit via Bluetooth (refer to section 5.4).
- Open the pre-installed application named "Zlink" on the head unit.
- Wait for automatic connection. Ensure your phone's Wi-Fi is also enabled for data transfer.
- Wired Connection:
- Connect your mobile phone to the head unit using a USB cable.
- Open the "Zlink" application. The connection should establish automatically.
6. Operating Instructions
6.1. Radio Function
Access the Radio application to tune into FM/AM stations. The MT6625LN Radio Module ensures stable signal reception and clear audio.

Image 6.1: The radio application interface showing an FM station tuned to 98.50 MHz, with options for preset stations.
6.2. Split Screen Mode (PIP)
The split-screen function allows you to run two applications simultaneously, such as navigation and music playback. To activate, long-press the recent apps button or drag an app to one side of the screen, then select another app for the remaining side.

Image 6.2: The display in split-screen mode, showing a navigation map on one side and a music player on the other, enabling simultaneous use of two applications.
6.3. Steering Wheel Control (SWC)
The unit supports analog steering wheel controls. Manual learning is required to map your vehicle's steering wheel buttons to the head unit's functions (e.g., volume, track skip, call answer/end). Access the SWC settings in the system menu to configure.
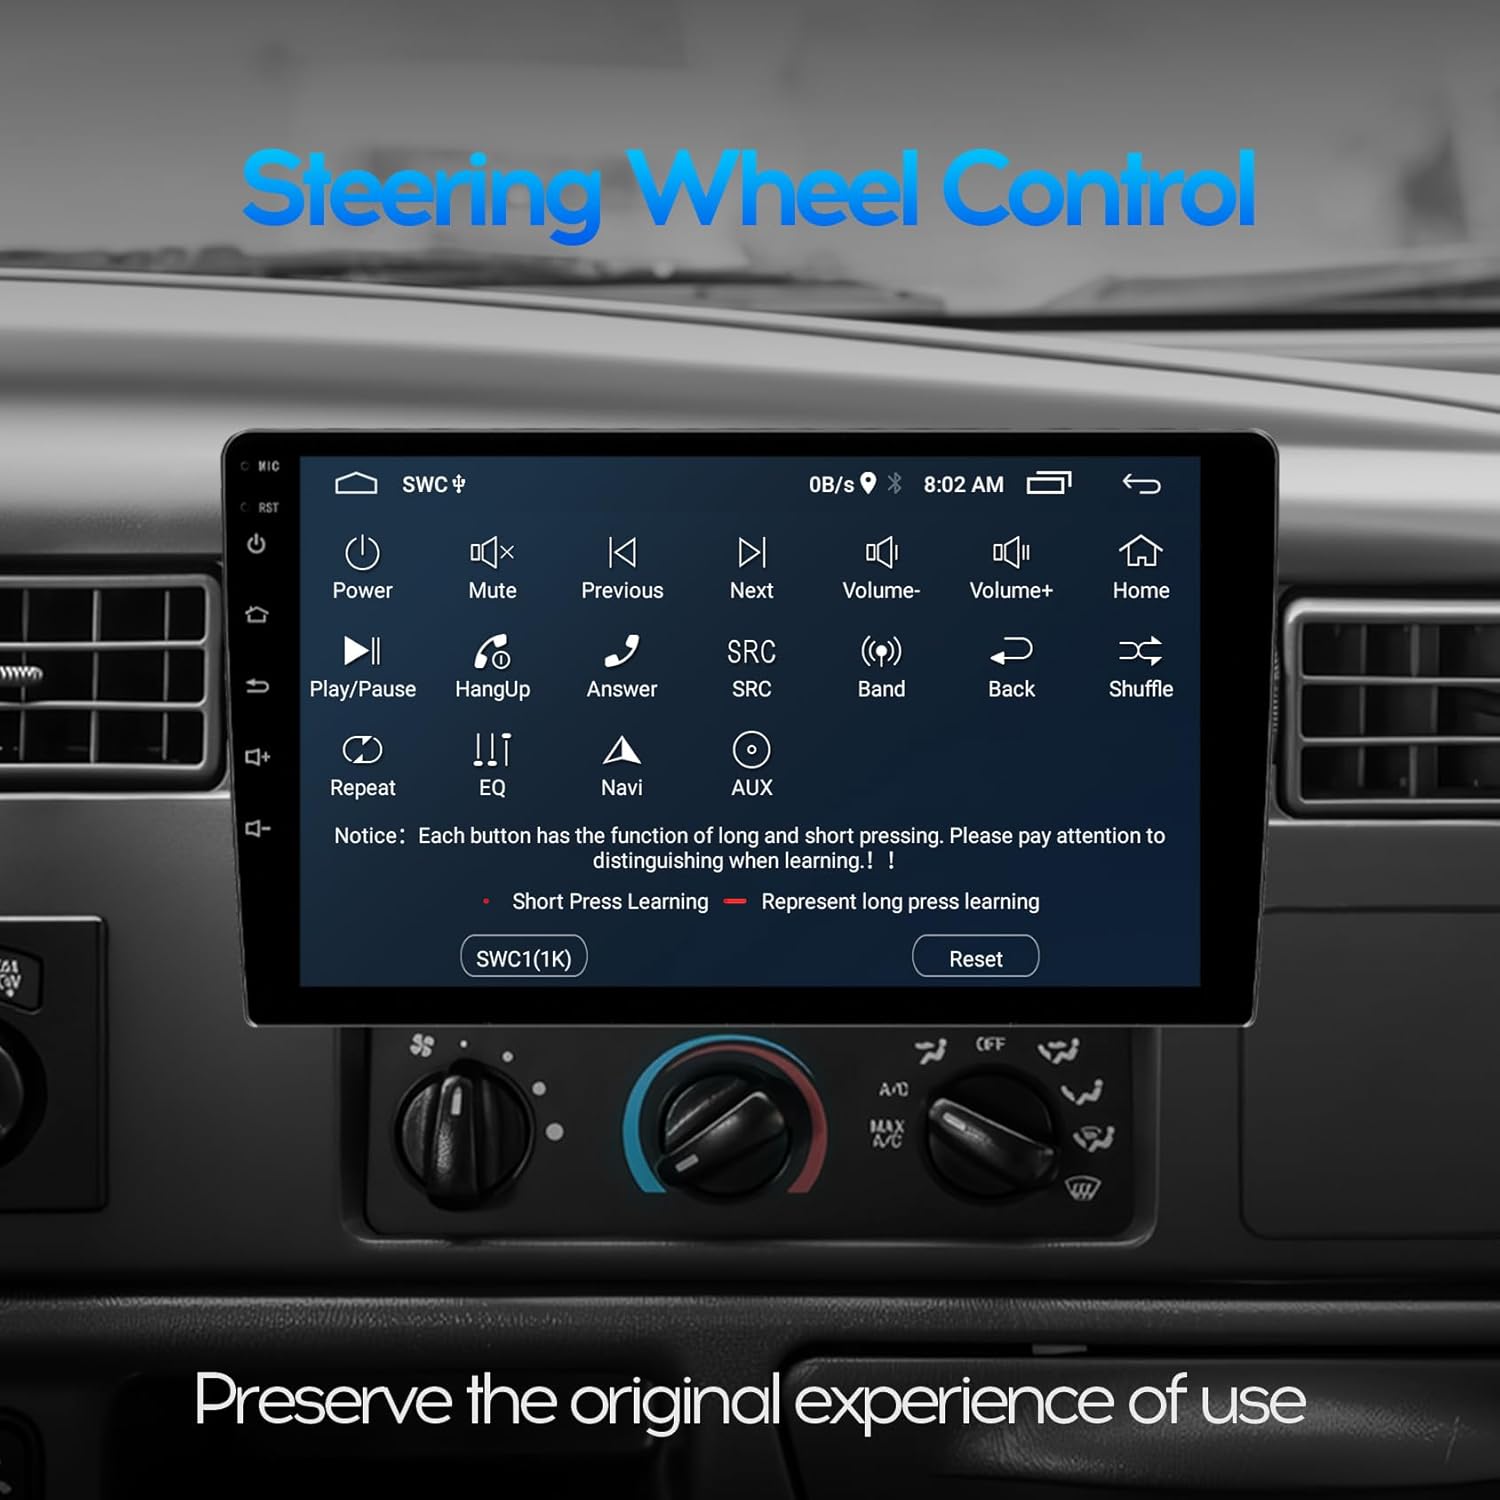
Image 6.3: The interface for configuring Steering Wheel Controls, showing various functions that can be assigned to vehicle buttons.
6.4. Reverse Camera Function
When the vehicle is shifted into reverse gear, the car stereo will automatically display the rear view image from the connected backup camera. This feature provides assistance for parking and maneuvering.

Image 6.4: The display showing the reverse camera feed with parking guidelines, assisting with safe backing up.
7. Maintenance
- Screen Cleaning: Use a soft, lint-free cloth to clean the touch screen. Avoid abrasive cleaners or solvents.
- Software Updates: Periodically check for software updates through the system settings to ensure optimal performance and access to new features. A Wi-Fi connection is required for updates.
- Temperature: Avoid exposing the unit to extreme temperatures, as this can affect performance and lifespan.
- Fuse Replacement: If the unit loses power, check the fuse located on the back of the unit (refer to wiring diagram). Replace with a fuse of the same rating if necessary.
8. Troubleshooting
| Problem | Possible Cause | Solution |
|---|---|---|
| Unit does not power on. | Incorrect wiring, blown fuse, insufficient power supply. | Check power connections. Inspect and replace the fuse if blown. Ensure proper power supply from the vehicle. |
| No sound. | Volume too low, incorrect audio output settings, speaker wiring issues. | Increase volume. Check audio settings and ensure correct output is selected. Verify speaker connections. |
| CarPlay/Android Auto not connecting. | Bluetooth/Wi-Fi not enabled, "Zlink" app not open, faulty USB cable, phone compatibility. | Ensure Bluetooth and Wi-Fi are active on both devices. Open the "Zlink" app. Try a different USB cable. Check phone compatibility. |
| GPS signal weak or inaccurate. | GPS antenna obstructed, antenna not connected properly. | Relocate the GPS antenna to a position with a clear view of the sky. Ensure the antenna is securely connected. |
| Touch screen unresponsive. | Temporary software glitch, screen damage. | Restart the unit (use the reset button if available). If the problem persists, contact support. |
9. Specifications
| Feature | Detail |
|---|---|
| Display Size | 10 inches (26 cm) |
| Display Type | IPS Full Touch, 2.5D Tempered Glass |
| Resolution | 1024*600 |
| Operating System | Android |
| CPU | Quad Core 1.1GHz (4Core ARM Mali 450 GPU) |
| RAM | 2GB |
| ROM (Internal Storage) | 32GB |
| Connectivity | Bluetooth 4.1, USB, Wi-Fi |
| Car Integration | Wireless & Wired CarPlay, Android Auto |
| GPS | Built-in GPS module (GPS/QZSS/SBAS) |
| Radio Module | MT6625LN |
| Audio Output Mode | Stereo (2.0 Surround Sound Channel Configuration) |
| Video Encoding Support | MP4, AVI, RM, MKV, H.264, MPEG-4, H.265/HEVC |
| Compatible Devices | Camera, Smartphone, Tablet |
| Item Weight | 2.97 pounds |
| Package Dimensions | 11.46 x 7.52 x 3.23 inches |
10. Warranty and Support
This product comes with a warranty card. Please refer to the card for specific warranty terms and conditions. For technical assistance, troubleshooting, or any product-related inquiries, please contact WENMENGDE customer support. The manufacturer, Shenzhen WeBetter Electronic Technology Co.,Ltd, is committed to providing professional support.
Contact information can typically be found on the warranty card or the official WENMENGDE website.