
1. Introduction
This manual provides detailed instructions for the safe and efficient operation of the NYBGBAR PSG9060 Programmable Pulse Signal Generator. Please read this manual thoroughly before using the device to ensure proper functionality and to prevent damage.
2. Product Overview
The NYBGBAR PSG9060 is a dual-channel programmable pulse signal generator designed for various testing and measurement applications. It features a 3.5-inch LCD display, a wide range of waveform types, and a frequency range up to 60MHz for sine waves.
Key Features:
- Dual Channel Output: Provides two independent signal output channels.
- Wide Frequency Range: Sine wave frequency from 1nHz to 60MHz.
- High Sampling Rate: 300MSa/s for accurate waveform generation.
- High Vertical Resolution: 14 bits for precise waveform detail.
- Extensive Waveform Library: Includes sine, square, pulse, triangular, ramp, CMOS, DC level, half wave, full wave, step, exponential, Lorentz pulse, multisonic, noise, and 99 user-defined waveforms.
- Adjustable Pulse Width: Allows for precise control over pulse characteristics.
- USB Interface: For connectivity and control.
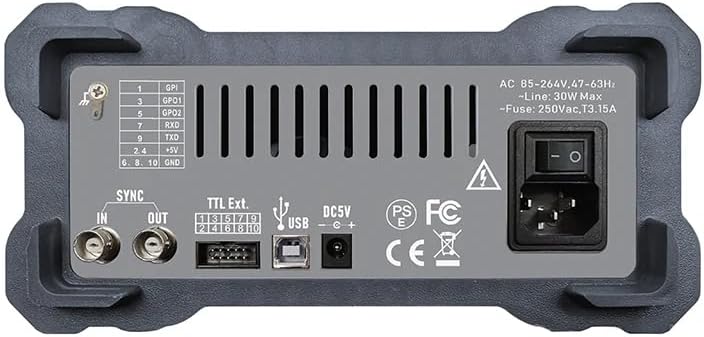
Figure 2.1: Front view of the PSG9060 showing the LCD display, control buttons, and output ports.
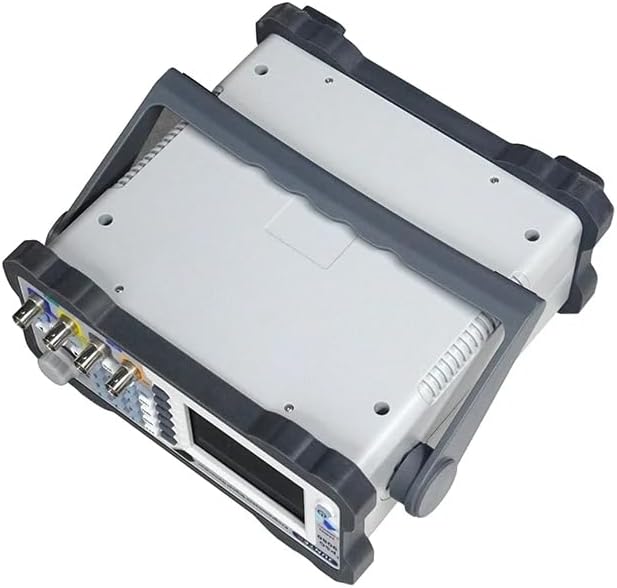
Figure 2.2: Rear view of the PSG9060, detailing power input, USB, TTL Ext., and SYNC ports.

Figure 2.3: Side view of the PSG9060, illustrating the adjustable stand for ergonomic positioning.
3. Setup
- Unpacking: Carefully remove the signal generator and all accessories from the packaging. Inspect for any signs of damage.
- Power Connection: Connect the provided power cord to the AC input on the rear panel of the device (refer to Figure 2.2). Ensure the power supply meets the specified voltage range (AC 85-264V, 47-63Hz).
- Initial Power On: Press the power switch on the rear panel to turn on the instrument. The LCD display will illuminate.
- Language Selection: Upon first power-on or after a reset, you may be prompted to select a language. Use the navigation controls to select "English" and confirm.
- Output Connection: Connect the desired output channels (CH1, CH2) to your testing equipment using appropriate BNC cables.
- USB Connection (Optional): For PC control or firmware updates, connect a USB cable from the device's USB port to your computer.
Video 3.1: An overview of the PSG9060's display and controls, demonstrating initial setup and language selection.
4. Operating Instructions
4.1 User Interface Overview
The PSG9060 features a 3.5-inch LCD screen for displaying waveform parameters and settings. Navigation and input are managed through function buttons, a numeric keypad, and a rotary knob.
- LCD Display: Shows current waveform, frequency, amplitude, offset, phase, and duty cycle for both channels.
- Function Buttons: Dedicated buttons for common operations like SYS (System), MOD (Modulation), MEAS (Measure), LOAD (Load), SAVE (Save), SHIFT, VFO, VCO, FUNC (Function), CH1, CH2, and OUT.
- Numeric Keypad: For direct entry of numerical values.
- Rotary Knob: Used for fine-tuning parameters and navigating menus. Pressing the knob often confirms selections.
4.2 Basic Waveform Generation
- Select Channel: Press the CH1 or CH2 button to select the desired output channel.
- Select Waveform: Press the WAVE button (often accessed via FUNC or a dedicated button) and use the knob or numeric keypad to select the desired waveform type (e.g., Sine, Square, Triangle).
- Set Frequency: Press the FREQ button. Use the numeric keypad to enter the desired frequency value and the knob to adjust the unit (Hz, kHz, MHz). Press ENTER or the knob to confirm.
- Set Amplitude: Press the AMPL button. Enter the desired peak-to-peak amplitude value using the numeric keypad and adjust units. Confirm the setting.
- Set Offset (Optional): Press the OFFSET button to set a DC offset voltage.
- Enable Output: Press the OUT button to enable the signal output for the selected channel. The button will typically illuminate when active.
4.3 Advanced Functions
- Modulation: Use the MOD button to access various modulation types (AM, FM, PM, ASK, FSK, PSK, PWM). Follow on-screen prompts to configure modulation parameters.
- Sweep Function: The device supports linear and logarithmic frequency sweeps. Configure start/stop frequencies, sweep time, and sweep mode via the menu.
- User-Defined Waveforms: The PSG9060 allows for the creation and storage of up to 99 user-defined waveforms. Refer to the detailed software manual for instructions on waveform editing and uploading via USB.
5. Maintenance
- Cleaning: Regularly clean the exterior of the device with a soft, dry cloth. For stubborn dirt, use a slightly damp cloth with mild detergent. Avoid abrasive cleaners or solvents.
- Storage: When not in use, store the signal generator in a cool, dry place, away from direct sunlight and extreme temperatures.
- Ventilation: Ensure the ventilation slots on the device are not obstructed to prevent overheating.
- Firmware Updates: Check the manufacturer's website periodically for firmware updates to ensure optimal performance and access to new features.
6. Troubleshooting
- No Power:
- Check if the power cord is securely connected.
- Verify the power switch on the rear panel is in the 'ON' position.
- Ensure the power outlet is functional.
- Check the fuse on the rear panel (Fuse: 250Vac, T3.15A). Replace if blown, using a fuse of the same rating.
- No Output Signal:
- Ensure the OUT button for the selected channel is enabled.
- Verify that the frequency and amplitude settings are not set to zero.
- Check the BNC cable connections to your testing equipment.
- Confirm that the testing equipment (e.g., oscilloscope) is correctly configured to receive the signal.
- Incorrect Waveform:
- Double-check the selected waveform type and its parameters (frequency, amplitude, offset, duty cycle).
- Ensure the output impedance of the generator (50Ω typical) matches the input impedance of the receiving device, or use appropriate termination.
- Display Issues:
- If the display is frozen or unresponsive, try restarting the device.
- If issues persist, contact customer support.
7. Specifications
The following table details the technical specifications of the NYBGBAR PSG9060 Programmable Pulse Signal Generator.

Figure 7.1: Detailed technical parameters of the PSG9060.
| Parameter | Value |
|---|---|
| Model | PSG9060 |
| Channels | 2 |
| Sine Wave Frequency | 1nHz - 60MHz |
| Square Wave Frequency | 1nHz - 30MHz |
| Triangular Wave Frequency | 1nHz - 50MHz |
| Sampling Rate | 300MSa/s |
| Wavelength | 8192 dots/channel |
| Vertical Resolution | 14 bits |
| Rise/Fall Time (Square Wave) | ≤10nS |
| Output Impedance | 50Ω (typical) |
| Product Dimensions | 9.72 x 9.57 x 4.02 inches (247 x 243 x 102mm) |
| Power Supply | AC 85-264V, 47-63Hz |
| Max Power Consumption | 30W |
| Fuse | 250Vac, T3.15A |
| UPC | 675580722958 |
8. Warranty and Support
For warranty information, technical support, or service inquiries, please refer to the documentation included with your purchase or contact the seller directly. Keep your proof of purchase for warranty claims.