Introduction
Thank you for choosing the BSNAW Cordless Stick Vacuum Cleaner. This manual provides essential information for the safe and efficient operation, maintenance, and troubleshooting of your new appliance. Please read these instructions thoroughly before first use and retain them for future reference.
Product Overview
The BSNAW Cordless Stick Vacuum Cleaner is designed for versatile cleaning across various surfaces, offering powerful suction and a long-lasting battery.
Key Features:
- Powerful Suction: Up to 30000Pa for effective dirt, debris, and pet hair removal.
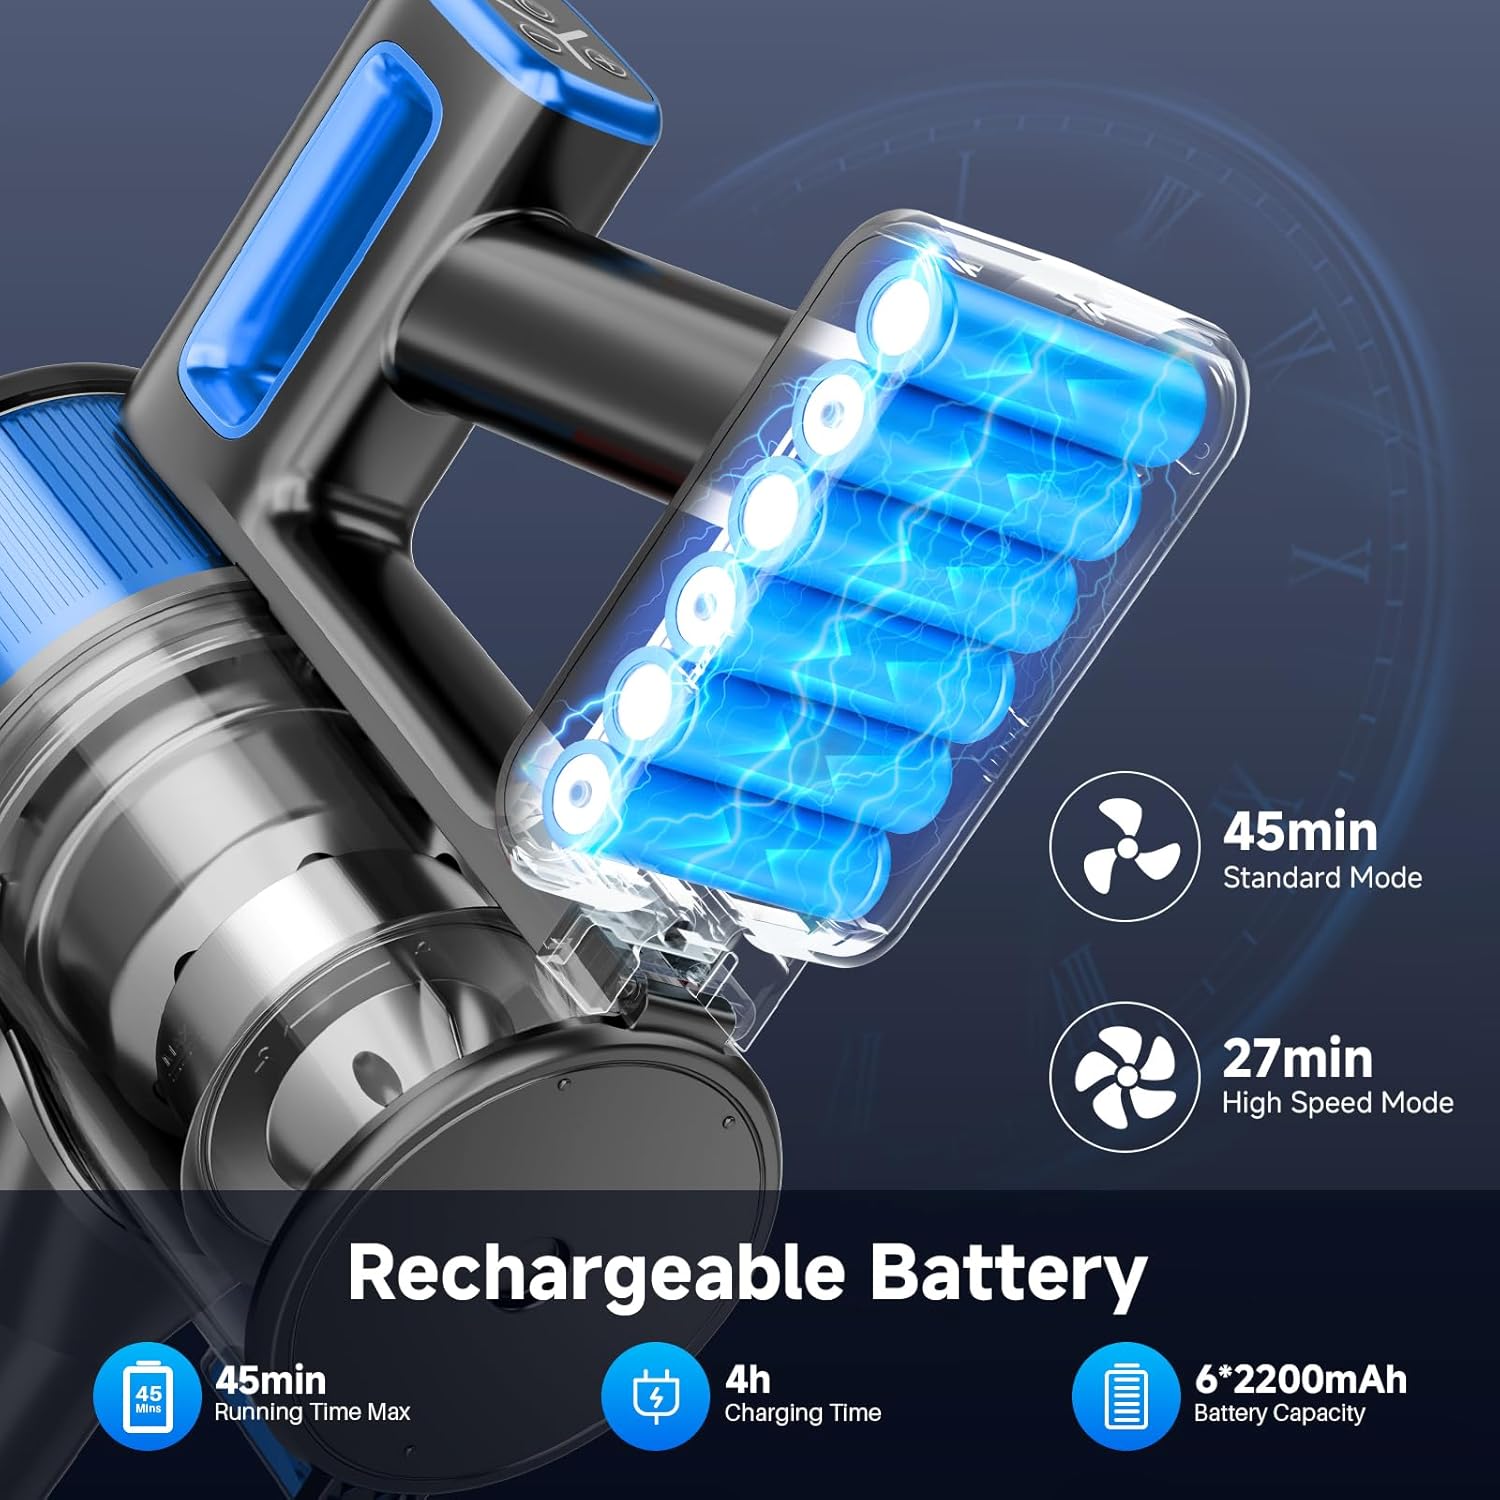
- Long Battery Life: Up to 45 minutes runtime on minimum suction mode with a 6*2600mAh power core.
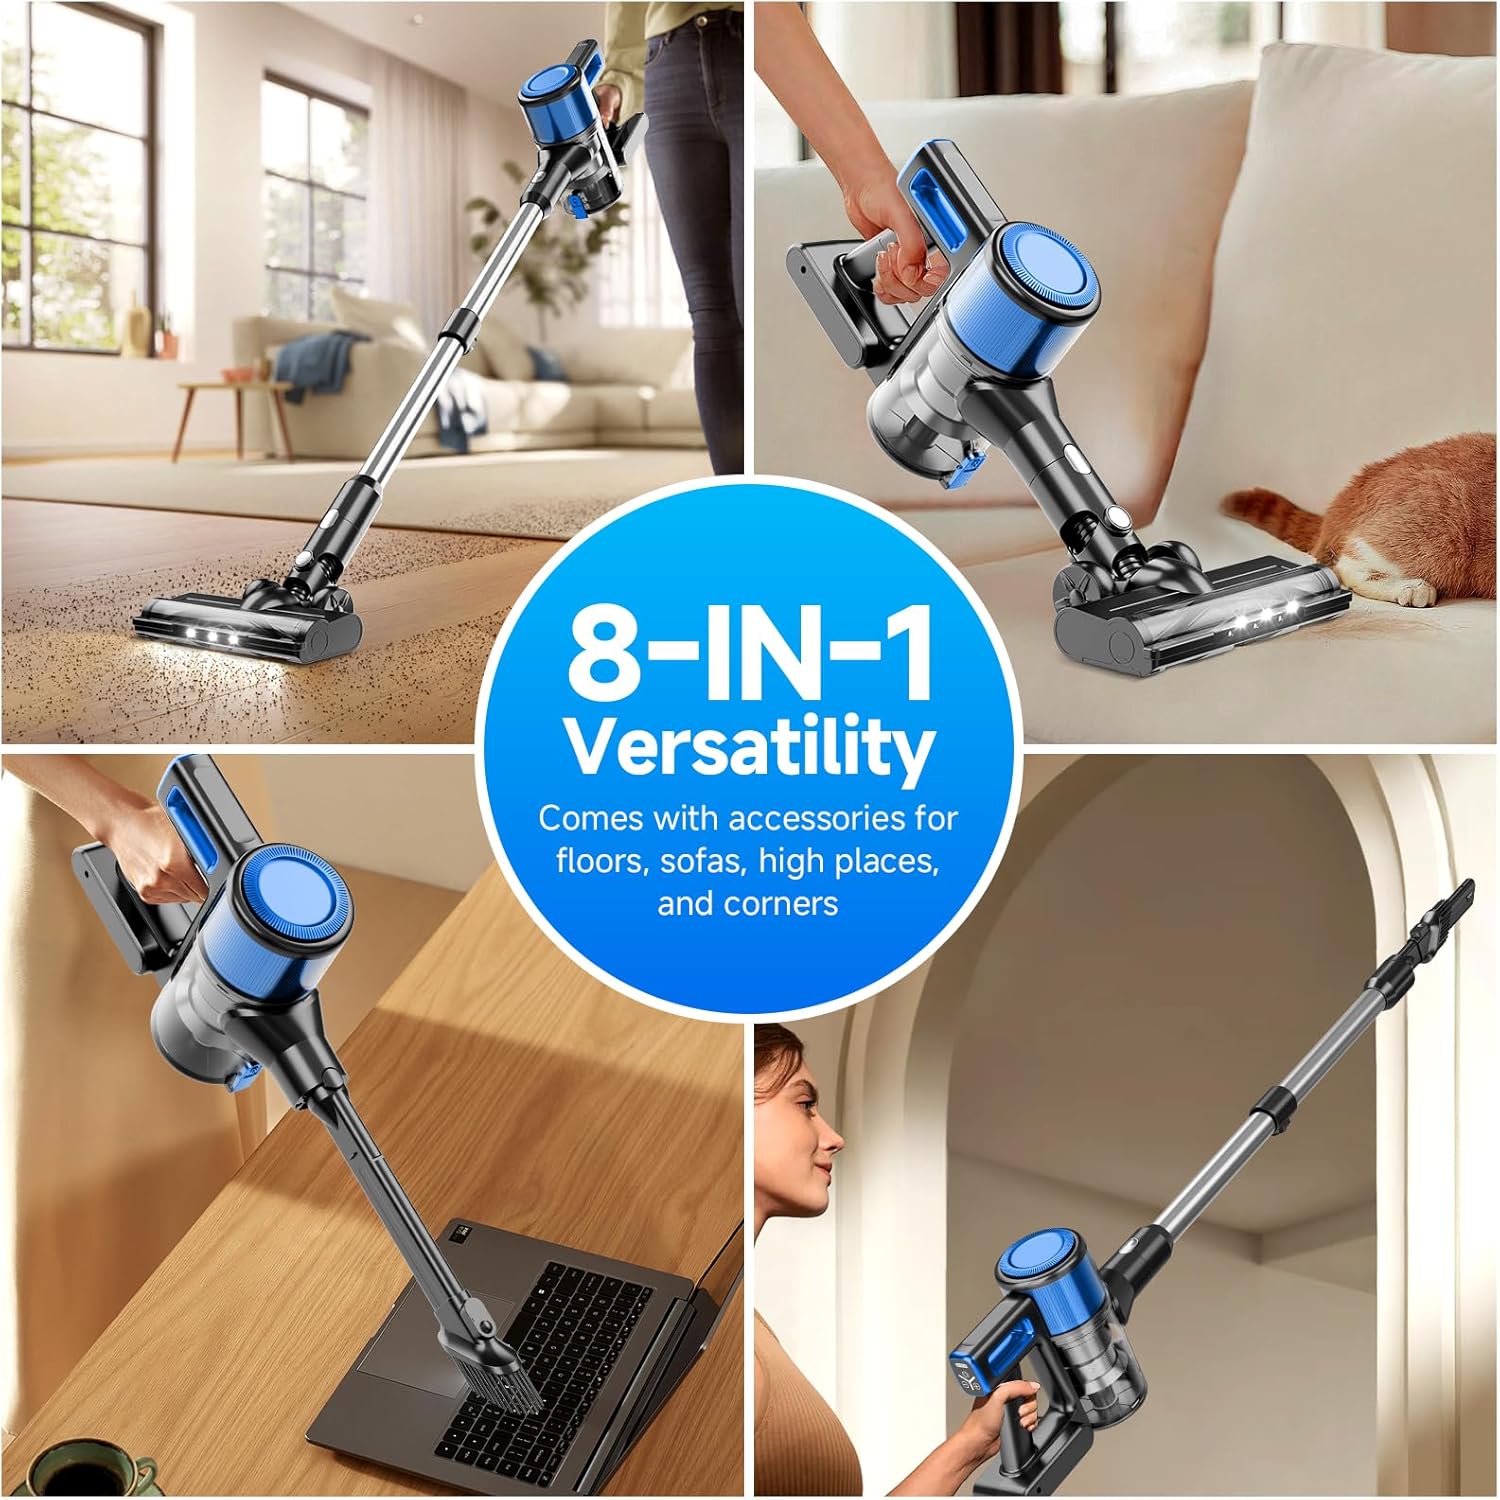
- 8-in-1 Versatility: Easily converts to a handheld vacuum with various attachments for different cleaning needs.
- Advanced Filtration System: Fully sealed cyclone filtration with HEPA, stainless steel, and sponge filters captures 99.99% of fine dust.
- Easy Maneuverability: Swivels 180° sideways and 90° up/down with LED lights for dark areas.
- One-Touch Dust Disposal: Hygienic emptying of the 1.2L dust cup.
Components Included:

- Handheld Vacuum Unit
- Motorized Brush Head
- 2-in-1 Dust Brush
- Crevice Nozzle / Hair Cleaning Tool
- Scalable Metal Tube (Extension Wand)
- Roller Brush (pre-installed in motorized head)
- Power Adapter
- HEPA Filter (spare)
- Wall Mount Bracket
- Mounting Screws
- User Manual
Setup
1. Initial Charging:
Before first use, fully charge the vacuum cleaner's battery. Connect the power adapter to the charging port on the main unit and plug it into a wall outlet. The battery indicator lights will show charging progress. A full charge typically takes approximately 4 hours.
2. Assembly:
- Insert the scalable metal tube into the main handheld vacuum unit until it clicks securely.
- Attach the motorized brush head to the other end of the metal tube until it clicks.
- For handheld use, attach desired accessories (e.g., 2-in-1 dust brush, crevice nozzle) directly to the main unit.
Operating Instructions
1. Power On/Off and Suction Modes:
Press the power button on the handle to turn the vacuum on. Use the mode selection button to switch between standard and max suction modes. The display will indicate the current mode and battery level.

2. Cleaning Different Surfaces:
- Hard Floors & Low-Pile Carpets: Use the motorized brush head. The LED lights will illuminate dark areas for thorough cleaning.
- High-Pile Carpets: The V-shaped anti-tangle roller brush is suitable for high-density carpets under 10 mm in length. It is not recommended for shaggy carpets.
- Corners, Crevices, Upholstery: Use the appropriate attachments (crevice nozzle, 2-in-1 dust brush) directly with the handheld unit.


3. Emptying the Dust Cup:
The 1.2L dust cup features a one-touch disposal design. Press the release button to open the bottom flap and empty debris directly into a trash bin. This prevents direct contact with dirt.


Maintenance
Regular maintenance ensures optimal performance and extends the lifespan of your vacuum cleaner.
1. Cleaning the Filters:
- Never immerse the main dustbin unit in water.
- Rotate and remove the dustbin from the main unit.
- Remove dust and debris from the filters.
- Rinse the HEPA filter and mesh shell under running water.
- Allow components to dry completely for at least 24 hours before reinstallation.
- Install the filter/filter cone back into place.

2. Checking and Cleaning the Roller Brush:
- Never immerse the motorized brush in water.
- Open the side cover of the motorized brush head.
- Take out the inside roller brush.
- Remove any tangled hairs or debris from the roller brush.
- Replace the brush, ensuring it is correctly seated.
- Install the side cover securely.

Troubleshooting
If you encounter issues with your BSNAW Cordless Stick Vacuum Cleaner, please refer to the following common solutions:
| Problem | Possible Cause | Solution |
|---|---|---|
| Vacuum does not turn on. | Battery is depleted or not properly installed. | Charge the battery fully. Ensure the battery is securely connected. |
| Low suction power. | Dust cup is full, filters are clogged, or brush head is blocked. | Empty the dust cup. Clean the HEPA and mesh filters. Remove any blockages from the brush head or extension tube. |
| Brush head stops rotating. | Hair or debris tangled in the roller brush. | Turn off the vacuum, remove the roller brush, and clear any obstructions. |
| Short battery runtime. | Vacuum is consistently used on Max suction mode or battery is aging. | Use Standard mode for general cleaning. Ensure battery is fully charged before each use. If battery life significantly degrades, consider battery replacement. |
If the problem persists after attempting these solutions, please contact customer support.
Specifications
- Brand: BSNAW
- Model: N502
- Filter Type: HEPA Filter
- Cordless: Yes
- Color: Black-Blue
- Battery Life: Up to 45 minutes (Standard Mode)
- Motor Horsepower: 6 HP
- Portable: Yes
- Number of Power Levels: 2 (Standard, Max)
- Maximum Suction: 30000Pa
- Vacuum Collection Technology: Cyclonic and Rotating Brush
- Product Dimensions: 30 x 10 x 15 inches
- Item Weight: 6.82 pounds (3.1 Kilograms)
- Batteries: 1 Lithium Ion battery (included)
- Dust Cup Capacity: 1.2 Liters
Warranty and Support
BSNAW provides a lifetime customer service guarantee and exchange service for this product. For any issues or inquiries regarding your vacuum cleaner, please contact our customer support team. We are committed to ensuring your satisfaction.
For support, please refer to the contact information provided on the product packaging or the official BSNAW website.