1. Introduction
This manual provides essential information for the safe and efficient operation of your KLARSTEIN Elizabeth Slim Built-in Oven. Please read these instructions carefully before installation, use, and maintenance. Keep this manual for future reference.
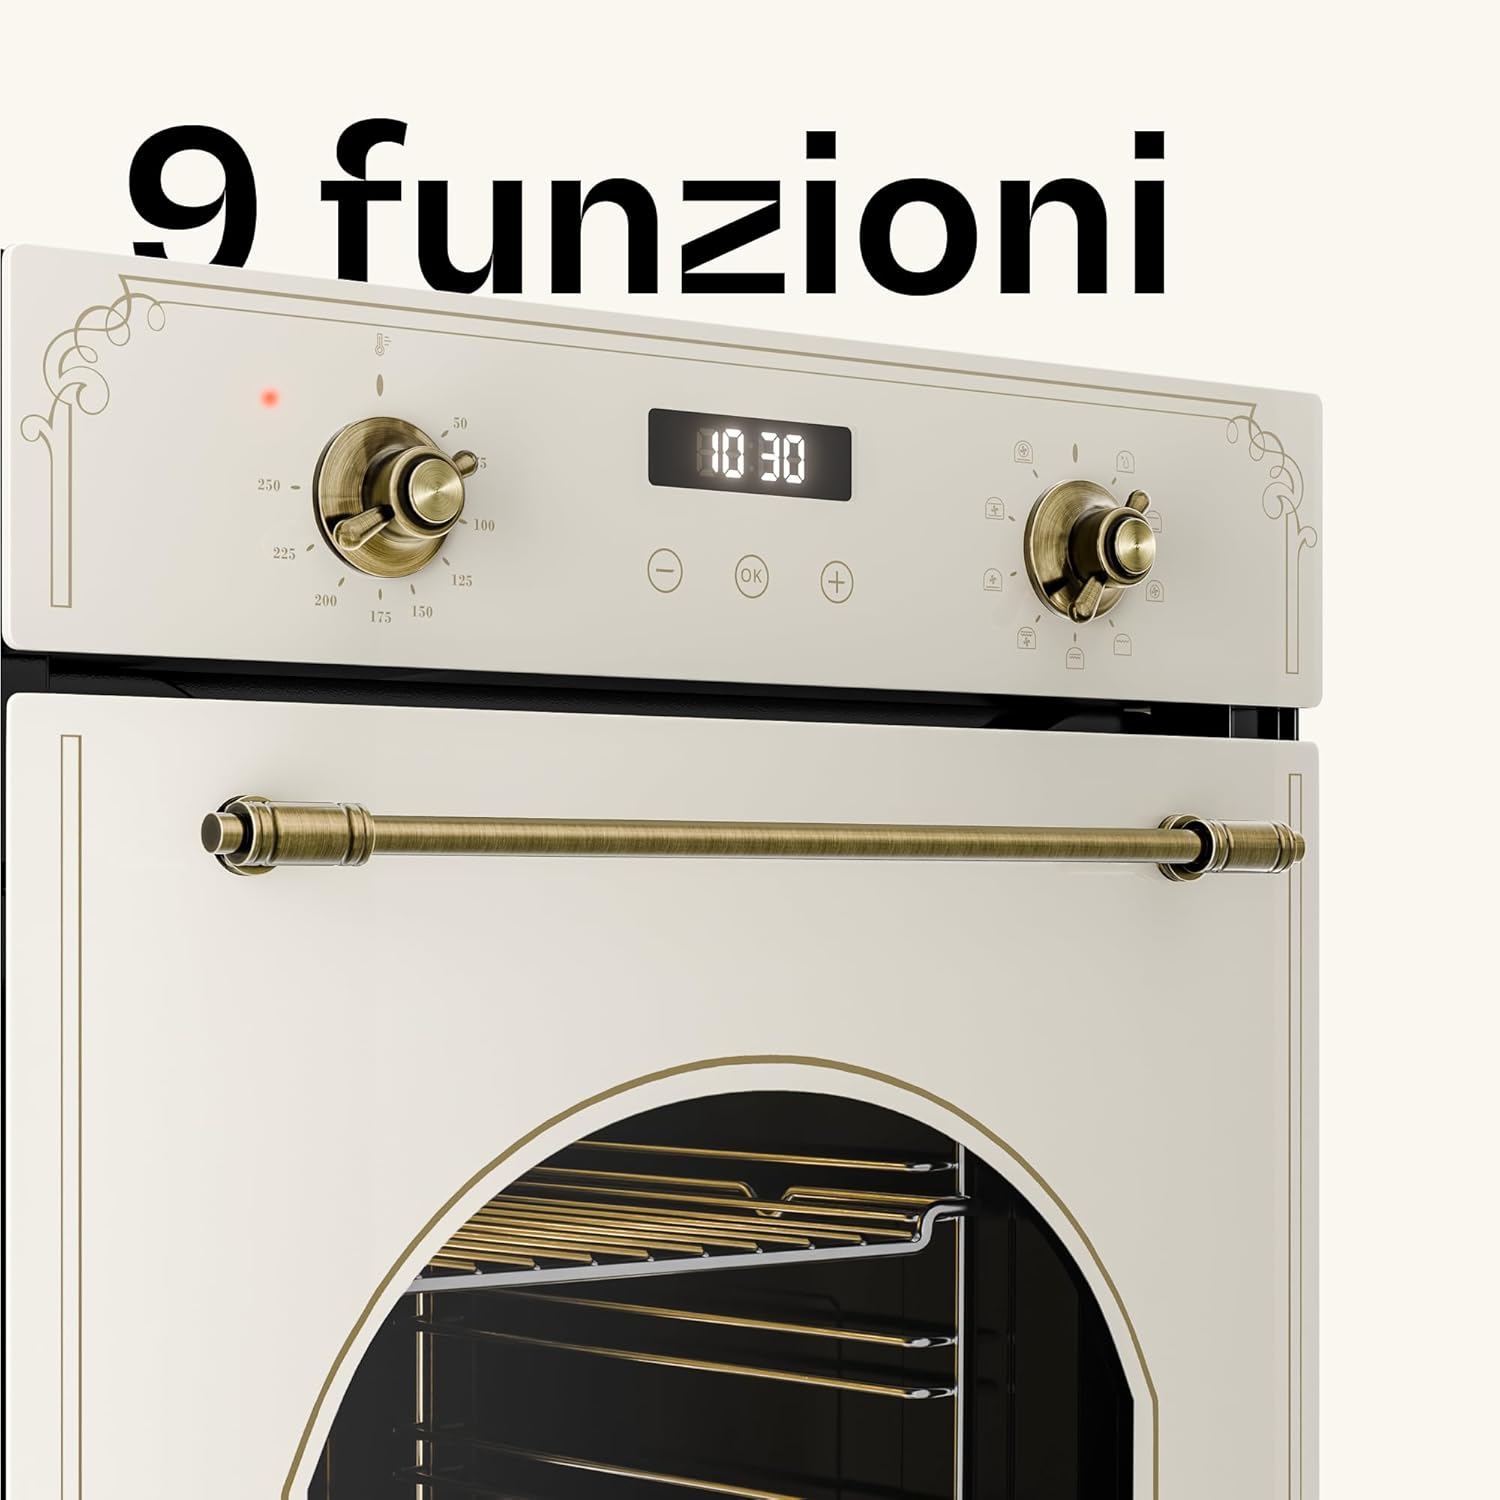
The KLARSTEIN Elizabeth Slim oven features a 49-liter capacity, 9 cooking functions, steam cleaning capability, and a digital timer, designed for modern kitchens with its compact 45cm width.
2. Safety Instructions
Always follow basic safety precautions when using electrical appliances to reduce the risk of fire, electric shock, burns, or injury.
- Read all instructions before using the appliance.
- Ensure the appliance is properly installed and grounded by a qualified technician.
- Do not touch hot surfaces. Use oven mitts or pot holders.
- Never clean the oven door seals with harsh abrasives.
- Supervise children when the oven is in use.
- Do not store flammable materials in or near the oven.
- Disconnect power before servicing.
3. Product Overview
The KLARSTEIN Elizabeth Slim oven combines a compact design with versatile cooking options and easy maintenance features.

Front view of the KLARSTEIN Elizabeth Slim Built-in Oven in Cream Vintage color, showcasing its elegant design and control knobs.

Close-up of the oven's control panel, highlighting the digital timer and the two rotary knobs for temperature and function selection, indicating 9 available functions.
View of the oven's interior, demonstrating its 49-liter capacity and the chrome guides for shelves, suitable for various cooking needs.

Image showing the oven door partially removed, illustrating the ease of cleaning due to its removable double-glass design.
4. Specifications
| Brand | KLARSTEIN |
| Model | Elizabeth Slim |
| Capacity | 49 Liters |
| Functions | 9 (including Turbo cooking, Pizza mode, Grill function, Recirculation mode, Steam cleaning) |
| Energy Class | A |
| Power | 2000 W |
| Installation Type | Built-in |
| Heating Method | Convection |
| Dimensions (approx.) | 44.8 cm (width) x 59.5 cm (height) x 53 cm (depth) |

Diagram showing the external dimensions of the oven (44.8 cm width, 59.5 cm height, 53 cm depth) and the required cabinet cutout dimensions for installation (42 cm width, 60 cm height, 56 cm depth).
5. Setup and Installation
Proper installation is crucial for the safe and efficient operation of your oven. It must be installed by a qualified technician in accordance with local regulations.
5.1 Unpacking
- Carefully remove all packaging materials.
- Check the oven for any signs of damage. Do not install a damaged appliance.
- Keep packaging materials away from children.
5.2 Electrical Connection
- Ensure the electrical supply matches the voltage and frequency specified on the rating plate.
- The oven must be properly grounded.
- Do not use extension cords or adapters.
5.3 Cabinet Installation
- The oven is designed for built-in installation into a standard kitchen cabinet.
- Ensure adequate ventilation around the appliance.
- Refer to the dimension diagram for precise cutout measurements.
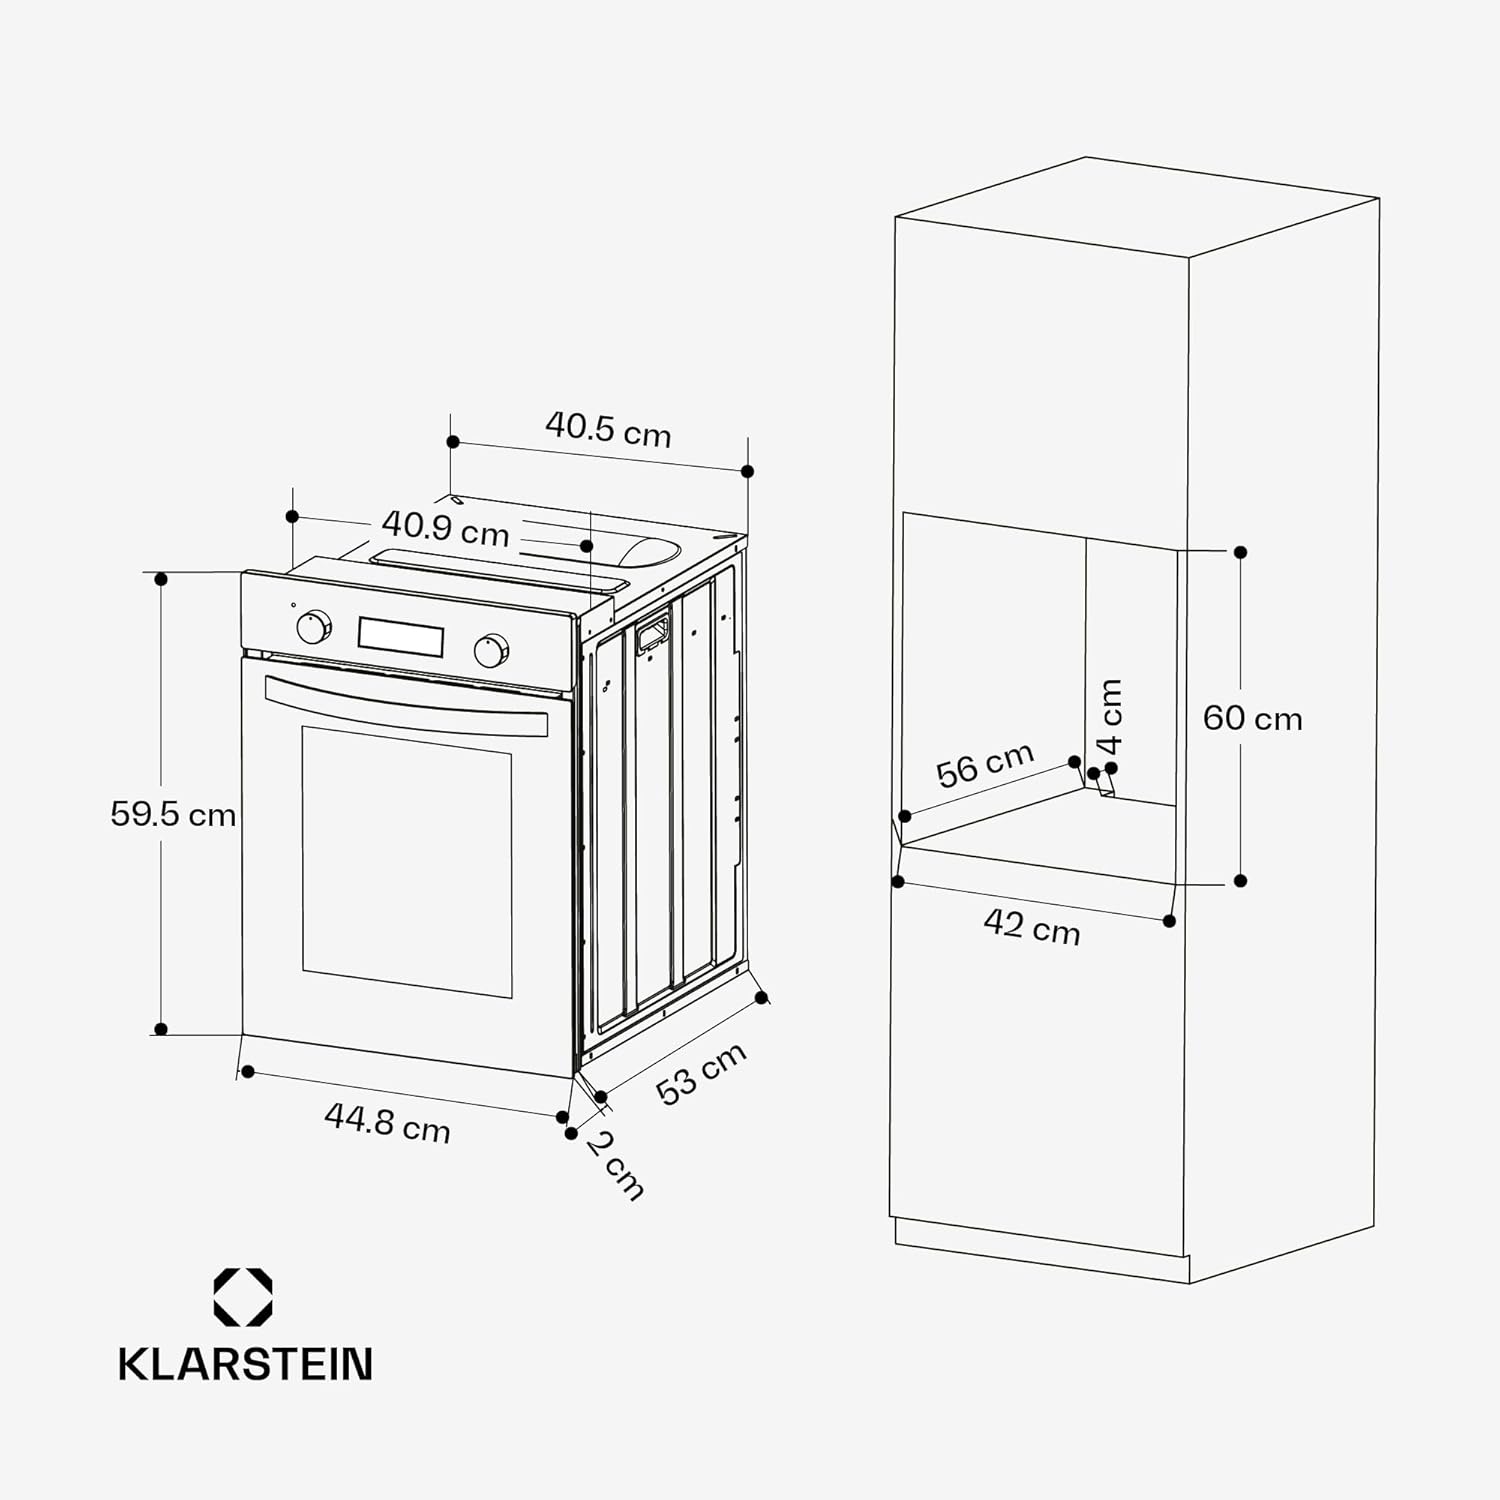
Detailed technical drawing showing the oven's dimensions (44.8 cm width, 59.5 cm height, 53 cm depth) and the required cabinet opening dimensions (42 cm width, 60 cm height, 56 cm depth) for proper built-in installation.
6. Operating Instructions
Your KLARSTEIN Elizabeth Slim oven offers various cooking functions for optimal results.
6.1 Control Panel Overview
The control panel consists of two rotary knobs and a digital display with touch controls.
- Left Knob: Function Selector (e.g., Conventional, Fan, Grill, Pizza, Steam Clean).
- Right Knob: Temperature Selector (adjusts temperature from 50°C to 250°C).
- Digital Display: Shows time, temperature, and timer settings.
- Touch Controls: Used for setting the timer, clock, and other digital functions.

Close-up of the oven's control panel, showing the two vintage-style golden rotary knobs for function and temperature selection, and the central digital display for time and settings.
6.2 First Use
- Before first use, clean the oven interior with a damp cloth.
- Heat the empty oven at maximum temperature for approximately 30 minutes to burn off any manufacturing residues. Ensure good ventilation during this process.
6.3 Cooking Functions
Select the desired cooking function using the left rotary knob.
- Conventional Heating: Top and bottom heating elements for traditional baking.
- Fan Assisted Heating: Even heat distribution for multi-level cooking.
- Grill Function: For grilling and browning.
- Pizza Mode: Combines fan and bottom heating for crispy bases.
- Refer to the full manual for all 9 functions and their specific uses.
6.4 Setting the Timer
Use the digital display and touch controls to set the cooking duration or a delayed start time.
- Press the timer button on the digital display.
- Use the '+' and '-' buttons to adjust the time.
- Confirm the setting.
7. Maintenance and Cleaning
Regular cleaning and maintenance ensure the longevity and optimal performance of your oven.
7.1 Steam Cleaning Function
- Pour a small amount of water into the oven cavity.
- Select the steam cleaning function.
- The steam will loosen food residues, making them easier to wipe away.
7.2 General Cleaning
- Always ensure the oven is cool and disconnected from power before cleaning.
- Clean the interior with a soft cloth and mild detergent. Avoid abrasive cleaners.
- The oven door is removable for easier cleaning of the glass panels.
- Clean exterior surfaces with a damp cloth.

Image highlighting key features such as grill function, recirculation mode, steam cleaning, and digital timer, all contributing to ease of use and maintenance.
8. Troubleshooting
Before contacting customer service, refer to the following table for common issues and their solutions.
| Problem | Possible Cause | Solution |
|---|---|---|
| Oven does not heat up. | No power supply; Door not closed properly; Function/temperature not set. | Check power connection; Ensure door is fully closed; Set desired function and temperature. |
| Food not cooking evenly. | Incorrect rack position; Overcrowding the oven; Fan not working. | Use recommended rack position; Do not overcrowd; Contact service if fan is faulty. |
| Digital display not working. | Power interruption; Faulty display. | Check power supply; Reset power by unplugging for a few minutes; Contact service. |
9. Warranty and Support
Your KLARSTEIN Elizabeth Slim Built-in Oven comes with a standard manufacturer's warranty. For specific warranty terms and conditions, please refer to the documentation provided with your purchase or visit the official KLARSTEIN website.
For technical support, spare parts, or service requests, please contact KLARSTEIN customer service. You can find contact information on the official KLARSTEIN website or through your retailer.
Klarstein Italia Customer Service: Contact Seller