1. Introduction
Thank you for choosing the LVWIT GU10 3-Spot LED Ceiling Light. This manual provides essential information for the safe installation, operation, and maintenance of your new lighting fixture. This modern ceiling light features three adjustable black metal LED spotlights mounted on a rectangular wooden base, designed to provide versatile illumination for various indoor spaces.
Key features include:
- Adjustable Spotlights: Each GU10 lamp base can be tilted 180° and rotated 352° for precise light direction.
- Modern Design: Features a durable fine powder coating to prevent rust and fading, combined with a solid wooden base.
- Versatile Application: Suitable for bedrooms, hallways, living rooms, kitchens, garages, and bars.
2. Safety Information
Please read all safety instructions carefully before installation and use. Failure to follow these instructions may result in electric shock, fire, or other hazards.
- Electrical Safety: Always disconnect power at the circuit breaker or fuse box before installation, maintenance, or bulb replacement.
- Qualified Electrician: If you are unsure about electrical wiring, consult a qualified electrician.
- Indoor Use Only: This product has an IP20 protection rating, making it suitable for dry indoor locations only. Do not expose to water or high humidity.
- Bulb Compatibility: Use only GU10 LED bulbs. Do not exceed the maximum wattage of 40 watts per bulb.
- Secure Mounting: Ensure the fixture is securely mounted to a structurally sound surface.
- Heat: Allow bulbs to cool before handling.
3. Package Contents
Verify that all components are present and undamaged before beginning installation. If any parts are missing or damaged, contact customer support.
- LVWIT GU10 3-Spot LED Ceiling Light Fixture (1)
- Mounting Hardware (screws, wall anchors)
- Instruction Manual (this document)
Note: GU10 bulbs are not included and must be purchased separately.
4. Specifications
| Brand | LVWIT |
| Model Number | 26c6ada3-2dac-4e61-bcb8-11dc74bc9eca |
| Color | Black |
| Material | Metal, Wood |
| Style | Modern |
| Light Fixture Form | Close to Ceiling |
| Product Dimensions (L x W x H) | 17.17" x 2.48" x 3.62" (430mm x 63mm x 92mm) |
| Number of Light Sources | 3 |
| Max Wattage per Bulb | 40 watts |
| Bulb Type | GU10 (not included) |
| Assembly Required | Yes |
| Item Weight | 1.72 pounds (0.78 kg) |
| IP Rating | IP20 (Indoor Use Only) |

Figure 1: Product Dimensions. This image shows the ceiling light installed in a room, highlighting its overall dimensions, including the length of 430mm (16.92 inches) and a height of 140mm (5.51 inches) from the ceiling.

Figure 2: GU10 Bulb Compatibility. This image displays different styles of GU10 bulbs and provides a visual guide for inserting a GU10 bulb into the fixture, along with recommended bulb dimensions for compatibility.
5. Installation Instructions
Installation is straightforward due to the two-part design. Please follow these steps carefully.
- Prepare for Installation:
- Turn off the main power supply at your circuit breaker or fuse box to prevent electric shock.
- Ensure the mounting surface (ceiling or wall) is clean, dry, and structurally sound.
- Mount the Bracket:
- Position the metal mounting bracket against the desired installation spot.
- Mark the drilling points.
- Drill holes and insert wall anchors if necessary.
- Securely attach the metal bracket to the ceiling or wall using the provided screws.
- Connect Wiring:
- Carefully connect the electrical wires from your power supply to the fixture's wires. Match the Live (L), Neutral (N), and Ground wires according to local electrical codes.
- Ensure all connections are secure and insulated with wire connectors.
- Attach the Fixture:
- Align the fixture's wooden base with the mounted bracket and secure it using the provided screws or fasteners.
- Insert Bulbs:
- Insert GU10 LED bulbs (not included) into each of the three lamp bases. Ensure bulbs are pushed in and twisted to lock into place. Do not exceed 40 watts per bulb.
- Restore Power:
- Once installation is complete and all connections are secure, restore power at the circuit breaker.
- Test the light fixture.

Figure 3: Easy Installation Guide. This diagram provides a clear visual guide for installation, detailing how to secure the mounting bracket, connect the live, neutral, and ground wires, and finally, how to insert the GU10 bulb into the fixture.

Figure 4: Multiple Installation Options. This image demonstrates the versatility of the light fixture, showing it mounted on a ceiling in a dining area and on a wall in a living room, illustrating its multiple installation possibilities.
6. Operating Instructions
Once installed and powered, the LVWIT GU10 3-Spot LED Ceiling Light is ready for use. The primary operation involves adjusting the direction of the spotlights.
- Adjusting Spotlights: Each individual spotlight can be manually adjusted to direct light where needed.
- Tilt: Gently tilt each spotlight up to 180 degrees vertically.
- Swivel: Rotate each spotlight up to 352 degrees horizontally.
Caution: Do not force the spotlights beyond their intended range of motion.
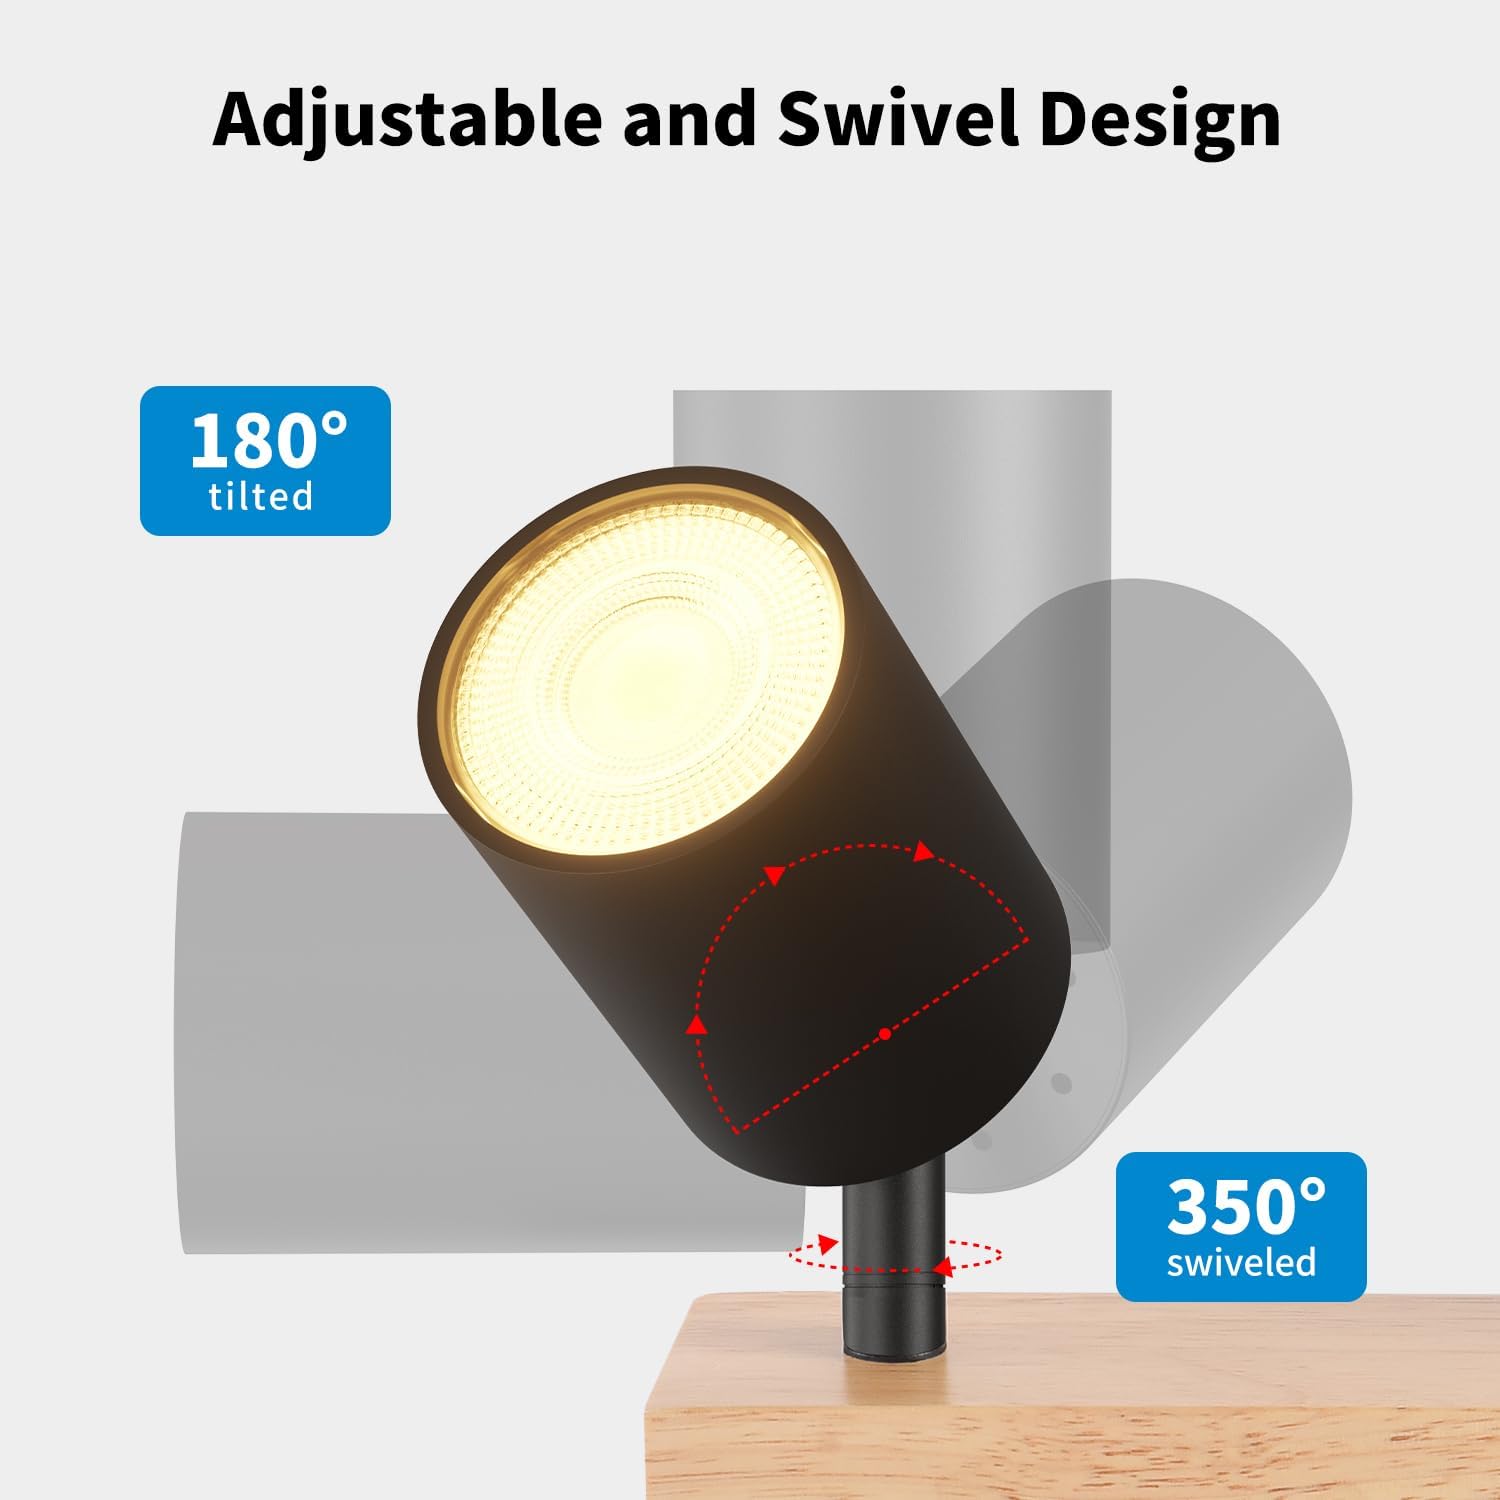
Figure 5: Adjustable and Swivel Design. This image illustrates the adjustable nature of the spotlight, demonstrating its ability to tilt up to 180 degrees and swivel up to 350 degrees, allowing for flexible light direction.
7. Maintenance
Regular maintenance ensures the longevity and optimal performance of your light fixture.
- Cleaning: Disconnect power before cleaning. Use a soft, dry cloth to wipe the fixture. Avoid abrasive cleaners, solvents, or polishes that could damage the finish. The fine powder coating is designed to resist rust and fading.
- Bulb Replacement: Disconnect power before replacing bulbs. Allow old bulbs to cool completely. Gently twist and pull out the old GU10 bulb. Insert a new GU10 LED bulb (max 40W) by pushing it in and twisting to secure.
- Inspection: Periodically check for any loose connections or signs of wear.
8. Troubleshooting
If you encounter issues with your LVWIT GU10 3-Spot LED Ceiling Light, refer to the following common problems and solutions:
| Problem | Possible Cause | Solution |
|---|---|---|
| Light does not turn on | No power supply Loose wiring connection Faulty bulb | Check circuit breaker/fuse. Ensure power is on. Verify all wire connections are secure (with power off). Replace bulb with a known working GU10 bulb. |
| Light flickers | Loose bulb Incompatible dimmer switch Faulty bulb | Ensure bulb is securely seated. If using a dimmer, ensure it is compatible with LED bulbs. Try without dimmer. Replace bulb. |
| One spotlight not working | Faulty bulb in that spot Loose connection to that spot | Replace the specific bulb. Check wiring connections for that particular spotlight (with power off). |
If the problem persists after attempting these solutions, please contact customer support.
9. Warranty and Support
The LVWIT GU10 3-Spot LED Ceiling Light is backed by a two-year warranty from the date of purchase. This warranty covers defects in materials and workmanship under normal use.
For warranty claims, technical support, or any questions regarding your product, please contact LVWIT customer service through the retailer where the product was purchased or visit the official LVWIT website for contact information.
Please have your model number (26c6ada3-2dac-4e61-bcb8-11dc74bc9eca) and proof of purchase available when contacting support.