SanmeiLi HCT-322
SanmeiLi HCT-322 Automatic Water Timer User Manual
Intelligent Sprinkler for Garden Digital Irrigation
1. Introduction
Thank you for choosing the SanmeiLi HCT-322 Automatic Water Timer. This intelligent digital irrigation machine is designed to simplify your garden watering tasks, saving both water and time. This manual provides detailed instructions for installation, operation, maintenance, and troubleshooting to ensure optimal performance and longevity of your device.
2. Safety Information
- Do not immerse the timer in water. It is designed for outdoor use and is IPX5 rated, meaning it is protected against low-pressure water jets from any direction.
- Ensure all connections are tight to prevent leaks.
- Do not use the timer with water temperatures exceeding 104°F (40°C) or below 32°F (0°C).
- Remove batteries if the timer will not be used for an extended period or during freezing weather to prevent damage.
- Keep out of reach of children.
3. Package Contents
Please check the package to ensure all items are present:
- SanmeiLi HCT-322 Automatic Water Timer (Type-A)
- User Manual
- Various connectors/adapters (as shown in product images)
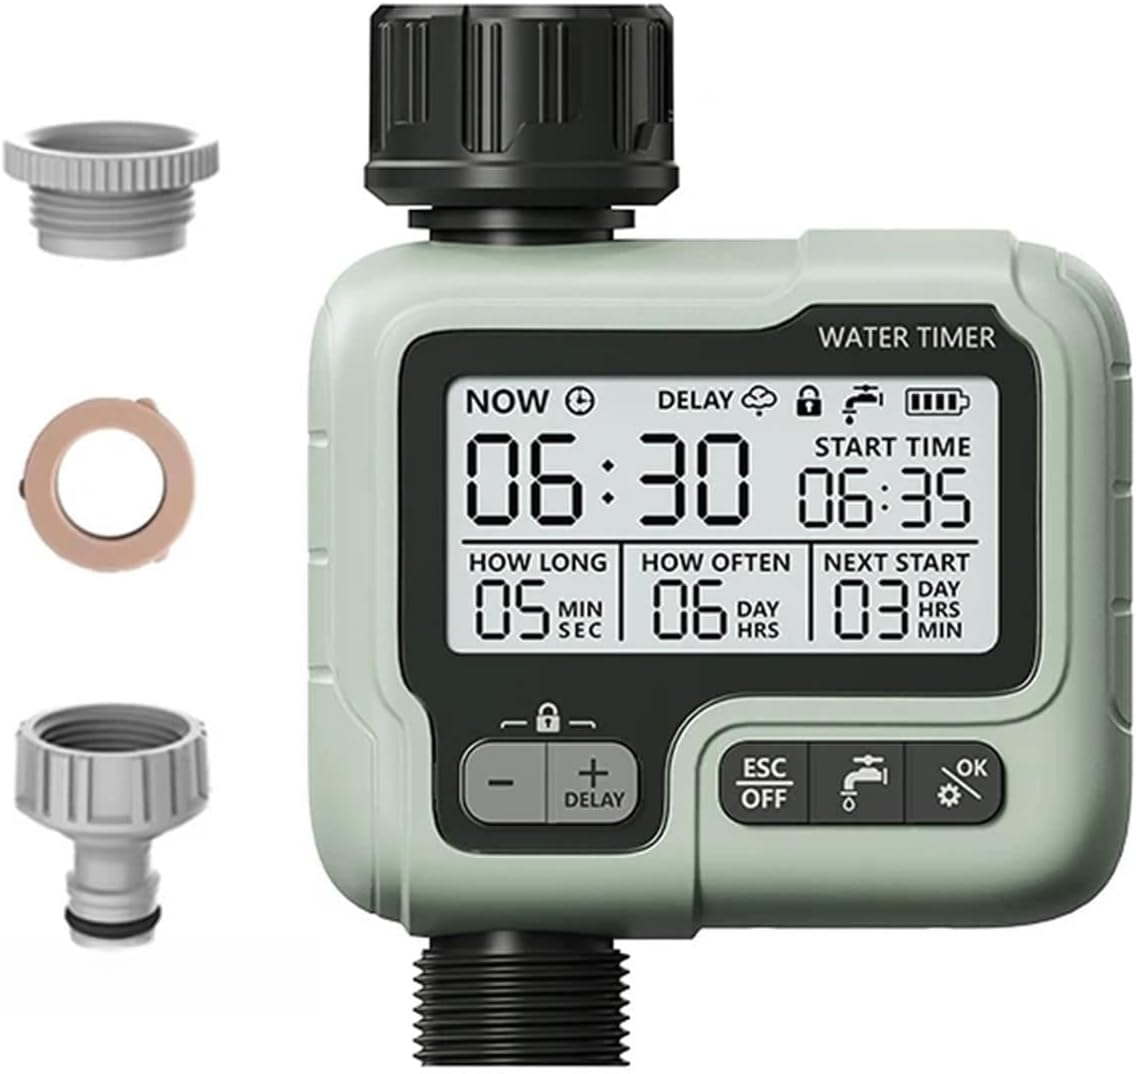
Image 3.1: The SanmeiLi HCT-322 Automatic Water Timer shown with its various connection adapters, including a filter washer and different thread sizes for hose and faucet connections.
4. Setup
4.1. Battery Installation
The water timer requires 2 x AA batteries (not included). Open the battery compartment on the back of the timer, insert the batteries according to the polarity markings, and securely close the compartment.
4.2. Connecting the Timer
The HCT-322 features a 360° movable connector for easy installation in various spaces.
- Screw the timer onto your outdoor faucet or spigot. Ensure the connection is hand-tight to prevent leaks.
- Attach your garden hose to the outlet of the water timer. Again, hand-tighten for a secure fit.
- Ensure the filter washer is properly seated in the inlet connection to prevent debris from entering the timer.
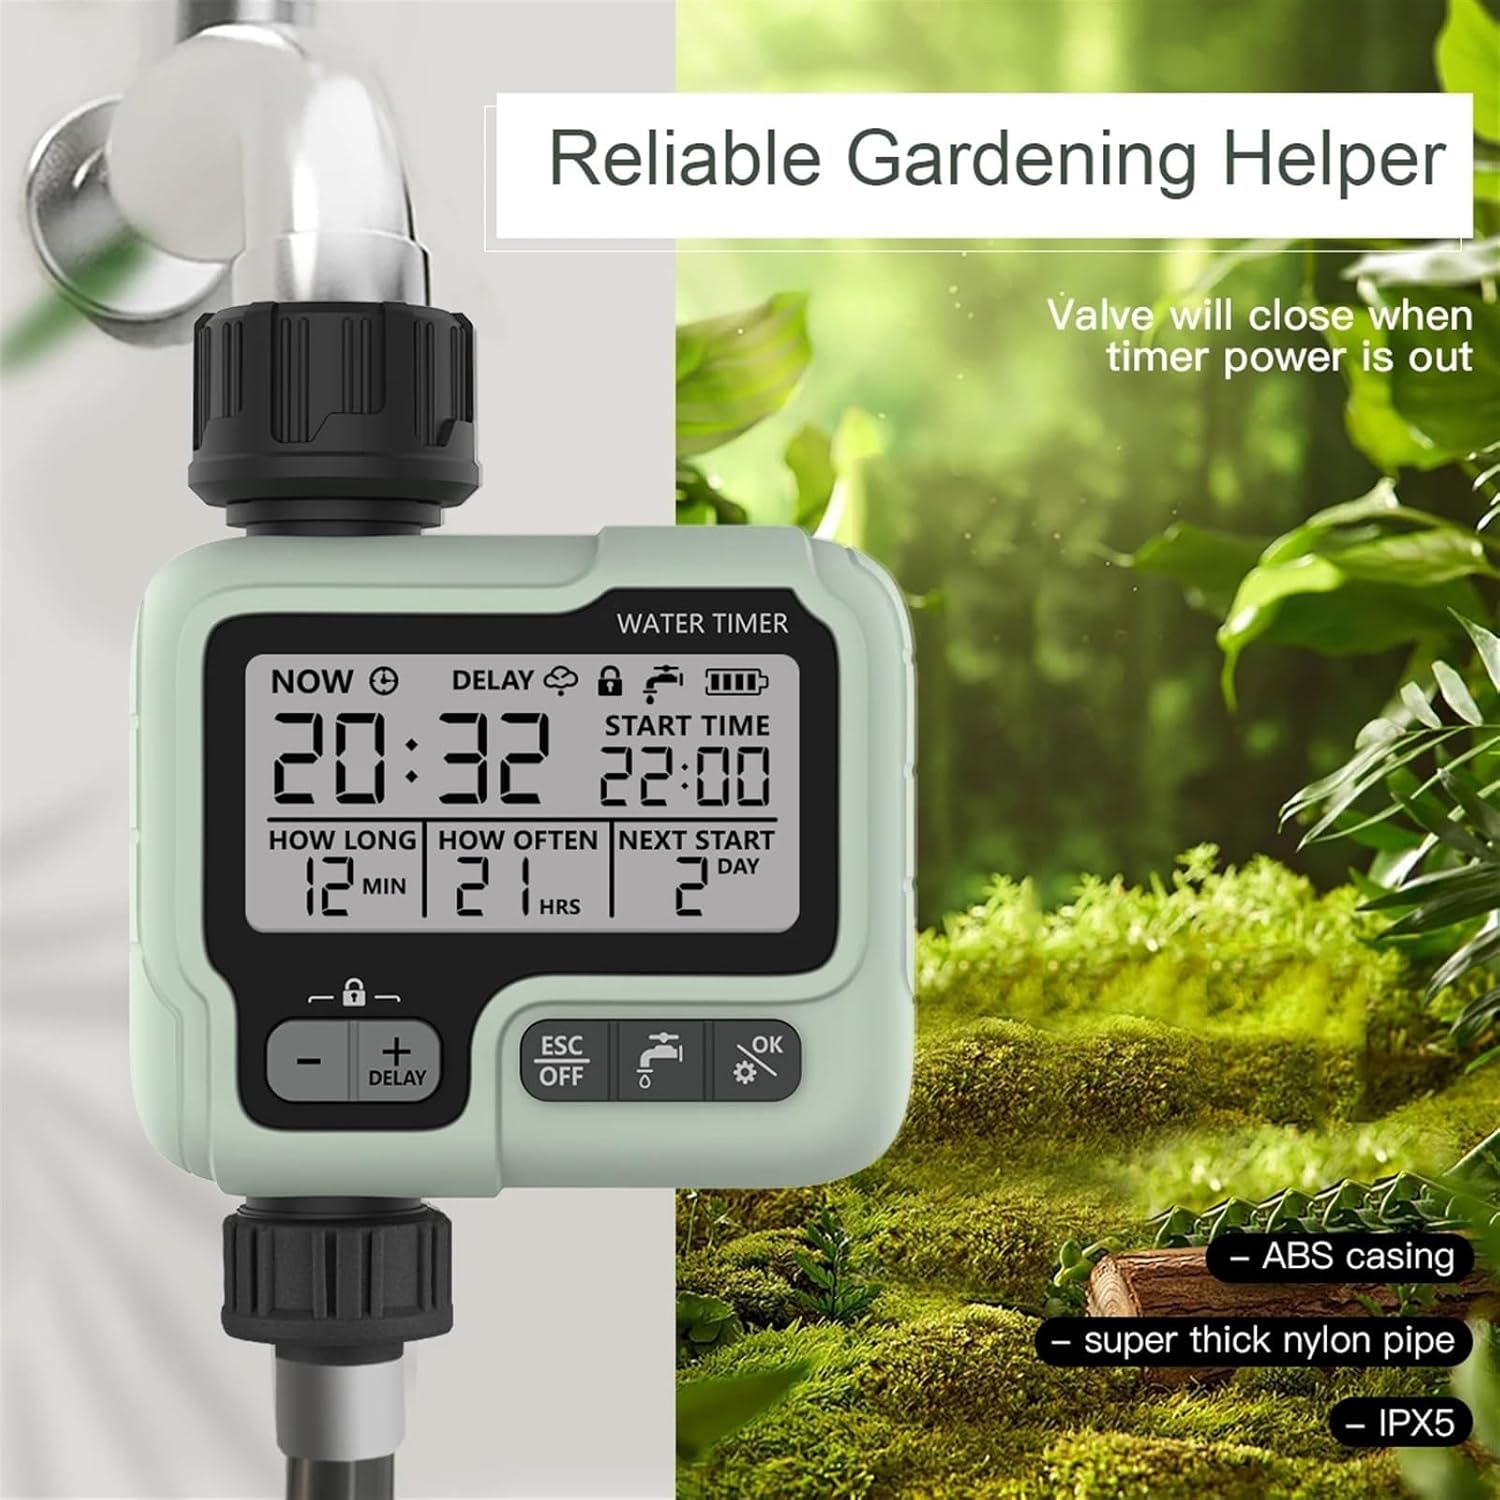
Image 4.1: The water timer installed on an outdoor faucet, demonstrating its use in a garden setting. The image highlights its role as a reliable gardening helper.

Image 4.2: This image illustrates the ease of installation with the 360° movable connector and the simplicity of setting programs directly on the large 2.76-inch display.
5. Operating Instructions
The HCT-322 features a large display for easy readability and intuitive button controls.
5.1. Display Overview

Image 5.1: The digital display of the water timer, showing key information such as current time (NOW), start time (START TIME), watering duration (HOW LONG), frequency (HOW OFTEN), and the next scheduled start (NEXT START).
The display shows:
- NOW: Current time.
- DELAY: Indicates if a delay function is active.
- Battery Indicator: Shows remaining battery life.
- Child Lock Indicator: Shows if child lock is active.
- START TIME: The programmed time for watering to begin.
- HOW LONG: The duration of each watering cycle (in minutes/seconds).
- HOW OFTEN: The frequency of watering (in hours/days).
- NEXT START: The time until the next scheduled watering cycle.
5.2. Button Functions
- +/-: Adjusts values up or down during setting.
- DELAY: Activates or adjusts the rain delay function.
- ESC/OFF: Exits current setting mode or turns off the timer.
- OK/Gear Icon: Confirms settings or enters programming mode.
5.3. Setting the Current Time
- Press the OK button to enter setting mode. The 'NOW' time will flash.
- Use the +/- buttons to adjust the hour.
- Press OK to move to minutes, then use +/- to adjust.
- Press OK to confirm and save the current time.
5.4. Programming Watering Schedules
Programs are set based on watering logic: Start Time, How Long, How Often.
- From the main screen, press OK repeatedly until 'START TIME' flashes.
- Use +/- to set the desired start hour, then press OK to set minutes. Press OK again to confirm.
- Next, 'HOW LONG' will flash. Use +/- to set the watering duration (from 1 second to 99 minutes). Press OK to confirm.
- Then, 'HOW OFTEN' will flash. Use +/- to set the watering frequency (from 1 hour to 15 days). Press OK to confirm.
- The timer will now display the 'NEXT START' time, indicating when the next watering cycle will begin based on your settings.

Image 5.2: This image illustrates the range of settings for watering duration (1 second to 59 seconds, 1 minute to 99 minutes) and frequency (1 hour to 23 hours, 1 day to 15 days), allowing for flexible irrigation scheduling.
5.5. Manual Watering
To manually water outside of the programmed schedule:
- Press the OK button until the manual watering icon (faucet) flashes.
- Use the +/- buttons to set the desired manual watering duration.
- Press OK to start manual watering. The timer will automatically turn off after the set duration.
5.6. Rain Delay Function
To temporarily pause scheduled watering:
- Press the DELAY button. The delay icon will appear, and the delay duration will flash.
- Use the +/- buttons to set the desired delay period (e.g., 24 hours, 48 hours).
- Press OK to confirm. The timer will resume its schedule after the delay period ends.
5.7. Child Lock Function
To prevent accidental changes to settings:
- To activate: Press and hold the +/- buttons simultaneously for 3 seconds until the lock icon appears.
- To deactivate: Press and hold the +/- buttons simultaneously for 3 seconds until the lock icon disappears.

Image 5.3: This image highlights the various functions of the water timer, including Delay, Child Lock, Manual watering, and the OFF/ESC button for exiting settings.
6. Maintenance
6.1. Cleaning the Filter
The timer is equipped with a removable filter to prevent debris from entering the unit and clogging the valve. Regularly inspect and clean the filter to ensure optimal water flow.
- Disconnect the timer from the faucet.
- Remove the filter washer from the inlet.
- Rinse the filter under running water to remove any accumulated debris.
- Reinsert the clean filter and reconnect the timer.
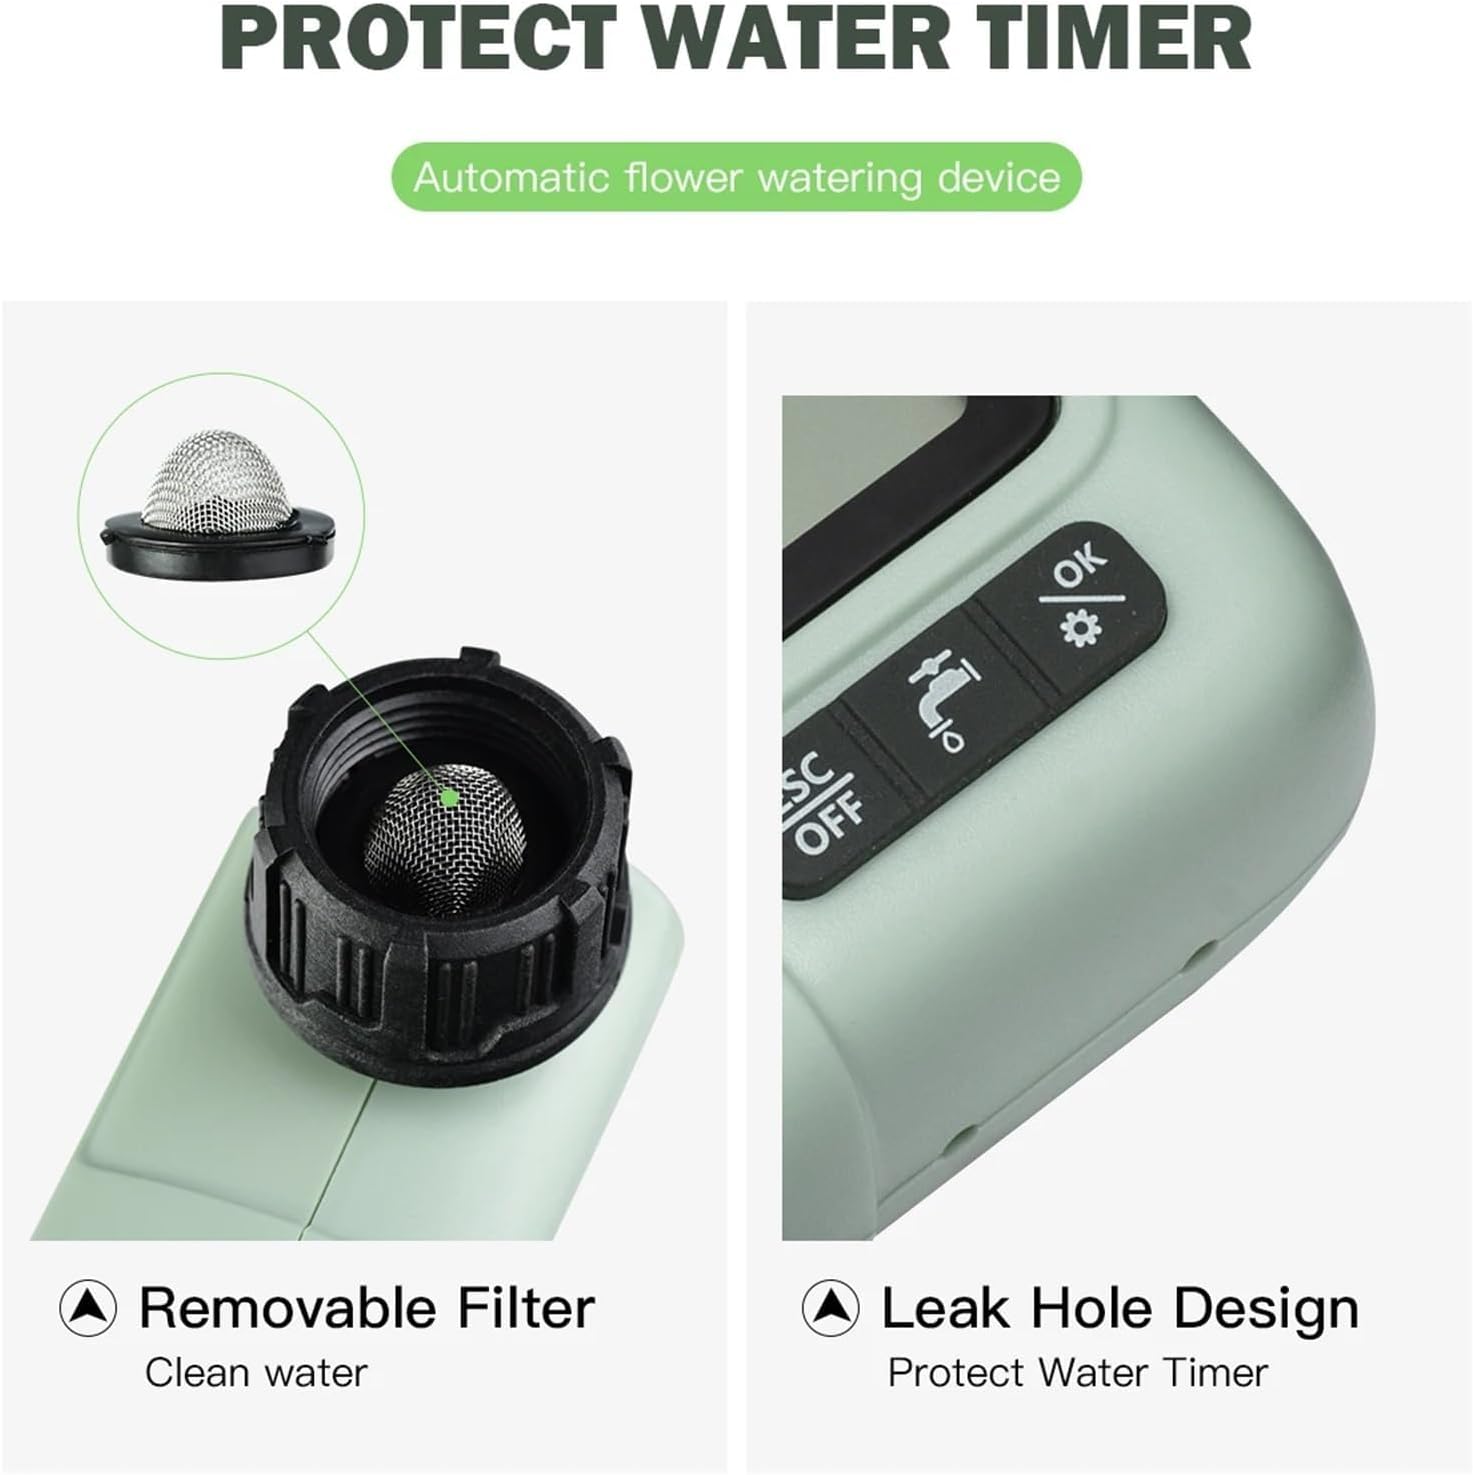
Image 6.1: This image shows the removable filter at the water inlet, designed to keep water clean, and the leak hole design, which helps protect the water timer from internal pressure build-up.
6.2. Winter Storage
During freezing temperatures, disconnect the water timer from the faucet and hose. Remove the batteries and store the timer indoors in a dry, frost-free location to prevent damage from freezing water.
7. Troubleshooting
| Problem | Possible Cause | Solution |
|---|---|---|
| Timer not turning on/display blank | Dead or incorrectly installed batteries. | Replace batteries with new ones, ensuring correct polarity. |
| Water not flowing or low flow | Faucet off; clogged filter; low water pressure; valve stuck. | Ensure faucet is fully open. Clean the inlet filter. Check water pressure. Contact support if valve is stuck. |
| Timer not watering at scheduled time | Incorrect program settings; rain delay active; child lock active. | Review and adjust program settings (Start Time, How Long, How Often). Deactivate rain delay. Deactivate child lock. |
| Leaks from connections | Loose connections; missing or damaged washer. | Ensure all connections are hand-tight. Check that the rubber washer is properly seated and not damaged. |
8. Specifications
- Model: HCT-322 (Type-A)
- Brand: SanmeiLi
- Power Source: 2 x AA Batteries (not included)
- Water Pressure Range: [Information not provided in source, typical range is 0.5-8 bar]
- Water Temperature Range: 32°F - 104°F (0°C - 40°C)
- Ingress Protection: IPX5 (Protected against low-pressure water jets)
- Display Size: 2.76 inches
- Item Weight: Approximately 1.76 ounces (50 grams)
- Package Dimensions: 1.18 x 0.79 x 0.39 inches
9. Warranty and Support
For warranty information or technical support, please refer to the product packaging or contact SanmeiLi customer service directly. Contact details are typically available on the manufacturer's official website or through your point of purchase.