1. Introduction
Thank you for choosing the ArcticPro 24-inch Gaming Monitor. This manual provides essential information for setting up, operating, and maintaining your monitor. Please read it thoroughly before use to ensure proper functionality and to maximize your viewing experience.
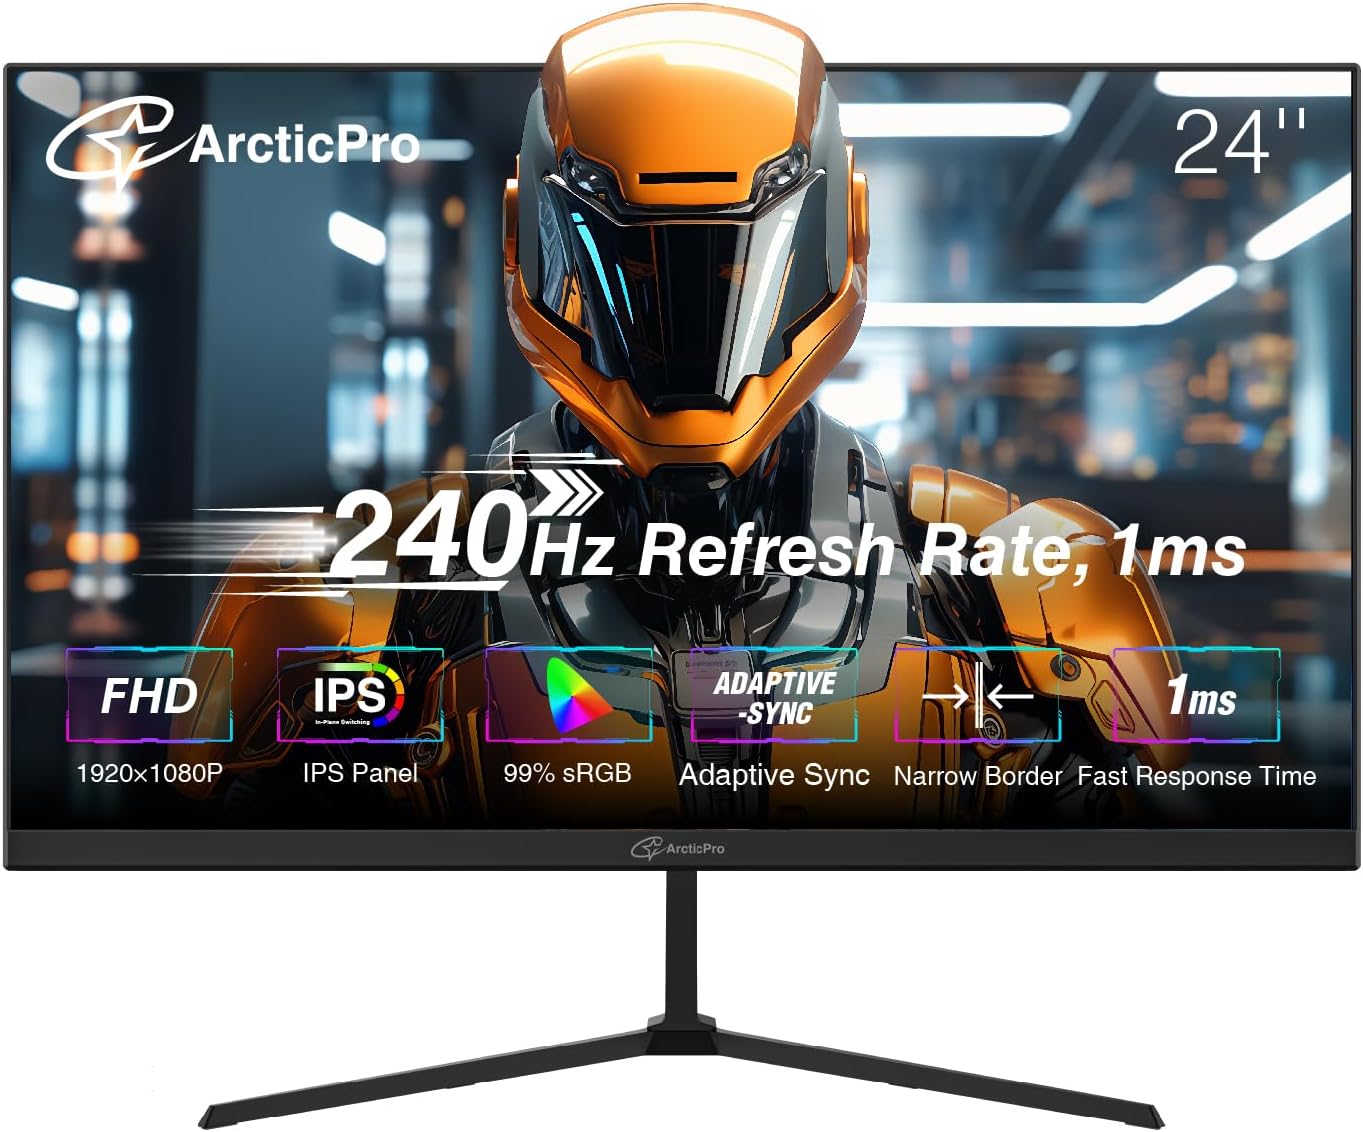
Image: Front view of the ArcticPro 24-inch Gaming Monitor, highlighting its 240Hz refresh rate, 1ms response time, FHD 1080p resolution, IPS panel, 99% sRGB color gamut, and Adaptive Sync technology.
2. Safety Information
To ensure safe operation and prevent damage, observe the following precautions:
- Do not expose the monitor to rain or moisture to avoid fire or shock hazards.
- Do not open the monitor casing. There are no user-serviceable parts inside. Refer all servicing to qualified personnel.
- Place the monitor on a stable, flat surface to prevent it from falling.
- Ensure proper ventilation around the monitor. Do not block ventilation openings.
- Use only the power adapter and cables supplied with the monitor.
- Disconnect the power plug from the outlet if the monitor will not be used for an extended period.
3. Package Contents
Verify that all items are present in your package:
- ArcticPro 24-inch Gaming Monitor
- Monitor Stand (Base and Neck)
- Power Adapter
- Power Cable
- HDMI Cable
- DisplayPort (DP) Cable
- User Manual (this document)
4. Setup
4.1 Physical Setup
Stand Assembly:
- Carefully remove the monitor from its packaging.
- Attach the stand neck to the monitor panel.
- Secure the stand base to the stand neck.
- Place the assembled monitor on a stable surface.
VESA Wall Mount (Optional):
The monitor supports a 100x100mm VESA wall mount pattern. To use a VESA mount, remove the stand and attach the VESA-compatible bracket (not included) to the monitor's rear panel.
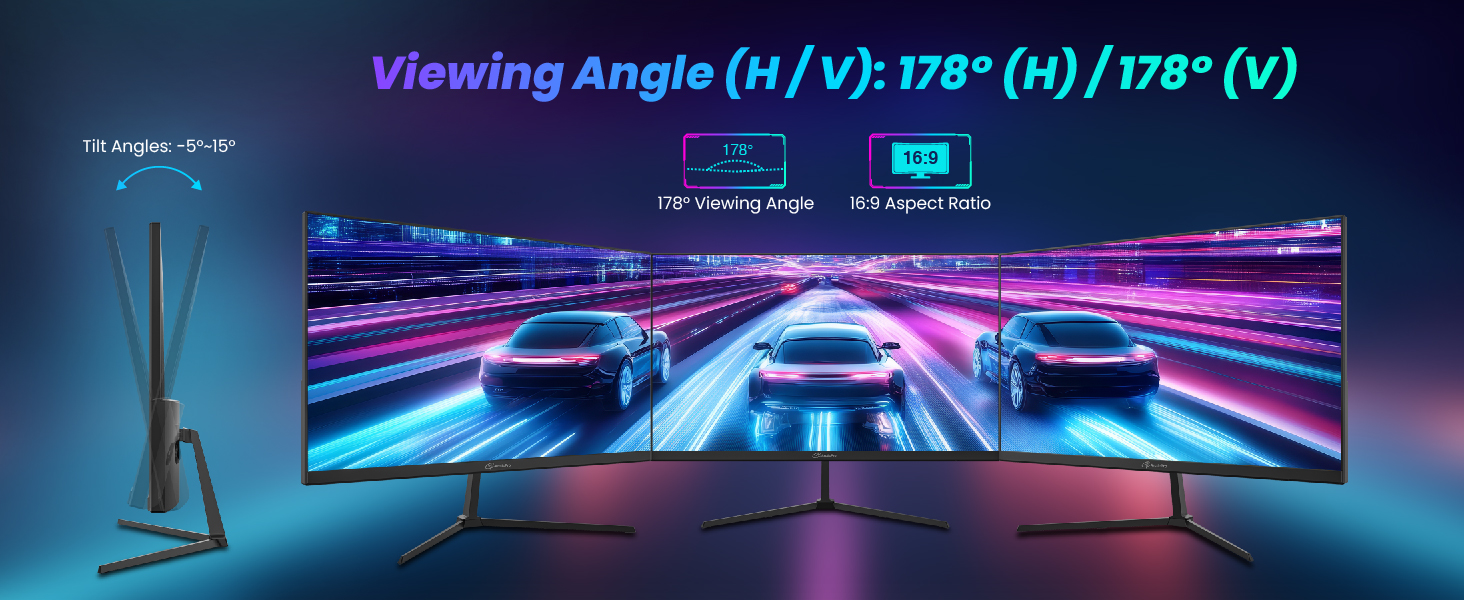
Image: Illustration showing the monitor's adjustable tilt angles (-5° to 15°) and wide 178° horizontal and vertical viewing angles, ensuring consistent image quality from various perspectives.
4.2 Connectivity
Connect the monitor to your computer or other devices using the appropriate cables.
- HDMI Port: Connect an HDMI cable from your device's HDMI output to the monitor's HDMI input.
- DisplayPort (DP): Connect a DisplayPort cable from your device's DP output to the monitor's DP input.
- Power: Connect the power adapter to the monitor's power input, then plug the power cable into a wall outlet.
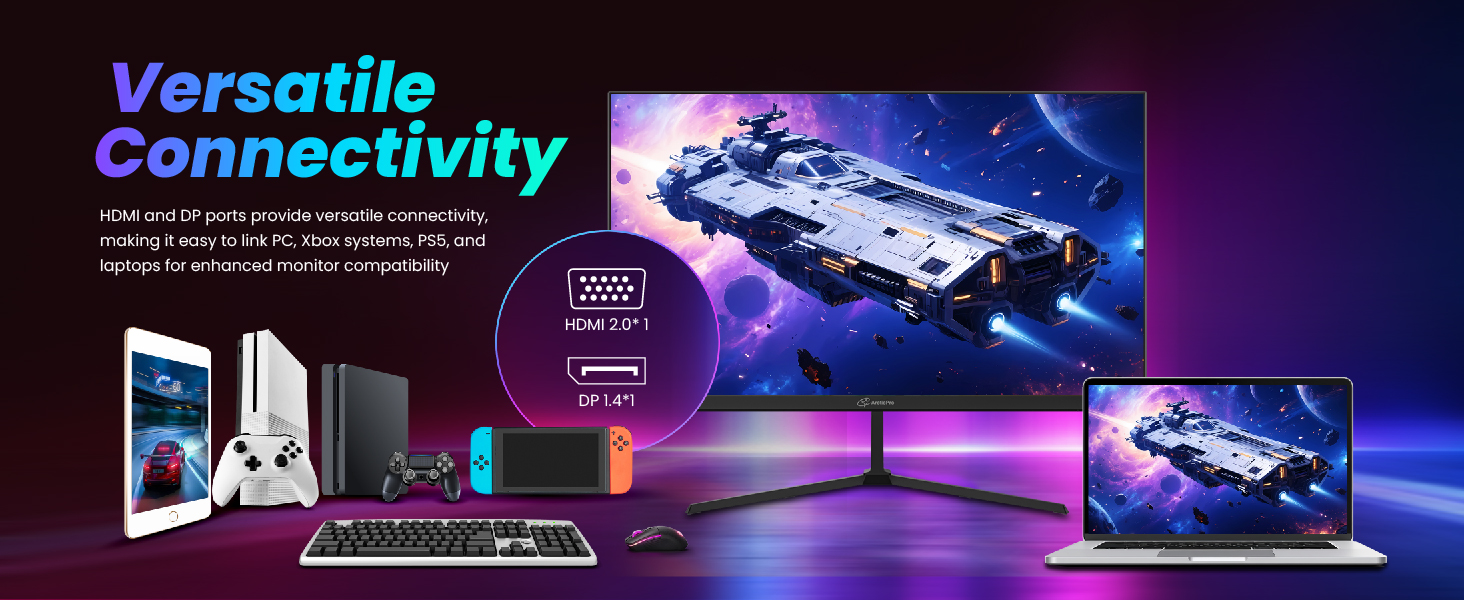
Image: Diagram illustrating the versatile connectivity options of the monitor, including HDMI 2.0 and DisplayPort 1.4, compatible with PCs, Xbox systems, PS5, and laptops.
5. Operating Instructions
5.1 Power On/Off
Press the power button located on the monitor to turn it on or off. The power indicator light will illuminate when the monitor is on.
5.2 OSD Menu Navigation
The On-Screen Display (OSD) menu allows you to adjust various monitor settings. Use the control buttons (usually located on the back or bottom of the monitor) to navigate the menu:
- Press a button to open the OSD menu.
- Use directional buttons to navigate through options.
- Press an 'Enter' or 'OK' button to select an option.
- Use a 'Back' or 'Exit' button to return to the previous menu or exit the OSD.
5.3 Display Settings
Adjust these settings for optimal performance:
- Resolution: The monitor supports Full HD 1920x1080p. Ensure your device's output resolution is set to match for the clearest image.
- Refresh Rate: This monitor features a 240Hz refresh rate for smooth motion. Verify your system settings are configured to utilize 240Hz.
- Response Time: The monitor offers a 1ms MPRT response time to minimize motion blur and ghosting.
- Adaptive Sync: Enable Adaptive Sync in the OSD menu and on your graphics card settings to eliminate screen tearing and stuttering.
- Color Settings: Adjust brightness, contrast, and color temperature to your preference. The IPS panel provides wide viewing angles and 120% sRGB color coverage.
- Low Blue Light & Flicker-Free: These features reduce eye strain during prolonged use. Enable them through the OSD menu.

Image: Side-by-side comparison showing the superior clarity and detail of 1080p Full HD resolution compared to 720p, with a robotic face as an example.
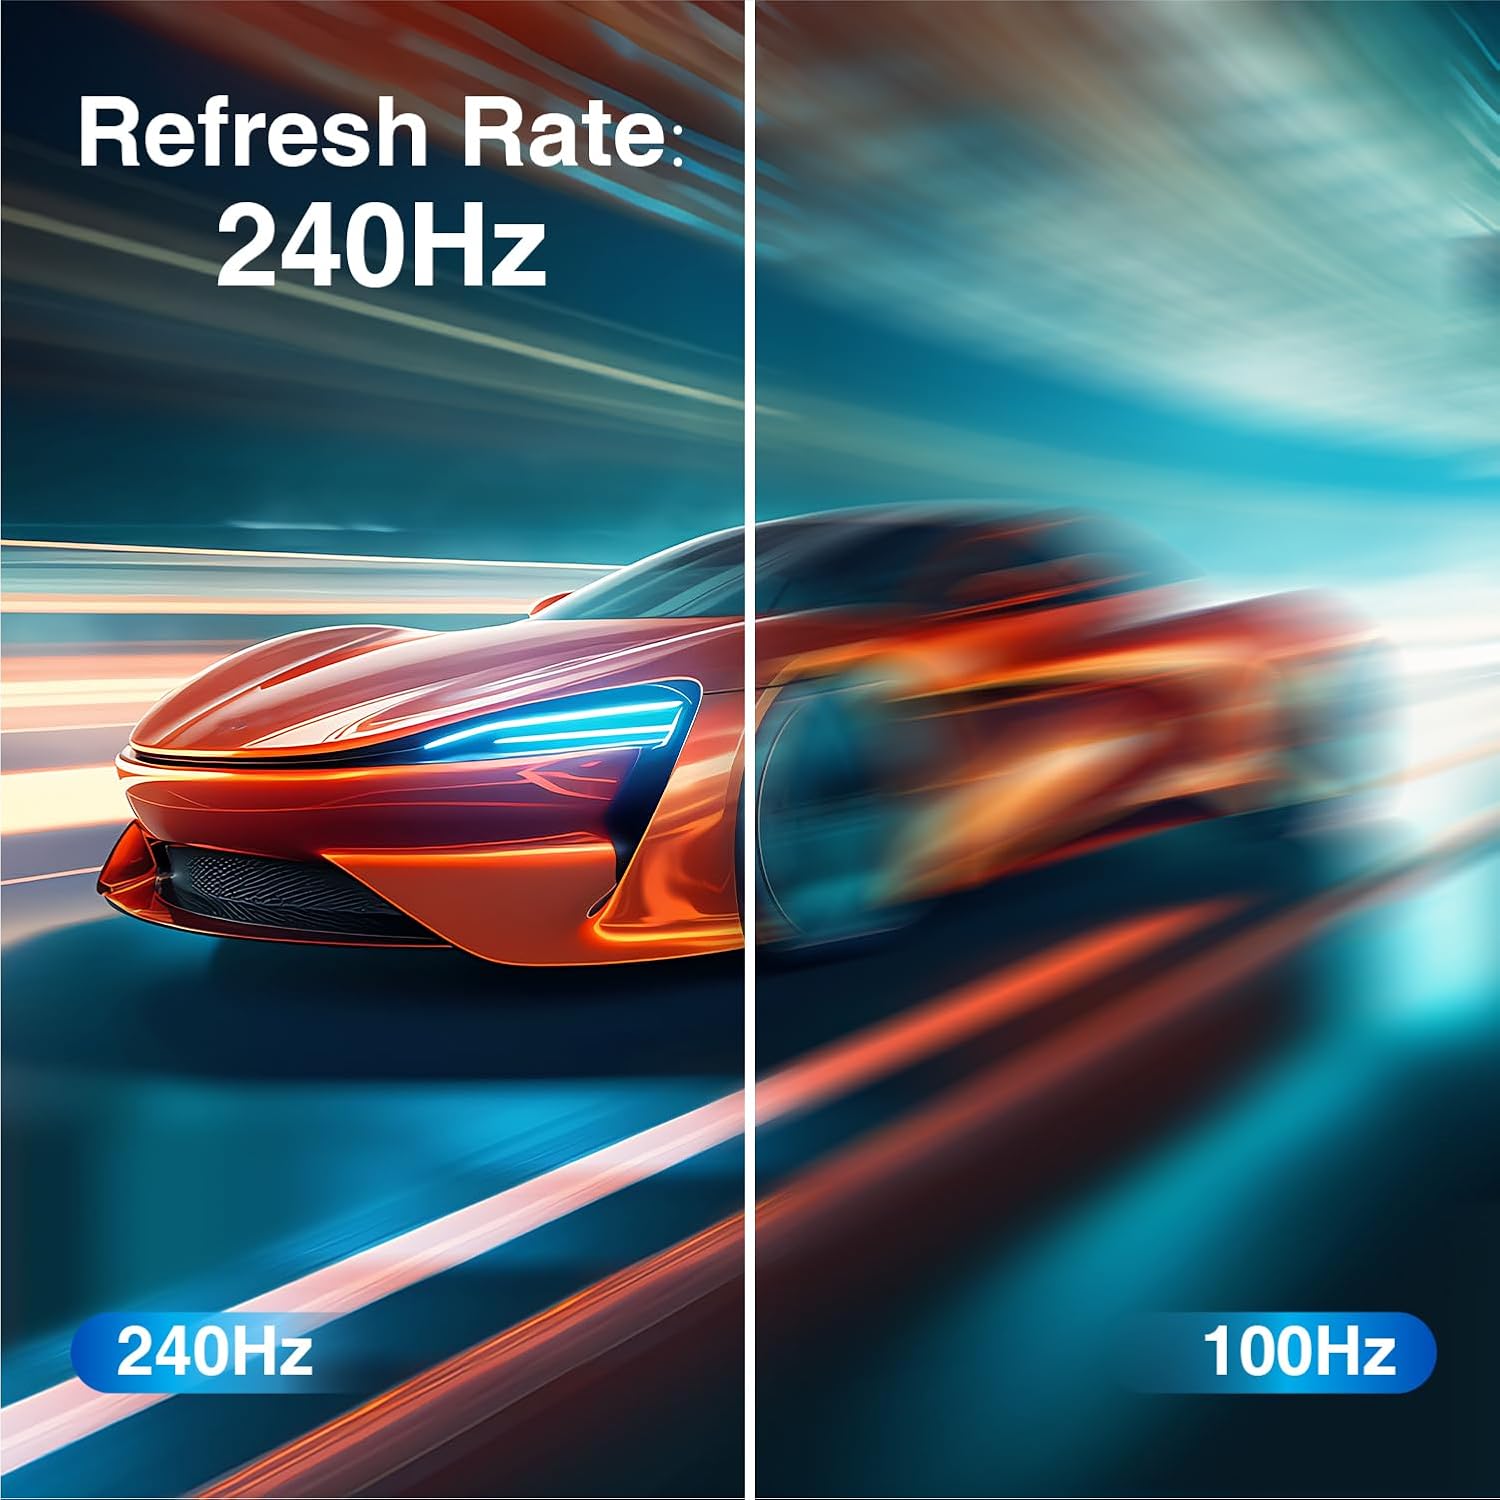
Image: Visual comparison demonstrating the difference between 240Hz and 100Hz refresh rates, with a fast-moving car appearing much smoother at 240Hz.

Image: Illustration showing the clarity of a fast-moving spaceship at 1ms response time compared to the blurred appearance at slower response times.
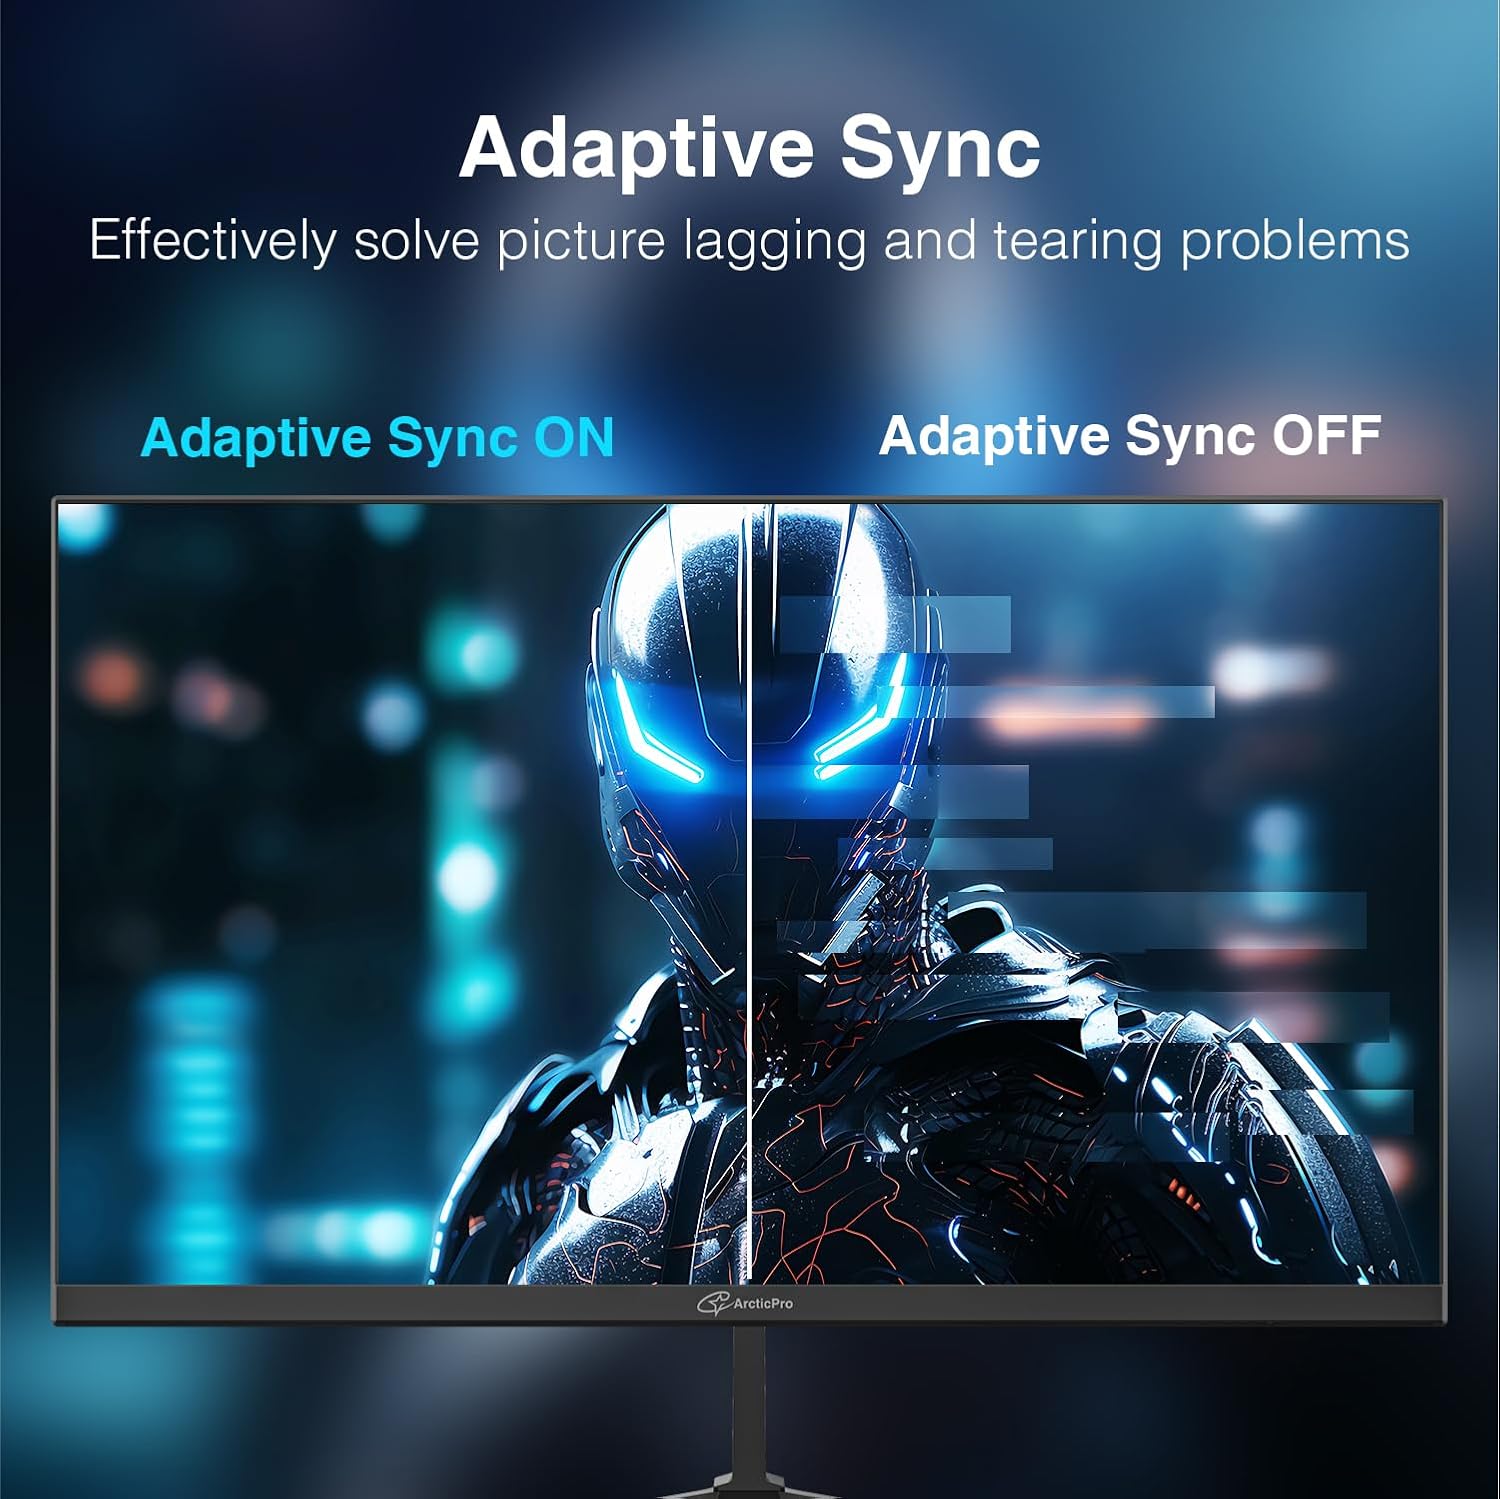
Image: Side-by-side view demonstrating the effect of Adaptive Sync, showing a clear, tear-free image when enabled versus a torn image when disabled.

Image: A vibrant display showcasing the benefits of IPS (In-Plane Switching) technology, known for wide viewing angles and accurate color reproduction.

Image: Comparison showing a clear, stable image with Flicker-Free Technology and Low Blue Light enabled, versus a flickering image without these features, illustrating reduced eye strain.
6. Maintenance
Proper maintenance ensures the longevity of your monitor:
- Cleaning the Screen: Gently wipe the screen with a soft, lint-free cloth. For stubborn marks, use a monitor-specific cleaning solution applied to the cloth, not directly to the screen.
- Cleaning the Casing: Use a soft, dry cloth to wipe the monitor casing. Avoid abrasive cleaners.
- Ventilation: Ensure the ventilation openings are clear of dust and debris to prevent overheating.
- Power Off: Always turn off and unplug the monitor before cleaning or if it will be unused for an extended period.
7. Troubleshooting
If you encounter issues with your monitor, refer to the following common problems and solutions:
| Problem | Possible Cause | Solution |
|---|---|---|
| No image on screen | Power cable disconnected; Video cable disconnected; Incorrect input source | Check power and video cable connections; Select correct input source via OSD menu. |
| Image is blurry or distorted | Incorrect resolution; Faulty video cable | Set display resolution to 1920x1080p; Try a different video cable. |
| Screen tearing or stuttering | Adaptive Sync not enabled | Enable Adaptive Sync in OSD menu and graphics card settings. |
| No sound (if applicable) | Volume too low; Audio output not selected | Adjust volume; Ensure monitor is selected as audio output device on your computer. |
| Monitor not turning on | Power cable not connected; Power outlet issue | Check power connections; Test power outlet with another device. |
8. Specifications
Detailed technical specifications for the ArcticPro 24-inch Gaming Monitor (Model AD24EF4):
- Model: AD24EF4
- Screen Size: 24 Inches
- Panel Type: IPS
- Resolution: 1920 x 1080 (Full HD)
- Refresh Rate: 240Hz
- Response Time: 1ms MPRT
- Aspect Ratio: 16:9
- Color Gamut: 120% sRGB, 80% NTSC
- Viewing Angles: 178° (Horizontal) / 178° (Vertical)
- Connectivity: HDMI, DisplayPort (DP)
- Features: Adaptive Sync, Low Blue Light, Flicker-Free, 3-Sided Frameless Design
- Tilt Angles: -5°±2° / 15°±2°
- VESA Mount: 100x100mm
- Product Dimensions: 21.2 x 1.6 x 13.4 inches
- Item Weight: 8.68 pounds
9. Warranty and Support
For warranty information and technical support, please refer to the warranty card included with your product or visit the official ArcticPro website. Keep your purchase receipt as proof of purchase for warranty claims.
Online Support: Visit the ArcticPro Store on Amazon


