1. Introduction
Thank you for choosing the JIANUA T8-C-2 Rechargeable Walkie Talkies. These two-way radios are designed for reliable communication in various environments, from outdoor adventures to professional settings. Featuring 22 FRS channels, 99 privacy codes, and a 1200mAh Li-ion battery, these devices offer clear communication and extended use. Please read this manual thoroughly to understand the proper operation and maintenance of your walkie talkies.

Image 1.1: JIANUA T8-C-2 Walkie Talkies (Red and Blue)
2. Safety Information
- Do not operate the radio in explosive atmospheres (e.g., around flammable gas, dust particles, metallic powders, etc.).
- Do not expose the radio to direct sunlight for extended periods or place it near heating appliances.
- Avoid using the radio in areas with strong electromagnetic interference.
- Keep the radio away from water and moisture. If the device gets wet, power it off immediately and allow it to dry completely before use.
- Use only JIANUA approved batteries and chargers. Unauthorized accessories may damage the device and void the warranty.
- Do not attempt to disassemble or modify the radio. Repairs should only be performed by qualified personnel.
- Dispose of batteries and electronic components responsibly according to local regulations.
3. Package Contents
Upon opening your JIANUA T8-C-2 package, please verify that all the following items are included:
- Walkie Talkies (x2)
- 1200 mAh Lithium Batteries (x2)
- USB-C Charging Cables (x2)
- Belt Clips (x2)
- User Manual (x1)

Image 3.1: Package Contents
4. Product Overview
4.1. Components Identification
Familiarize yourself with the various parts of your JIANUA T8-C-2 walkie talkie:

Image 4.1: Walkie Talkie Components Diagram
- Antenna: For transmitting and receiving radio signals.
- Power Switch / Volume Control Knob: Rotate to turn the radio on/off and adjust volume.
- PTT (Push-To-Talk) Button: Press and hold to transmit your voice.
- Call Button: Press to send a call tone.
- MON (Monitor) Button: Press to temporarily disable squelch and listen for weak signals.
- MENU / Lock Button: Press to enter menu settings; press and hold to lock/unlock keypad.
- Up/Scan Button: Navigate menu options upwards or initiate channel scan.
- Down/Monitor Button: Navigate menu options downwards or activate monitor function.
- Flashlight Button: Press to turn the LED flashlight on/off.
- Speaker: Outputs received audio.
- Microphone: Captures your voice for transmission.
- Earphone Jack: For connecting an external earphone/microphone.
- Charger Jack: USB-C port for charging the battery.
- Belt Clip: For attaching the radio to clothing or a belt.
4.2. Dimensions and Weight
The JIANUA T8-C-2 walkie talkie is designed for portability and ease of use.
- Dimensions: Approximately 1.52 x 2.28 x 5.94 inches (3.86 x 5.79 x 15.09 cm)
- Weight: Approximately 10.8 ounces (306 grams)

Image 4.2: Size Comparison
5. Setup
5.1. Battery Installation
Your walkie talkie uses a rechargeable 1200mAh Li-ion battery. Follow these steps to install it:
- Ensure the walkie talkie is powered off.
- Locate the battery compartment cover on the back of the radio.
- Push down on the tab and slide the cover downwards to remove it.
- Insert the 1200mAh Li-ion battery into the compartment, aligning the contacts correctly.
- Replace the battery compartment cover by sliding it upwards until it clicks into place.

Image 5.1: Battery Installation
5.2. Charging the Radios
Before first use, fully charge the battery. A full charge typically takes 1 hour.
- Connect the USB-C charging cable to the charging port on the side of the walkie talkie.
- Connect the other end of the USB-C cable to a compatible USB power adapter (not included) or a computer USB port.
- The battery indicator on the LCD screen will show charging status.
- Once fully charged, the battery indicator will show full. Disconnect the charging cable.
A fully charged battery can provide 72-96 hours of typical use or 8-12 hours of continuous use, depending on usage frequency.
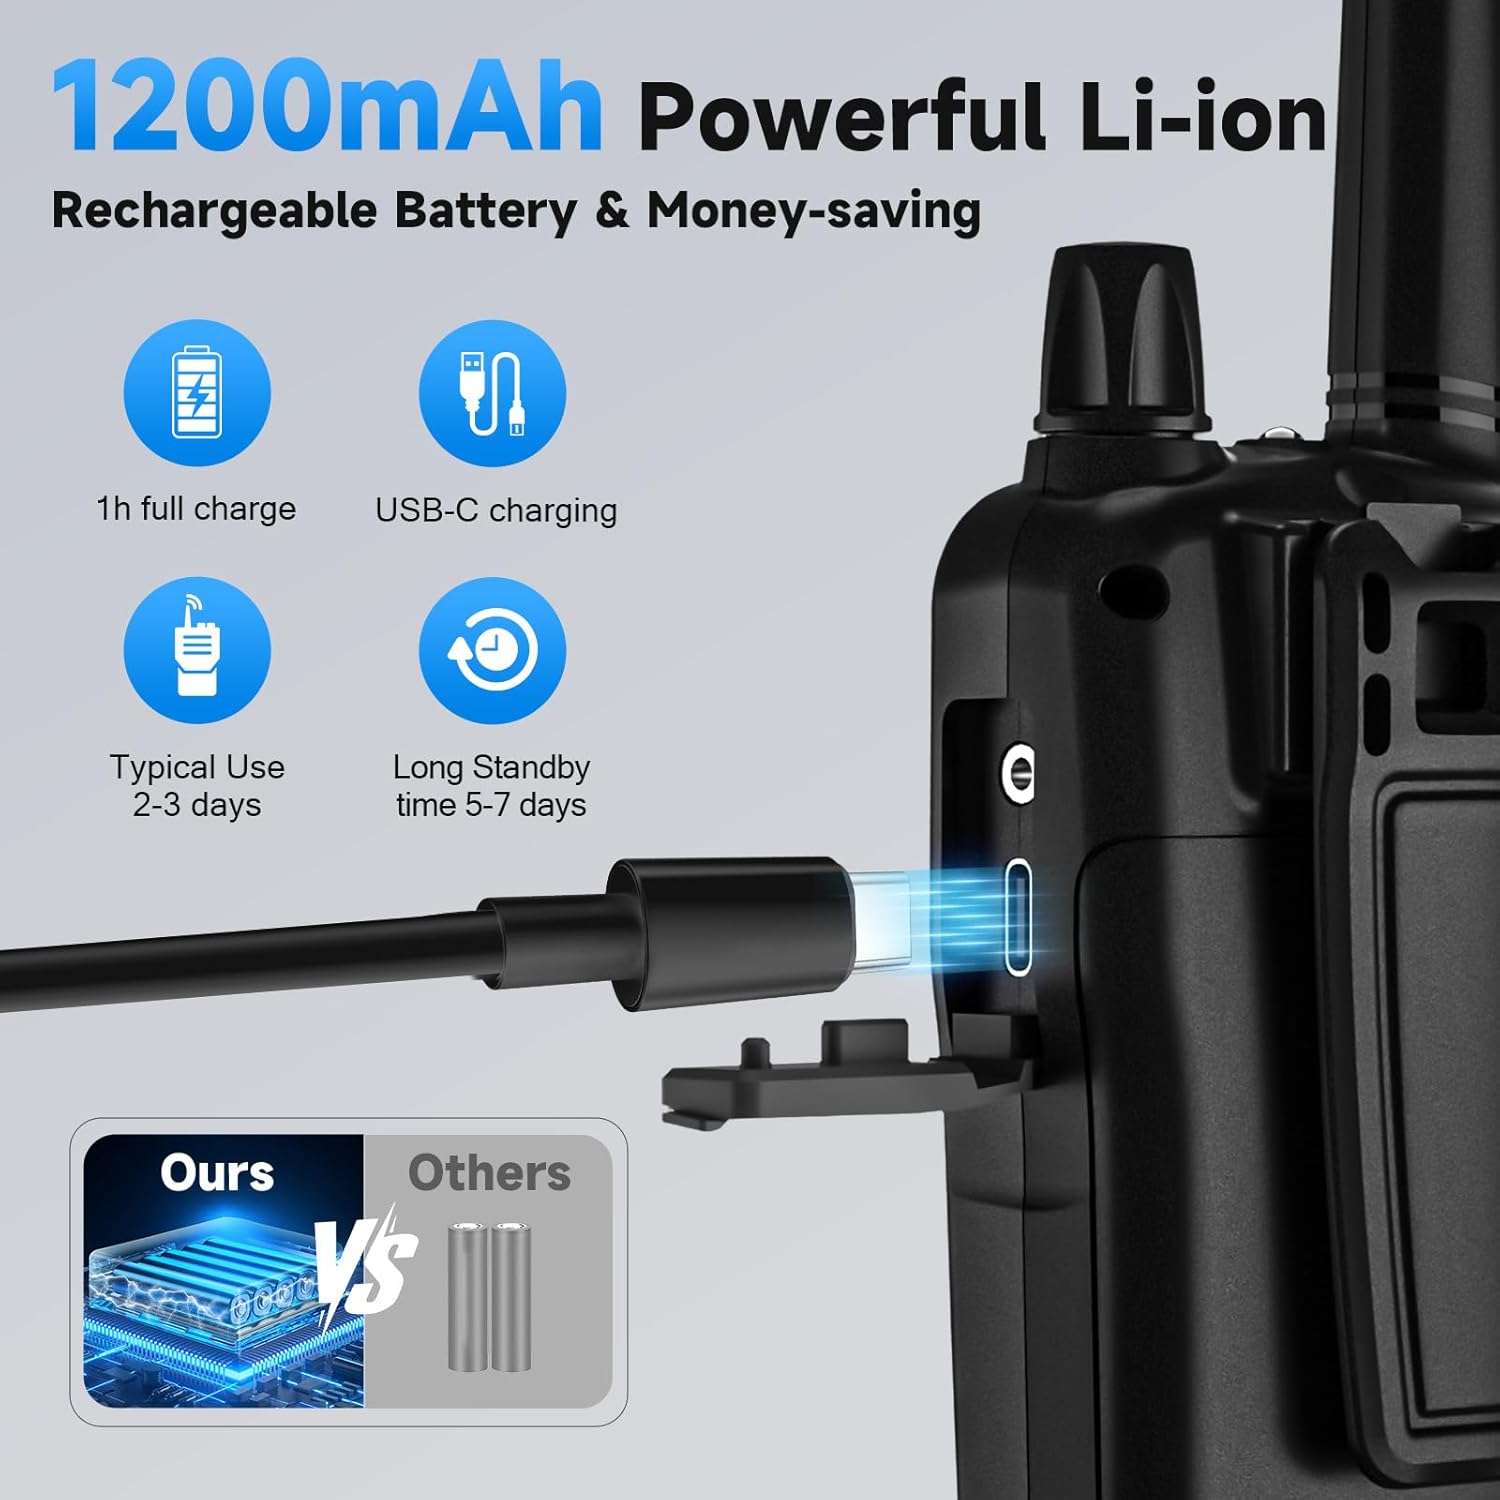
Image 5.2: USB-C Charging
5.3. Attaching the Belt Clip
To attach the belt clip:
- Align the belt clip with the grooves on the back of the walkie talkie.
- Slide the belt clip upwards until it locks into place.
To remove the belt clip, push down on the release tab and slide the clip downwards.

Image 5.3: Walkie Talkie with Belt Clip
6. Operating Instructions
6.1. Power On/Off and Volume Adjustment
- Power On: Rotate the Power Switch/Volume Control knob clockwise until you hear a 'click' sound and the LCD screen illuminates.
- Volume Adjustment: Continue rotating the knob clockwise to increase volume or counter-clockwise to decrease volume.
- Power Off: Rotate the Power Switch/Volume Control knob counter-clockwise until you hear a 'click' sound and the LCD screen turns off.
6.2. Channel Selection
Your walkie talkie has 22 FRS channels. To communicate with another radio, both devices must be on the same channel and privacy code.
- Press the MENU button once. The channel number will flash on the LCD screen.
- Use the Up or Down buttons to select your desired channel (1-22).
- Press the MENU button again or wait a few seconds for the selection to be saved.
6.3. Privacy Codes (CTCSS/DCS)
The T8-C-2 supports 99 sets of CTCSS (Continuous Tone-Coded Squelch System) tones, also known as privacy codes. These codes help filter out unwanted conversations on the same channel.
- Press the MENU button twice. The privacy code number will flash.
- Use the Up or Down buttons to select your desired privacy code (01-99). Code '00' means no privacy code is selected.
- Press the MENU button again or wait a few seconds to save.
For successful communication, both radios must have the same channel and privacy code selected.
6.4. Transmitting and Receiving (PTT)
- To Transmit: Press and hold the PTT button. Speak clearly into the microphone, holding the radio approximately 2-3 inches from your mouth. Release the PTT button when you finish speaking.
- To Receive: Simply release the PTT button. The radio will automatically receive signals on the selected channel and privacy code.
6.5. VOX (Voice Operated Exchange) Function
VOX allows you to transmit without pressing the PTT button, by simply speaking into the microphone. This is useful for hands-free operation.
- Press the MENU button until 'VOX' appears on the screen.
- Use the Up or Down buttons to select the VOX sensitivity level (0-3). '0' disables VOX, '3' is the most sensitive.
- Press the MENU button again or wait a few seconds to save.
6.6. Scan Function
The scan function allows the radio to automatically scan through all 22 FRS channels to find active conversations.
- Press the SCAN button (often shared with the Up button). The 'SCAN' icon will appear on the LCD.
- The radio will scan channels and stop on an active channel. It will resume scanning after a few seconds if no further activity is detected.
- To stop scanning, press the SCAN button again.
6.7. Monitor Function
The monitor function temporarily disables the squelch, allowing you to hear all activity on a channel, including weak signals or background noise.
- Press and hold the MON button to activate the monitor function.
- Release the MON button to return to normal operation.
6.8. Keypad Lock
The keypad lock prevents accidental changes to your settings.
- Press and hold the MENU / Lock button until the 'Lock' icon appears on the LCD.
- To unlock, press and hold the MENU / Lock button again until the 'Lock' icon disappears.
6.9. Flashlight
Your walkie talkie includes a built-in LED flashlight for convenience in low-light conditions.
- Press the Flashlight button once to turn the flashlight on.
- Press the Flashlight button again to turn it off.
7. Range and Usage
The communication range of your walkie talkies can vary significantly based on terrain, weather conditions, electromagnetic interference, and obstructions.
- Open Areas (e.g., rural, suburbs, seaside with no obstruction): Up to 5 miles.
- Open Fields: Approximately 3 miles.
- Urban or Forested Areas: Typically 0.6-1.2 miles due to buildings, trees, and other obstacles.
For optimal range, ensure a clear line of sight between radios and avoid transmitting from inside buildings or vehicles if possible.

Image 7.1: Communication Range Illustration
8. Maintenance
8.1. Cleaning
- Wipe the radio's surface with a soft, damp cloth. Do not use abrasive cleaners or solvents.
- Ensure the charging port and earphone jack are free of dust and debris.
8.2. Battery Care
- Avoid fully discharging the battery frequently, as this can reduce its lifespan.
- If storing the radio for an extended period, charge the battery to about 50% and remove it from the device. Recharge every 3-6 months.
- Do not expose batteries to extreme temperatures.
8.3. Storage
- Store the walkie talkies in a cool, dry place, away from direct sunlight and extreme temperatures.
- Keep them out of reach of children.
9. Troubleshooting
If you encounter issues with your JIANUA T8-C-2 walkie talkies, refer to the following common problems and solutions:
| Problem | Possible Cause | Solution |
|---|---|---|
| Radio does not power on | Battery is depleted or not installed correctly. | Charge the battery. Ensure the battery is correctly inserted. |
| Cannot communicate with other radios | Different channels or privacy codes. Radios are out of range. | Ensure all radios are on the same channel and privacy code. Move closer to the other radio. |
| Poor audio quality or static | Weak signal. Interference. Volume too low. | Move to an area with fewer obstructions. Change to a different channel. Adjust volume. |
| Short communication range | Obstructions (buildings, trees). Terrain. | Move to an open area. Avoid transmitting through dense obstacles. |
| Keypad is unresponsive | Keypad lock is active. | Press and hold the MENU / Lock button to unlock the keypad. |
10. Specifications
Technical specifications for the JIANUA T8-C-2 Walkie Talkies:
| Feature | Detail |
|---|---|
| Model Number | WalkieTalkie-T8-C-2 |
| Item Weight | 10.8 ounces (306 grams) |
| Product Dimensions | 1.52 x 2.28 x 5.94 inches |
| Battery Type | 1200mAh Nonstandard Li-ion Battery (included) |
| Number of Channels | 22 FRS Channels |
| Privacy Codes | 99 CTCSS Tones |
| Frequency Range | 462-467 MHz |
| Talking Range Maximum | 5 Miles (in open areas) |
| Special Features | VOX, Automatic Squelch, LED Flashlight, Keypad Lock, Channel Scan |
| Water Resistance Level | Waterproof (Note: Refers to splash resistance, not submersion) |
| Manufacturer | JIANUA |
11. Warranty Information
JIANUA provides a 1-Year Manufacturer Warranty for the T8-C-2 Walkie Talkies from the date of purchase. This warranty covers defects in materials and workmanship under normal use. It does not cover damage caused by misuse, accidents, unauthorized modifications, or normal wear and tear.
Please retain your purchase receipt as proof of purchase for warranty claims.
12. Customer Support
If you have any questions, require technical assistance, or need to make a warranty claim, please contact JIANUA customer support through the retailer where you purchased the product or visit the official JIANUA website for contact information.
For further information and updates, you may visit the JIANUA Store on Amazon.