Introduction
This manual provides essential instructions for the safe assembly, operation, and maintenance of your Outsunny 2.6m² Galvanized Steel Garden Shed. Please read all instructions carefully before beginning assembly and retain this manual for future reference.

Image: The Outsunny 2.6m² Galvanized Steel Garden Shed, showcasing its dark grey finish, white window, and open door in a garden environment.
Safety Information
Warning:
- This product requires assembly. Follow all assembly instructions precisely to ensure safety during installation.
- Do not use the product in adverse weather conditions, such as strong winds or heavy snow, or with excessive loads on the roof.
- Ensure the shed is installed on a stable, level base.
- Keep children and pets away from the assembly area.
- Wear appropriate safety gear (gloves, eye protection) during assembly.
- Periodically check all fasteners for tightness and re-tighten as necessary.
Package Contents
Your Outsunny Garden Shed is delivered in multiple packages. Please verify all components are present and undamaged before beginning assembly. Refer to the parts list in your printed manual for detailed component identification.

Image: Illustration showing two packages, indicating the shed is shipped in multiple boxes.
Setup and Assembly
Assembly of this shed typically requires 2-3 hours with 2-3 people. Follow the step-by-step instructions provided in your physical manual. It is crucial to ensure the base is perfectly level before starting construction.
- Prepare the Site: Choose a flat, level area for installation. A concrete slab or a sturdy wooden platform is recommended as a base.
- Unpack Components: Carefully unpack all parts and lay them out. Identify each component using the provided parts list.
- Assemble the Base Frame: Construct the base frame according to the manual. Ensure it is square and level.
- Install Wall Panels: Attach the wall panels to the base frame, securing them as instructed.
- Attach Roof Structure: Assemble and attach the roof frame and panels. The sloping roof design facilitates rainwater runoff.
- Install Door and Window: Mount the door and transparent window. Ensure the door operates smoothly and the lock functions correctly.
- Final Checks: Verify all screws and fasteners are tight. Ensure the shed is stable and secure.

Image: Dimensional diagram of the shed, illustrating overall and internal measurements. Note: Measure your base carefully before purchase.

Image: Interior view demonstrating potential storage capacity with shelving and a hose reel.
Operating Instructions
- Door Operation: The shed features a single hinged door. Use the integrated lock and provided keys to secure your stored items.
- Ventilation: Two air vents are integrated to promote fresh air circulation and prevent condensation, helping to keep the interior dry.
- Natural Light: The transparent window allows natural light into the shed, improving visibility without needing artificial lighting during the day.

Image: Detail showing the two air vents for fresh air flow and the transparent window for natural light.
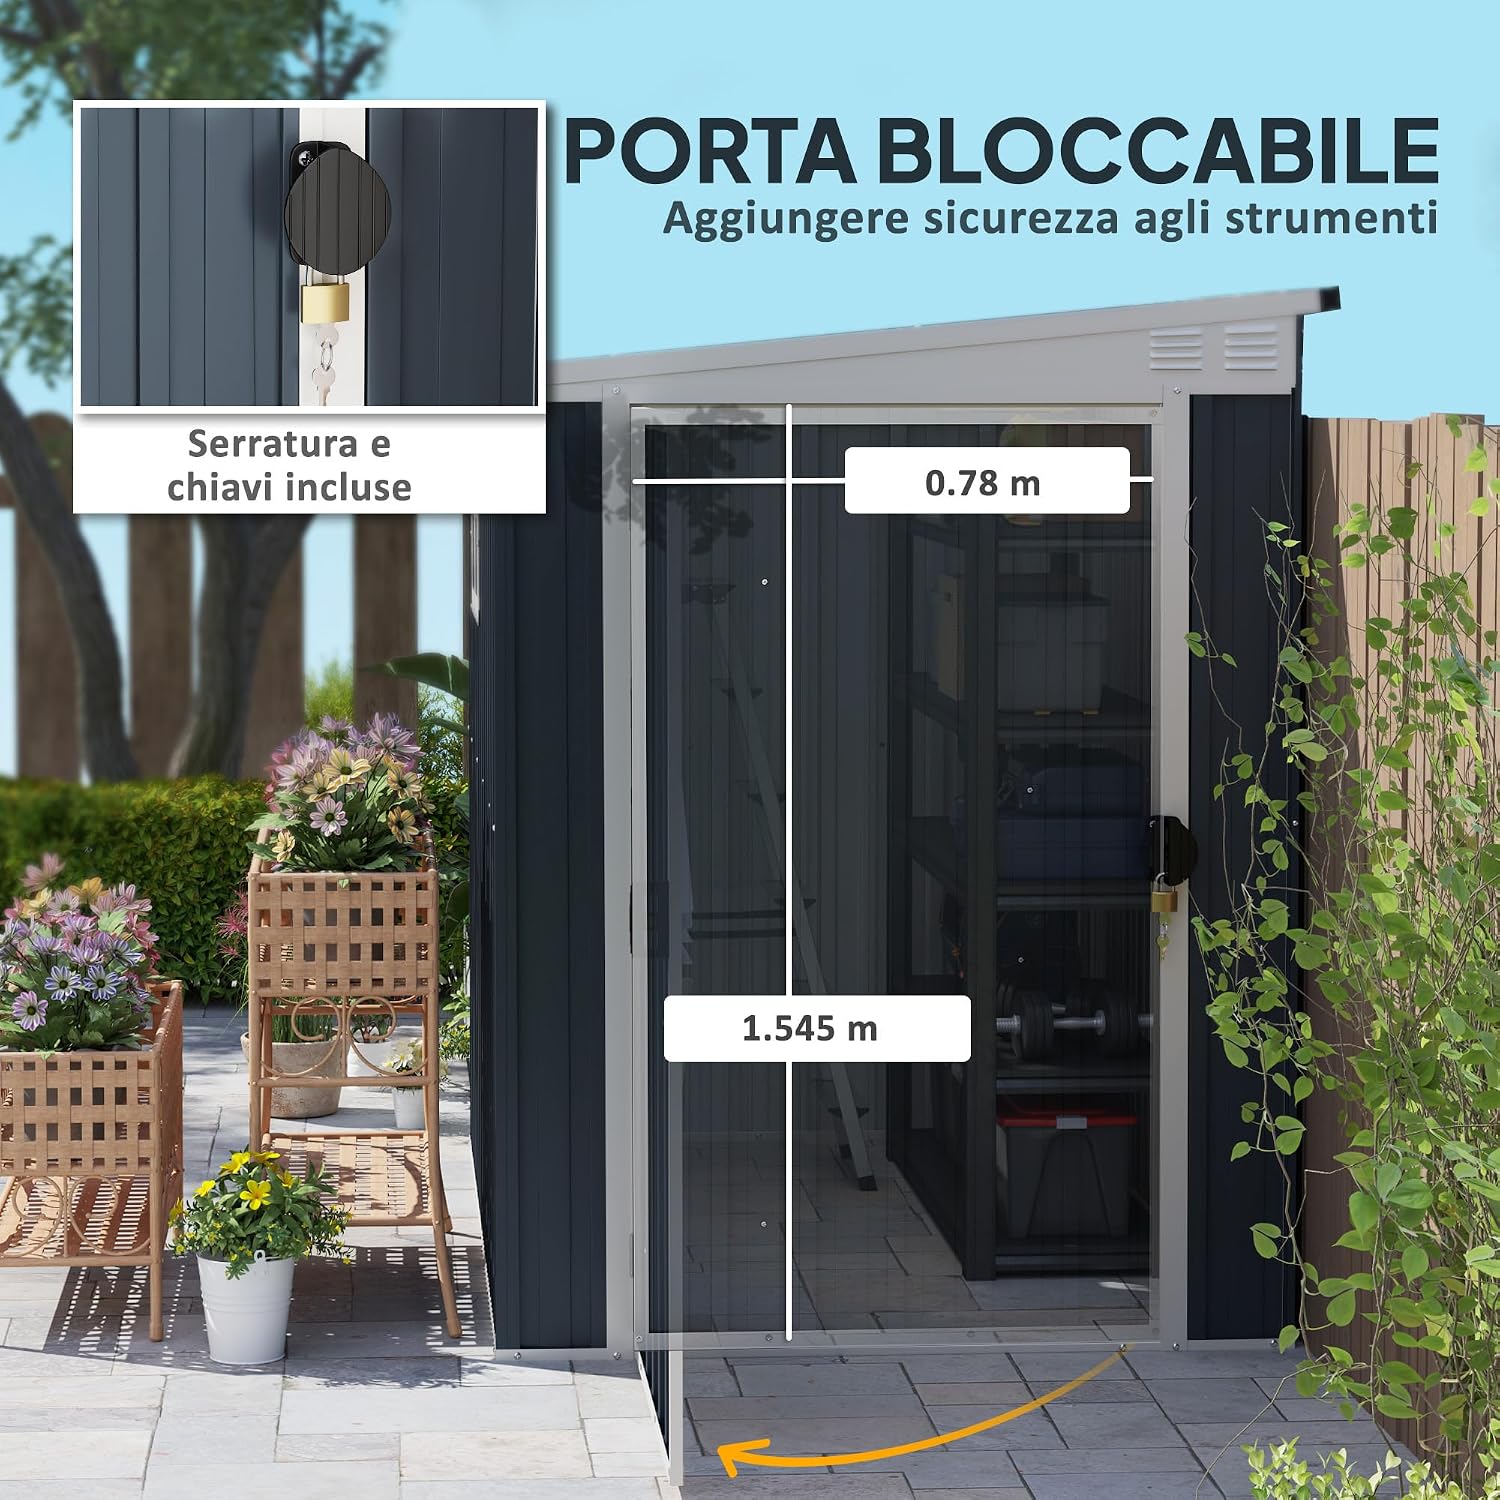
Image: The lockable door with included keys, providing secure access to the shed's contents. Door dimensions are also indicated.
Maintenance
- Cleaning: Clean the shed periodically with mild soap and water. Avoid abrasive cleaners or harsh chemicals that could damage the painted galvanized steel finish.
- Fastener Check: Regularly inspect all bolts and screws for tightness. Re-tighten any loose fasteners to maintain structural integrity.
- Drainage: Ensure the area around the shed is clear of debris to allow for proper rainwater runoff from the sloping roof.
- Snow Removal: In areas with heavy snowfall, remove accumulated snow from the roof to prevent excessive load and potential damage.
- Rust Prevention: Although made of galvanized steel, inspect for any scratches or chips in the paint that could expose the metal to moisture and lead to rust. Touch up as needed.
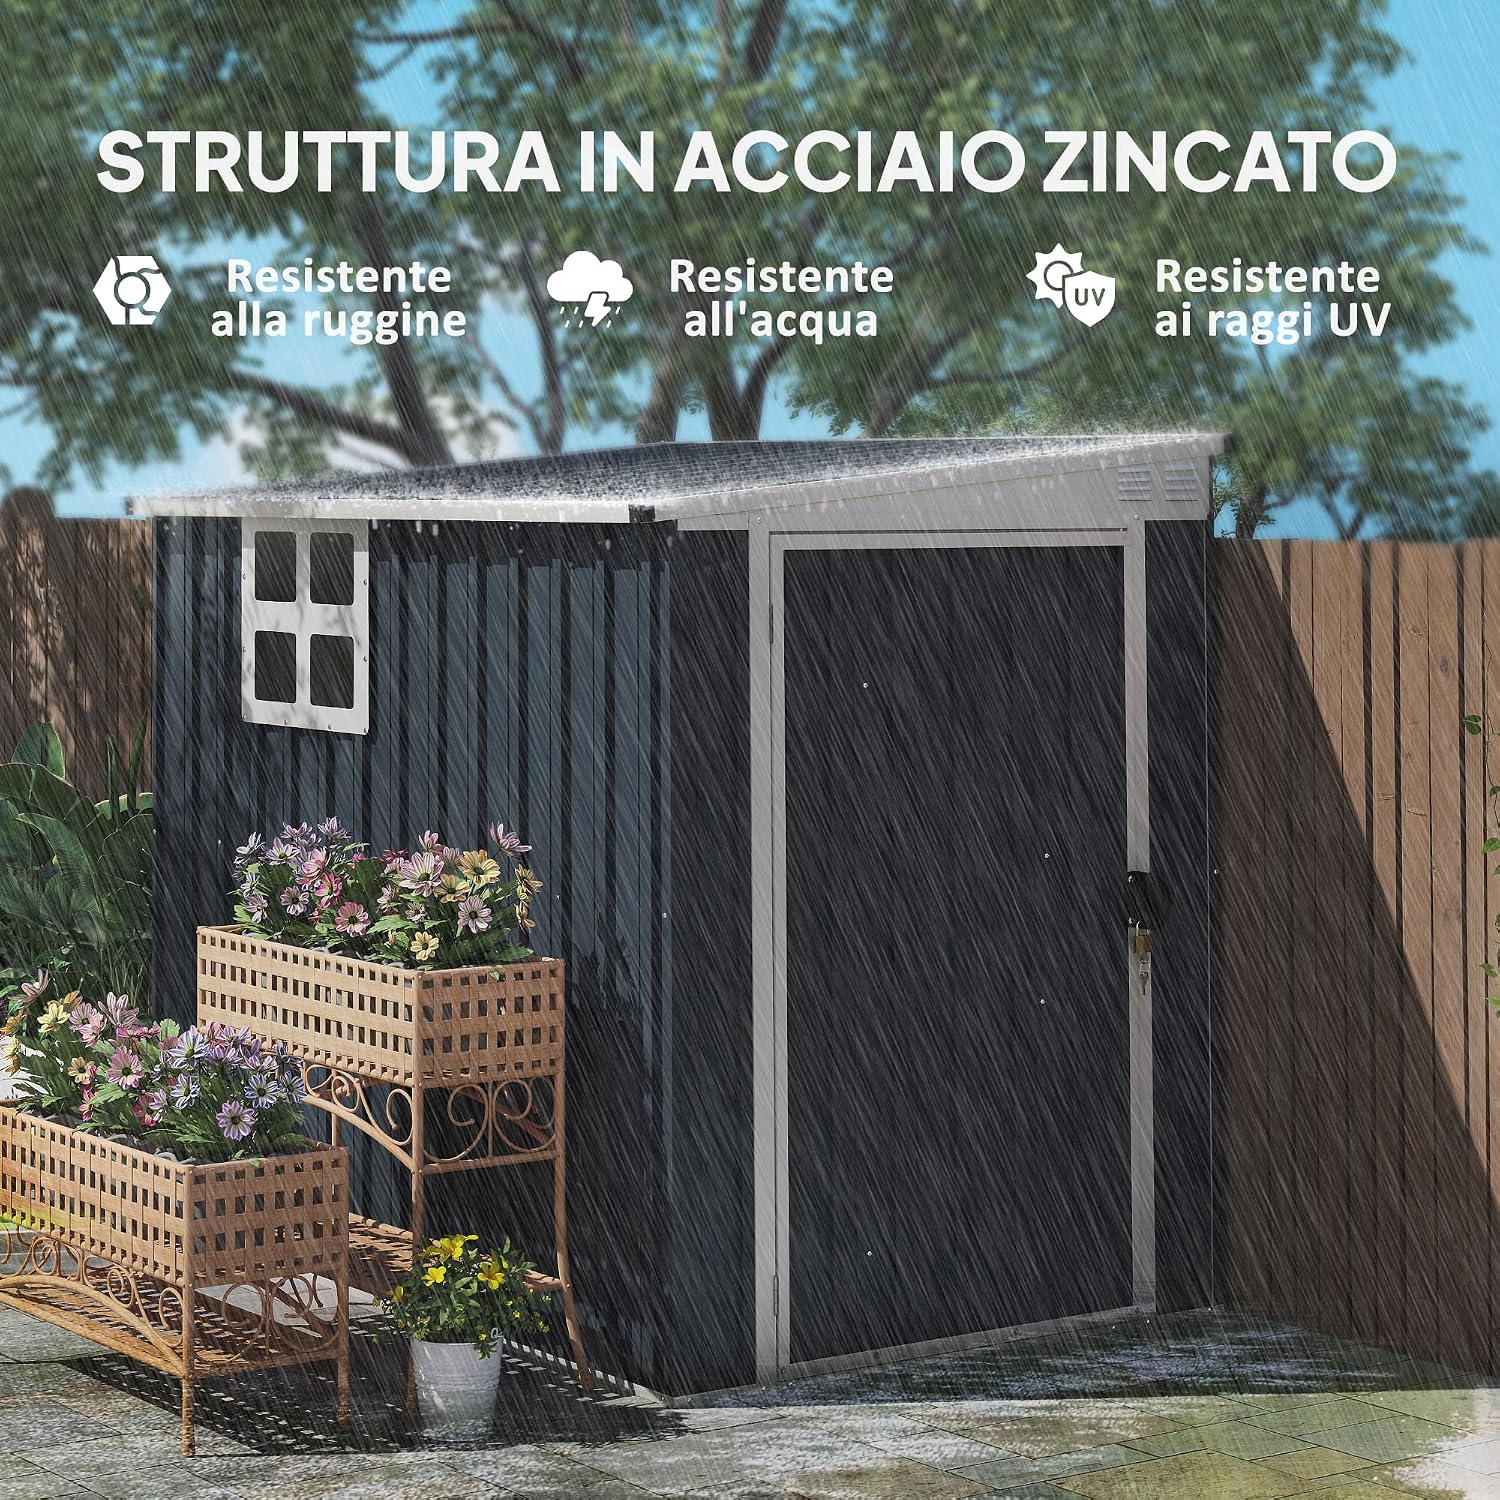
Image: The shed's galvanized steel structure, designed to be resistant to rust, water, and UV rays, shown under simulated rain.

Image: The sloping roof design, which helps prevent the accumulation of water and snow, shown with a light snow cover.
Troubleshooting
- Difficulty during assembly: Ensure all parts are correctly oriented as per the manual. Some steps may require two or three people. Do not force components.
- Door not closing properly: Check if the shed is installed on a perfectly level surface. Uneven ground can cause the frame to twist, affecting door alignment. Adjust the base or shims as needed.
- Water leakage: Verify that all roof panels are correctly overlapped and secured. Ensure all screws are tightened. Check for any gaps or damage to the panels. The sloping roof is designed for runoff, but proper sealing during assembly is crucial.
- Condensation inside: Ensure the air vents are not obstructed. Proper air circulation is essential to minimize condensation.
Specifications
| Brand | Outsunny |
| Model Number | 84H-359V00CG |
| Color | Dark Grey |
| Material | Galvanized Steel Alloy |
| Overall Dimensions (L x W x H) | 193 cm x 128 cm x 161/181 cm |
| Internal Dimensions (L x W) | 189 cm x 112 cm |
| Surface Area | 2.6 square meters |
| Door Width | 78 cm |
| Door Height | 154.5 cm |
| Item Weight | 46.5 kg |
| Water Resistance Level | Waterproof |
| UV Protection | Yes |
| Max Weight Capacity (Roof) | 30 kg |
| Assembly Required | Yes |
Warranty and Support
For warranty information and customer support, please refer to the documentation included with your purchase or contact Outsunny customer service directly. The product typically comes with a return policy of 30 days from receipt.
Manufacturer: Aosom Italy