
ONNAIS GL-04
ONNAIS Biometric Pistol Gun Safe (Model GL-04) Instruction Manual
Secure and Rapid Access Handgun Storage
1. Introduction
Thank you for choosing the ONNAIS Biometric Pistol Gun Safe. This manual provides essential information for the safe and effective use of your new gun safe. Please read all instructions carefully before installation and operation. Proper use ensures the security of your firearm and prevents unauthorized access.

Image 1.1: ONNAIS Biometric Pistol Gun Safe with handgun and spare magazines.
2. Important Safety Information
- Always store firearms unloaded with the safety engaged.
- Keep the safe locked at all times when not in use.
- Store mechanical keys in a secure location away from the safe and out of reach of children.
- Do not store a chambered firearm in the safe.
- Ensure firearms with weapon-mounted lights or lasers are removed before storing, as they may not fit.
- This safe is not compatible with revolvers.
- Regularly check the battery level and recharge as needed.
3. Package Contents
Verify that all items are present:
- ONNAIS Biometric Pistol Gun Safe (Model GL-04)
- Mounting screws (8 pieces)
- Charging cable (USB-C)
- Mechanical keys (2 pieces)
- User Manual (this document)
4. Product Features
- Quick Access: Biometric fingerprint sensor for rapid unlocking (under 0.5 seconds).
- Multiple Access Methods: Fingerprint, 4-digit keypad, and mechanical key backup.
- Secure Trigger Lock: Internal mechanism blocks trigger access when locked.
- Durable Construction: Made from alloy steel for enhanced security.
- Rechargeable Battery: Built-in Lithium Polymer battery with up to 1 year of use per charge, 2-hour recharge time via USB-C.
- Versatile Mounting: Includes pre-drilled holes and screws for wall, desk, under-counter, or vehicle console installation.
- Ambidextrous Design: Mounting bracket can be reversed for left or right-handed access.
- Magazine Storage: Integrated slots for two spare magazines.
Video 4.1: An overview of the ONNAIS Defender Pro Gun Safe's features, including quick access, secure trigger protection, and easy installation.
5. Setup
5.1 Initial Charging
Before first use, fully charge the safe's internal battery using the provided USB-C cable. The charging port is located on the bottom of the unit. A full charge takes approximately 2 hours.

Image 5.1: The safe's USB-C charging port for convenient recharging.
5.2 Mounting the Safe
The safe can be mounted in various locations using the included bracket and screws. The mounting bracket is ambidextrous and can be reversed to suit left or right-handed access.
- Determine Location: Choose a secure and discreet location such as a nightstand, desk, cabinet, or vehicle console.
- Position Bracket: Place the mounting bracket against the desired surface and mark the screw holes.
- Drill Pilot Holes: Drill pilot holes if necessary, appropriate for your mounting surface.
- Secure Bracket: Attach the bracket firmly using the provided screws.
- Attach Safe: Slide the safe onto the mounted bracket until it clicks securely into place.
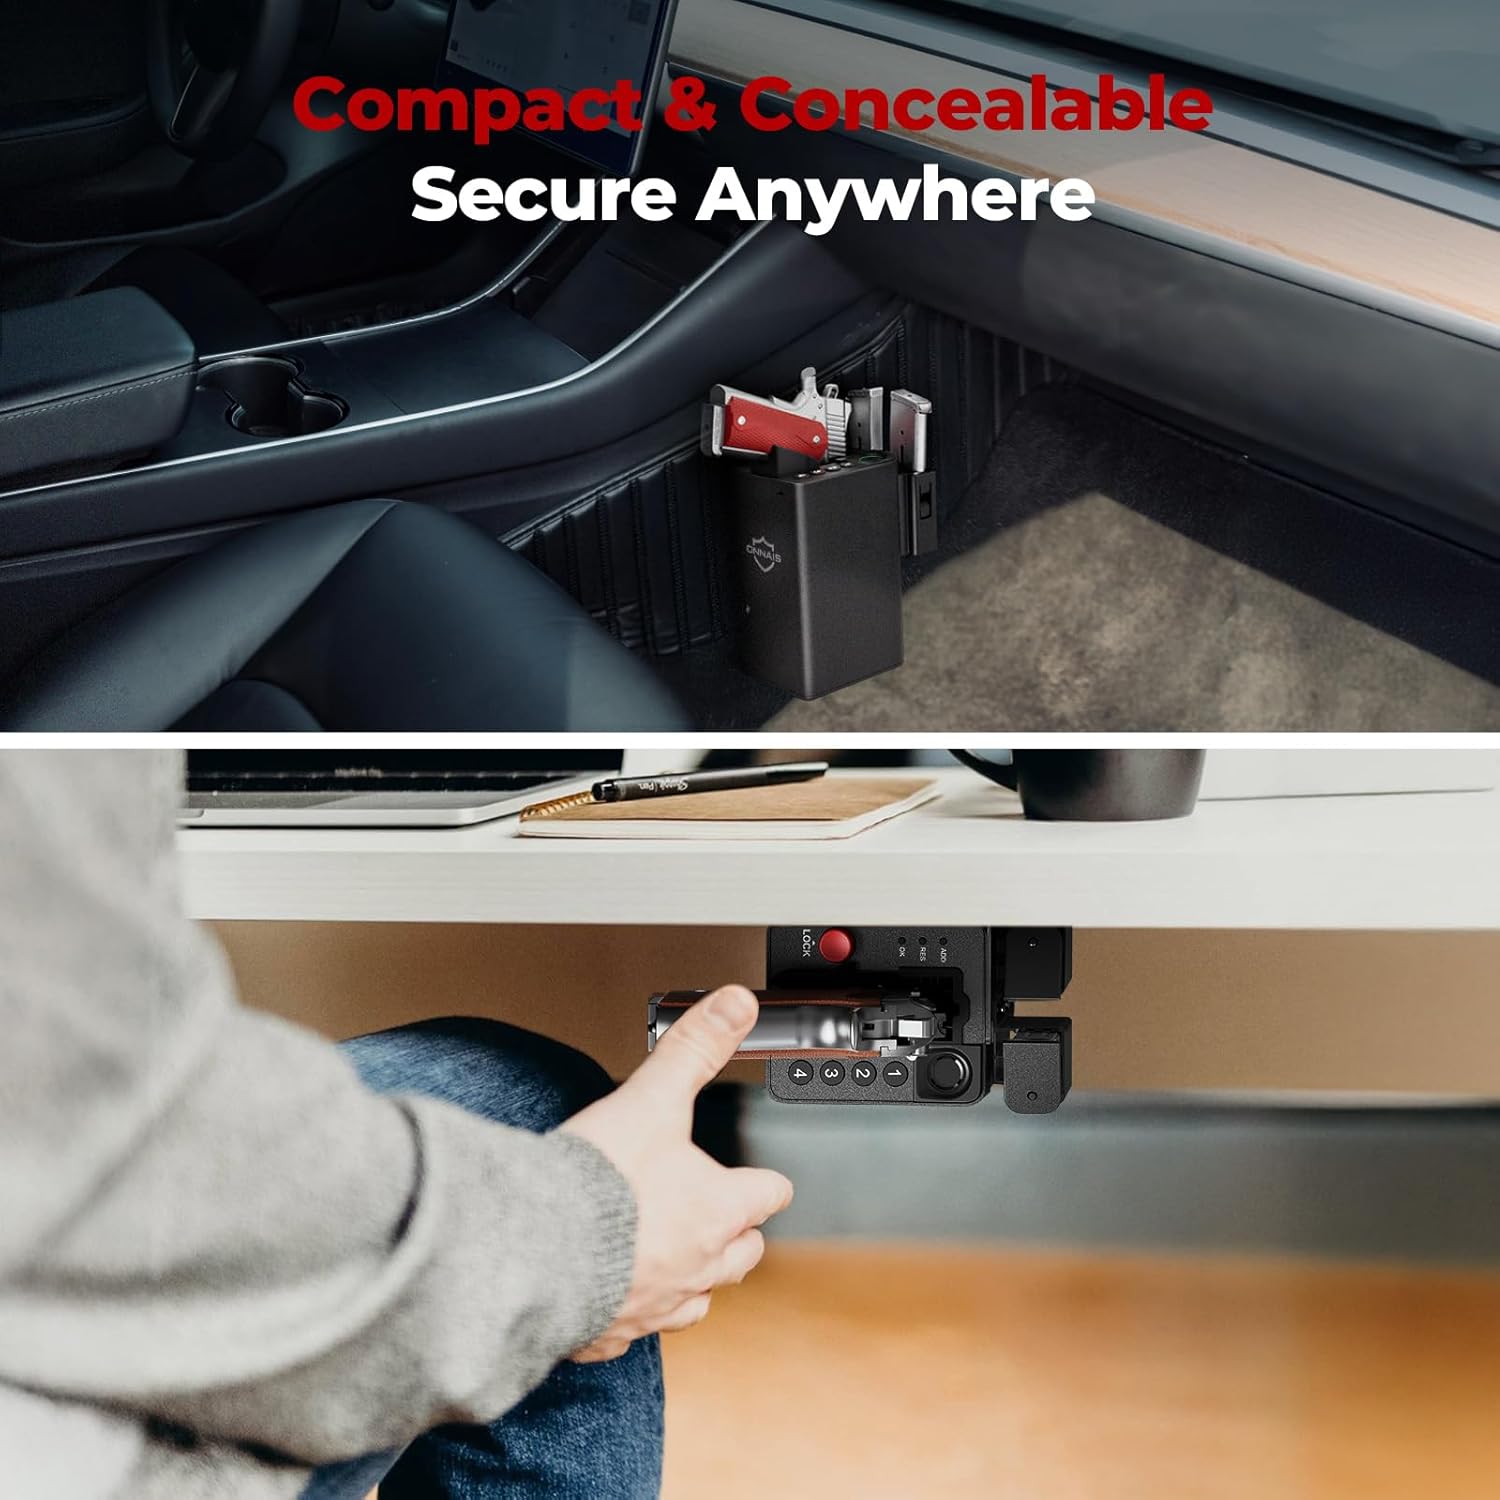
Image 5.2: Examples of the safe mounted under a desk and within a vehicle console.
5.3 Fingerprint Registration
The safe supports up to 80 fingerprints for multiple users or different finger orientations.
- Press the 'ADD' button on the bottom of the safe.
- Place your finger on the fingerprint sensor. The indicator light will flash.
- Lift and place your finger multiple times, slightly adjusting the position each time, until the indicator confirms successful registration.
5.4 Passcode Setup
Set a personal 5-10 digit passcode for backup access.
- Press the 'ADD' button on the bottom of the safe.
- Enter your desired 5-10 digit code using the keypad (buttons 1-4).
- Press 'OK' to confirm.
- Re-enter the same code and press 'OK' again to verify.
6. Operating Instructions
6.1 Storing a Firearm
Ensure the firearm is unloaded and the safety is engaged before storing.
- With the safe unlocked, gently slide the firearm into the designated slot, ensuring the trigger guard is clear.
- Press the red 'LOCK' button to engage the trigger lock mechanism. The safe is now secured.

Image 6.1: Proper insertion of a handgun into the safe. Note: Firearms with weapon-mounted lights or lasers are too large to fit. Remove attachments before storing.
6.2 Unlocking with Fingerprint
For rapid access:
- Place a registered finger firmly on the biometric sensor.
- The safe will unlock in approximately 0.5 seconds, releasing the trigger lock.
- Grasp the firearm's handle and draw it out.

Image 6.2: Quick draw access from the safe, highlighting the exposed grip for immediate retrieval.
6.3 Unlocking with Passcode
As an alternative access method:
- Enter your registered 5-10 digit passcode using the keypad.
- Press 'OK' to confirm. The safe will unlock.
- Grasp the firearm's handle and draw it out.

Image 6.3: Close-up of the 4-button keypad for passcode entry.
6.4 Unlocking with Mechanical Key
For emergency or battery-depleted situations:
- Locate the keyhole on the side of the safe.
- Insert one of the provided mechanical keys and turn to unlock.
- Grasp the firearm's handle and draw it out.

Image 6.4: The mechanical key and keyhole for emergency access.
7. Maintenance
7.1 Battery Maintenance
- Recharge the battery when the low battery indicator appears.
- Avoid completely draining the battery to prolong its lifespan.
7.2 Cleaning
- Wipe the exterior of the safe with a soft, damp cloth.
- Do not use harsh chemicals or abrasive cleaners.
- Keep the fingerprint sensor clean and dry for optimal performance.
8. Troubleshooting
| Problem | Possible Cause | Solution |
|---|---|---|
| Fingerprint not recognized | Finger is dirty, wet, or improperly placed; fingerprint not registered. | Clean and dry finger; ensure proper placement; re-register fingerprint if needed. |
| Keypad not responding | Incorrect passcode; low battery. | Enter correct passcode; recharge battery. |
| Safe does not unlock | Low battery; electronic malfunction. | Recharge battery; use mechanical key for emergency access. |
| Firearm does not fit | Firearm is too large or has attachments; revolver. | Remove lights/lasers; confirm firearm dimensions (6.5"D x 3.5"W x 7.9"H); safe is not compatible with revolvers. |
9. Specifications
| Feature | Detail |
|---|---|
| Brand | ONNAIS |
| Model Number | GL-04 |
| Product Dimensions | 6.5"D x 3.5"W x 7.9"H |
| Lock Type | Biometric with Keypad Backup |
| Color | Black |
| Material | Alloy Steel |
| Special Features | Anti-Theft, Biometric Fingerprint, Combination Lock, Scratch Resistant |
| Mounting Type | Wall Mount / Desk Mount / Undercounter Mount |
| Item Weight | 5.28 pounds |
| Battery Type | 1 Lithium Polymer battery (included) |
| UPC | 860012389858 |
10. Warranty and Support
The ONNAIS Biometric Pistol Gun Safe comes with a Lifetime Warranty. For any questions, troubleshooting assistance, or warranty claims, please contact ONNAIS customer support.
Contact information for support is typically found on the product packaging or the official ONNAIS website.
Ask a question about this manual
Ask about setup, troubleshooting, compatibility, parts, safety, or missing instructions. Manuals+ will review the question and use this page’s manual context to help answer it.