
HSHa WZ-DCJ2-FT-UK-FBA-LCX
HSHa 21V Cordless Strimmer User Manual
Model: WZ-DCJ2-FT-UK-FBA-LCX | Brand: HSHa
Introduction
Thank you for choosing the HSHa 21V Cordless Strimmer. This manual provides essential information for the safe and efficient operation, maintenance, and troubleshooting of your new grass trimmer. Please read this manual thoroughly before first use and keep it for future reference.
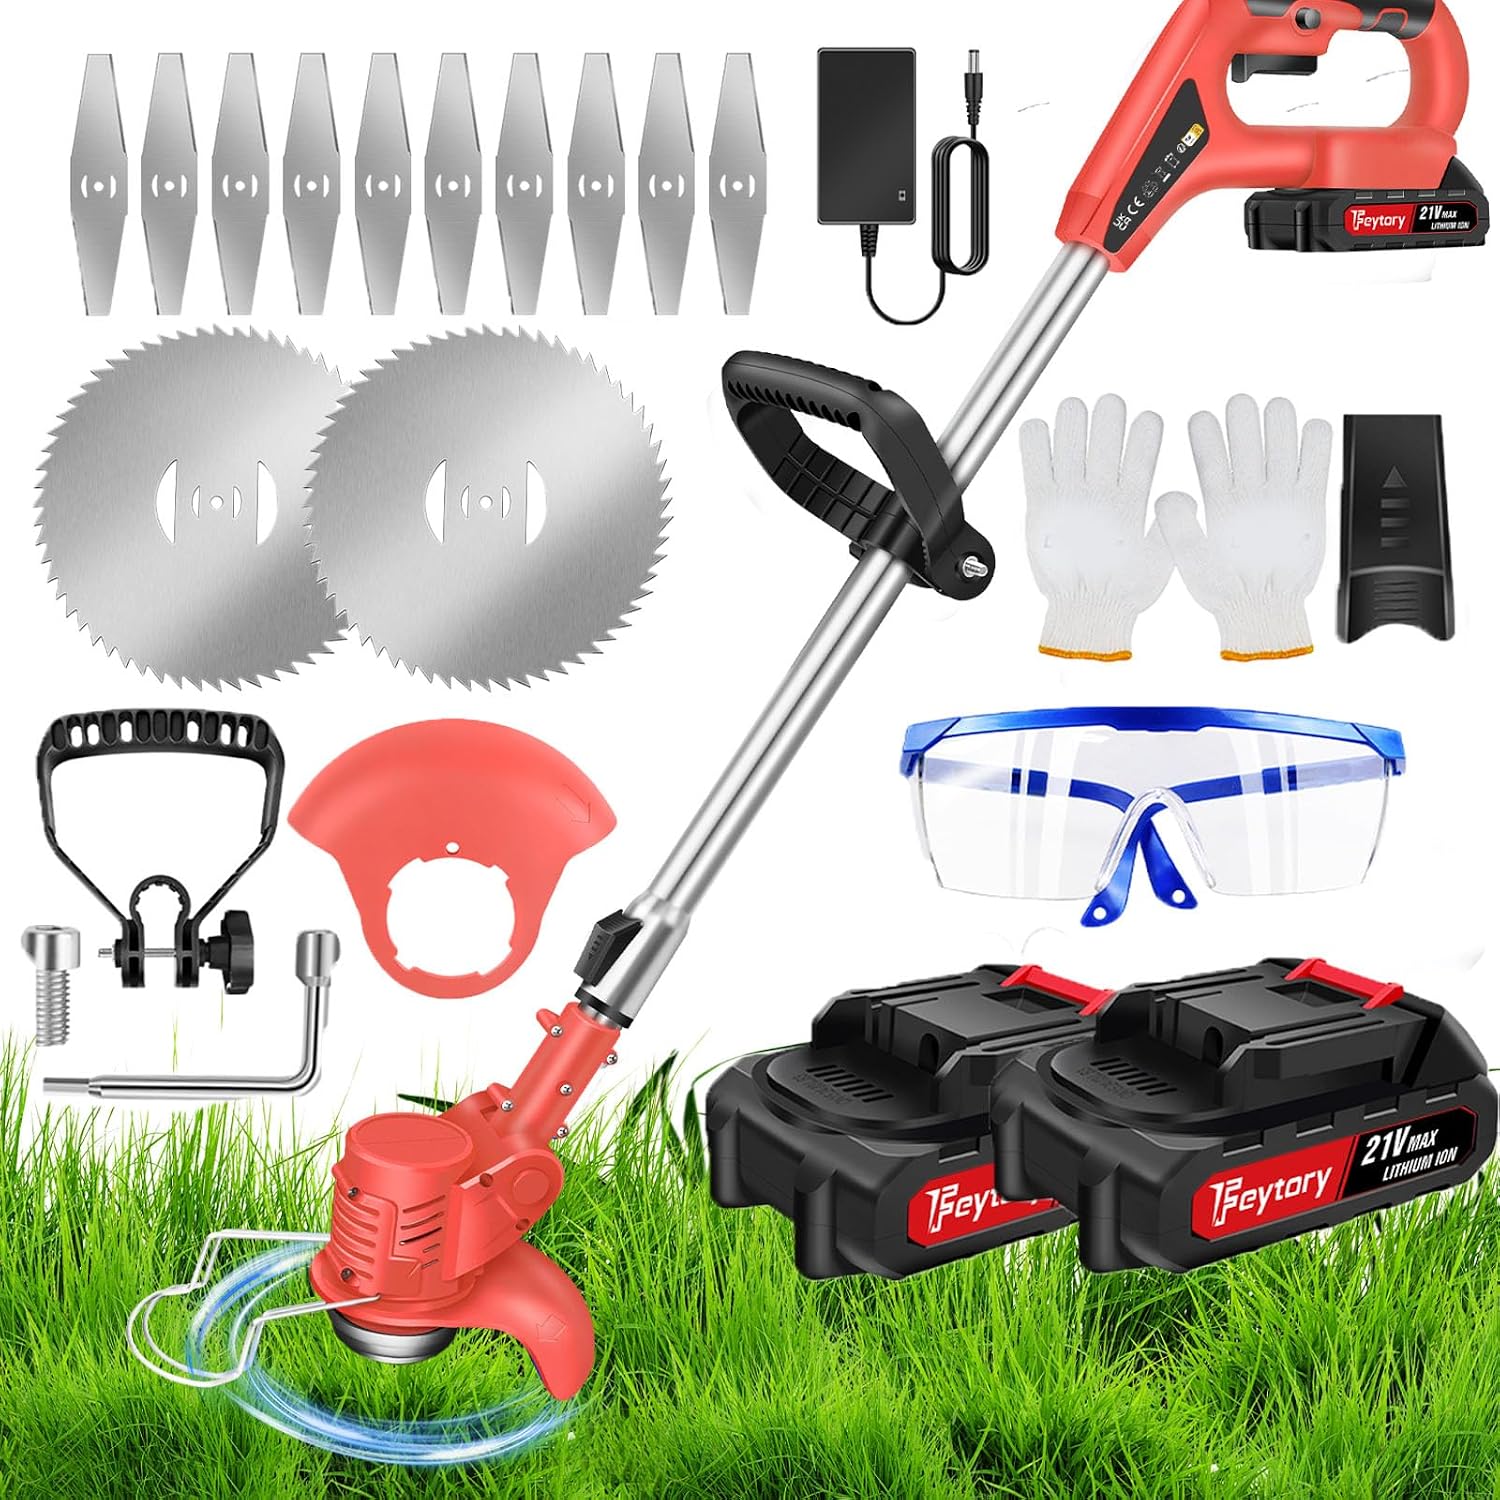
Image: The HSHa 21V Cordless Strimmer, showcasing the main unit, two batteries, charger, various metal blades, safety goggles, gloves, and installation tools.
Important Safety Instructions
Always follow basic safety precautions when using electrical appliances to reduce the risk of fire, electric shock, and personal injury. This includes, but is not limited to:
- Wear appropriate personal protective equipment (PPE) including safety goggles, gloves, and sturdy footwear.
- Keep children and bystanders away while operating the strimmer.
- Ensure the work area is clear of debris, rocks, and other objects that could be thrown by the blades.
- Do not operate the strimmer in wet conditions or rain.
- Always remove the battery before cleaning, performing maintenance, or changing accessories.
- Use only HSHa approved batteries and chargers.
- To activate the strimmer, you must first press the anti-mistouch switch (lock button) and then the main power switch.
Product Components
Familiarize yourself with the parts of your HSHa Cordless Strimmer:

Image: Detailed diagram showing the Power Switch, Lock Button, Auxiliary Handle, Lithium Battery, Length Expansion Buckle, Anti-Collision Wire, Head Rotation Button, and Mudguard.
- Main Unit: Contains the motor, handle, and battery slot.
- Lithium Battery: 21V 1500mAh rechargeable battery.
- Quick Charger: For charging the lithium battery.
- Metal Blades: Includes 10x 6-inch metal blades for general grass and weed cutting.
- Circular Saw Blades: 2x 6-inch metal circular blades for cutting thicker bushes and branches.
- Auxiliary Handle: Adjustable for comfortable grip and control.
- Grass Guard: Protects against splashing debris.
- Anti-collision Iron Bar: Prevents damage when encountering hard surfaces.
- Safety Goggles & Gloves: Essential protective gear.
- Wrench & Pressure Plate Screw: For blade installation.
- Retractable Tube Interface & Gaskets: For length adjustment.
Setup and Assembly
Follow these steps to assemble your strimmer:
- Attach the Auxiliary Handle: Secure the auxiliary handle to the main pole using the provided screw and knob. Ensure it is firm but adjustable for your comfort.
- Install Crash Wires (Anti-collision Bar): Insert the ends of the anti-collision metal ring into the designated holes on the strimmer head.
- Install Grass Guard: Attach the plastic grass guard to the strimmer head, aligning it with the screw holes and securing it with the provided screw.
- Install Blades:
- For metal blades: Place the desired metal blade onto the spindle, followed by the washer and nut. Tighten securely with the wrench.
- For circular saw blades: Place the circular saw blade onto the spindle, ensuring it sits flat. Add the washer and nut, then tighten firmly with the wrench.
- Insert Battery: Slide a fully charged 21V lithium battery into the battery slot on the main handle until it clicks into place.
- Adjust Length: Press the length telescopic push button and extend or retract the pole to your desired working length (33-47.2 inches). Release the button to lock the length.
Assembly Video Guide:
Video: This video demonstrates the assembly process of the strimmer, including attaching the auxiliary handle, installing the crash wires, and fitting the different types of blades. It also shows how to insert the battery and adjust the telescopic pole length.

Image: Illustration of the strimmer's adjustable telescopic rod, showing the minimum (33 inches) and maximum (47.2 inches) lengths for user comfort and adaptability to different environments.
Operating Instructions
Before operating, ensure you are wearing all necessary PPE.
- Starting the Strimmer: To start the machine, first press and hold the anti-mistouch switch (lock button) located on the handle, then press the main power switch. Release the lock button once the strimmer starts.
- Adjusting Cutting Angle: The cutting head can be adjusted to different angles for versatile use, such as edging or trimming in tight spaces. Press the head rotation button to adjust the angle as needed.
- Trimming Technique: Move the strimmer in a sweeping motion, keeping the blades parallel to the ground for even cutting. Use the anti-collision bar to protect the blades when working near obstacles like walls or stones.
- Battery Life: Each 1500mAh lithium battery provides approximately 1 hour of continuous use. It is recommended to have a second charged battery for extended tasks.
Operation Video Guide:
Video: This video provides an overview of the 21V Cordless Strimmer in action, demonstrating its adjustable length, safety switch operation, efficient mowing capabilities, and the function of the anti-collision metal ring.

Image: The strimmer head can be rotated to adjust the cutting angle, allowing for flexible use in various gardening tasks and hard-to-reach areas.
Maintenance
Regular maintenance ensures optimal performance and extends the life of your strimmer.
- Cleaning: After each use, remove the battery and clean the strimmer head, blades, and grass guard. Use a damp cloth to wipe down the main unit. Do not use harsh chemicals or abrasive cleaners.
- Blade Inspection and Replacement: Regularly inspect blades for wear, damage, or dullness. Replace dull or damaged blades immediately to maintain cutting efficiency and safety. Refer to the setup section for blade installation.
- Battery Care: Store batteries in a cool, dry place away from direct sunlight. Do not expose batteries to extreme temperatures. Charge batteries fully before long-term storage.
- Storage: Store the strimmer in a dry, secure location, out of reach of children.
Troubleshooting
| Problem | Possible Cause | Solution |
|---|---|---|
| Strimmer does not start. | Battery not inserted correctly or not charged. Safety switch not engaged. | Ensure battery is fully charged and properly inserted. Press the anti-mistouch switch (lock button) before the main power switch. |
| Reduced cutting performance. | Blades are dull or damaged. Excessive weeds/grass. | Replace blades. Clear dense vegetation in smaller passes. |
| Strimmer stops during operation. | Battery is low. Overload protection activated. | Recharge or replace battery. Reduce load on the motor by cutting less material at once. |
| Unusual noise or vibration. | Loose blade or component. Damaged blade. | Check all connections and tighten. Inspect and replace damaged blades. If problem persists, contact support. |
Product Specifications
- Model: WZ-DCJ2-FT-UK-FBA-LCX
- Brand: HSHa
- Power Source: Battery Powered
- Battery Type: 21V Lithium Ion (1500mAh)
- Item Weight: 3 Kilograms
- Product Dimensions: 127L x 15W centimetres (Adjustable length: 33-47.2 inches)
- Cutting Width: 6 inches
- Motor Speed: Up to 10000 RPM
- Color: Red (as per current model)
- Assembly Required: Yes
Warranty Information
This HSHa product comes with a standard manufacturer's warranty. For details regarding warranty coverage, terms, and conditions, please refer to the warranty card included in your product packaging or contact HSHa customer support. Keep your proof of purchase for warranty claims.
Customer Support
If you have any questions, concerns, or require assistance with your HSHa 21V Cordless Strimmer, please contact our customer support team. Refer to the contact information provided on the product packaging or the official HSHa website.
We are committed to providing excellent service and support for your product.
Ask a question about this manual
Ask about setup, troubleshooting, compatibility, parts, safety, or missing instructions. Manuals+ will review the question and use this page’s manual context to help answer it.