Introduction
This manual provides comprehensive instructions for the safe and efficient operation of your TIDRADIO TD-H3 Plus GMRS Radio. Please read this manual thoroughly before using the device to ensure proper functionality and to prevent damage. Keep this manual for future reference.
What's in the Box
Your TIDRADIO TD-H3 Plus GMRS Radio package includes the following components:
- 2 x TD-H3 Plus GMRS Radio
- 2 x 2500mAh Battery
- 2 x USB-C Cable & Desktop Charger
- 2 x Standard Antenna
- 2 x Earpiece
- 2 x Belt Clip
- 2 x Hand Strap
- 1 x Manual

Product Overview
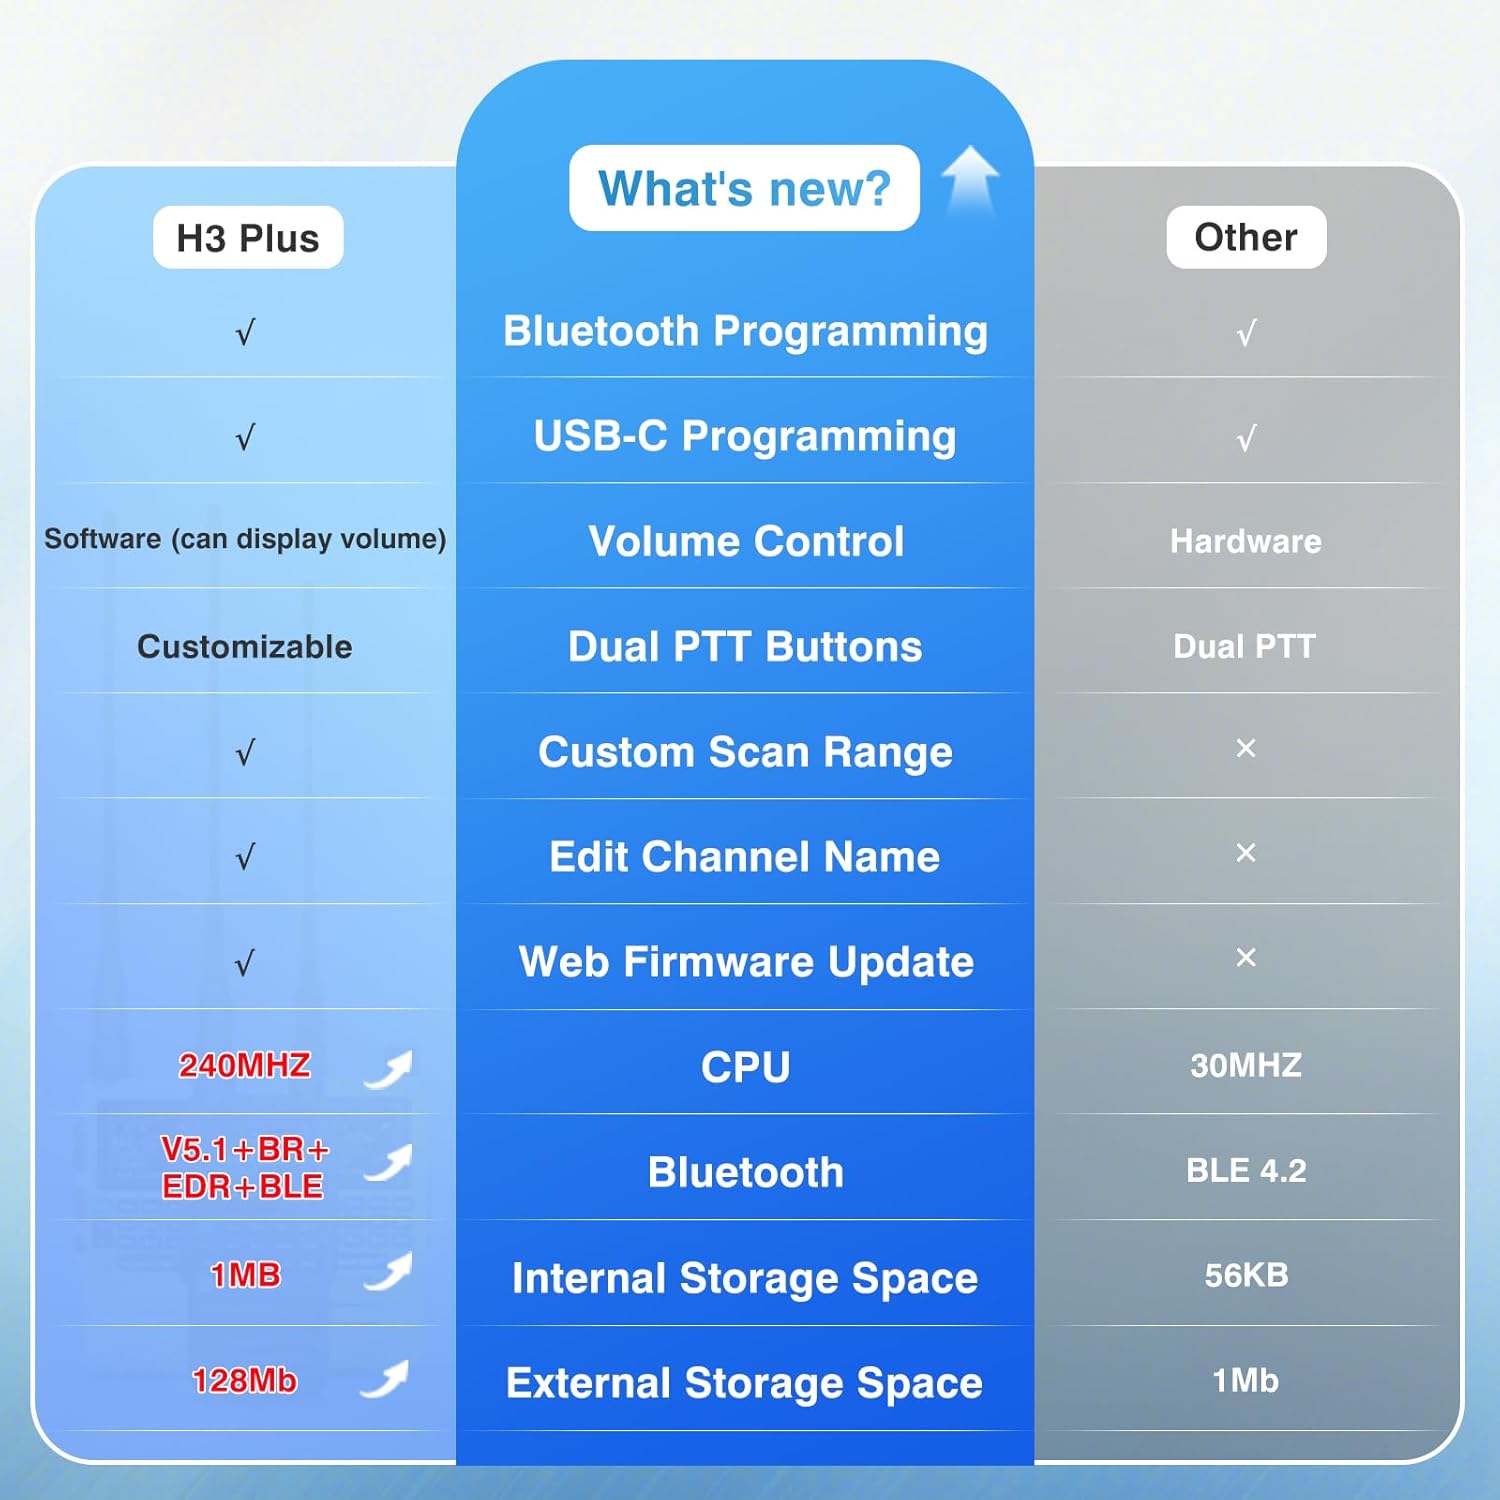
The TIDRADIO TD-H3 Plus is a versatile GMRS radio designed for reliable communication. It features a clear display, intuitive controls, and multiple advanced functions.

Key Features:
- Multi-band Reception: Supports GMRS frequencies (462.55000-467.72500MHz RX/TX) and wide-range scanning (FM, AM aviation, VHF, UHF).
- USB-C Charging & Programming: Convenient charging and direct programming via USB-C port.
- Wireless Programming: Compatible with Odmaster App for Bluetooth programming.
- NOAA Weather Radio: Provides real-time weather alerts for safety.
- Frequency Copy: One-click duplication of common frequency settings.
- Customizable Side Keys: Assign shortcuts for various functions like FM, Lamp, TONE, Alarm, Weather, PTT2, OD PTT.
- Odmaster App Integration: Enables calling, music playback, and global walkie-talkie functionality.
Setup
1. Battery Installation and Charging:
Insert the 2500mAh battery into the radio, ensuring it clicks securely into place. The TD-H3 Plus supports two charging methods:
- USB-C Charging: Connect the provided USB-C cable directly to the radio's side port and a power source (e.g., wall adapter, laptop, car charger).
- Desktop Charger: Place the radio in the desktop charging cradle. The indicator light will show charging status (red for charging, green for charged).

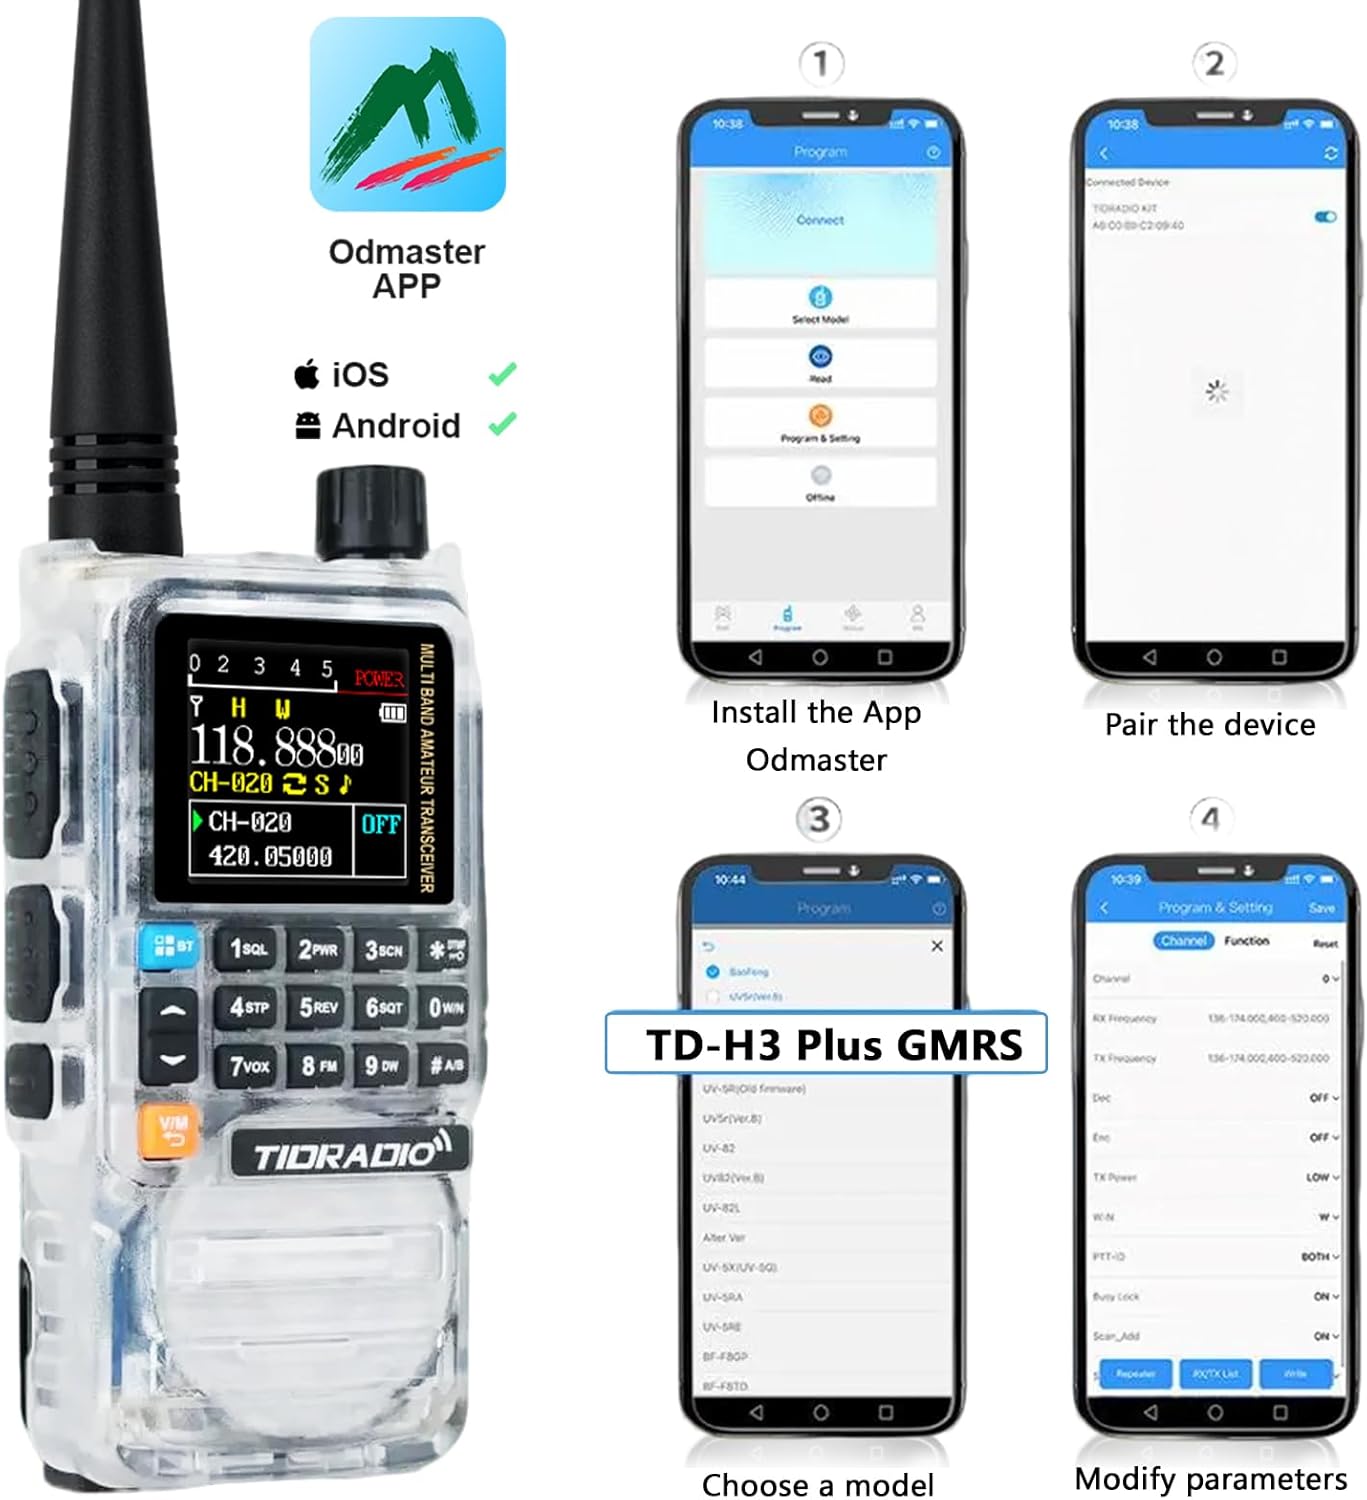
2. Initial Programming (Odmaster App):
The Odmaster App allows for convenient wireless programming of your radio. Ensure your smartphone has Bluetooth enabled.
- Install the Odmaster App on your iOS or Android device.
- Open the app and pair your TD-H3 Plus radio via Bluetooth.
- Select the "TD-H3 Plus GMRS" model within the app.
- Modify parameters such as frequencies, channels, and other settings as needed.
Operating Instructions
1. Power On/Off and Volume Control:
To power on the radio, rotate the top knob clockwise. To power off, rotate it counter-clockwise until it clicks. Adjust the volume by rotating the same knob. The H3 Plus features precise digital volume control.
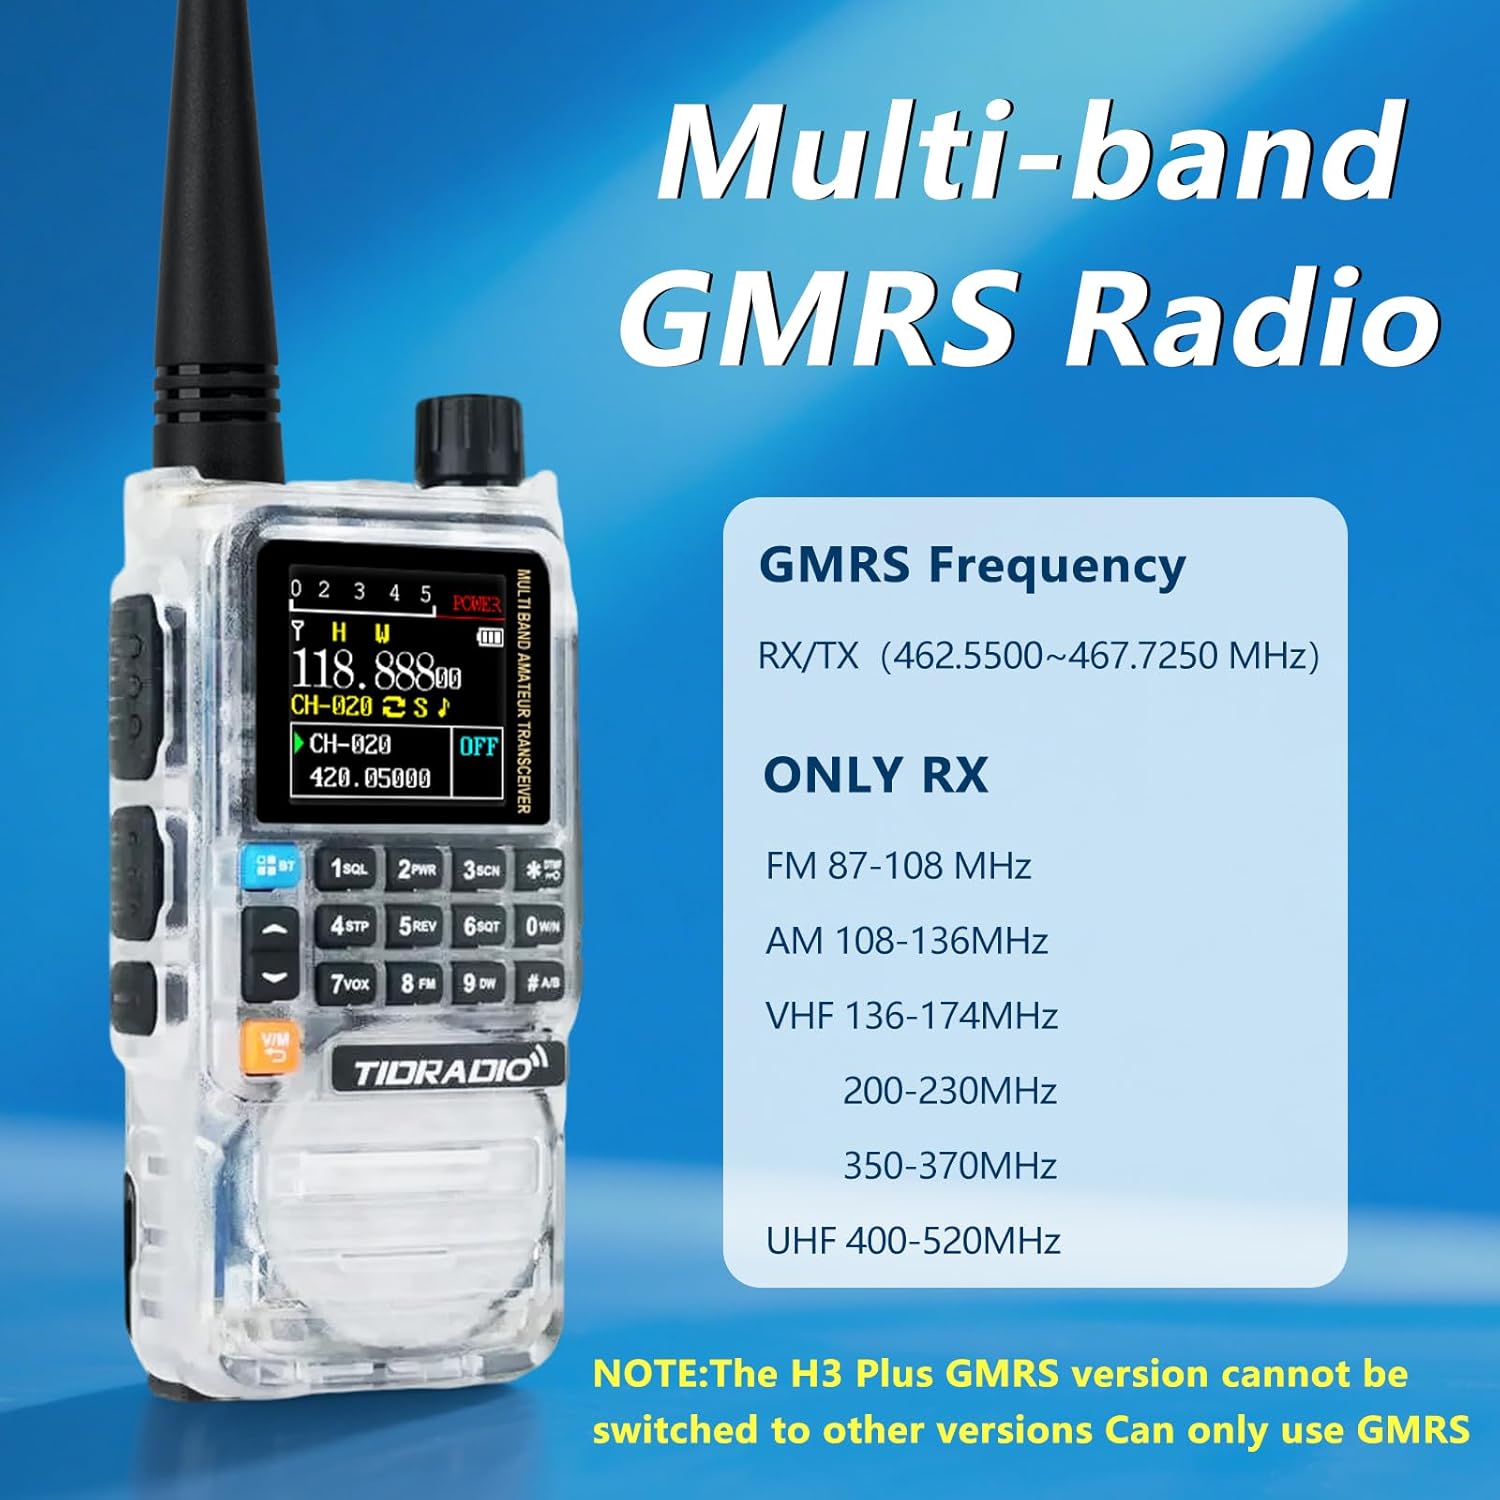
2. Multi-band Reception:
Your TD-H3 Plus radio operates on pre-programmed GMRS frequencies (462.55000-467.72500MHz for both transmit and receive). It also supports wide-range multi-band scanning for receive-only frequencies:
- FM broadcasts (87-108MHz)
- AM aviation bands (108-136MHz)
- VHF (136-174MHz, 200-230MHz, 350-370MHz)
- UHF (400-520MHz)
Note: The H3 Plus GMRS version is fixed and cannot be switched to other radio versions.
3. NOAA Weather Radio:
The built-in NOAA Weather Radio provides real-time weather alerts and broadcasts. This feature is crucial for safety during outdoor activities or in unpredictable weather conditions.

4. One-Touch Frequency Search:
The frequency copy feature allows you to quickly duplicate commonly used frequency settings from another radio. Hold down the "1" button to identify the frequency when another radio is transmitting, then save it directly to a new channel.

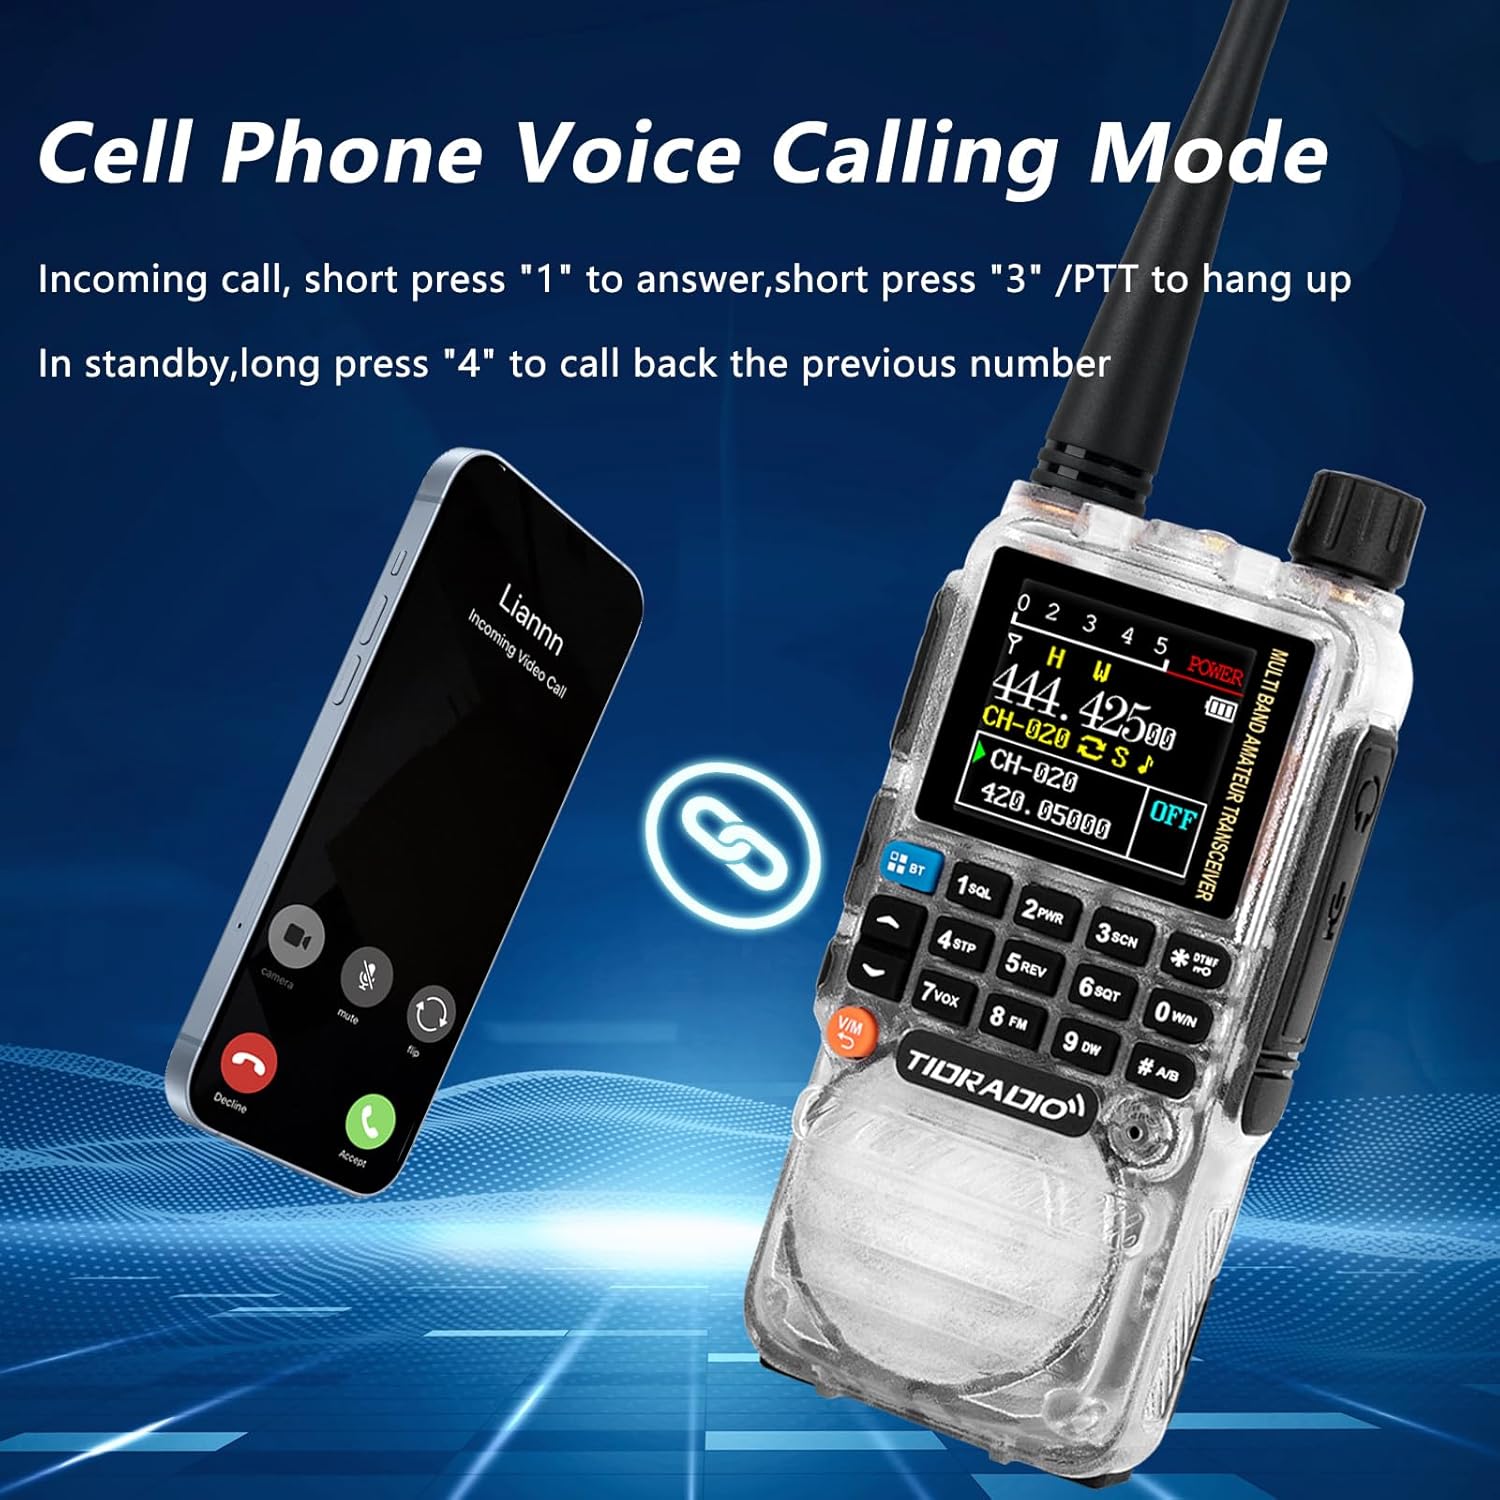
5. Odmaster App Advanced Functions:
Beyond programming, the Odmaster App enhances your radio's capabilities:
- Calling Function: Transform your radio into a versatile audio device. Easily answer and make calls through the app. Short press "1" to answer an incoming call, short press "3" or PTT to hang up. Long press "4" in standby to call back the previous number.
- Audio Function (Wireless Speaker): Play your favorite music directly on the H3 Plus via Bluetooth. Press button "1" for the previous song, "3" for the next song, and long/short press button "2" to play/pause music.
- OD PTT Function (Global Intercom): Paired with the "Talk" module in the Odmaster app, this enables global walkie-talkie functionality, allowing real-time communication with family or teams anywhere on Earth, breaking distance barriers.


Maintenance
General Care:
- Keep the radio clean by wiping it with a soft, damp cloth. Avoid harsh chemicals.
- Do not expose the radio to extreme temperatures, direct sunlight for prolonged periods, or excessive moisture.
- Ensure the USB-C port cover is properly sealed when not in use to prevent dust and water ingress.
Battery Care:
- Charge the battery fully before first use.
- Avoid overcharging or completely draining the battery to prolong its lifespan.
- Store the radio and battery in a cool, dry place when not in use for extended periods.
Firmware Upgrade:
Firmware updates can enhance performance and add new features. It is recommended to back up your data before performing any firmware upgrade.
To upgrade firmware, use the Odmaster Web platform. You will need a CH340 programming cable (or FTDI cable for macOS). Connect the radio to your computer, enter firmware upgrade mode (press PTT+1+Power), select the port, and start the upgrade. After completion, restart the radio and verify the firmware version in the menu (Menu 3 > Radio Info > Versions Info).
Troubleshooting
If you encounter issues with your TIDRADIO TD-H3 Plus, please refer to the following common solutions:
| Problem | Possible Cause | Solution |
|---|---|---|
| Radio does not power on. | Low or dead battery; improperly installed battery. | Charge the battery fully. Ensure the battery is correctly inserted and locked. |
| Cannot transmit or receive. | Incorrect frequency/channel; out of range; antenna not connected. | Verify frequency settings. Move closer to the other radio. Ensure antenna is securely attached. |
| Poor audio quality. | Low battery; interference; damaged earpiece/speaker. | Charge the battery. Move away from sources of interference. Test with a different earpiece or use the built-in speaker. |
| Odmaster App connection issues. | Bluetooth off; app not updated; radio not in pairing mode. | Ensure Bluetooth is enabled on your phone. Update the app. Restart both radio and phone. |
If the problem persists, please contact TIDRADIO technical support for assistance.
Specifications
| Feature | Detail |
|---|---|
| Product Dimensions | 1.6 x 1.4 x 3.9 inches |
| Item Weight | 2.01 pounds |
| Model Number | TIDRADIO TD-H3 Plus |
| Battery Type | 2500mAh Nonstandard Battery (included) |
| Connectivity Technology | USB, Bluetooth |
| Tuner Technology | GMRS Frequency |
| Radio Bands Supported | 8-Band (GMRS, FM, AM Aviation, VHF, UHF) |
| Power Source | Battery Powered |
| Manufacturer | TIDRADIO |
Technical Support
As the TIDRADIO TD-H3 Plus is a new product, if you encounter any issues or require assistance, please do not hesitate to reach out to TIDRADIO's dedicated technical team. They are committed to providing professional support and resolving any problems you may experience.
For support, please visit the official TIDRADIO website or contact their customer service through the platform where you purchased the product.