1. Introduction
This manual provides essential information for the installation, operation, and maintenance of your XSPANDER Gas Range Oven Igniter. This component is designed to replace original igniters in various gas range and oven models, restoring proper heating and ignition functionality.
High Compatibility: This igniter is compatible with a wide range of oven burner brands including GE, Frigidaire, Electrolux, Sears, Kenmore, Hotpoint, Crosley, Tappan, Westinghouse, Kelvinator, and Gibson. It fits specific model series such as FFGF30, 790, CRG, TGF, and WWGF.
Replacement Part Numbers: This igniter replaces part numbers 5304509706, 316489402, 316489408, WB02X10016, 4545981, AP6230715, EAP12071409, PS12071409, and Norton-501a 316119301, 1704, 41-209, AP2009619, PS241804.
2. Safety Information
WARNING: Before attempting any installation or repair, always disconnect power to the appliance at the circuit breaker or fuse box and shut off the gas supply to the range. Failure to do so can result in serious injury, electric shock, gas leak, or fire.
It is recommended that installation be performed by a qualified technician. If you are unsure about any step, consult a professional.

Image 2.1: The igniter shown in a kitchen environment, emphasizing the importance of disconnecting power and gas before installation.
3. Product Overview and Components
The XSPANDER Gas Range Oven Igniter is a critical component for the proper functioning of your oven's gas burner. It is designed for plug-in installation and can be used in both single and double oven configurations.
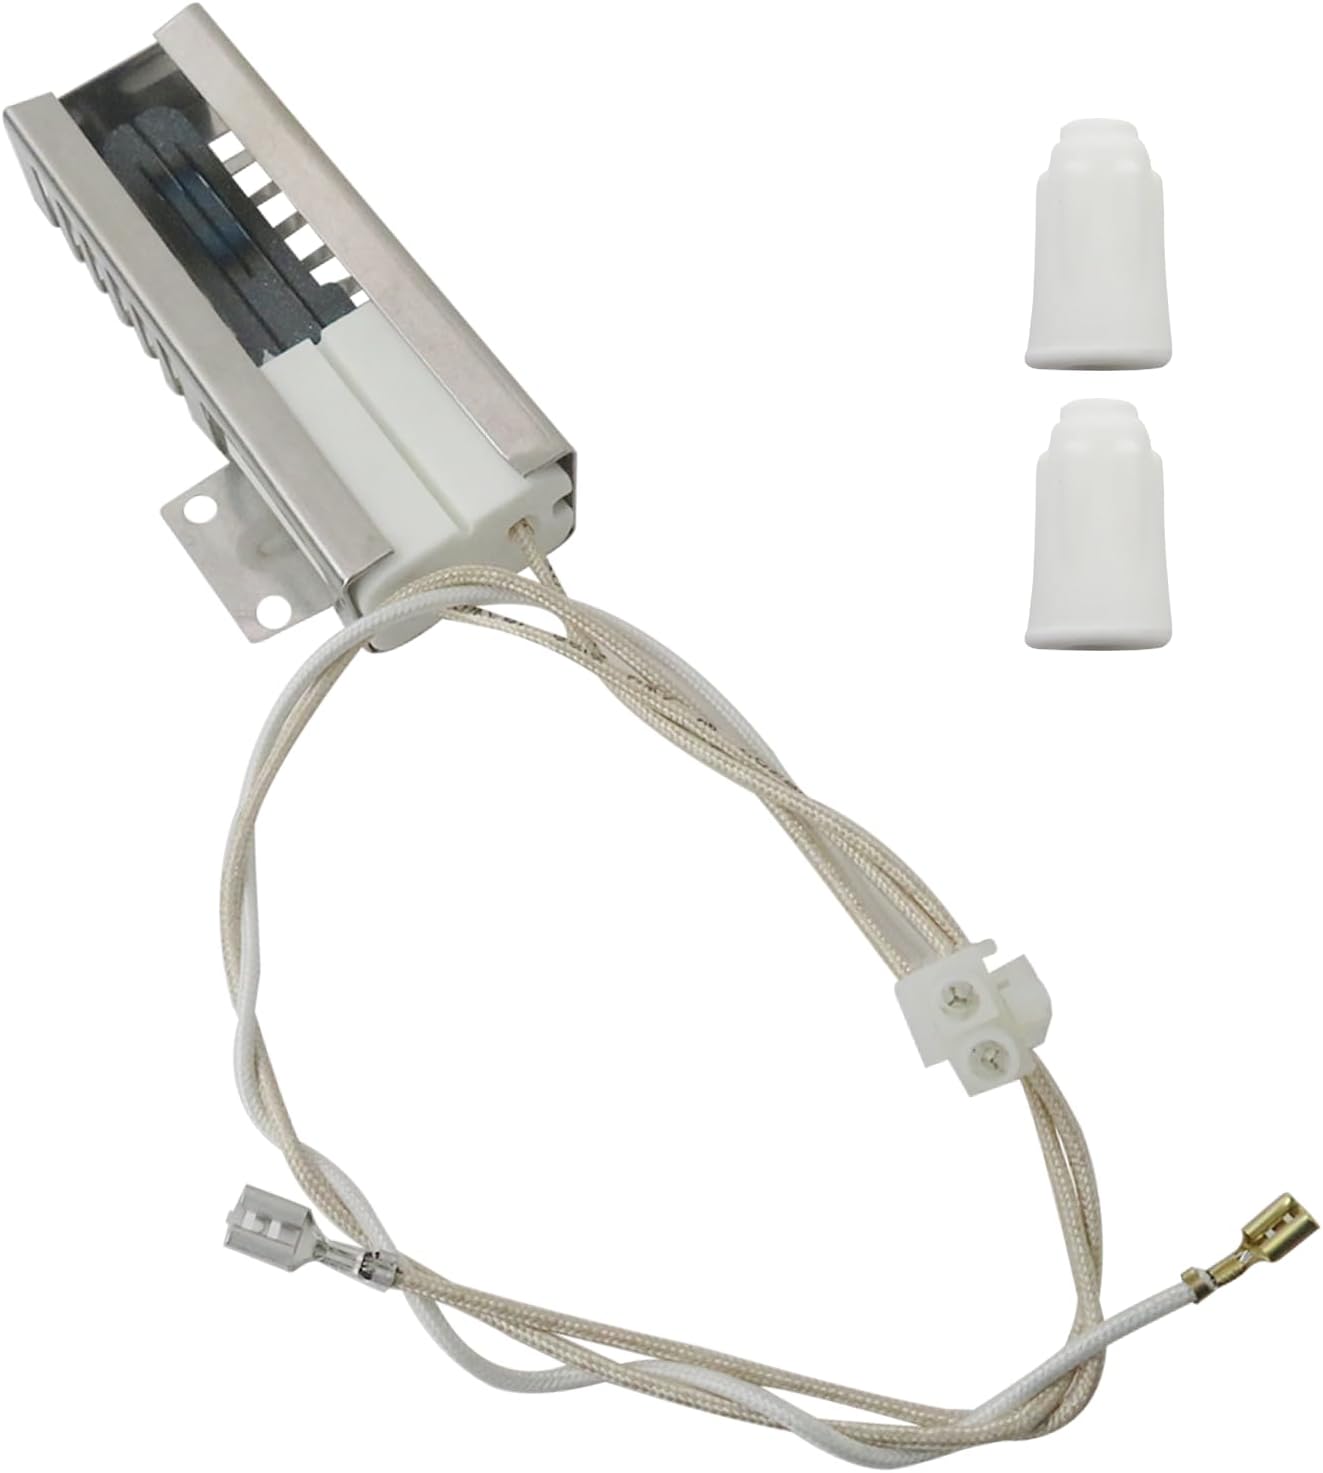
Image 3.1: The XSPANDER Gas Range Oven Igniter, including the igniter assembly with wiring and two porcelain wire nuts for splicing.
Included Components:
- 1x Gas Range Oven Burner Igniter
- 2x Porcelain Wire Nuts (for splicing connections)
Key Features:

Image 3.2: Detailed view of the igniter's key features, highlighting the hot surface carbide, aluminum alloy bracket, and engineered plug.
- Hot Surface Carbide: The igniter element may show discoloration after high-temperature quality testing. This is a normal appearance change and does not affect performance or indicate a used product.
- Aluminum Alloy Bracket: Features a high-temperature stainless steel shield to protect the igniter element.
- Highly Engineered Plug: Constructed from high-quality materials and tested through multiple processes to ensure reliable connection.
4. Installation Instructions
Follow these steps carefully for proper installation of the oven igniter. Always prioritize safety by disconnecting power and gas before starting.
- Prepare the Appliance: Ensure the gas supply to the range is turned off and the electrical power is disconnected at the circuit breaker.
- Access the Igniter: Depending on your oven model, you may need to remove oven racks, the oven bottom panel, or other components to access the existing igniter. Refer to your appliance's specific service manual for detailed access instructions.
- Disconnect Old Igniter: Carefully disconnect the wiring from the old igniter. Note the routing of the wires.
- Remove Old Igniter: Unscrew or unclip the old igniter from its mounting bracket.
- Install New Igniter: Mount the new XSPANDER igniter in the same position as the old one, ensuring it is securely fastened.
- Connect Wiring: Connect the new igniter's wiring.

Image 4.1: The igniter positioned near an open oven, demonstrating the typical installation environment.
Wire Connection Tip:
The wire connections on the replacement igniter may differ from your original part. If the wire connector does not match, you will need to cut off the existing connector and splice the wires using the provided porcelain wire nuts. Ensure a secure and insulated connection.
For visual guidance, you may find helpful installation videos by searching online for "how to replace oven igniter 316489402" or similar terms.
5. Operating Principles
The gas oven igniter functions as a safety device and an ignition source. When the oven is turned on, the igniter heats up to a high temperature, drawing electrical current. This current flow signals the gas valve to open, allowing gas to flow to the burner. The hot igniter then ignites the gas, initiating the heating process in the oven.
6. Maintenance
The XSPANDER oven igniter is designed for durability and undergoes anti-aging testing to ensure extended life and consistent performance. During its lifespan, it is normal for the igniter element to show discoloration due to high temperatures. This discoloration does not affect its functionality or indicate a defect.
No routine maintenance is typically required for the igniter itself. If you experience issues, refer to the troubleshooting section.
7. Troubleshooting
This igniter is designed to address common oven issues related to ignition and heating. If your oven exhibits any of the following symptoms, replacing the igniter may resolve the problem:
- Igniter burned out
- Oven abnormal heating
- Unpleasant gas smell (ensure gas supply is off immediately if this occurs)
- Oven cannot heat
- Oven cannot light up
If symptoms persist after replacing the igniter, consult a qualified appliance repair technician.
8. Specifications

Image 8.1: Product dimensions for the igniter and wire nuts.
| Specification | Value |
|---|---|
| Electrical Rating | 3.4 to 3.6 Amps, 120V AC |
| Item Weight | 1.76 ounces (approx. 50 grams) |
| Igniter Length | Approximately 3.5 inches (8.9 cm) |
| Igniter Width | Approximately 1.2 inches (3.0 cm) |
| Wire Length | Approximately 1.1 inches (2.8 cm) from connector to igniter body |
| Wire Nut Height | Approximately 0.8 inches (2.0 cm) |
| Manufacturer | XSPANDER |
| Part Numbers | 5304509706, WB2X10016, 316489408, 316489402, G812071409 |
9. Support
For any questions or assistance regarding your XSPANDER Gas Range Oven Igniter, please contact XSPANDER customer support through the retailer where the product was purchased. Provide your product model numbers and a detailed description of the issue for efficient support.
While specific warranty details are not provided in this manual, please refer to the terms and conditions of your purchase for warranty information.