1. Setup
1.1 Initial Inspection and Battery Installation
Upon receiving your Thmosz 2.6 Cuft Depository Safe, carefully inspect the packaging and the safe for any signs of damage. Ensure all included components are present: 1x safe, 2x emergency keys, 4x expansion bolts, 1x external power box, and this user manual.

This diagram illustrates the four steps for initial setup: removing the emergency lock cover, inserting the emergency key and turning the knob to open the door, installing 4 AA batteries into the compartment, and pressing the reset button to enter a new 3-8 digit passcode.
- Open the Safe: Remove the emergency lock cover located on the keypad panel. Insert one of the emergency keys and turn it anticlockwise. Simultaneously, turn the knob clockwise to open the safe door.
- Install Batteries: Locate the battery compartment on the inside of the safe door. Open the compartment and insert 4 AA batteries (not included), ensuring correct polarity. Close the compartment.
1.2 Setting Your Personal Passcode
After installing the batteries, you can set your personal passcode. The initial password is 159+#.
This video demonstrates the process of setting a personal password for the Thmosz Depository Safe. It shows how to access the reset button and input a new code.
- With the safe door open, locate the red reset button on the inside of the door, near the hinge. Press this button.
- On the keypad, enter your desired 1-8 digit passcode.
- Press the '#' key to confirm your new passcode. The display will show 'GOOD' or a similar confirmation.
- Test the new passcode with the door open to ensure it works correctly before closing the safe.

This image details the digital keypad and emergency key access point on the Thmosz safe. It illustrates the initial password '159+#' and provides a visual guide for daily use (fast access) and first-time operation (forgotten passcode), emphasizing the importance of not leaving emergency keys inside the safe.
1.3 Mounting the Safe
For enhanced security, the safe can be mounted to a floor or wall using the provided expansion bolts.
- Choose a suitable location for mounting.
- Mark the drilling points through the pre-drilled holes on the back or bottom panel of the safe.
- Drill pilot holes into the wall or floor.
- Align the safe with the drilled holes and secure it using the expansion bolts.
2. Operating the Safe
2.1 Opening with Digital Passcode
- Enter your 1-8 digit personal passcode on the keypad.
- Press the '#' key. The display will show 'OPEN' or a similar indication.
- Within 5 seconds, turn the knob clockwise to open the safe door.
2.2 Using the Drop Slot
The depository safe features a quick-place drop slot for depositing items without opening the main safe door.
This video demonstrates the functionality of the Thmosz Depository Safe, including the use of the drop slot for quick deposits and the general operation of the safe.
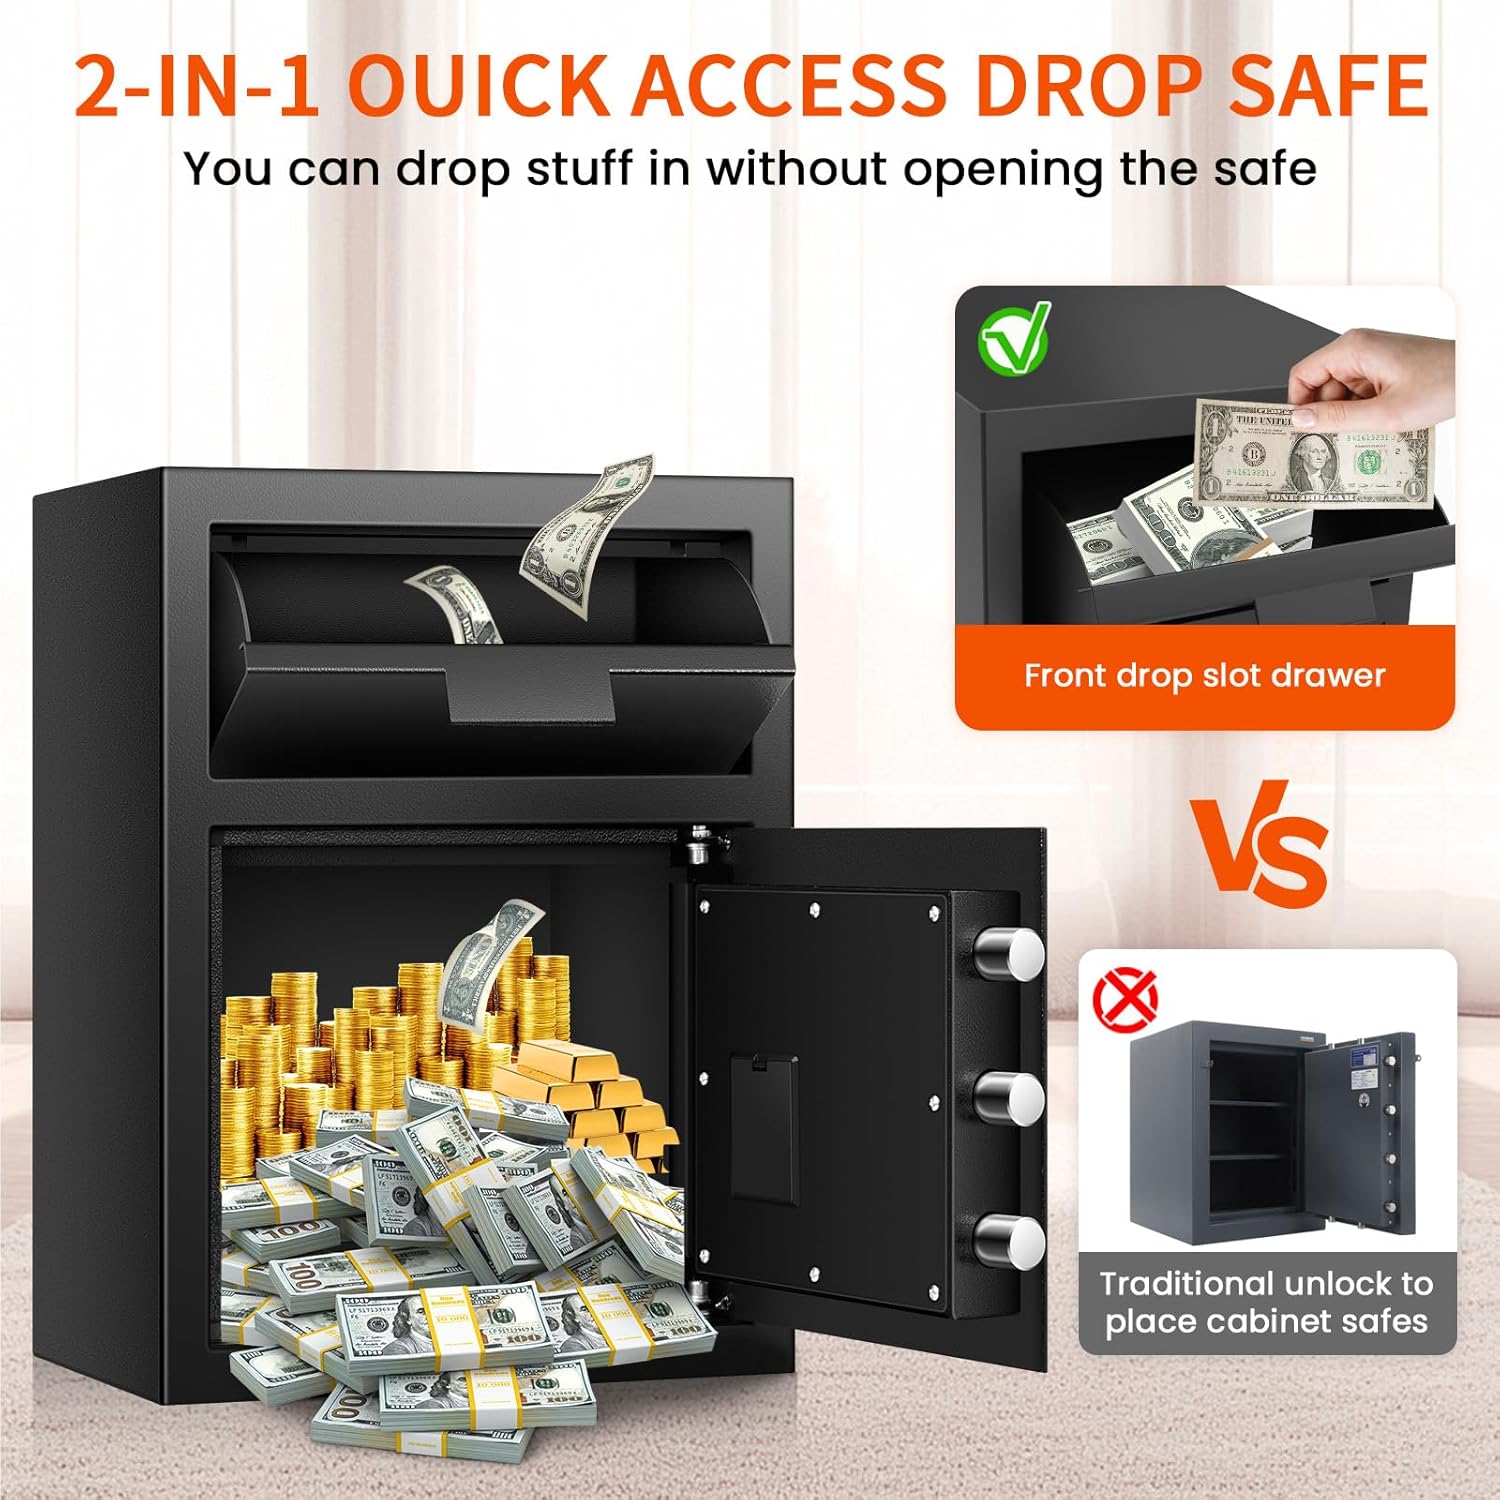
This image compares the Thmosz 2-in-1 quick access drop safe, showing how items can be dropped in without opening the main safe door, versus a traditional safe that requires unlocking to place items. It highlights the convenience of the front drop slot drawer.
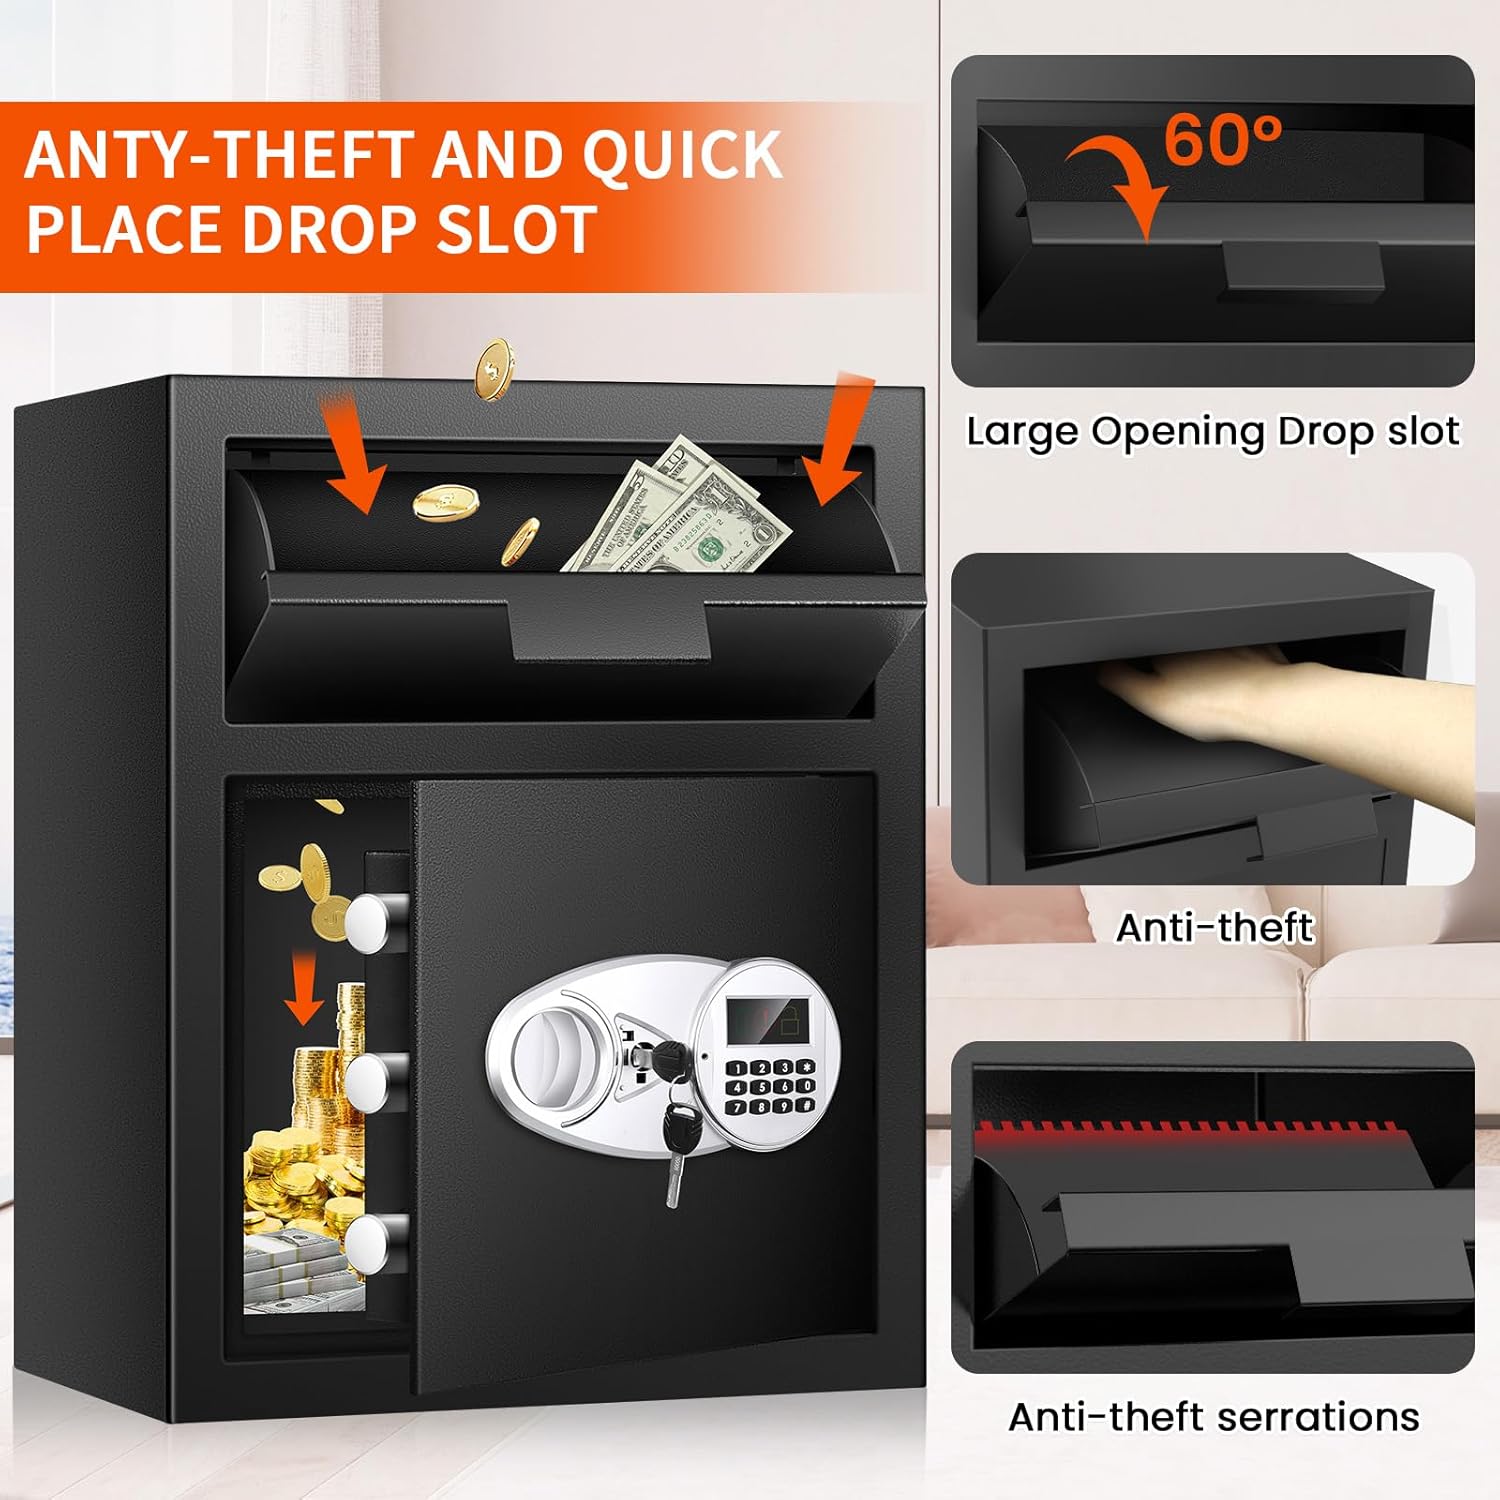
This image focuses on the anti-theft and quick place drop slot features of the Thmosz safe. It shows a large 60-degree opening, an anti-theft mechanism, and anti-theft serrations designed to prevent unauthorized retrieval of dropped items.
To deposit items, simply place them into the top drop slot. The internal anti-fishing baffle prevents unauthorized removal of contents.
2.3 Emergency Key Access
In case you forget your passcode or the batteries are completely drained, you can use the emergency keys.

This diagram outlines the three methods to unlock the Thmosz safe: using a personal code with the turning knob, using emergency keys with the turning knob, and using an external battery box with a personal code in case of internal battery failure or lost keys.
- Remove the emergency lock cover from the keypad panel.
- Insert an emergency key into the keyhole and turn it anticlockwise.
- Turn the knob clockwise to open the safe door.
2.4 Using the External Power Box
If the internal batteries are dead and you do not have the emergency key readily available, you can use the external power box.
- Insert 4 AA batteries into the external power box.
- Plug the external power box cable into the emergency power port located on the keypad panel.
- Enter your personal passcode on the keypad and press '#'.
- Turn the knob clockwise to open the safe door.
3. Maintenance
3.1 Battery Replacement
Replace the 4 AA batteries inside the safe door when the low battery indicator appears on the display or if the keypad becomes unresponsive. Always use new, high-quality alkaline batteries.
3.2 Cleaning
Clean the exterior of the safe with a soft, damp cloth. Avoid using abrasive cleaners or solvents that could damage the finish or electronic components.
3.3 Security Check
Periodically check the mounting bolts to ensure they are tight and secure, especially if the safe is frequently moved or subjected to vibrations.
4. Troubleshooting
4.1 Keypad Lockout

This image illustrates the smart alarm system of the Thmosz safe. It shows that 3 failed passcode entries activate a 20-second keypad lockout, and 6 failed entries activate a 5-minute lockout. It also features icons for a low battery reminder and an alarm beep, with a cartoon burglar running away.
- Symptom: Keypad is unresponsive after multiple incorrect entries.
- Cause: The safe's automatic lock function activates after 3 incorrect entries (20-second lockout) or 6 incorrect entries (5-minute lockout) to prevent unauthorized access.
- Solution: Wait for the lockout period to expire. The keypad will automatically reset. Ensure you enter the correct passcode.
4.2 Dead Batteries / Lost Key
- Symptom: Safe does not open, keypad is dark, or emergency key is lost.
- Cause: Internal batteries are drained, or emergency key is not accessible.
- Solution: Use the external power box (see Section 2.4) to temporarily power the safe and open it with your passcode. Alternatively, use a spare emergency key if available.
4.3 Safe Not Opening with Correct Passcode
- Symptom: Passcode is entered correctly, but the safe does not open.
- Cause: Batteries are low, or the knob was not turned within the 5-second window after entering the passcode.
- Solution: Replace the batteries. Ensure you turn the knob clockwise immediately after the 'OPEN' indicator appears on the display. If the issue persists, use the emergency key to open the safe.
5. Specifications
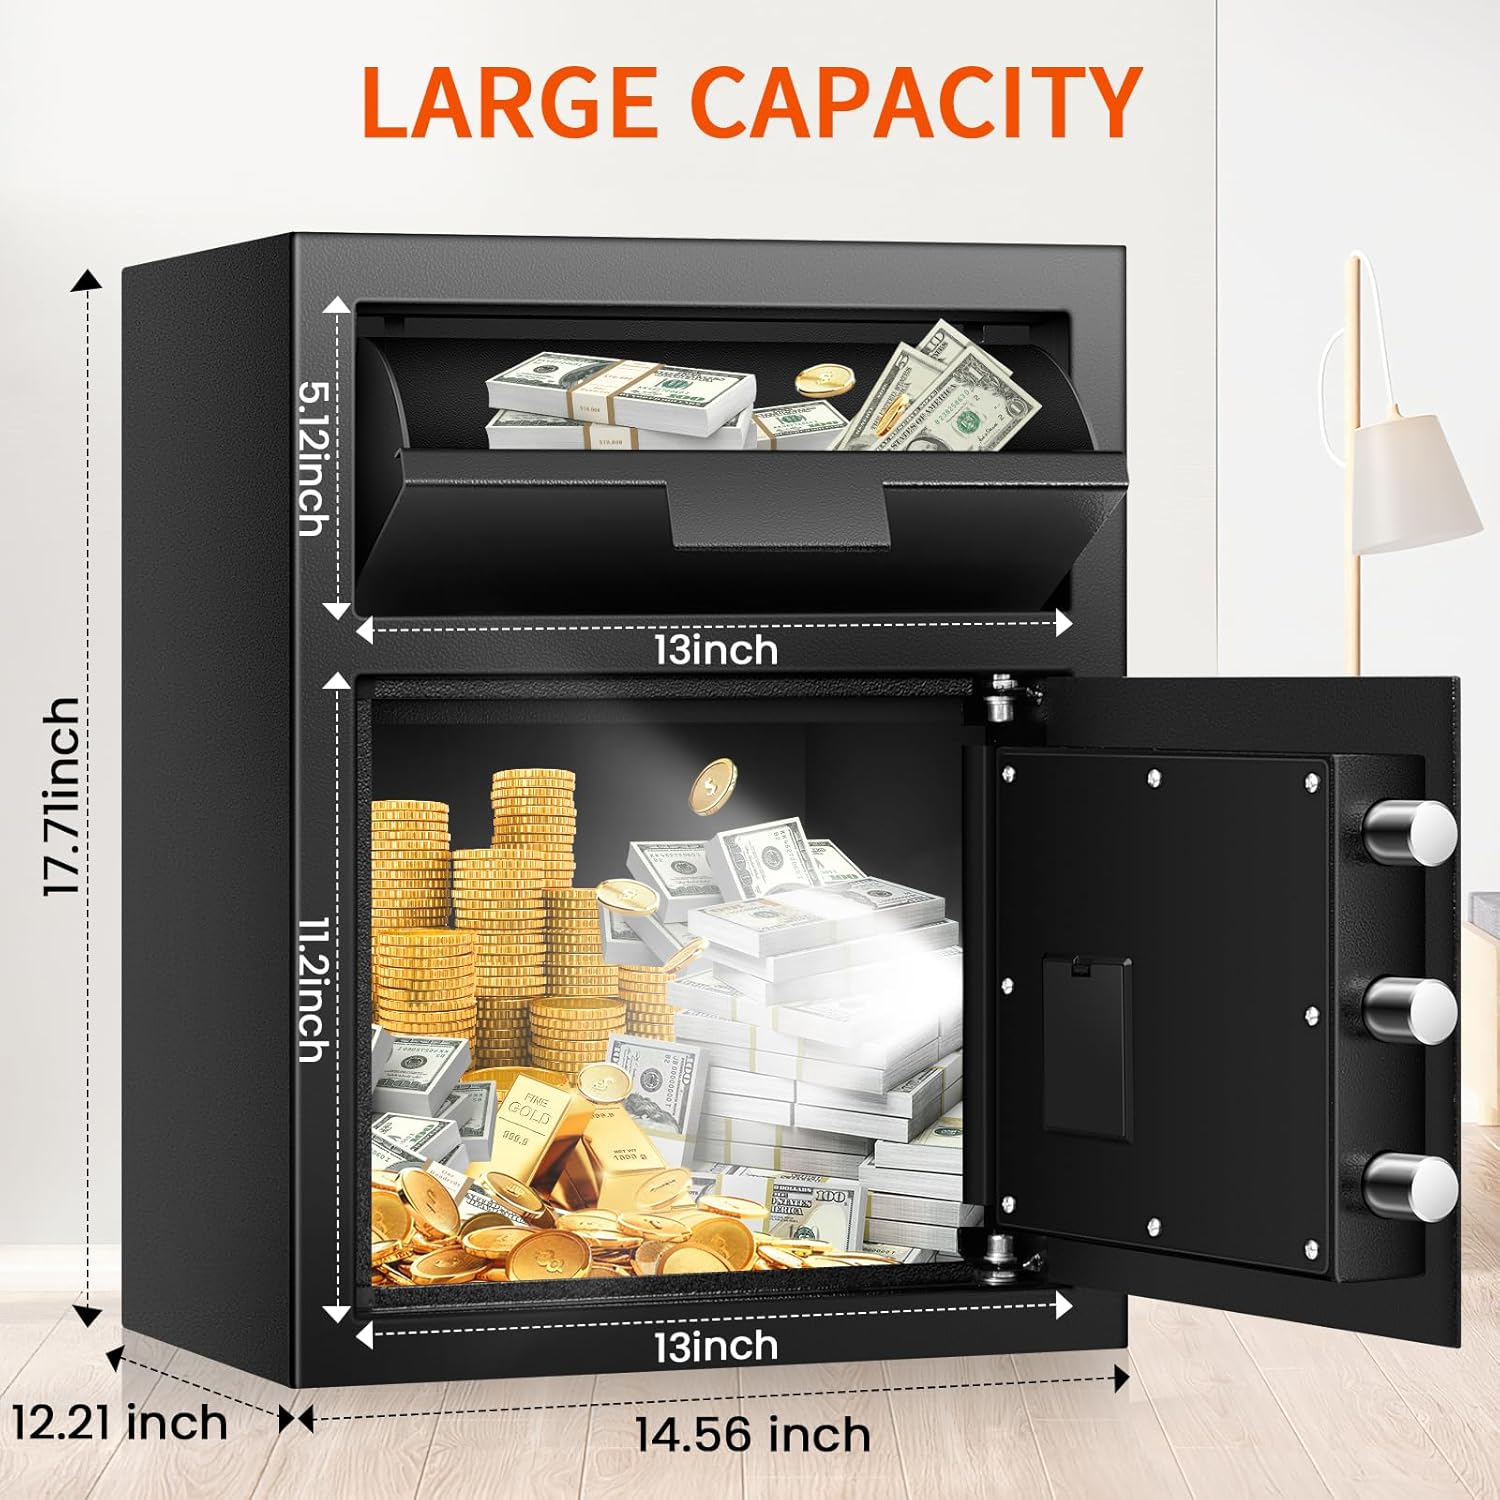
This image provides a visual representation of the Thmosz safe's external dimensions: 17.71 inches (H), 14.56 inches (W), and 12.21 inches (D). Internal dimensions for the drop slot and main compartment are also shown.
| Feature | Detail |
|---|---|
| Brand | Thmosz |
| Model Number | 45ED |
| Product Dimensions | 12.2"D x 14.6"W x 17.7"H |
| Capacity | 2.58 Cubic Feet |
| Lock Type | Electronic Combination Lock |
| Material | Alloy Steel |
| Color | Black |
| Item Weight | 35 Pounds |
| Special Feature | Anti-Theft, Drop Slot |
| Mounting Type | Floor or Wall Mount |
| Alarm | Password Error Alarm |
| Water Resistance Level | Not Water Resistant |

This close-up image showcases the anti-pry design of the Thmosz safe door, featuring three 27mm solid steel bolts and a 34mm thick door. Icons indicate its resistance to prying, drilling, and general theft attempts.
6. Warranty Information
Specific warranty details for the Thmosz 2.6 Cuft Depository Safe are typically provided with your purchase documentation. Please refer to the warranty card or contact the seller directly for information regarding coverage, terms, and conditions. In general, the manufacturer stands behind the quality of its products and encourages customers to reach out for any issues encountered after receiving their item.
7. Customer Support
For any questions, technical assistance, or support regarding your Thmosz 2.6 Cuft Depository Safe, please contact the seller or manufacturer through the platform where the product was purchased. Good communication is key to resolving any potential issues.
You may also visit the official Thmosz Store for additional product information and support: Thmosz Store on Amazon.