1. Introduction and Overview
This manual provides essential information for the safe and efficient operation of your EVJUICION 3.68KW Type 2 Portable EV Charger. Please read this manual thoroughly before using the product and retain it for future reference. This charger is designed for electric vehicles (BEV) and plug-in hybrid electric vehicles (PHEV) compatible with the IEC 62196-2 Type 2 standard.
Key Features:
- Adjustable Current: 8A / 10A / 13A / 16A
- Power Output: Up to 3.68 kW
- Programmable Charging: 0-12 hours delayed start
- Large 2.4-inch LED Screen: Real-time display of charging status, current, voltage, temperature, and time.
- Robust Safety: IP67 waterproof and dustproof rating, multiple protection mechanisms.
- Cable Length: 6 meters (other lengths may be available)
2. What's in the Box
Upon opening the package, verify that all the following items are present and in good condition:
- EVJUICION Type 2 Electric Vehicle Charger (1 unit)
- Wall Mounting Base (1 unit)
- Screws for installation (5 units)
- Portable Storage Bag (1 unit)
- User Manual (1 unit)
- Cleaning Cloth (1 unit)

Image: Diagram showing the EVJUICION Type 2 charger, wall mount, screws, portable bag, user manual, and cleaning cloth.
Video: Unboxing the EVJUICION Type 2 EV Charger.
3. Setup and Installation
Wall Mount Installation:
- Choose a suitable location near your parking area, ensuring it is within reach of your vehicle's charging port and a power outlet.
- Use the provided screws and wall plugs to securely attach the wall mounting base to a solid surface.
- Place the charger control box onto the mounted base.

Image: The EVJUICION charger control box is shown securely mounted on a wall, with the charging cable neatly coiled and stored on an adjacent hook.

Image: Visual guide demonstrating correct charger usage with the cable neatly stored on the wall mount, contrasting with incorrect usage where the charger is left on the ground.
4. Operating Instructions
Basic Charging Steps:
- Connect to Power: Plug the Schuko plug into a compatible wall socket. The LED screen on the control box will illuminate.
- Adjust Current (Optional): Press the button on the control box to cycle through available current settings (8A, 10A, 13A, 16A). Long-press to confirm your selection.
- Set Timer (Optional): If you wish to delay the charging start, press the button to enter the timer setting. Select the desired delay (0-12 hours) and long-press to confirm.
- Connect to Vehicle: Insert the Type 2 connector into your electric vehicle's charging port. Ensure a secure connection.
- Start Charging: The charger will automatically begin charging or start after the programmed delay. The LED screen will display real-time charging information.
- End Charging: Once charging is complete, or if you need to stop it, disconnect the Type 2 connector from your vehicle first, then unplug the Schuko plug from the wall socket.

Image: Infographic detailing the five steps for safe EV charging, from plugging into the socket to disconnecting after charging.
Video: Product features and operation demonstration.
5. Features and Benefits
Efficient Charging:
The EVJUICION charger offers adjustable current options (8A/10A/13A/16A) with a power output of up to 3.68 kW, providing a charging speed up to 1.6 times faster than conventional chargers. This allows you to optimize charging based on your vehicle's battery and condition, potentially extending battery life.
Programmable Charging:
Utilize the delayed start function (0 to 12 hours) to schedule charging during off-peak electricity hours, reducing your energy costs. Simply set the desired current and delay time using the control box buttons.

Image: Illustration showing a vehicle charging at night during off-peak hours, highlighting potential cost savings compared to peak hour charging.
2.4-inch LED Screen:
The large, rigid, and energy-efficient LED screen provides clear, real-time information including battery level, voltage, charging time, current, temperature, and power. This enhances monitoring and parameter adjustment convenience.

Image: Close-up of the 2.4-inch LED screen displaying charging status, current (16A), energy delivered, charging time, CP voltage, real-time temperature, real-time input voltage, and real-time power.
Robust Security and Durability:
The charger features a robust plug and thick copper cable, certified by TUV and tested for 15,000 bending cycles. The gun head has passed 15,000 pull-out tests. The ABS shell is designed to withstand a 1.5-ton car crush test and a 1.5-meter drop test, ensuring long-term durability.

Image: Visual representation of the charger's safety categories and protection against various hazards, including overcurrent, overheating, and leakage.
Multiple Protection:
CE tested, the charger provides multiple protections against overcurrent, overheating, leakage, overvoltage, undervoltage, and surges. Its IP67 waterproof and dustproof standards ensure safe operation in various environments, from -20°C to +50°C.
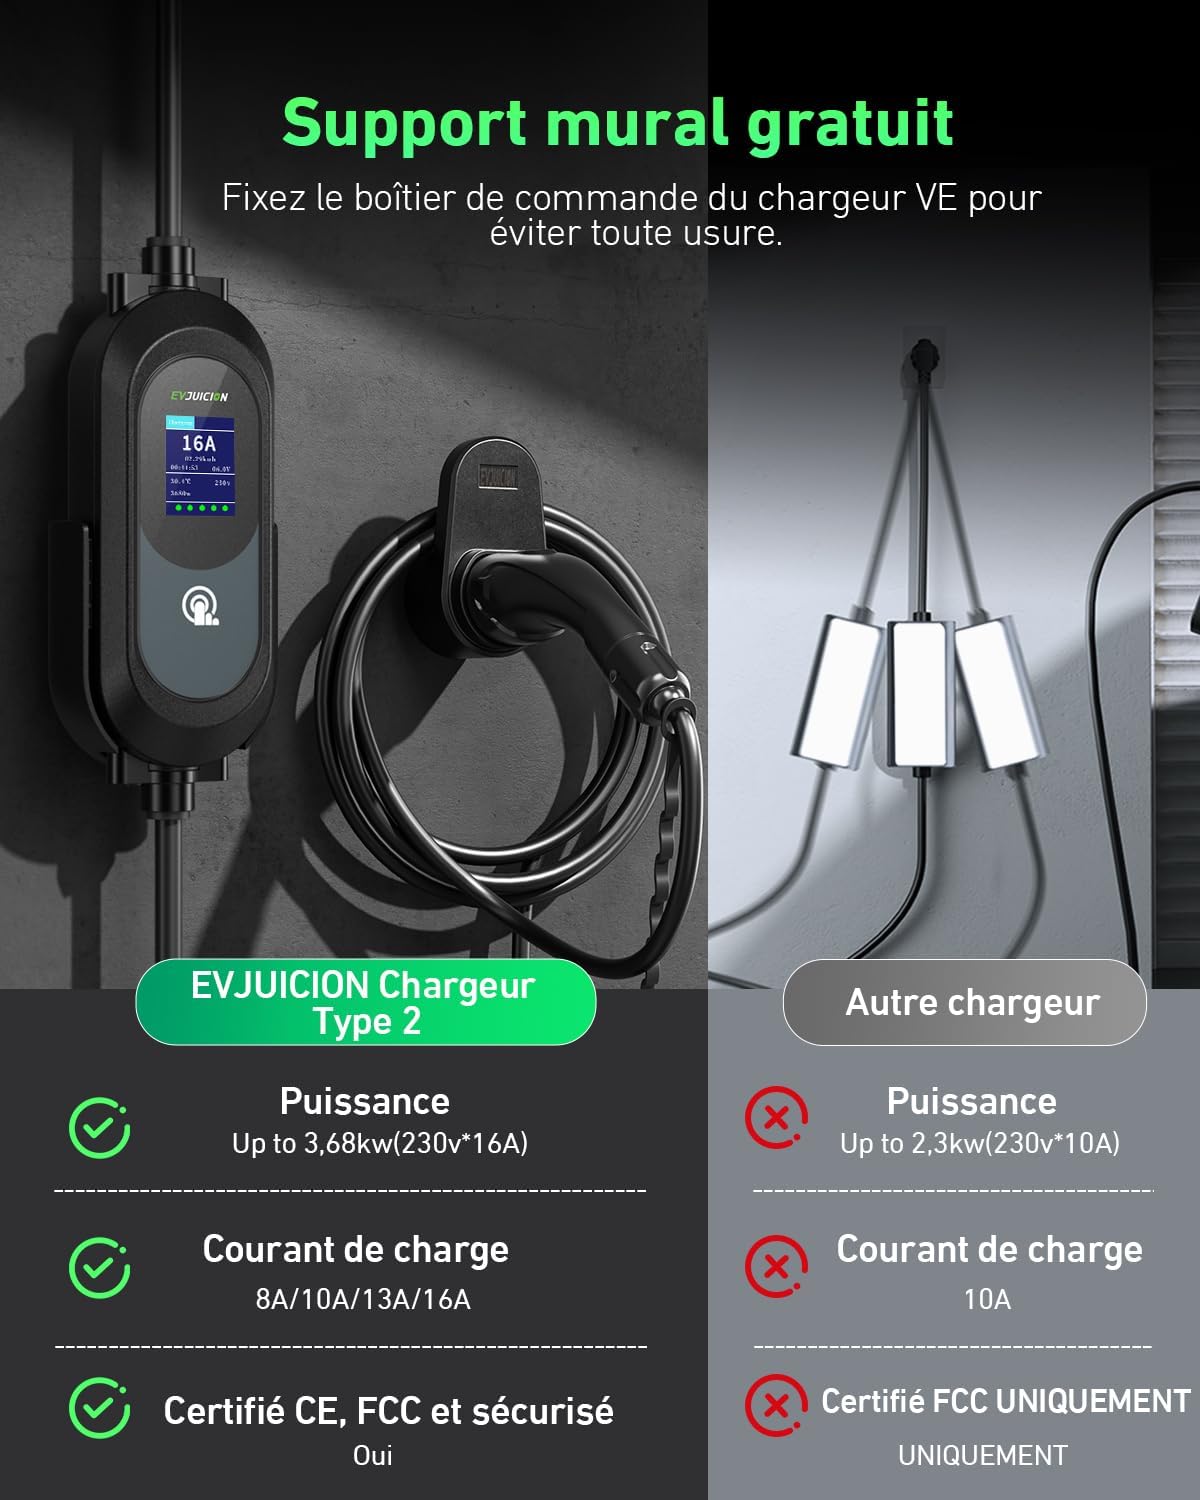
Image: The charger is shown in various weather conditions (rain, snow, sun) to illustrate its IP67 waterproof and dustproof rating, and its ability to operate in temperatures from -20°C to +50°C.
Wide Compatibility:
The Type 2 16A cable is compatible with European electric vehicles and PHEVs conforming to IEC 62196-2, including models like Peugeot 3008/508/308 PHEV, C5X, DS7, GLA, Q3, X3, ID.3, ID.4, ID.5, e-Golf, e-Up, Model Y, Model 3, Spring, Kona, Ioniq 5, e-tron, i3, i4, and many others.
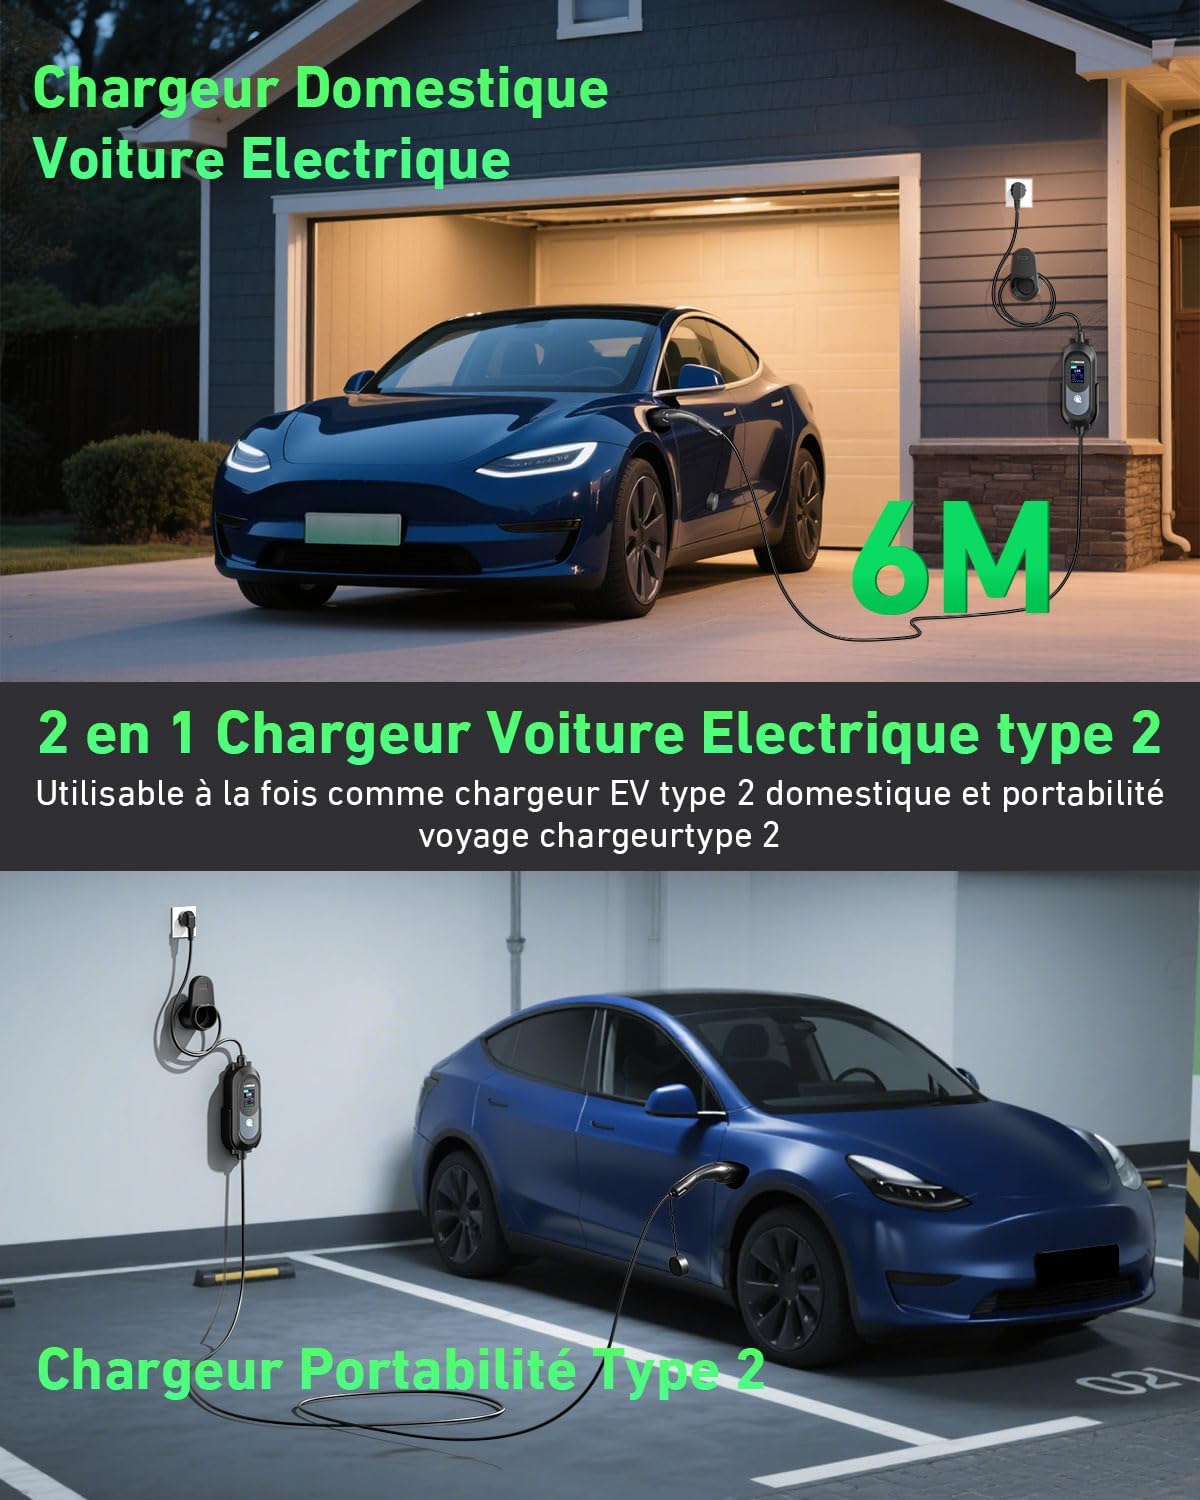
Image: A visual guide displaying the Type 2 connector and a list of compatible electric vehicle models, such as Dacia Spring, Fiat 500e, Tesla Model Y, Hyundai Kona, and more.
6. Safety Guidelines
Always prioritize safety when using the EVJUICION charger. Adhere to the following guidelines:
- Ensure the power outlet you use can support the selected charging current (e.g., for 16A charging, the outlet must be rated for 16A or higher).
- Never use the charger if the cable or connectors are damaged.
- Do not attempt to open or repair the charger yourself. Contact qualified personnel for service.
- Keep the charger and cables away from water, heat, and sharp objects.
- Always disconnect the charger from the power source when not in use or before cleaning.
- Supervise children and pets around the charging area.

Image: Safety guidelines regarding the power outlet, emphasizing that the current supported by the socket must be equal to or greater than the current selected on the EV charger.
7. Maintenance
To ensure the longevity and optimal performance of your EVJUICION charger, follow these maintenance tips:
- Regularly inspect the charging cable and connectors for any signs of wear, damage, or corrosion.
- Keep the charger unit and connectors clean and free from dust and debris. Use the provided cleaning cloth or a soft, dry cloth.
- Store the charger in its portable bag when not in use to protect it from physical damage and environmental elements.
- Avoid coiling the cable too tightly or placing heavy objects on it.

Image: The EVJUICION charger, neatly coiled, and its portable storage bag are shown in the trunk of an electric vehicle, ready for transport or storage.
8. Troubleshooting
If you encounter issues with your EVJUICION charger, refer to the following common problems and solutions:
| Problem | Possible Cause | Solution |
|---|---|---|
| Charger not powering on | No power from outlet; loose connection | Check power outlet and ensure the plug is fully inserted. Test the outlet with another device. |
| Charging not starting | Vehicle not connected properly; incorrect current setting; timer set for delayed start | Ensure Type 2 connector is fully inserted into the vehicle. Verify current setting is compatible with the vehicle/outlet. Check if a delayed start timer is active. |
| Error message on LED screen | Overcurrent, overvoltage, overheating, etc. | Refer to the specific error code displayed on the screen for detailed instructions. Disconnect the charger, wait a few minutes, and try again. If the problem persists, contact customer support. |
| Slow charging speed | Low current setting; vehicle limitations | Increase the current setting on the charger if your vehicle and power outlet support it. Consult your vehicle's manual for its maximum charging rate. |
If you cannot resolve the issue using the above steps, please contact EVJUICION customer support for assistance.
9. Specifications
| Specification | Value |
|---|---|
| Brand | Evjuicion |
| Power Output | 3.68 kW |
| Adjustable Current | 8A, 10A, 13A, 16A |
| Input Voltage | 230 Volts |
| Output Voltage | 230 Volts |
| Connector Type | Type 2 (Mennekes) |
| Cable Length | 6 Meters |
| Programmable Charging Time | 0-12 hours |
| Weight | 2.67 Kilograms |
| IP Rating | IP67 (Waterproof & Dustproof) |
| Operating Temperature | -20 °C to +50 °C |
| Certifications | CE, TUV, UKCA |
10. Warranty and Support
The EVJUICION Type 2 Portable EV Charger comes with a 1-year warranty from the date of purchase. This warranty covers manufacturing defects and malfunctions under normal use. Please retain your proof of purchase for warranty claims.
Customer Support:
For technical assistance, troubleshooting, or warranty inquiries, please contact EVJUICION customer support through the retailer where you purchased the product or visit the official EVJUICION website for contact information.