1. Introduction
This manual provides essential instructions for the FINGEREVO R36S Plus Handheld Game Console. It covers product features, setup, operation, maintenance, and technical specifications to ensure optimal use of your device. Please read this manual thoroughly before using the console.
2. Product Overview
2.1 Key Features
- High-resolution 4.0-inch 720x720 1:1 IPS screen for clear visuals.
- Equipped with a powerful RK3326 quad-core 1.5GHz Cortex-A35 chipset for efficient game performance.
- Built-in 3200mAh 3.7V LiPo battery providing approximately 3-5 hours of gameplay.
- Features an OTG-port, 3.5mm earphone port, and dual TF-card slots for expanded functionality and storage.
- Supports various game platform formats; users can download and add their own games.
2.2 Package Contents
Upon opening the package, verify that all the following items are included:
- 1x R36S Plus Handheld Game Console (Lake Blue-64GBVer.)
- 1x Portable Case by FINGEREVO
- 1x Screen Protector
- 1x USB-C Charge Cable
- 1x Instruction Manual (this document)

Image 1: The FINGEREVO R36S Plus Handheld Game Console in Lake Blue, shown with its included portable case, USB-C charging cable, and screen protector.
3. Setup
3.1 Initial Charging
- Connect the provided USB-C charge cable to the console's USB-C port.
- Connect the other end of the cable to a compatible 5V/1.5A USB power adapter (not included).
- Allow approximately 2 hours for a full charge. The charging indicator light will change to indicate a full charge.
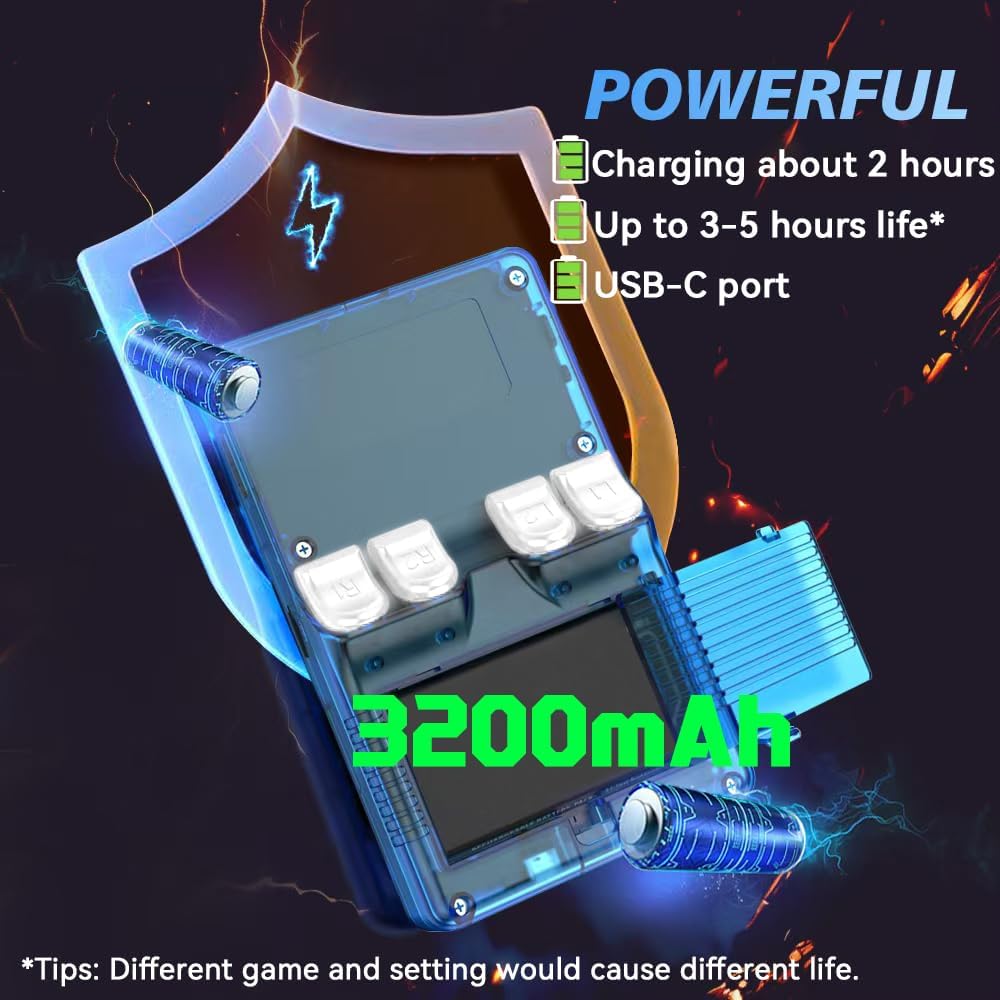
Image 2: Illustration highlighting the 3200mAh battery, USB-C charging port, and approximate charging time of 2 hours for 3-5 hours of life.
3.2 Inserting the TF/MicroSD Card
The console comes with one TF/MicroSD card pre-installed with the operating system and some games. If you wish to add more games or use a different card:
- Locate the TF/MicroSD card slot(s) on the console.
- Gently insert the TF/MicroSD card into the slot until it clicks into place. Ensure the card is oriented correctly.
- To remove, gently push the card inward until it springs out.
Note: The console supports users to download games in related formats. Please prepare your own game files.
4. Operating Instructions
4.1 Power On/Off
- To Power On: Press and hold the Power button located on the side of the console until the screen illuminates.
- To Power Off: Press and hold the Power button until a power-off menu appears on the screen. Select "Shut Down" or "Power Off" to safely turn off the device. Avoid simply holding the power button until it forces off, as this can lead to data corruption.
4.2 Basic Controls
The R36S Plus features standard handheld gaming controls:
- D-Pad: For directional movement in games and menu navigation.
- Analog Sticks: For 360-degree movement in supported games.
- Action Buttons (A, B, X, Y): For in-game actions and menu selections.
- START/SELECT Buttons: For pausing games, accessing in-game menus, or making selections.
- Shoulder Buttons (L1, L2, R1, R2): Located on the top of the console for additional in-game controls.

Image 3: A user holding the R36S Plus console, demonstrating the ergonomic design and button placement during gameplay.
4.3 Navigating the Interface
The console runs on a Linux-based operating system. Use the D-Pad or analog sticks to navigate through game libraries and system settings. The A button typically confirms selections, while the B button usually cancels or goes back.
4.4 Loading and Playing Games
- Ensure your game files are correctly placed on the TF/MicroSD card in the designated folders for each system.
- From the main menu, select the desired game system (e.g., PSP, PS1, GBA).
- Browse the list of available games and select the one you wish to play.
- Press the A button to launch the game.
Important Note: This console does not include Nin10do-games. Users are responsible for providing their own game ROMs in compatible formats.
5. Maintenance
5.1 Cleaning the Console
- Use a soft, dry, lint-free cloth to wipe the console's exterior.
- For the screen, use a microfiber cloth specifically designed for electronics. Avoid harsh chemicals or abrasive materials.
- Do not allow liquids to enter any openings.
5.2 Battery Care
- To prolong battery life, avoid fully discharging the battery frequently.
- Store the console in a cool, dry place when not in use for extended periods.
- Use only the provided USB-C cable and a compatible 5V/1.5A power adapter for charging.
5.3 Screen Protector Application
A screen protector is included to prevent scratches. Follow these general steps for application:
- Clean the console screen thoroughly with a microfiber cloth to remove dust and smudges.
- Carefully peel off the protective film from the screen protector.
- Align the screen protector with the console's screen, ensuring it is centered.
- Gently lay the protector onto the screen, pressing out any air bubbles from the center outwards.
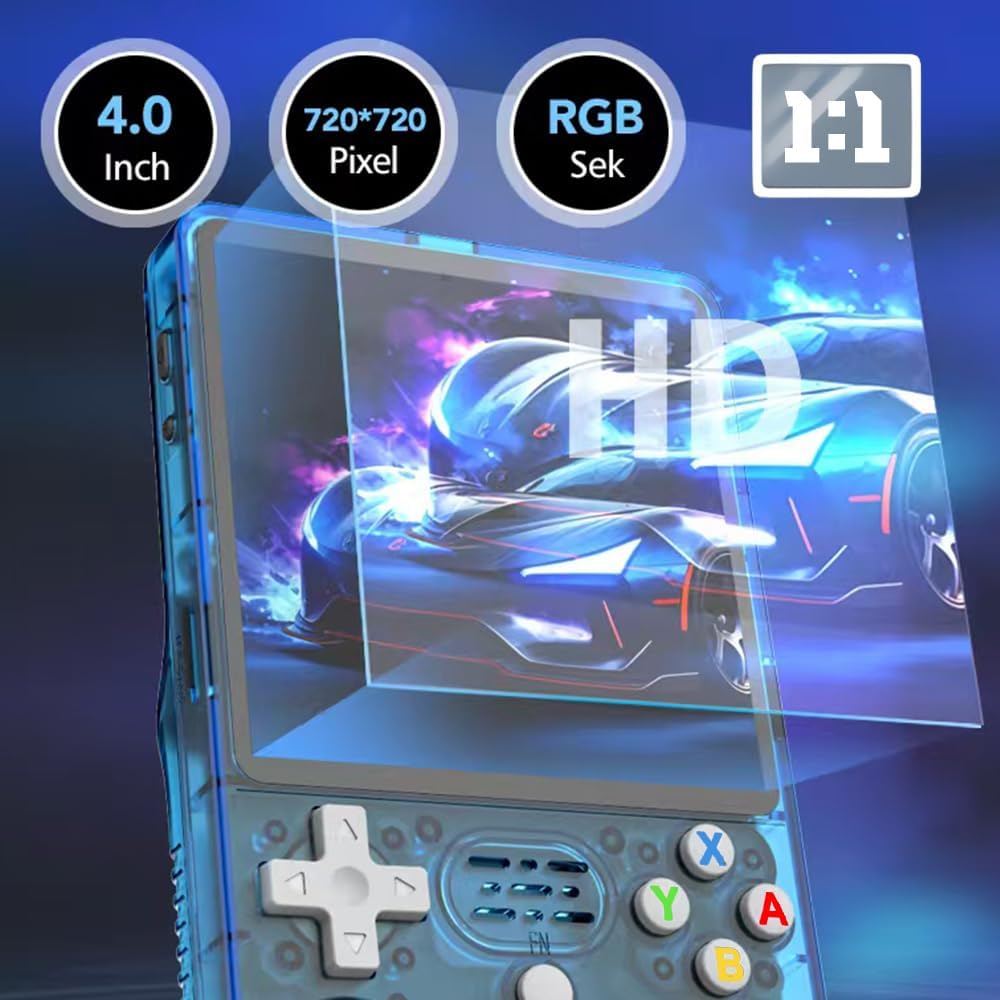
Image 4: Close-up of the R36S Plus screen, highlighting its 4.0-inch, 720x720 pixel IPS display and the application of a screen protector.
6. Troubleshooting
- Console does not power on:
- Ensure the battery is sufficiently charged. Connect the console to a power source and allow it to charge for at least 30 minutes before attempting to power on again.
- Games are not loading or performing poorly:
- Verify that the game files are in the correct format and placed in the appropriate directories on the TF/MicroSD card.
- Some advanced systems (e.g., Dreamcast, PSP) may experience performance limitations due to hardware constraints. Adjust in-game settings or emulator settings if available.
- Ensure the TF/MicroSD card is properly inserted.
- Short battery life:
- Battery life can vary based on game intensity, screen brightness, and volume settings. Reduce screen brightness and volume to extend playtime. Ensure the console is fully charged before use.
- No sound:
- Check the volume settings on the console. If using headphones, ensure they are properly plugged into the 3.5mm jack.
7. Specifications

Image 5: The R36S Plus console, emphasizing the RK3326 processor and various ports like USB-C and 3.5mm audio jack.
| Feature | Detail |
|---|---|
| Model Name | R36S Plus |
| Item Model Number | W8SE6C48491OCI3UB146Z |
| Brand | FINGEREVO |
| Screen | 4.0-inch 1:1 IPS full viewing angle, OCA full lamination 720*720 |
| CPU | RK3326 quad-core 1.5GHz Cortex-A35 |
| GPU | Mali-G31MP2 |
| RAM | 1GB |
| Storage | 64GB TF/MicroSD (one card version) |
| Battery | Li-polymer 3200mAh 3.7V |
| Battery Life | Approx. 3-5 hours |
| Charging | 5V/1.5A, approx. 2 hours for full charge |
| Ports | USB-C (charging/OTG), 3.5mm audio jack, dual TF card slots |
| Console Size | 142 x 82 x 28 mm (5.6 x 3.2 x 1.1 inches) |
| Console Weight | 0.22 kg (0.49 lb) |
| Material | Plastic |
| UPC | 784227930912 |
| ASIN | B0F21F83FD |
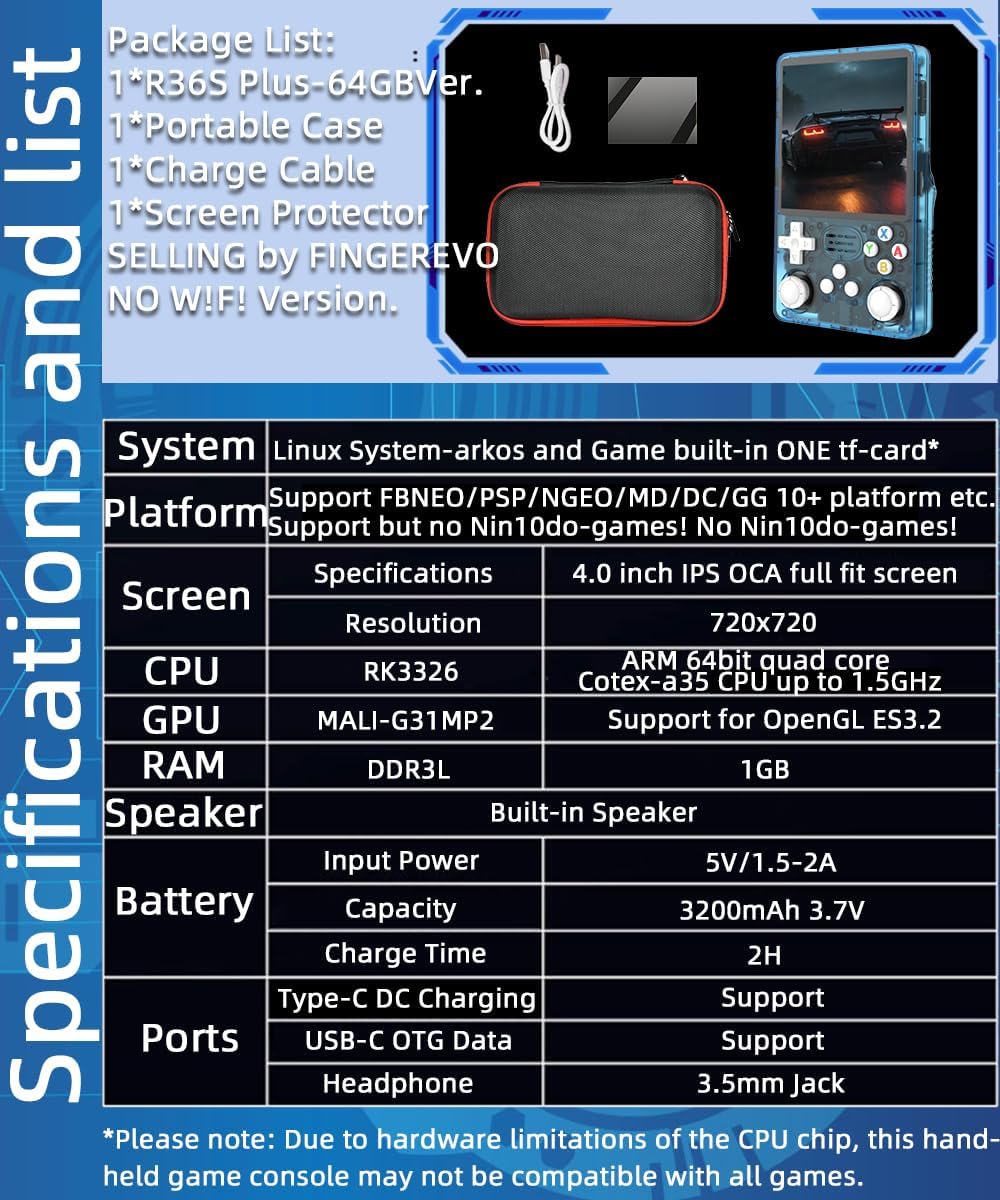
Image 6: A visual representation of the R36S Plus specifications, including system, platform support, screen, CPU, GPU, RAM, speaker, battery, charge time, and ports.
8. Warranty and Support
For warranty information or technical support, please contact FINGEREVO directly through their official channels or the retailer from whom the product was purchased. Keep your proof of purchase for warranty claims.
You can visit the FINGEREVO Store on Amazon for more information: FINGEREVO Amazon Store.