
1. Introduction
This manual provides detailed instructions for the installation, operation, and maintenance of your CAMECHO Android Car Radio. This 9-inch touch display unit is designed specifically for BMW 3 Series E46 models manufactured between 1999 and 2005, featuring an 8-core processor, 6GB RAM, and 128GB ROM. It integrates advanced functionalities such as wireless Carplay, Android Auto, GPS navigation, Bluetooth connectivity, FM/RDS radio, and support for an AHD rearview camera.
Please read this manual thoroughly before installation and use to ensure proper function and to maximize your experience with the device.
2. Setup and Installation
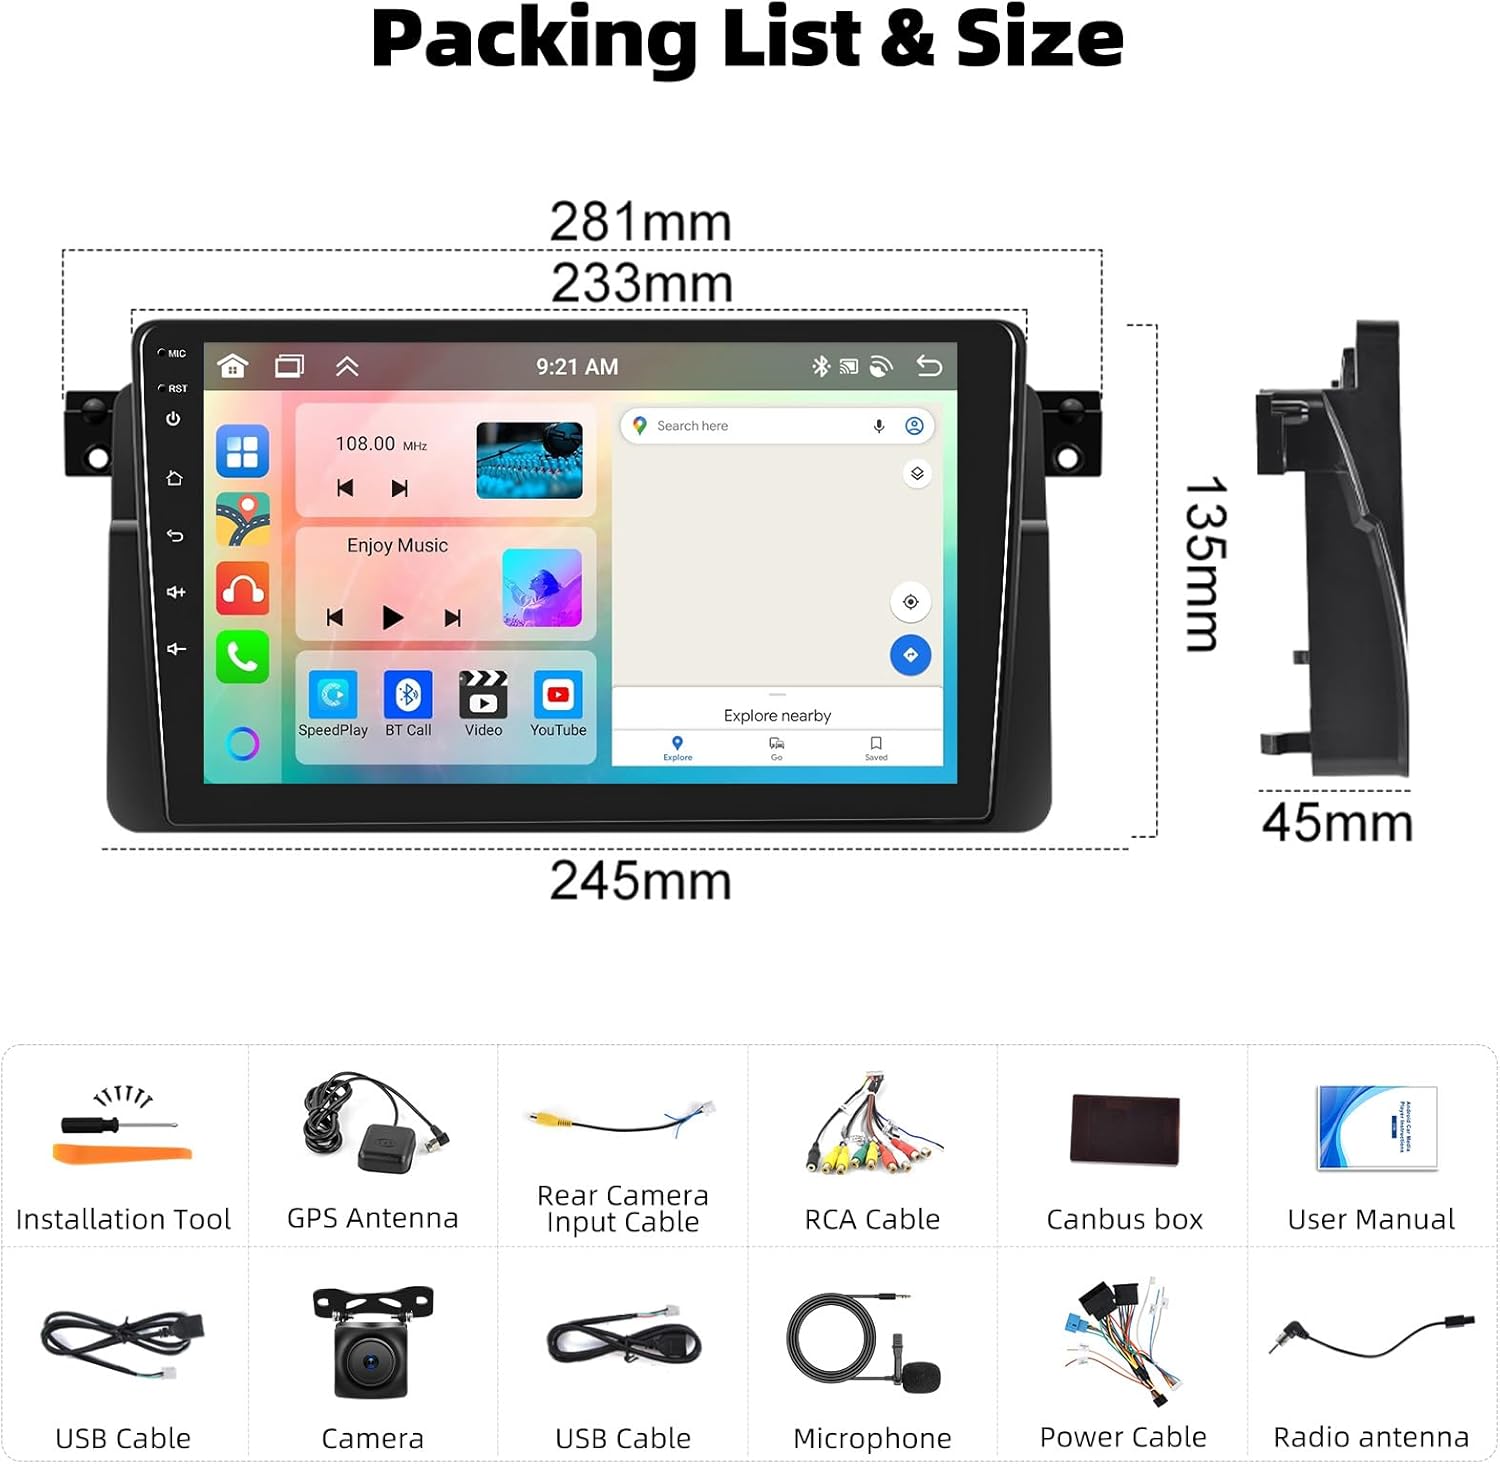
2.1 Package Contents
Verify that all components are present in the package:
- Main Head Unit (9-inch Touch Stereo)
- Installation Tool
- GPS Antenna
- Rear Camera Input Cable
- RCA Cable
- Canbus Box
- User Manual
- USB Cables (x2)
- Camera (AHD Rearview Camera)
- Microphone
- Power Cable
- Radio Antenna
2.2 Vehicle Compatibility
This car radio is designed for BMW 3 Series E46 models from 1999 to 2005. If you are unsure about compatibility, please compare your car's central console and the back of your original CD unit with the provided images or consult a professional installer.

2.3 Rearview Camera Wiring
Follow these steps to correctly wire the rearview camera:
- Red Cable 1 and 3: Connect to the positive power supply of the car's reverse light.
- Black Cable 2: Connect to the negative power supply of the car's reverse light.
- Black Cable 4: Connect to the reverse trigger wire on the power harness.

3. Operating Instructions
3.1 Carplay & Android Auto & Mirror Link
The unit supports both wired and wireless connections for Carplay and Android Auto. Mirror Link functionality is also available.
- Carplay & Android Auto: Connect your iPhone or Android phone to access navigation, music, calls, and more via voice control or touch.
- Mirror Link: Mirror your phone's screen onto the 9-inch display for enhanced viewing of apps and content.


3.2 Bluetooth Connectivity
The integrated Bluetooth module allows for hands-free calling, phonebook synchronization, and audio streaming from your mobile device.

3.3 FM/RDS Radio
The high-quality FM/RDS radio supports storing up to 30 stations. RDS (Radio Data System) provides additional information such as station name and program type.
Refer to Figure 3.2 for the FM/RDS interface.
3.4 GPS Navigation
Utilize the built-in GPS module for accurate navigation. The system supports both online and offline maps, and provides voice guidance and real-time traffic information when connected to the internet.

3.5 WiFi Connection
Connect to the internet via a WiFi hotspot or tethering from your smartphone. This enables online map usage, app downloads, and streaming of TV shows, music, or live content.
Refer to Figure 3.4 for the WiFi connection interface.
3.6 Digital Sound Processor (DSP)
The unit features a DSP with 32EQ (32-band equalizer) for advanced audio tuning. Adjust frequency, AE (acoustic environment), and other sound parameters to optimize your audio experience.

3.7 Steering Wheel Control (SWC)
The unit supports steering wheel controls for safer operation. You can configure the buttons within the settings menu to control various functions of the car radio.
- Without CANBUS Decoder: Connect the plugs or steering wheel control wires (Key1/Key2) in the power cable to the corresponding port or wire of your original car. Then, go to "Steering Wheel Key" manual match in settings to activate the button function.
- With CANBUS Decoder: Connect the CANBUS before powering on the machine. Then, follow this path: Apps -> Car Settings -> Factory Settings (password: 1234) -> Protocol settings -> Choose Canbus Brand Name -> Choose Car's style to make SWC work properly. First select the brand of the CANBUS decoder, then select the matching model and year according to the actual situation.

3.8 Backup Camera
The included AHD rearview camera provides an ultra-wide viewing angle, is waterproof, and offers HD night vision for improved safety when reversing.
Refer to Section 2.3 for wiring instructions.

3.9 Split Screen Functionality
The split-screen feature allows you to run two applications simultaneously on the 9-inch display, such as navigation and music playback.

3.10 Optional Features
The unit may support additional optional features such as Intelligent Voice control, Weather Forecast display, and Network Radio, depending on software version and internet connectivity.

4. Maintenance
- Cleaning: Use a soft, dry cloth to clean the screen and unit exterior. Avoid abrasive cleaners or solvents.
- Software Updates: Periodically check for available software updates to ensure optimal performance and access to new features. Updates can typically be found through the system settings or the manufacturer's website.
- Environmental Conditions: Avoid exposing the unit to extreme temperatures, direct sunlight for prolonged periods, or excessive moisture.
5. Troubleshooting
5.1 Radio Does Not Turn Off
If the radio remains on even after the car is switched off, the following steps may help:
- Step 1: Cut the Wiring Harness. Locate the 5th wire from the B+ wire harness (the wire at position 9 in the diagram) and cut the ACC wire.
If this method does not resolve the problem, please provide the following information to customer support for further assistance:
- A video demonstrating the radio malfunction.
- Detailed model/version specifications of the device.

6. Specifications
| Feature | Detail |
|---|---|
| Brand | CAMECHO |
| Model Number | A7200A3533H1MI2-AM39DE-CAM |
| Operating System | Android 15 |
| Processor | 8 Core |
| RAM | 6GB |
| ROM (Internal Storage) | 128GB |
| Display | 9-inch 2.5D IPS Touchscreen |
| Connectivity | Bluetooth, HDMI, USB, WiFi |
| Special Features | Carplay (Wireless), Android Auto (Wireless), Mirror Link, 59 UI Desktop Themes, 3 Split Screen, Steering Wheel Control, 32EQ DSP, GPS Navigation, FM/RDS Radio, Double USB port |
| Audio Output Mode | Stereo, Surround (2.1 channels) |
| Video Encoding | H.264, H.265/HEVC |
| Compatible Devices | Smartphones |
| Included Accessories | Radio + Accessories (as listed in Section 2.1) |

7. Warranty and Support
CAMECHO provides comprehensive support for its products:
- Warranty: 24 Months Warranty.
- Replacement Policy: 30 Day Replacement.
- Online Response: 18 Hours Online Response for inquiries.
- Technical Support: Lifetime Technical Support.
For any technical assistance or warranty claims, please contact customer support via email: CAMECHOVIP@126.com.