
1. Safety Information
Please read all safety instructions carefully before assembly and use. Keep this manual for future reference.
- Assembly Kit Safety: Always keep the assembly kit away from children during assembly due to small parts and sharp objects.
- Anti-Tip Device: To prevent tipping and potential injuries, ensure the cabinet is securely mounted to the wall using the included anti-tip device. This is crucial for household safety, especially in homes with children or pets.
- Weight Distribution: Distribute weight evenly across shelves and drawers. Avoid placing heavy items on top shelves or overloading any single section.
- Stable Surface: Place the cabinet on a flat, level, and stable surface to prevent wobbling or instability.
2. Product Overview
The GarveeHome 67-inch Tall Kitchen Hutch Storage Cabinet is a versatile freestanding unit designed to enhance storage and organization in various rooms. It features multiple storage compartments and integrated LED lighting.
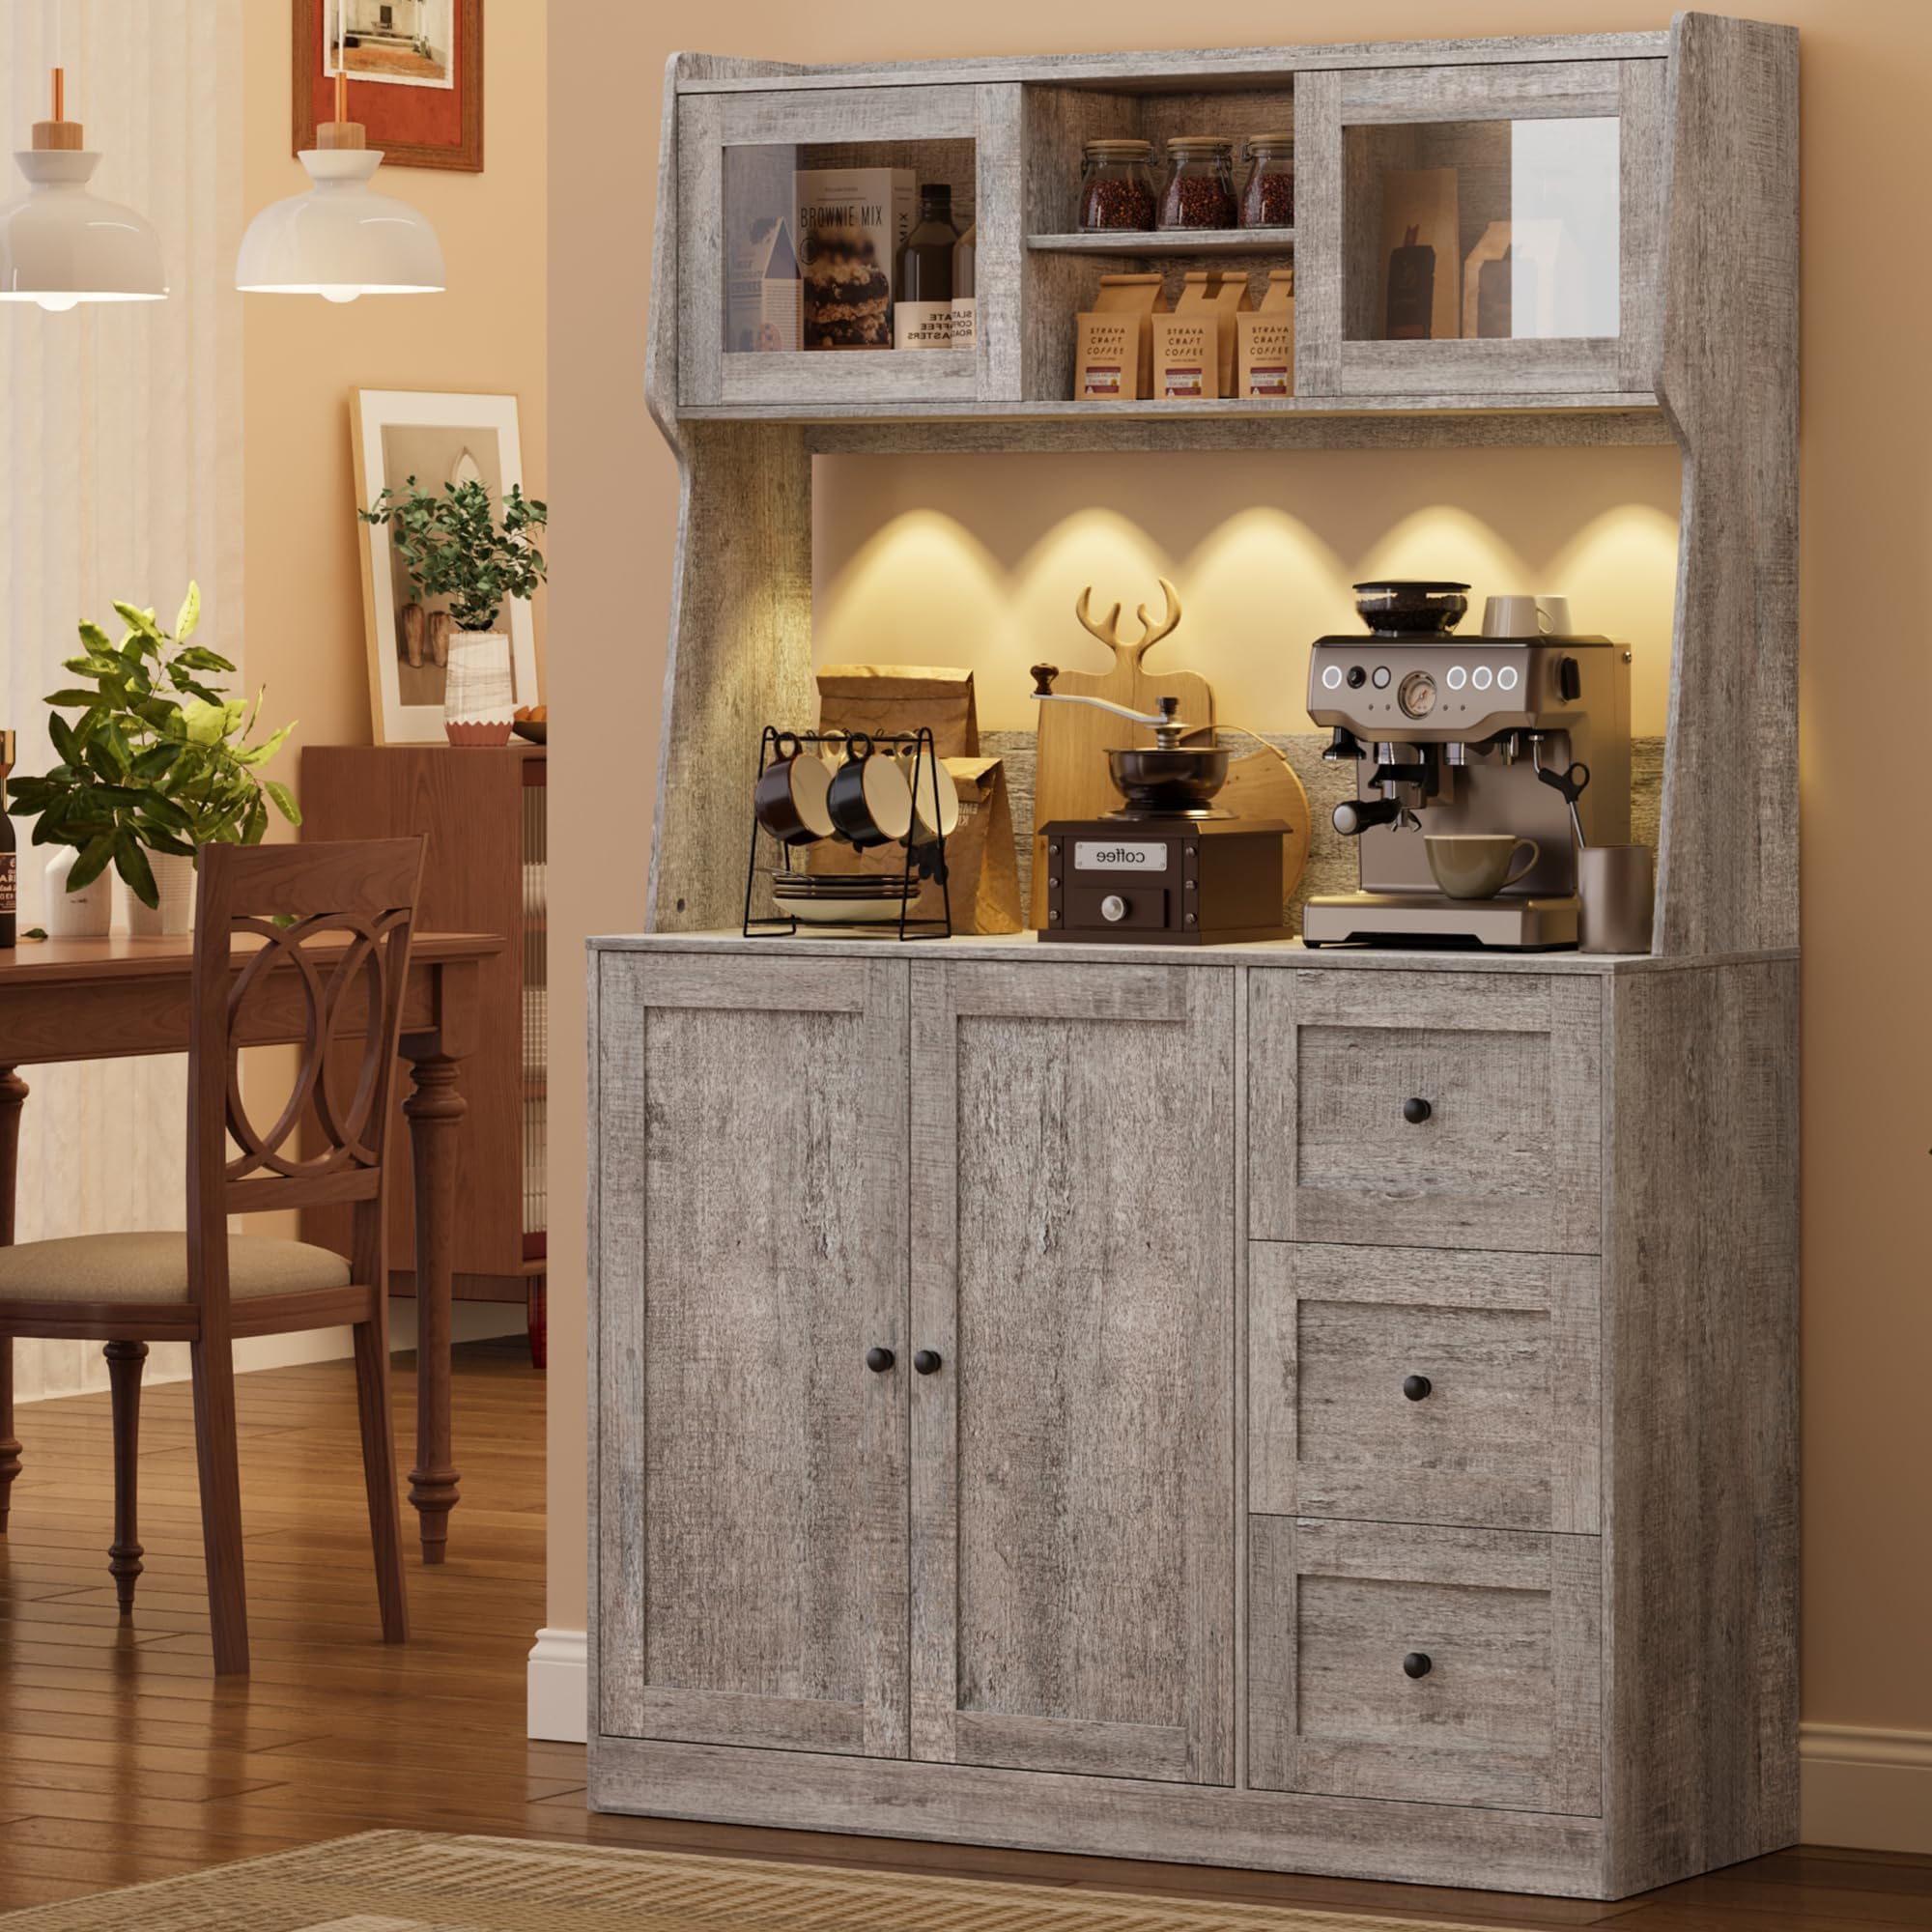
Image 2.1: Fully assembled GarveeHome 67-inch Tall Kitchen Hutch Storage Cabinet in Grey.
Key Features:
- Top Glass-View Cabinet: Features double glass doors and 2-tier open shelves for displaying items.
- Middle Countertop: A spacious open worktop suitable for kitchen appliances like coffee makers or microwaves.
- Three Drawers: Provides convenient storage for smaller items and utensils.
- Enclosed Storage Cabinets: Lower cabinets offer concealed storage for larger items.
- Integrated LED Lights: Energy-efficient lights enhance visibility and ambiance.
- Sturdy Construction: Made from thickened PB board for durability and stability.
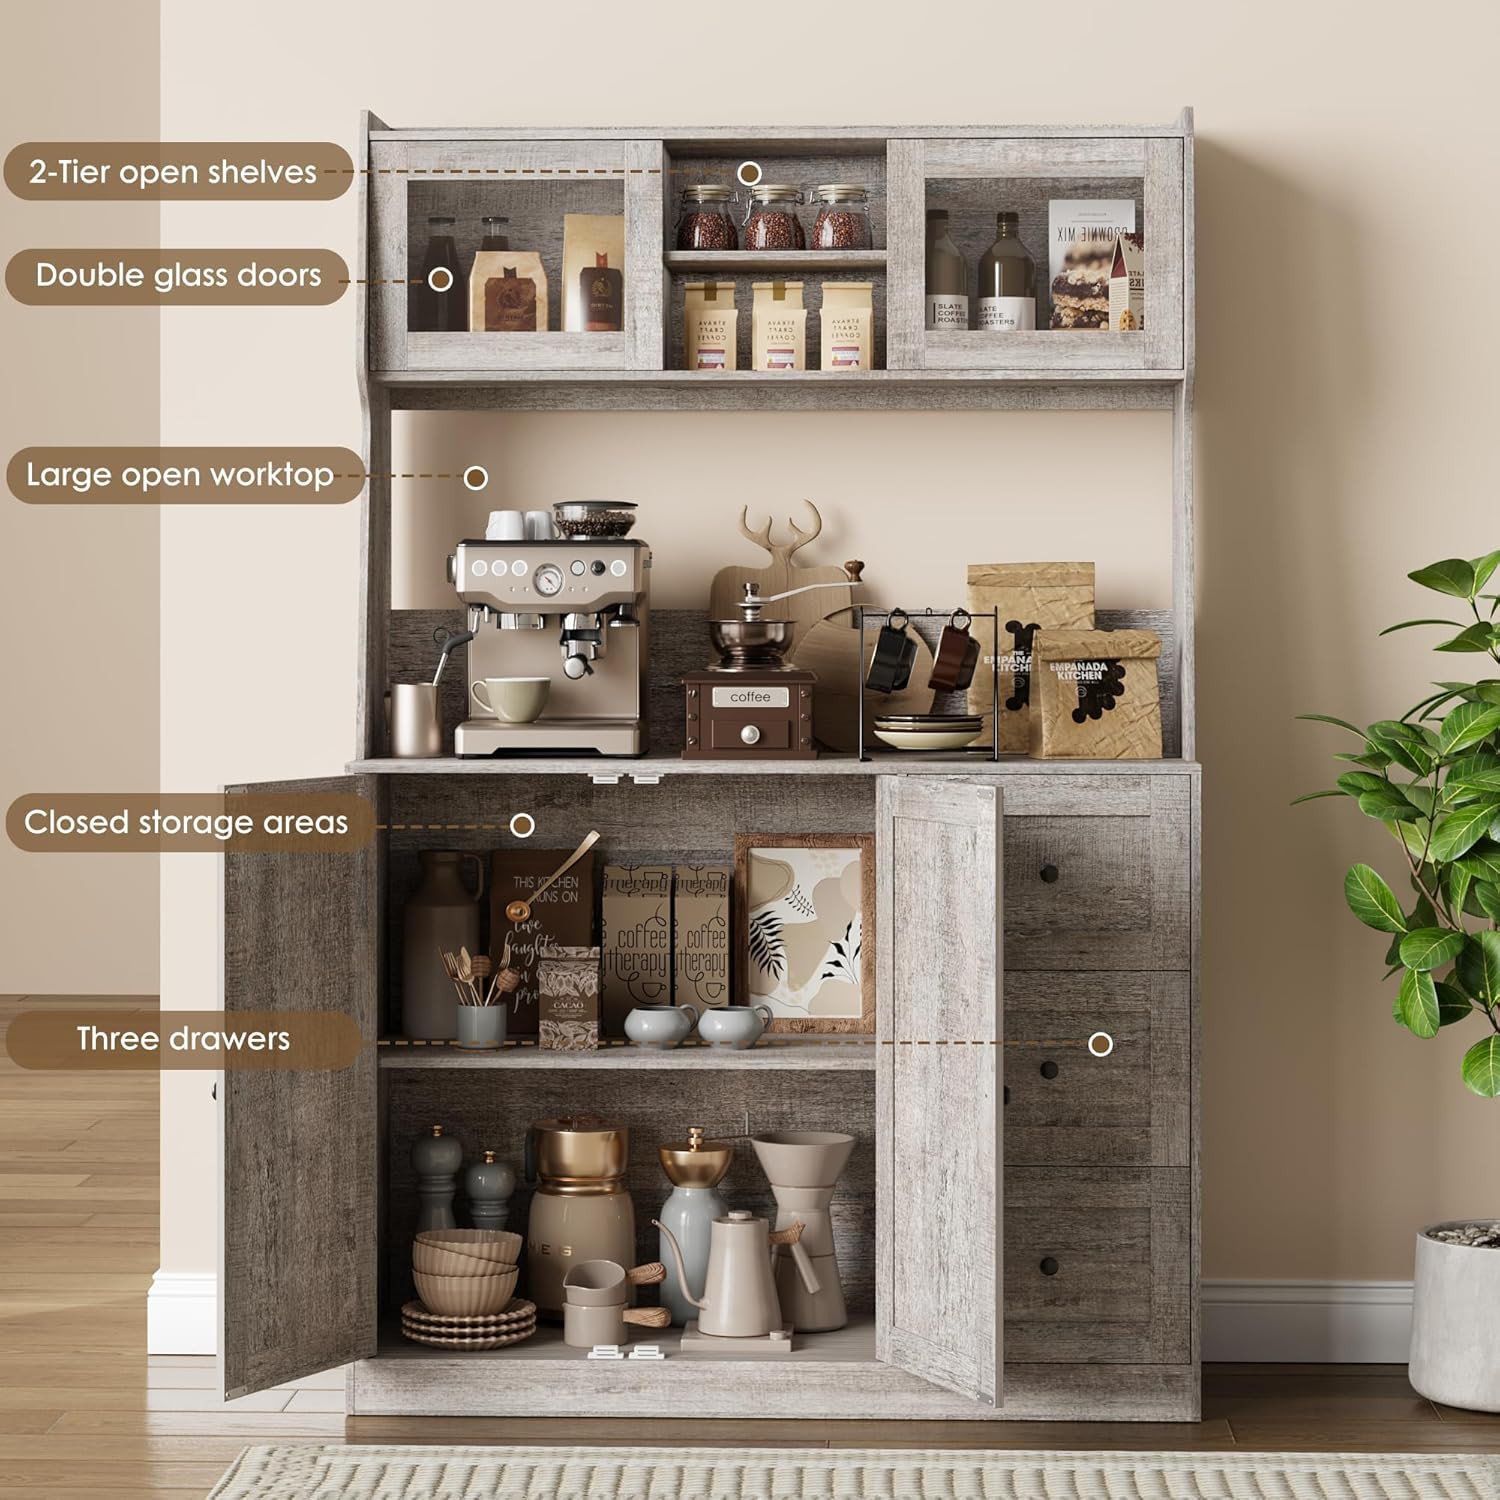
Image 2.2: Overview of the cabinet's labeled features, including glass doors, open shelves, large open worktop, closed storage areas, and three drawers.
3. Setup and Assembly
Assembly is required for this product. Please follow the included instructions carefully. It is recommended to have two people for assembly.
Before You Begin:
- Unpack and Verify: Carefully unpack all components and lay them out on a clean, soft surface (e.g., a blanket or cardboard) to prevent scratches. Verify that all parts and hardware listed in the instruction manual are present.
- Tools Required: Ensure you have the necessary tools for assembly (e.g., screwdriver, hammer).
- Read Instructions: Read the entire assembly manual before starting to familiarize yourself with the steps.
Assembly Steps:
- Follow the step-by-step diagrams and instructions provided in the separate assembly guide. Each part is labeled for easy identification.
- Pay close attention to the orientation of each piece as indicated in the diagrams.
- Secure all fasteners tightly, but do not overtighten to avoid damaging the material.
- Install Anti-Tip Device: Once the cabinet is fully assembled and in its desired location, securely attach the anti-tip device to the wall according to the instructions. This step is critical for safety.

Image 3.1: Proper installation of the anti-tip device to secure the cabinet to the wall.
4. Operating Instructions
Using the Storage Compartments:
- Doors: Open and close cabinet doors gently. Ensure they latch properly to keep contents secure.
- Drawers: Pull drawers out smoothly. Avoid forcing them if they feel stiff. Ensure items are placed within the drawer's capacity.

Image 4.1: The three drawers, shown open, providing storage for various kitchen items.

Image 4.2: The lower closed storage area, with doors open, revealing internal shelving for larger items.

Image 4.3: The upper glass-view cabinet, with doors open, showcasing items on the shelves.
Adjustable Shelves:
Some shelves within the cabinet are adjustable to three different heights. To adjust a shelf, remove all items, lift the shelf, and reposition the support pins to the desired height before placing the shelf back.

Image 4.4: Details of the tempered glass door and an adjustable shelf, highlighting its repositioning capability.
LED Lights:
The integrated LED lights are designed to provide warm illumination. Locate the power switch, typically a small button or touch sensor, to turn the lights on or off. Ensure the power adapter is securely plugged into a functional outlet.
5. Maintenance
- Cleaning: Wipe surfaces with a soft, damp cloth. Avoid abrasive cleaners or harsh chemicals that could damage the finish.
- Spills: Clean up spills immediately to prevent staining or damage to the engineered wood.
- Hardware: Periodically check all screws and fasteners to ensure they remain tight. Retighten if necessary.
- LED Lights: If LED lights stop working, check the power connection. If issues persist, contact customer support.
6. Troubleshooting
| Problem | Possible Cause | Solution |
|---|---|---|
| Cabinet feels wobbly or unstable. | Not on a level surface; fasteners loose; anti-tip device not installed. | Move to a level surface. Check and tighten all fasteners. Install the anti-tip device securely to the wall. |
| Drawer does not slide smoothly. | Drawer runners misaligned; obstruction in the runner. | Ensure drawer runners are correctly installed and free of debris. Re-check assembly steps for drawer installation. |
| Cabinet door is crooked or does not close properly. | Hinges misaligned; assembly error. | Adjust hinges as per assembly instructions. If a hole is misaligned, a washer might help to even it out (as noted by some users). |
| LED lights are not working. | Power adapter unplugged; faulty connection; switch issue. | Check if the power adapter is securely plugged into a working outlet. Ensure the light switch is functioning. If problems persist, contact customer support. |
| Missing parts during assembly. | Packaging not thoroughly checked. | Double-check all packaging materials. If parts are genuinely missing, contact GarveeHome customer support immediately. |
7. Specifications

Image 7.1: Detailed dimensions of the GarveeHome 67-inch Tall Kitchen Hutch Storage Cabinet.
| Feature | Detail |
|---|---|
| Brand | GarveeHome |
| Model Name | Kitchen Pantry Cabinet |
| Model Number | FNXT-GCBGGREYWI54T |
| Color | Grey |
| Material | Engineered Wood |
| Product Dimensions (D x W x H) | 15.4" x 43.5" x 67" |
| Item Weight | 114.2 Pounds |
| Special Feature | Prelit (Integrated LED Lights) |
| Mounting Type | Floor Mount |
| Installation Type | Freestanding |
| Number of Shelves | 3 (adjustable) |
| Included Components | Drawers, LED Lights, Anti-tip device |
| Assembly Required | Yes |
| UPC | 199108729323 |
8. Warranty and Support
For warranty information or customer support, please refer to the documentation included with your purchase or contact GarveeHome directly through their official website or the retailer where the product was purchased.
If you encounter any issues or have questions regarding assembly, operation, or maintenance, please do not hesitate to reach out to GarveeHome customer service for assistance.