Introduction
Thank you for choosing the TRIUMPHKEY Vanity with LED Light Mirror and Storage Cabinet. This manual provides essential information for the safe assembly, operation, and maintenance of your new vanity. Please read these instructions thoroughly before beginning assembly or use to ensure proper function and longevity of the product.
Safety Information
- Always follow the assembly instructions carefully to avoid injury.
- Ensure all screws and fasteners are securely tightened before use.
- Do not overload drawers or shelves to prevent tipping or damage.
- Keep electrical components (LED lights) away from water.
- Place the vanity on a flat, stable surface.
Package Contents
Before assembly, verify that all components are present and undamaged. The package should include:
- Vanity Desk Frame
- LED Light Mirror Unit
- Drawers (4 units)
- Storage Shelves
- Assembly Hardware (screws, dowels, etc.)
- Assembly Instructions Manual
- Stool (if included in your specific package)
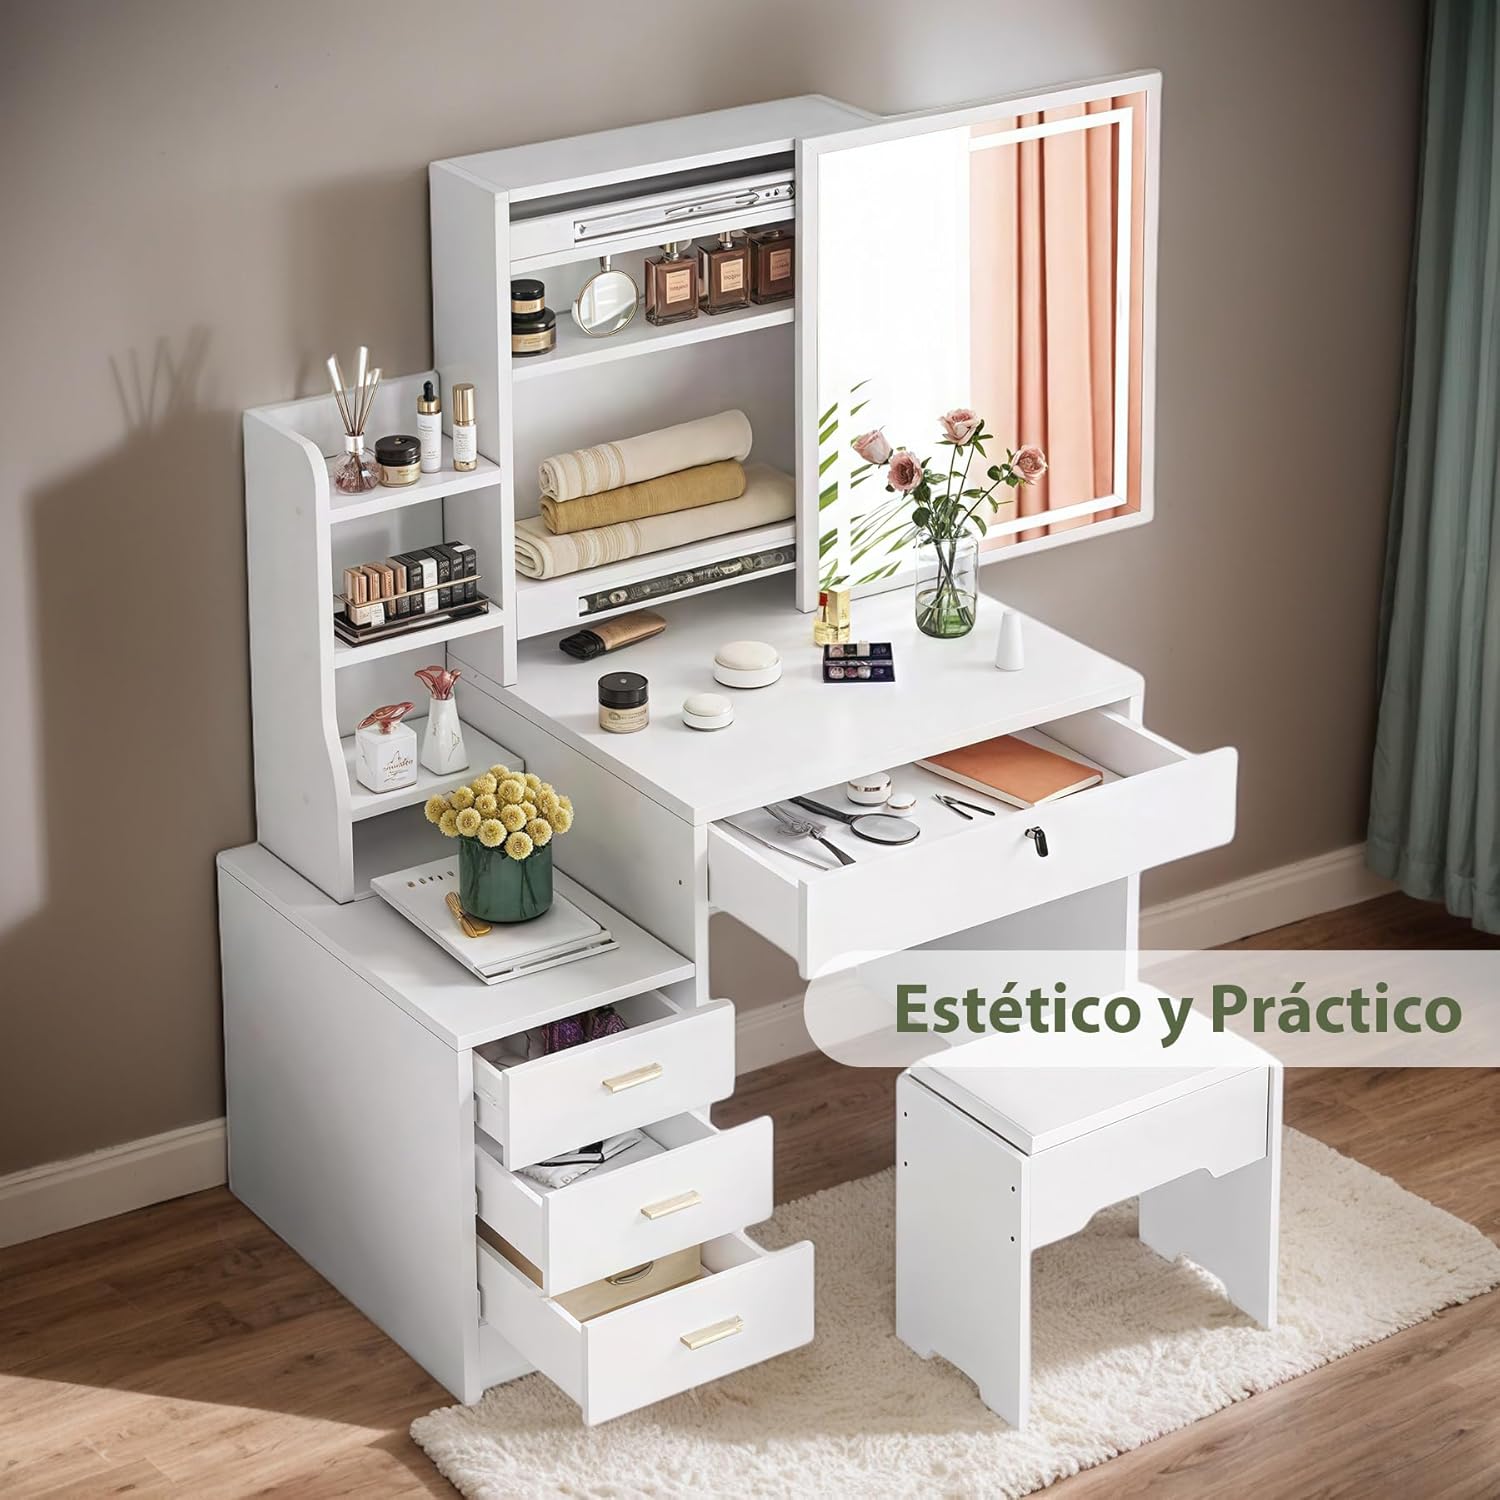
Image: Overview of the TRIUMPHKEY Vanity with LED Light Mirror, storage, and accompanying stool.
Setup and Assembly
Assembly is required for this product. Please follow the provided assembly instructions carefully. While instructions are included, note that some components may not be individually marked, requiring careful identification based on diagrams.
- Unpack Components: Carefully remove all parts from the packaging and lay them out on a clean, soft surface to prevent scratches.
- Identify Parts: Refer to the assembly diagram in the separate instruction manual to identify each piece. Pay close attention to shapes and sizes as parts may not be numbered.
- Assemble Frame: Begin by assembling the main desk frame according to the diagrams. Ensure all connections are secure.
- Install Drawers: Assemble the four drawers and install them into their respective slots.
- Attach Mirror Unit: Secure the LED light mirror unit to the vanity desk. Connect any necessary electrical wiring for the LED lights as per the instructions.
- Install Shelves: Place the open storage shelves in their designated positions.
- Final Check: Once assembled, double-check all screws and fasteners to ensure they are tight and the vanity is stable.
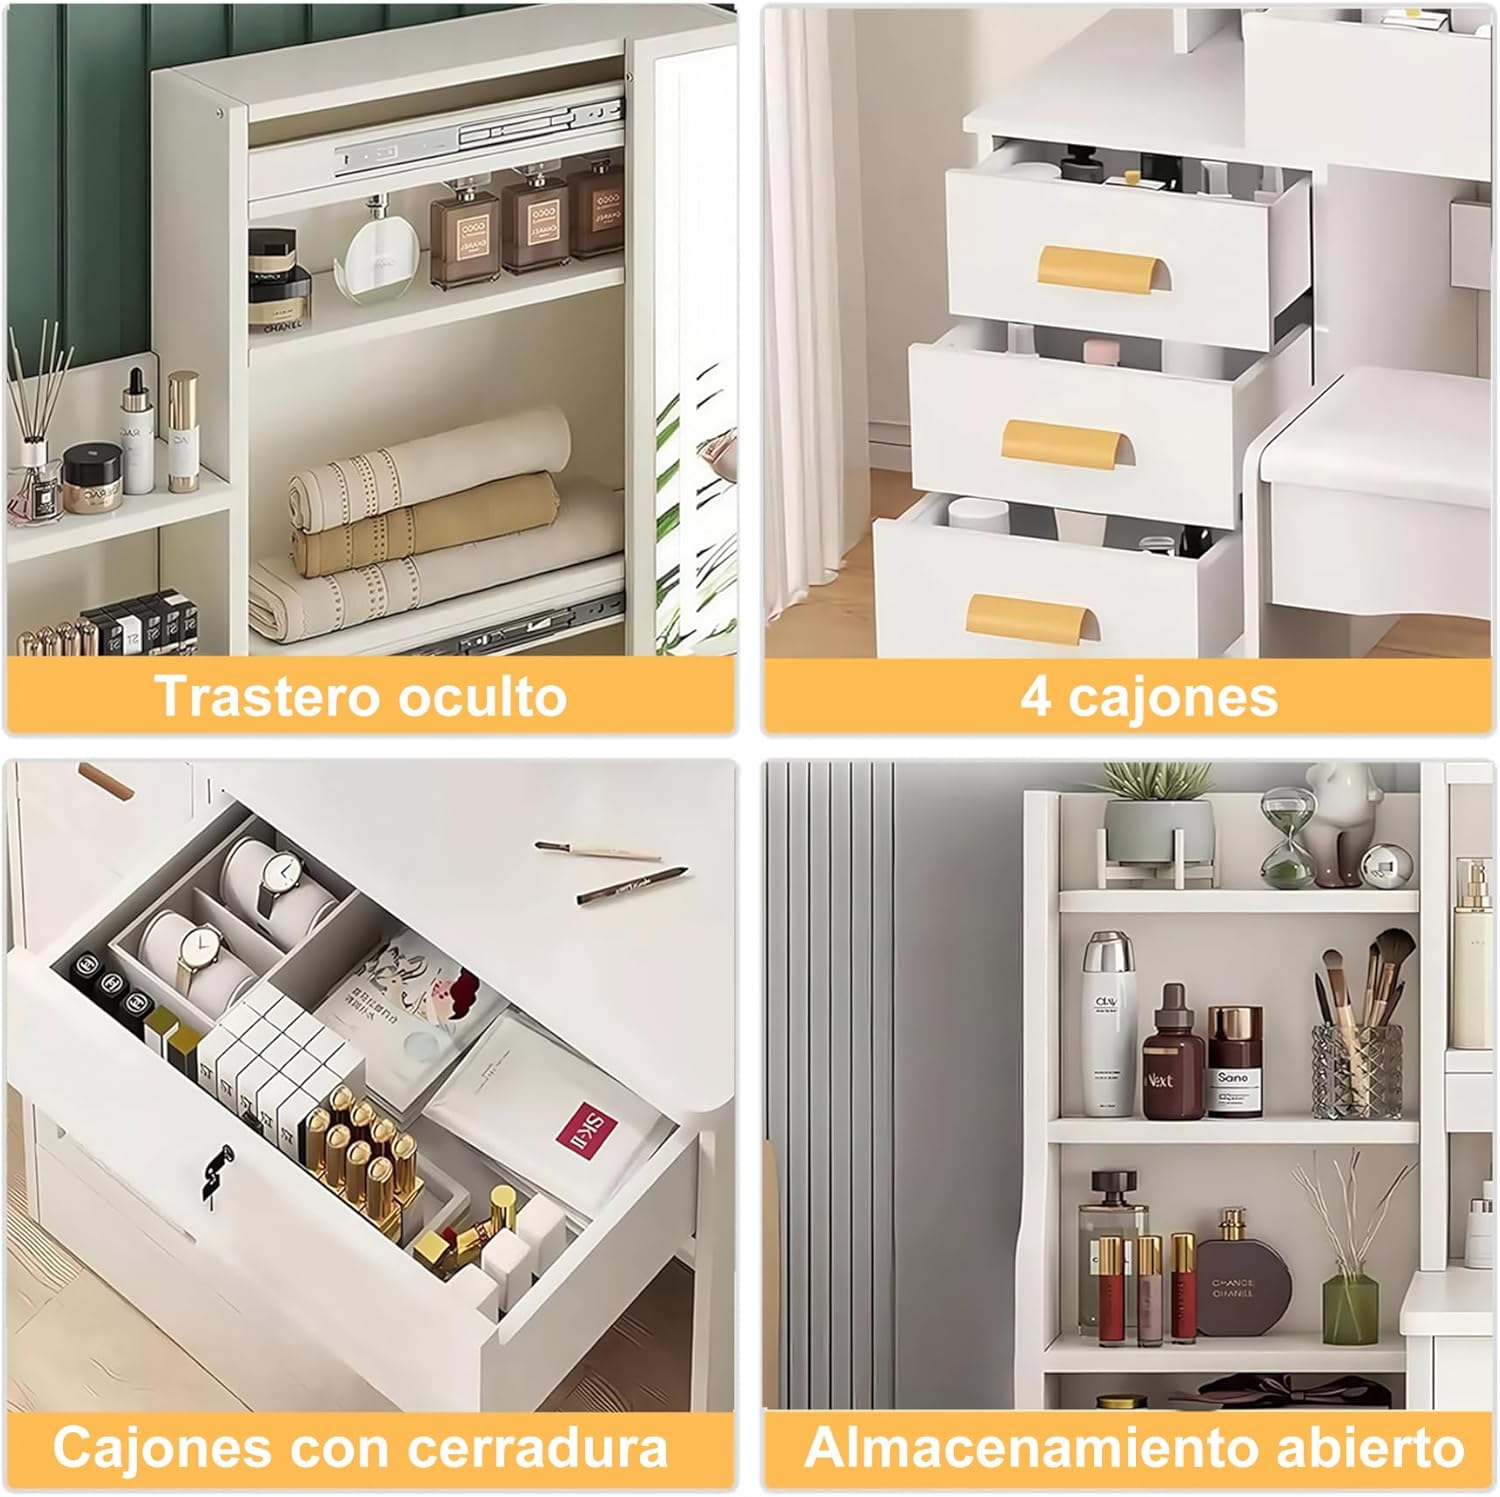
Image: This image illustrates the various storage components including the four drawers, a lockable drawer, and open shelves, which are part of the assembly process.
Operating Instructions
LED Light Mirror
The integrated LED light mirror features three adjustable brightness levels to suit various lighting conditions and preferences.
- Power On/Off: Locate the touch sensor on the mirror surface to turn the LED lights on or off.
- Adjust Brightness: Tap the touch sensor repeatedly to cycle through the three brightness levels: Low, Medium, and High. Select the desired brightness for your task.

Image: The LED mirror offers three distinct brightness settings: Low, Medium, and High, controlled by a touch sensor.
Sliding Mirror and Hidden Storage
The mirror unit is designed to slide horizontally, revealing a hidden storage compartment behind it. This feature helps keep items organized and dust-free while saving space.
- Access Hidden Storage: Gently slide the mirror to the side to access the shelves located behind it.
- Close Mirror: Slide the mirror back into its original position to conceal the storage and protect contents from dust.

Image: The vanity features multi-level storage shelves and a movable mirror, allowing for flexible organization and access to hidden compartments.
Drawer and Shelf Usage
The vanity includes four drawers and three layers of open shelves for various storage needs.
- Drawers: Utilize the four drawers for storing cosmetics, accessories, and personal items. One drawer may include a lock for securing valuables.
- Open Shelves: The three-layer open shelves are suitable for displaying frequently used items, decorative pieces, or additional storage.
- Curved Handles: The drawers are equipped with curved wooden handles for comfortable opening and closing.
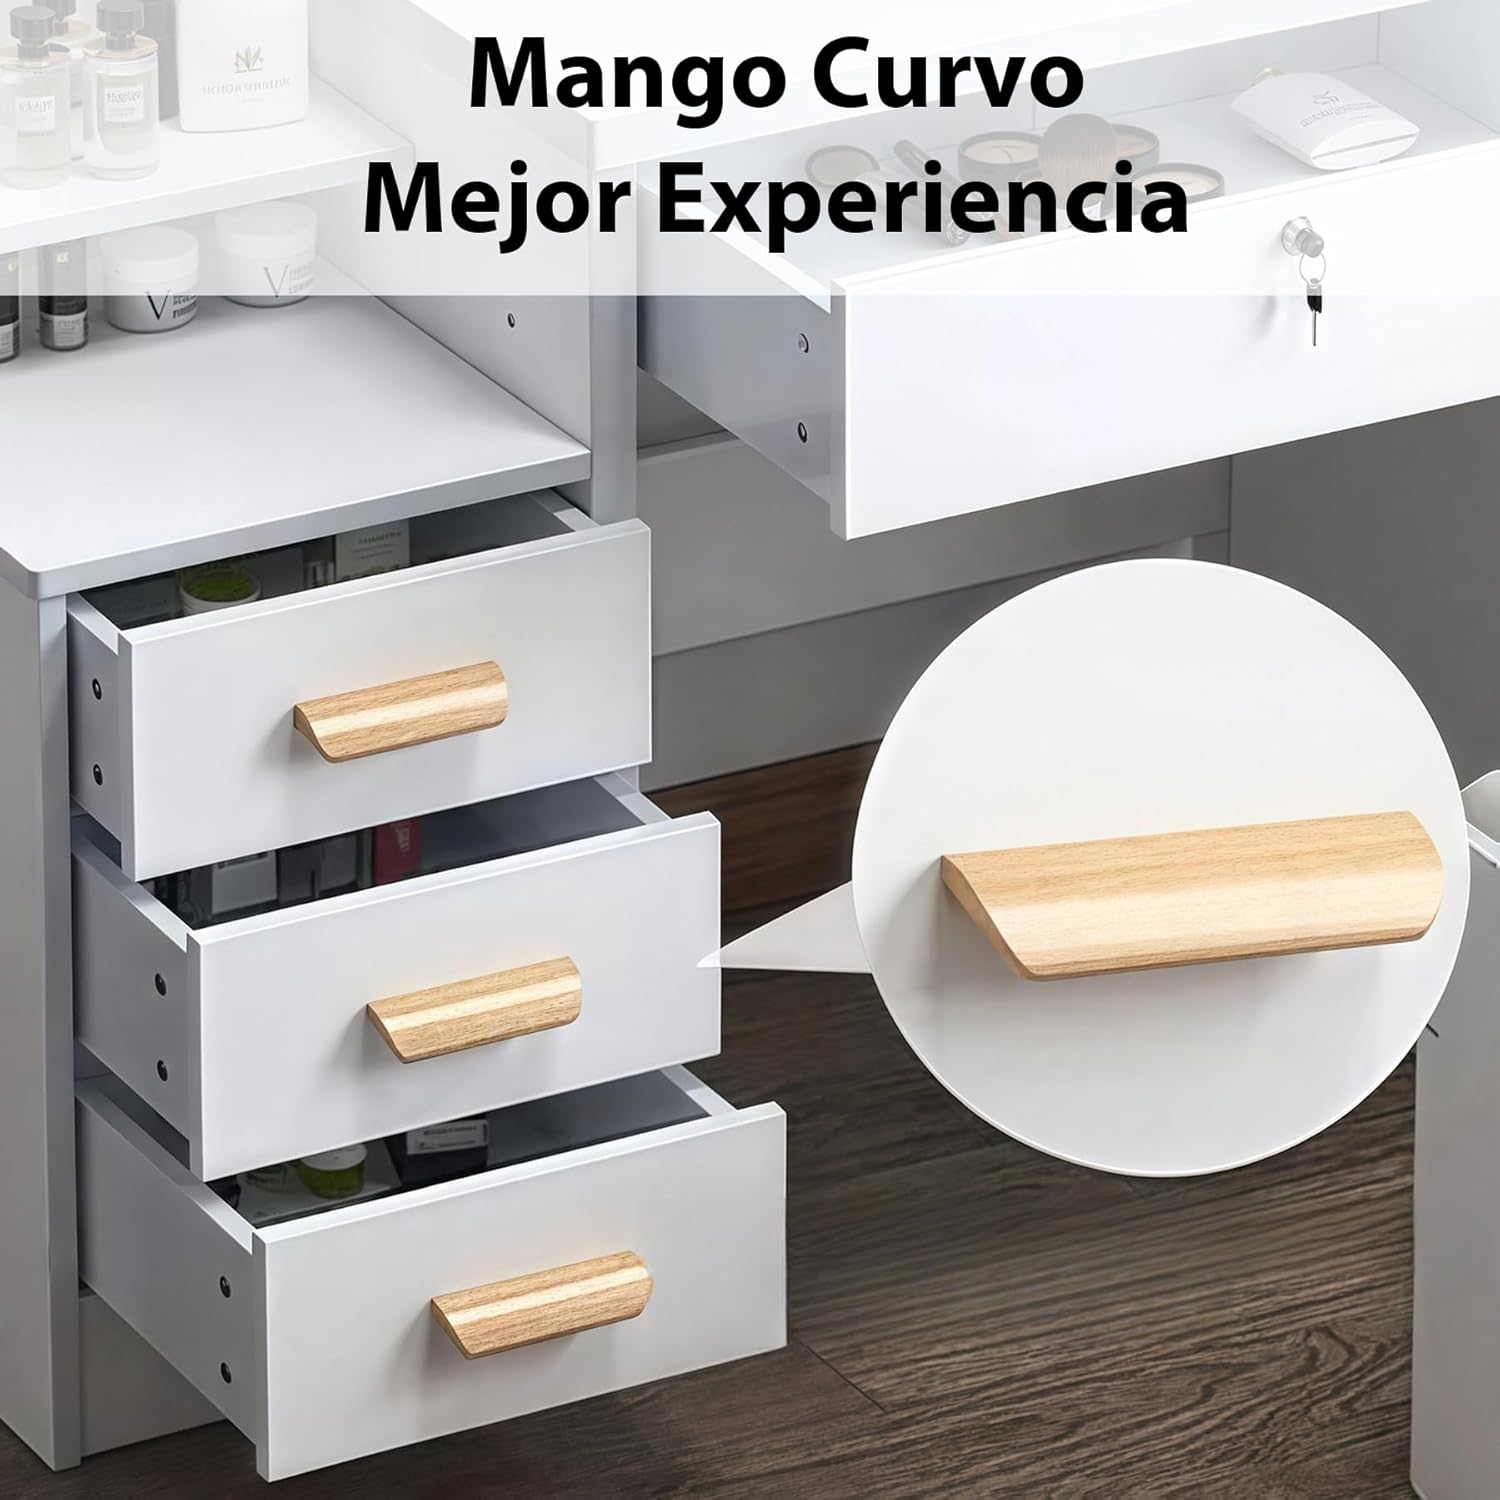
Image: Close-up of the ergonomically designed curved wooden handles on the vanity drawers, providing a comfortable grip.
Maintenance
- Cleaning: Wipe surfaces with a soft, damp cloth. Avoid abrasive cleaners or harsh chemicals that may damage the finish.
- Mirror Care: Clean the mirror surface with a glass cleaner and a lint-free cloth. Do not spray cleaner directly onto the LED light strip.
- Hardware: Periodically check all screws and fasteners for tightness and re-tighten if necessary to maintain stability.
- Spills: Clean up spills immediately to prevent staining or damage to the wood material.
Troubleshooting
| Problem | Possible Cause | Solution |
|---|---|---|
| LED lights not turning on. | Power connection issue, faulty wiring, or sensor malfunction. |
|
| Vanity feels unstable or wobbly. | Loose assembly screws or uneven floor surface. |
|
| Drawers are difficult to open or close. | Misaligned drawer slides or obstruction. |
|
Specifications
| Model Number | A54 |
| Brand | TRIUMPHKEY |
| Product Dimensions (L x W x H) | 80 x 38 x 130 cm (31.5 x 15 x 51.2 inches) |
| Item Weight | 26 kg (57.3 lbs) |
| Material | Wood |
| Color | White |
| Number of Drawers | 4 |
| LED Light Features | 3 adjustable brightness levels |
| Assembly Required | Yes |
| UPC | 769003447723 |

Image: Diagram illustrating the overall dimensions of the TRIUMPHKEY Vanity: 80cm width, 38cm depth, and 130cm height.
Warranty Information
Specific warranty details for the TRIUMPHKEY Vanity (Model A54) are not provided in this manual. For information regarding warranty coverage, terms, and conditions, please refer to the product packaging or contact TRIUMPHKEY customer support directly.
Customer Support
If you encounter any issues during assembly or use, or have questions about your TRIUMPHKEY Vanity, please do not hesitate to contact our customer service team. We are committed to providing a solution within 24 hours.
- Contact Method: Refer to your purchase documentation or the TRIUMPHKEY official website for the most current contact information (e.g., email, phone number).
- When contacting support, please have your product model number (A54) and purchase details ready.