
VEVOR YX-SHJHW-08
VEVOR Refrigerated Combo Vending Machine User Manual
Model: YX-SHJHW-08
Brand: VEVOR
1. Introduction
This manual provides comprehensive instructions for the safe and efficient operation, installation, and maintenance of your VEVOR Refrigerated Combo Vending Machine, Model YX-SHJHW-08. This commercial-grade vending machine is designed for dispensing a variety of snacks, sodas, and drinks, featuring a 36-slot, 6-layer large capacity and an integrated ICT bill/coin acceptor.
Please read this manual thoroughly before operating the machine and retain it for future reference. Proper understanding and adherence to these guidelines will ensure optimal performance and longevity of your vending machine.

Figure 1.1: Front view of the VEVOR Refrigerated Combo Vending Machine.
This image displays the full exterior of the VEVOR Refrigerated Combo Vending Machine, showcasing its sleek black design, transparent product display window, and integrated control panel with bill and coin acceptors.
2. Safety Instructions
Always observe the following safety precautions to prevent injury and damage to the machine:
- Electrical Safety: Ensure the machine is connected to a grounded power outlet with the correct voltage (AC115V 60Hz). Do not use extension cords. Disconnect power before any maintenance or cleaning.
- Placement: Place the machine on a stable, level surface. Ensure adequate ventilation around the machine, especially at the rear where the compressor is located, to prevent overheating.
- Weight: The machine is heavy (265 kg). Use appropriate lifting equipment and personnel when moving to prevent injury.
- Refrigerant: The refrigeration system contains refrigerant. Only qualified personnel should service the refrigeration unit.
- Children: Keep children away from the machine, especially during operation and maintenance.
- Door Safety: Be cautious when opening and closing the door to avoid pinching fingers.
3. Key Components
Familiarize yourself with the main parts of your vending machine:
- Product Display Window: Transparent glass door showcasing available products.
- Control Panel: Includes the keypad for product selection and digital display.
- Bill Acceptor (ICT L70): Accepts $1, $5, $10, $20 bills.
- Coin Acceptor (ICT): Accepts $0.01, $0.05, $0.10, $1 coins.
- Coin Return Slot: Dispenses change and refunds.
- Product Shelves: Six adjustable layers for various product sizes.
- Drop Sensor: Detects if a product has successfully dispensed.
- Refrigeration Unit: Maintains internal temperature for chilled products.
- Product Retrieval Area: Bottom compartment where dispensed items are collected.
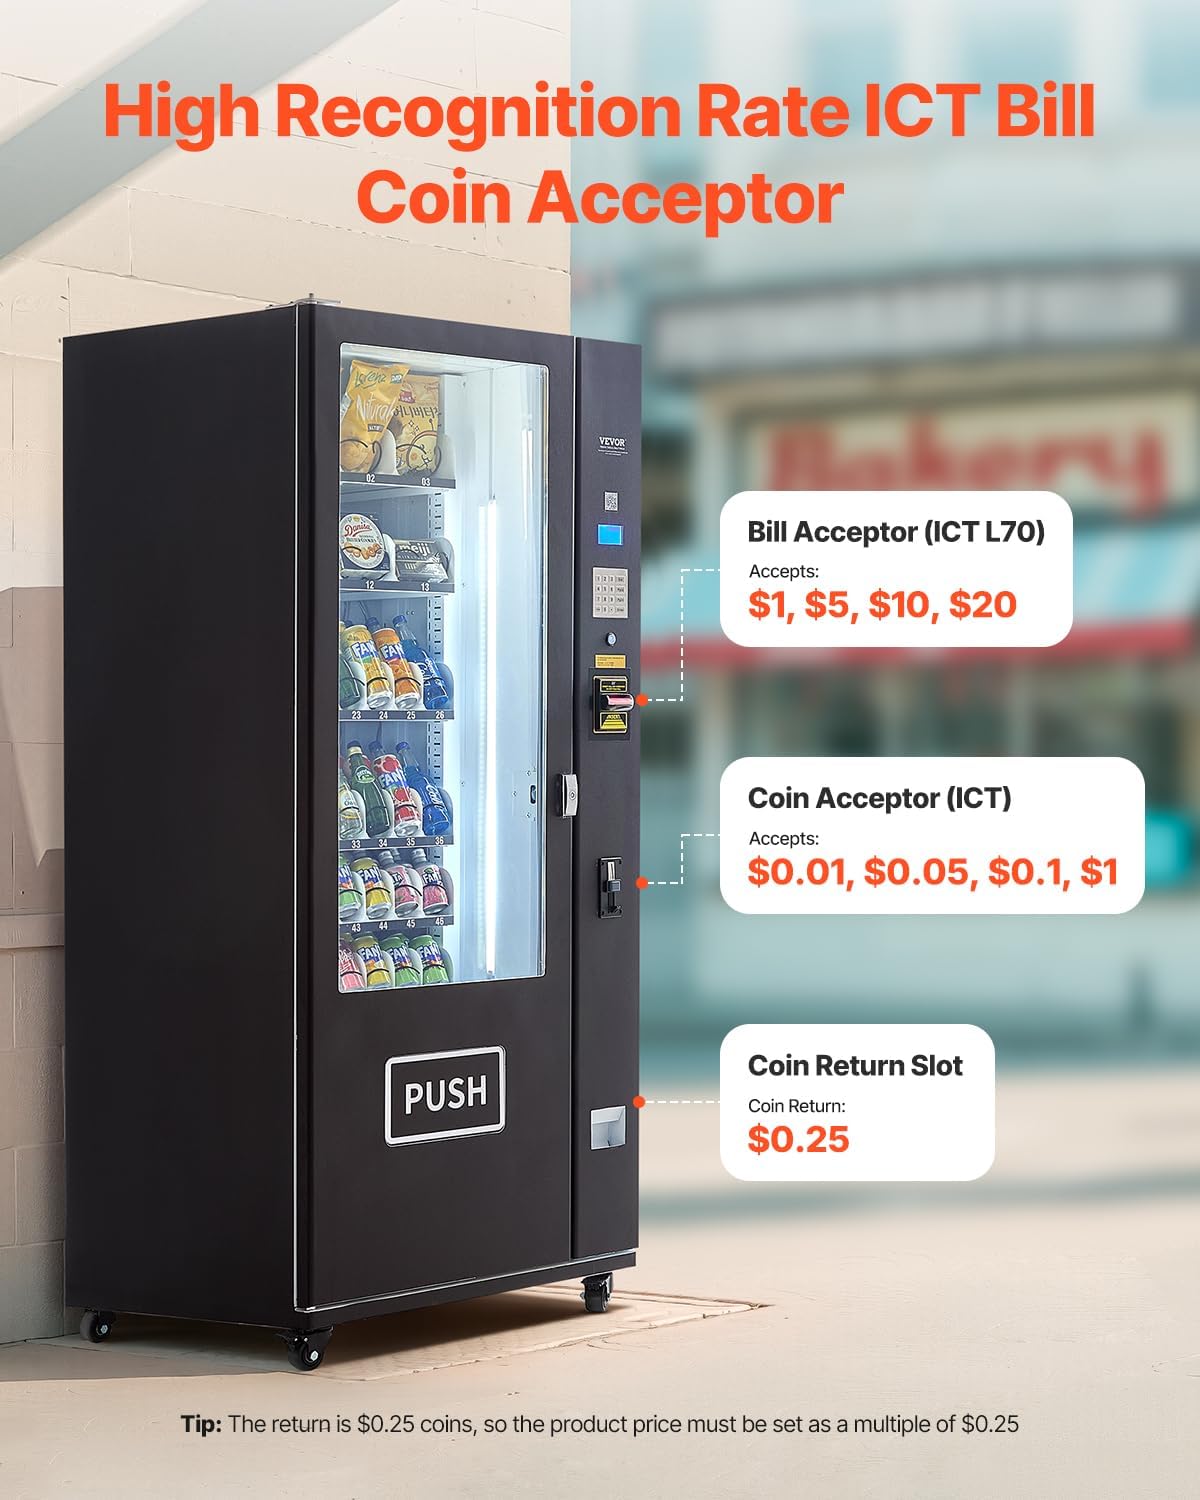
Figure 3.1: Overview of the payment acceptance system.
This image highlights the ICT bill acceptor (accepting $1, $5, $10, $20) and the ICT coin acceptor (accepting $0.01, $0.05, $0.10, $1) on the side panel of the vending machine, along with the coin return slot.
4. Setup and Installation
4.1 Unpacking
Carefully remove the machine from its packaging. Inspect for any shipping damage. Report any damage to your carrier immediately.
4.2 Placement
- Choose a location with a stable, level floor capable of supporting the machine's weight (265 kg).
- Ensure there is at least 10 cm (4 inches) of clearance around the back and sides for proper ventilation.
- Avoid direct sunlight or heat sources that could affect refrigeration efficiency.
- The machine is designed for indoor use.
4.3 Power Connection
Connect the power cord to a dedicated, grounded AC115V 60Hz electrical outlet. Do not use power strips or extension cords.
4.4 Initial Product Loading
Open the main door using the provided keys. Arrange products neatly on the shelves, ensuring they fit within the designated slots and do not obstruct the dispensing mechanism. The machine has 6 layers, each capable of holding multiple selections.

Figure 4.1: Illustration of the machine's internal capacity and shelf configuration.
This image visually represents the 6-layer shelf design, showing how various products like chips, bottled water, and canned drinks can be organized and stored within the vending machine, highlighting its large capacity.
5. Operation
5.1 Making a Purchase
- Insert Payment: Insert bills ($1, $5, $10, $20) into the bill acceptor or coins ($0.01, $0.05, $0.10, $1) into the coin acceptor. The display will show the credit accumulated.
- Select Product: Use the keypad to enter the selection number corresponding to your desired product. The display will confirm your selection.
- Dispensing: The machine will dispense the product. The built-in drop sensor will verify successful delivery.
- Collect Product: Retrieve your product from the retrieval area at the bottom of the machine.
- Collect Change: Any remaining change will be dispensed from the coin return slot.
5.2 Drop Sensor Functionality
The integrated drop sensor monitors the product dispensing process. If a product fails to drop into the retrieval area after payment, the machine will automatically initiate a refund to the customer. This ensures fair transactions and prevents product loss.

Figure 5.1: Close-up view of the built-in drop sensor.
This image provides a detailed view of the drop sensor located within the vending machine, illustrating its position to detect if a product has successfully fallen to the pickup area, ensuring proper dispensing or initiating a refund.
5.3 Restocking Products
To restock, unlock and open the main door. Carefully slide out the shelves as needed. Replenish products, ensuring they are correctly positioned and do not exceed the maximum capacity or obstruct the dispensing mechanism. Close and lock the door securely after restocking.
6. Maintenance
Regular maintenance ensures the longevity and optimal performance of your vending machine.
6.1 Cleaning
- Exterior: Wipe down the exterior surfaces with a soft, damp cloth and mild detergent. Avoid abrasive cleaners.
- Interior: Periodically clean the interior shelves and product retrieval area. Ensure no spills or debris accumulate.
- Glass Door: Clean the tempered glass door with a glass cleaner for optimal product visibility.
- Bill/Coin Acceptor: Refer to the ICT acceptor's specific cleaning instructions if available, or use compressed air to clear dust and debris.
6.2 Refrigeration System
The machine utilizes a high-performance compressor and microporous foam technology for efficient and long-lasting refrigeration. The defrost system is automatic, minimizing maintenance requirements. Ensure the rear ventilation area remains clear of obstructions.

Figure 6.1: Illustration of the machine's refrigeration components.
This image highlights the key elements of the vending machine's refrigeration system, including the high-performance compressor, high-quality copper tubes, microporous foam layer for insulation, and stainless steel sheet for good thermal conductivity, ensuring long-term cooling.
7. Troubleshooting
Refer to the table below for common issues and their solutions:
| Problem | Possible Cause | Solution |
|---|---|---|
| Machine not powering on. | No power supply; power cord loose; circuit breaker tripped. | Check power connection; ensure outlet is functional; reset circuit breaker. |
| Bills/Coins not accepted. | Acceptor dirty; currency damaged; acceptor malfunction. | Clean acceptor with compressed air; try different currency; contact support if issue persists. |
| Product not dispensing. | Product jammed; incorrect selection; drop sensor issue. | Ensure product is not jammed; re-enter selection; if drop sensor fails, refund should be issued. |
| Refrigeration not working. | Poor ventilation; compressor issue; door not sealed. | Ensure adequate clearance; check door seal; contact qualified technician for compressor issues. |
| No change dispensed. | Coin mechanism empty; jam in coin return. | Refill coin tubes; clear any obstructions in coin return. |
8. Specifications
Technical specifications for the VEVOR Refrigerated Combo Vending Machine (Model YX-SHJHW-08):
| Feature | Detail |
|---|---|
| Item Model Number | YX-SHJHW-08 |
| Manufacturer | VEVOR |
| Product Dimensions (L x W x H) | 89.51 x 86 x 205 cm (35 x 34 x 81 inches) |
| Item Weight | 265 kg (584 lbs) |
| Voltage | AC115V 60Hz |
| Rated Power | 650W |
| Noise Level | ≤60dB |
| Number of Shelves | 6 Layers (36 Slots) |
| Temperature Range | 41-68°F / 5-20°C |
| Cooling Method | Compressor |
| Defrost System | Automatic |
| Installation Type | Freestanding |
| Main Materials | Interior: Pre-coated Steel Plate; Shelves: Metal; Exterior: Cold-rolled Steel Plate with Coating |
| Product Content | 3 x Keys, 1 x User Manual |

Figure 8.1: Dimensional drawing and key specifications.
This image provides a visual representation of the vending machine's dimensions (height, width, depth) and lists key technical specifications such as model number, voltage, power, weight, and temperature range.
9. Warranty Information
VEVOR products typically come with a limited warranty. Please refer to the warranty card included with your purchase or visit the official VEVOR website for detailed warranty terms and conditions. Keep your proof of purchase for warranty claims.
10. Customer Support
For technical assistance, parts replacement, or any inquiries regarding your VEVOR Refrigerated Combo Vending Machine, please contact VEVOR customer support. You can find contact information on the official VEVOR website or through your purchase platform.
Website: www.vevor.com
Ask a question about this manual
Ask about setup, troubleshooting, compatibility, parts, safety, or missing instructions. Manuals+ will review the question and use this page’s manual context to help answer it.