Introduction
This manual provides essential information for the installation, operation, and maintenance of the YANPXDOE Central Air Conditioning Control Board, model MDV-D36Q4.D.1.1.1-2, V-CIK71-DAN-A[T2]17126000005069. This control board is designed to manage the functions of central air conditioning systems, ensuring efficient and reliable performance.
Product Overview and Functions
The YANPXDOE Central Air Conditioning Control Board integrates various electronic components to provide comprehensive control over your HVAC system. Its primary functions include:
- Function: The motherboard is responsible for receiving sensor signals and controlling the operation of the compressor, fan, and other electrical components.
- Control Method: Modern air conditioning motherboards mostly use microprocessor control to achieve functions such as temperature regulation, timing switch, and mode selection.
- Fault Diagnosis: Many motherboards have self-diagnosis functions, which prompt users with fault codes through flashing indicator lights or displays.
- Protection Function: The motherboard generally has safety designs such as overload protection, short circuit protection, and over-temperature protection to prevent equipment damage.
- Hardware Components: The motherboard contains multiple electronic components, such as resistors, capacitors, diodes, and integrated circuits, which are the basis for implementing control functions.
For detailed component identification, refer to the image below:
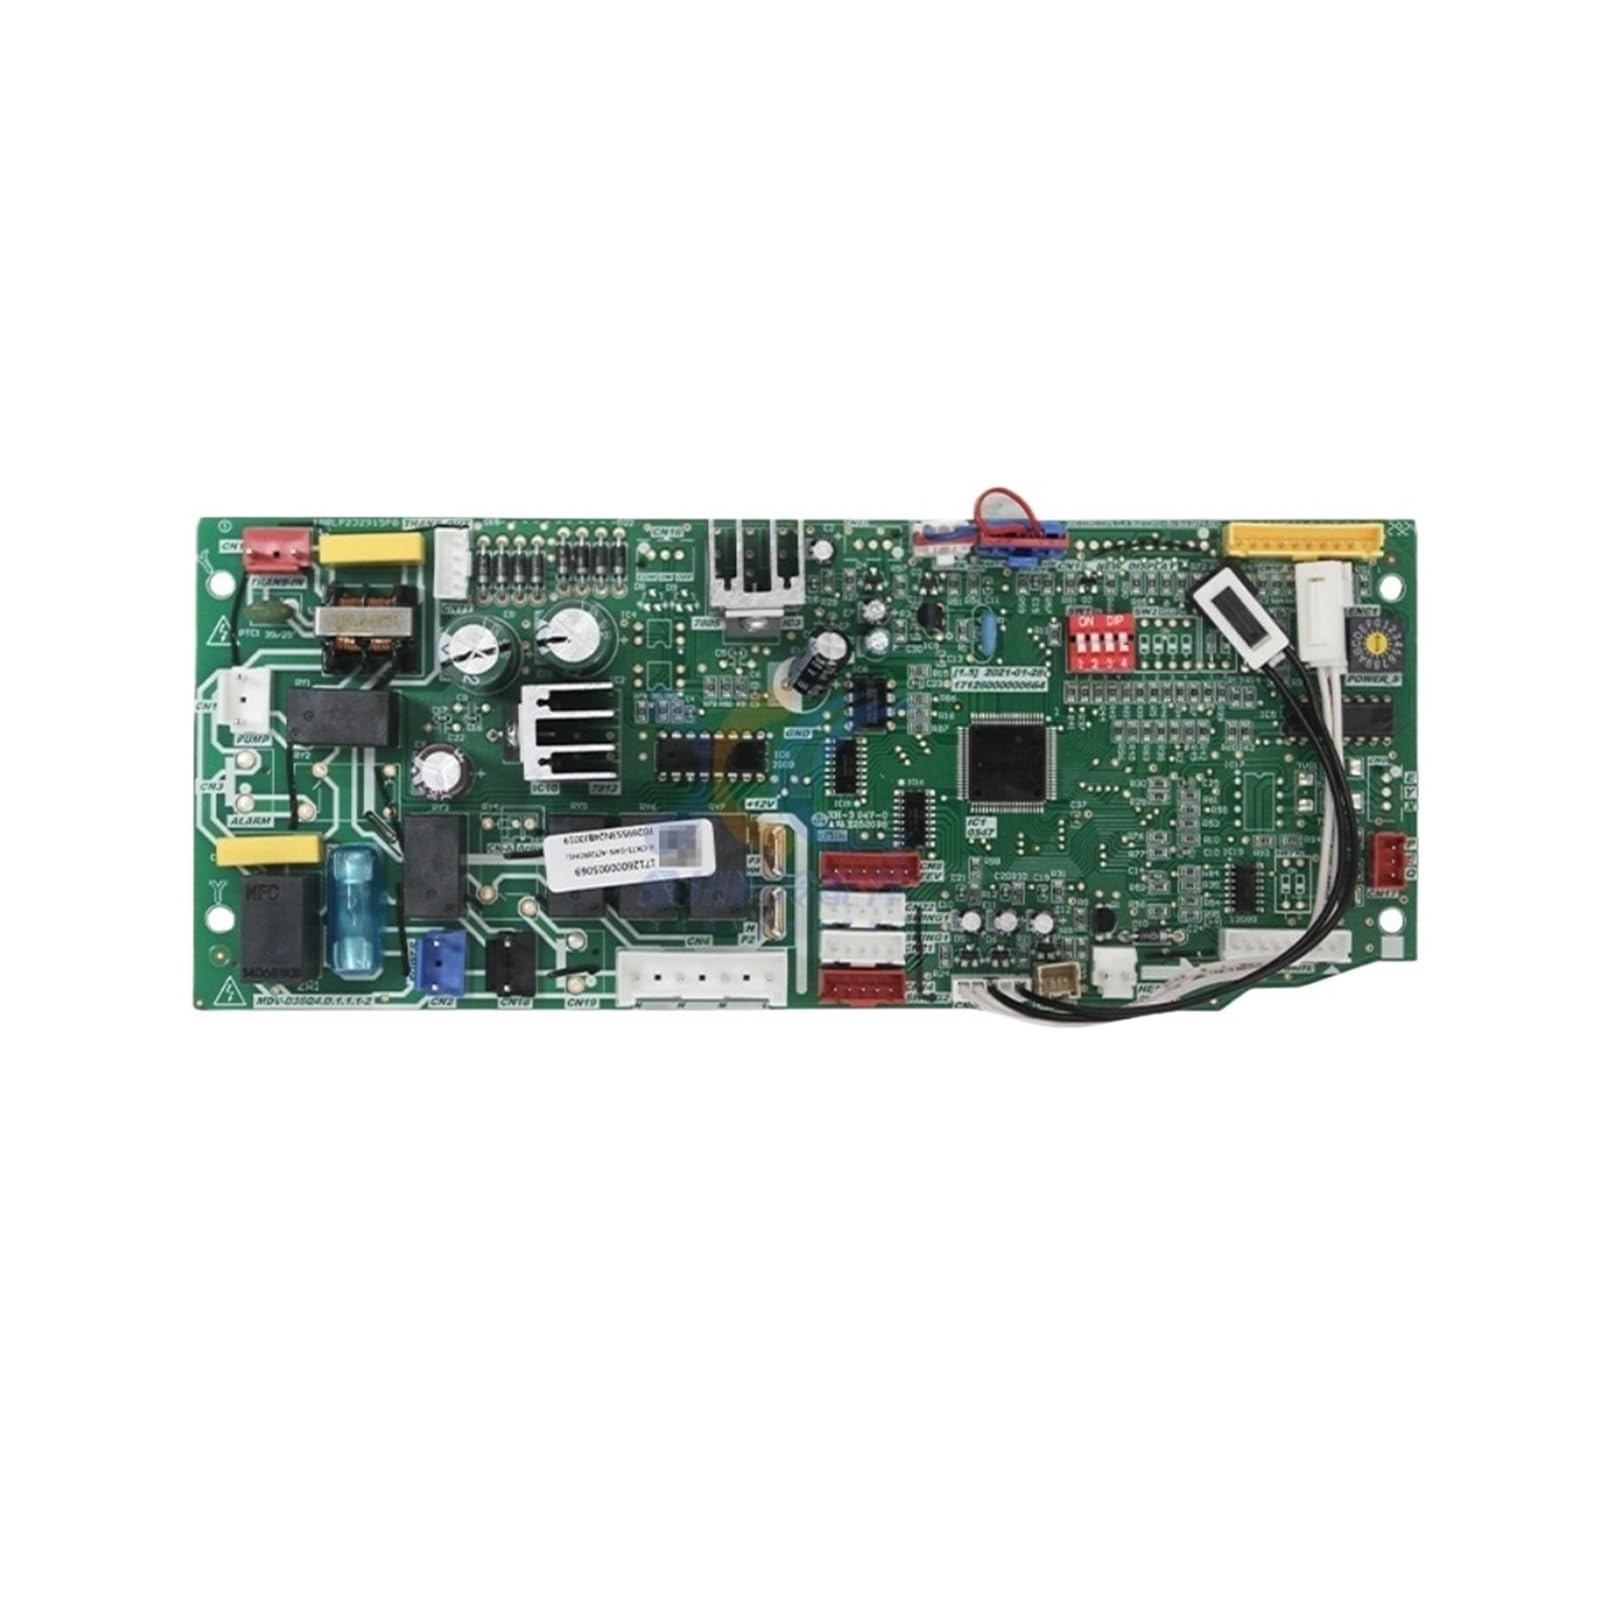
Note: The image highlights specific connectors and labels crucial for installation and troubleshooting.
Safety Information
- Always disconnect power to the air conditioning unit at the main circuit breaker before installing, servicing, or removing the control board.
- Installation should be performed by a qualified technician to prevent electrical shock, fire hazards, or damage to the unit.
- Do not touch the board with wet hands or when standing on a wet surface.
- Ensure all connections are secure and correctly oriented before restoring power. Incorrect wiring can cause severe damage.
- Refer to the air conditioning unit's main service manual for specific wiring diagrams and additional safety precautions.
Warning: Improper installation or handling can lead to serious injury, electrical shock, fire, or equipment damage.
Installation Guide
Follow these steps carefully for proper installation of the control board. Professional installation is highly recommended.
- Power Disconnection: Turn off the main power supply to the central air conditioning unit at the circuit breaker. Verify power is off using a voltage tester.
- Access the Control Board: Locate and open the access panel of your air conditioning unit to expose the existing control board.
- Document Connections: Before disconnecting any wires, take clear photographs or draw a detailed diagram of all existing wire connections to the old control board. Pay close attention to connector labels such as CN3, POWER, CN2, CN18, and others as shown in Figure 1.
- Disconnect Wires: Carefully disconnect all wires and connectors from the old control board. Use appropriate tools to avoid damaging the connectors.
- Remove Old Board: Unscrew or unclip the old control board from its mounting. Store it safely if it needs to be returned or recycled.
- Install New Board: Mount the new YANPXDOE control board in the same position as the old one. Ensure it is securely fastened to prevent vibration.
- Reconnect Wires: Using your documented connections, carefully reconnect all wires and connectors to the corresponding terminals on the new control board. Double-check each connection for accuracy and security.
- Close Access Panel: Once all connections are verified and the board is secure, close and secure the access panel of the air conditioning unit.
- Restore Power: Turn on the main power supply to the air conditioning unit at the circuit breaker.
- Test Operation: Initiate a test cycle of your air conditioning system to ensure proper functionality. Monitor for any unusual noises, smells, or error codes.
Operating Principles
The YANPXDOE control board serves as the central processing unit for your air conditioning system. It continuously monitors sensor inputs (e.g., temperature, pressure) and executes commands based on user settings and programmed logic to maintain desired environmental conditions.
- Temperature Regulation: The board receives temperature readings from sensors and activates or deactivates the compressor and fan to maintain the desired temperature setpoint.
- Mode Selection: It manages different operating modes such as cooling, heating, fan-only, and dehumidification, based on user input from the thermostat or remote control.
- Timing Functions: Supports scheduled operations, including automatic on/off times, for energy efficiency and convenience.
- Component Control: Directly controls the operation of the compressor, indoor and outdoor fans, and other auxiliary components like relays (e.g., RY4) and anion generators (e.g., via CN-A Anion connector).
Maintenance
Proper maintenance ensures the longevity and optimal performance of your control board.
- Regular Inspection: Periodically inspect the control board for any signs of dust accumulation, corrosion, or loose connections. Always ensure power is disconnected before inspection.
- Cleaning: If dust is present, gently clean the board with a soft, dry brush or compressed air. Avoid using liquids or abrasive cleaners, which can damage electronic components.
- Connection Checks: Ensure all wire connectors (e.g., CN3, CN2, CN18, POWER) are firmly seated and free from corrosion.
- Environmental Control: Ensure the air conditioning unit's enclosure is properly sealed to protect the control board from moisture, excessive dust, and pests.
Troubleshooting
The control board is equipped with self-diagnosis capabilities to assist in identifying operational issues. If you encounter problems, consider the following:
- Fault Codes: If a fault occurs, the board may display error codes via flashing indicator lights or a connected display unit. Consult your air conditioning unit's service manual for a list of specific fault codes and their meanings.
- No Power:
- Check the main power supply to the unit at the circuit breaker.
- Verify all power connections to the board (e.g., POWER connector) are secure.
- Inspect the fuse (e.g., the blue fuse visible in Figure 1) on the board for continuity. Replace if blown, ensuring the correct amperage rating.
- Incorrect Operation:
- Ensure all sensor connections are secure and sensors are functioning correctly.
- Verify that the thermostat or remote control is functioning correctly and sending appropriate signals.
- Check for any loose or incorrect wiring connections on the board.
- Component Failure: If specific components (e.g., compressor, fan) are not operating despite correct signals, the board's relays (e.g., RY4) or integrated circuits (e.g., IC1) might be faulty. This typically requires professional diagnosis and replacement.
For complex issues or if you are unsure about any troubleshooting step, contact a qualified HVAC technician.
Specifications
| Feature | Detail |
|---|---|
| Model Number | MDV-D36Q4.D.1.1.1-2, V-CIK71-DAN-A[T2]17126000005069 |
| Brand | YANPXDOE |
| Part Number | V-CIK71-DAN-A[T2] 17126000005069 |
| Type | Air Conditioner Control Board |
| Package Dimensions | 1.18 x 0.79 x 0.39 inches |
| Item Weight | 1.76 ounces |
| Manufacturer | lihuanxiaodian |
Warranty and Support
For warranty information and technical support, please refer to the documentation provided with your purchase or contact the seller directly. Keep your purchase receipt for any warranty claims.
Manufacturer: lihuanxiaodian