1. Introduction
This manual provides essential information for the assembly, operation, and maintenance of your LINKHOO 10' x 8' Outdoor Storage Shed. This durable metal building is designed to offer a secure and organized storage solution for various items such as gardening tools, seasonal equipment, or as a compact workshop. Constructed from corrosion-resistant galvanized steel, it is engineered to withstand diverse weather conditions.
The shed features reinforced steel wall columns for structural strength, a 24-gauge steel frame, and 34-gauge exterior panels, providing resistance to wind and snow when properly anchored and assembled. It includes 4 vents and a translucent window for ventilation and natural light, along with lockable double doors for security.

Image 1.1: The LINKHOO 10' x 8' Outdoor Storage Shed, featuring a brown roof and white walls, situated in a residential backyard. This image illustrates the shed's overall appearance and size in a typical outdoor setting.
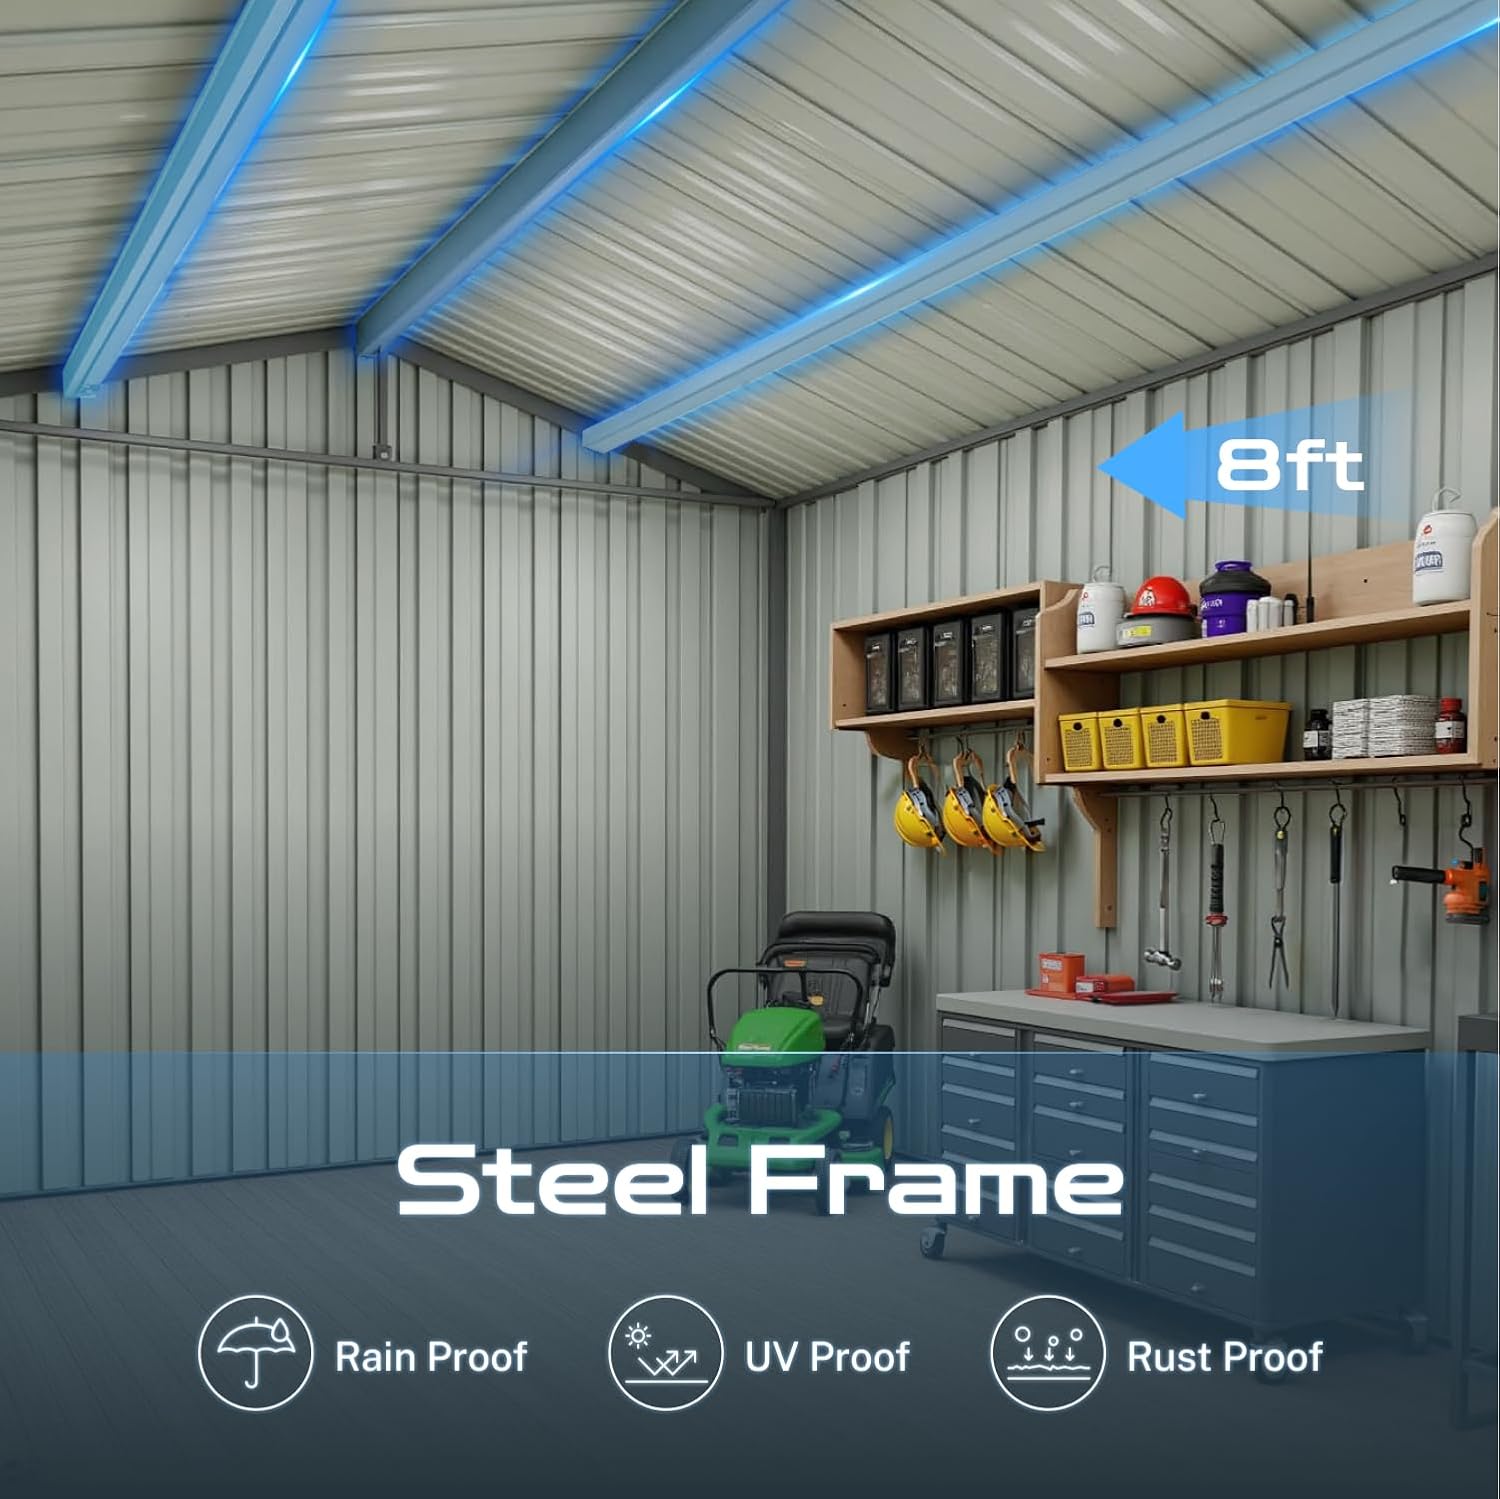
Image 1.2: An interior view of the shed highlighting the robust steel frame construction. Icons indicate rain-proof, UV-proof, and rust-proof properties, emphasizing the shed's durability and protective features.
2. Safety Information
WARNING: Failure to follow these safety instructions may result in injury or property damage.
- Always follow assembly instructions carefully and completely.
- Use power tools with caution. Ensure proper safety gear, such as gloves and eye protection, is worn during assembly.
- The metal panels and edges can be sharp. Handle all components with care to prevent cuts. Wearing heavy-duty gloves is highly recommended.
- Anchor the shed securely to a level foundation, such as a DIY raised wooden base (10–15 cm), to ensure stability and resistance against wind and storms. Proper anchoring is crucial for wind and snow certification.
- Keep children and pets away from the work area during assembly to prevent accidents.
- A minimum of two people is recommended for safe and efficient assembly.
- Ensure the assembly area is clear of obstructions and provides adequate space for maneuvering components.
3. Package Contents
Your LINKHOO storage shed is shipped in multiple reinforced boxes (typically 3) to ensure safe delivery of all components. Upon receiving your shipment, carefully unpack all boxes and verify that all parts are present and undamaged before beginning assembly.
Refer to the detailed parts list provided in your separate assembly guide for a complete inventory. If any parts are missing or damaged, please contact customer support immediately for free replacements.
4. Setup and Assembly
Assembly of the LINKHOO storage shed requires attention to detail and adherence to the provided instructions. A two-person team is recommended, and using power tools can expedite the process.
4.1 Preparation
- Foundation: Ensure a level and stable foundation. For optimal performance and storm resistance, anchor the shed to a DIY raised wooden base (10–15 cm) to protect against ground moisture.
- Tools Required: Gather necessary tools, including power drills, screwdrivers, wrenches, measuring tape, and safety gear (gloves, eye protection).
- Unpack and Organize: Unpack all components and organize them according to the parts list in your assembly manual.
4.2 Assembly Steps Overview
The assembly process generally follows these stages. Refer to your specific assembly manual for detailed, step-by-step instructions and diagrams.
- Frame Assembly: Bolt pre-drilled frame pieces onto the leveled ground or prepared base.
- Wall Panel Installation: Secure the main galvanized steel sheets to form the shed walls.
- Roof Frame Construction: Install the roof frame components.
- Roof Sheet Attachment: Secure the roof sheets to the roof frame.
- Door and Window Installation: Attach the double doors and the translucent window.
- Final Anchoring: Ensure the shed is firmly anchored to the ground or base as per instructions.

Image 4.1: An illustrative diagram outlining the four main stages of shed assembly: bolting the frame, securing wall panels, installing the roof frame, and attaching roof sheets. This provides a visual overview of the construction sequence.
Assembly Tip: Some users have noted that instructions for roof peak flashing may be better followed during roof panel assembly rather than after, to ensure easier access to screw holes. Always cross-reference with your specific manual.
5. Operating Instructions
5.1 Door Operation and Security
The shed is equipped with double hinged, lockable doors for secure access. To open, unlock the door using the provided key and pull the handles. To close, ensure both doors are properly aligned and engage the locking mechanism. For enhanced security, an additional padlock (not included) can be used.

Image 5.1: Detail of the internal door bolt mechanism, ensuring the shed doors remain securely closed.

Image 5.2: The external lock and key system for the shed doors, providing security for stored items.
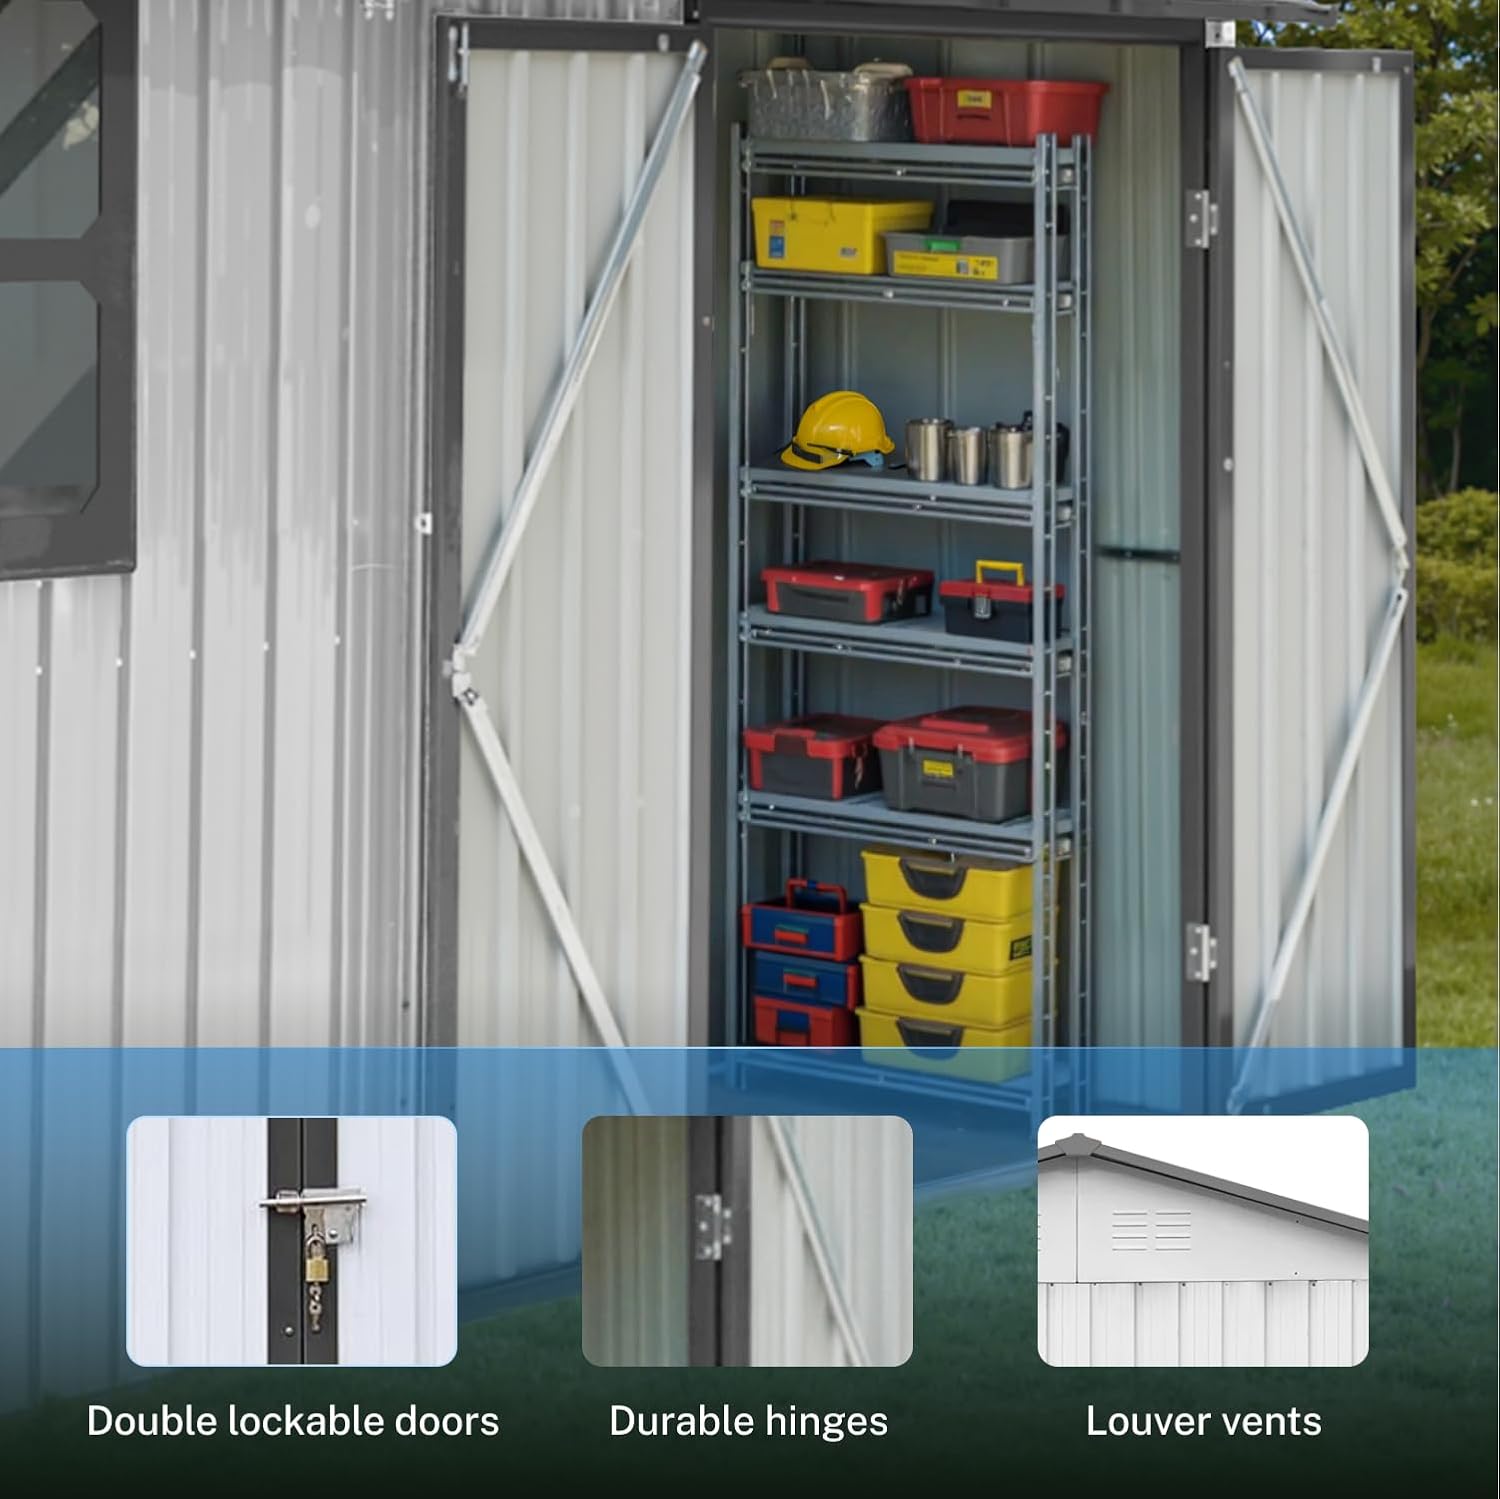
Image 5.3: A detailed view of the shed's double doors, highlighting the durable hinges and integrated louver vents for air circulation.
5.2 Ventilation and Lighting
The shed is equipped with 4 vents and a translucent window to provide natural light and prevent humidity buildup. Ensure vents are not obstructed to maintain proper airflow. The translucent window allows light into the shed without compromising privacy.

Image 5.4: A view of the shed's translucent windows, highlighting their function in providing natural light. The image also suggests various applications for the shed, such as a garden shed, pet room, bike room, or tool storage.
6. Maintenance
The LINKHOO storage shed is designed for low maintenance with a lifespan of up to 10 years, thanks to its durable galvanized steel construction. Regular checks and simple care can further extend its longevity.
- Cleaning: Periodically clean the exterior with mild soap and water to remove dirt, dust, and debris. Avoid abrasive cleaners or harsh chemicals that could damage the finish.
- Ventilation: Ensure the vents remain clear of obstructions to maintain proper airflow and prevent moisture buildup inside the shed.
- Anchoring Check: Annually inspect the anchoring points to ensure the shed remains securely fastened to its foundation, especially after severe weather conditions.
- Door and Hinge Lubrication: Lubricate door hinges and locking mechanisms as needed to ensure smooth operation.
- Interior Organization: Utilize the reinforced steel wall columns for installing shelves or hanging garden tools to keep the interior organized and maximize space.

Image 6.1: An example of hooks installed on the interior wall of the shed, demonstrating how the reinforced steel columns can be used for organized storage of tools and equipment.

Image 6.2: The interior of the shed featuring installed shelving, illustrating the potential for efficient and organized storage of various items.
7. Troubleshooting
This section addresses common issues you might encounter with your storage shed.
7.1 Missing or Damaged Parts
If you discover any missing or damaged parts upon delivery or during assembly, please contact our customer support team immediately. We offer free replacements shipped within 48 hours to ensure your assembly process is not delayed.
7.2 Assembly Difficulties
- Misaligned Holes: If screw holes appear misaligned, double-check that all panels and frame pieces are correctly oriented as per the manual. Slight adjustments may be needed. In rare cases, minor drilling might be required, but this should be a last resort.
- Instructions Unclear: Refer to the detailed step-by-step manual. If a particular step remains unclear, consider searching for online assembly videos or contacting customer support for clarification.
- Time-Consuming Assembly: Assembly is typically a two-person job and can take several hours. Ensure you have adequate time and assistance. Using power tools can significantly reduce assembly time.
7.3 Stability Concerns
If the shed feels unstable after assembly, verify that it is properly anchored to a level foundation. Re-check all bolts and screws to ensure they are tightened securely. Proper anchoring is critical for the shed's wind and snow resistance.
8. Specifications
| Attribute | Detail |
|---|---|
| Brand | LINKHOO |
| Model Number | W1350 |
| Product Dimensions | 118"D x 102"W x 81"H (approximately 10'D x 8.5'W x 6.75'H) |
| Floor Area | 90 sq.ft |
| Volume | 450 cu.ft |
| Color | Brown+White |
| Material | Galvanized Steel (24-gauge frame, 34-gauge exterior panels) |
| Base Material | Alloy Steel |
| Top Material Type | Metal |
| Water Resistance Level | Water Resistant |
| Frame Material | Alloy Steel |
| Door Style | Double Hinged, Lockable |
| Ventilation | 4 Vents + 1 Translucent Window |
| Assembly Required | Yes |
| Item Weight | 63.8 pounds |
| UPC | 755793400703 |

Image 8.1: A technical diagram illustrating the precise dimensions of the LINKHOO 10' x 8' Outdoor Storage Shed, including height, width, and depth measurements in both inches and centimeters.
9. Warranty and Support
LINKHOO is committed to providing reliable products and excellent customer service.
- Product Lifespan: The shed is designed for a lifespan of up to 10 years under normal use and proper maintenance.
- Missing/Damaged Parts: In case of missing or damaged parts due to handling or transportation, we offer free replacements shipped within 48 hours. Please contact our support team immediately for assistance.
- Customer Service: 24/7 customer service is available to assist with any questions or concerns regarding your product.
- Returns: This product is eligible for 30-day easy returns. Refer to the retailer's return policy for full details.
For support, please refer to the contact information provided with your purchase documentation or visit the official LINKHOO website.