10-inch 2K DVR (B0F1TLVDCC)
Asawin Rearview Mirror Instrument Panel Camera User Manual
Model: 10-inch 2K DVR (B0F1TLVDCC)
1. Introduction
Thank you for choosing the Asawin Rearview Mirror Instrument Panel Camera. This device is designed to enhance your driving safety and provide reliable recording capabilities with its advanced features, including a 10-inch 2K IPS screen, dual front and rear cameras, 24-hour parking monitoring, and loop recording. This manual will guide you through the installation, operation, and maintenance of your new device.
2. Safety Information
- Do not attempt to disassemble or modify the device. Unauthorized modifications may void the warranty and pose safety risks.
- Ensure the device is securely mounted and does not obstruct the driver's view or interfere with vehicle controls.
- Use only the provided power cable and accessories to prevent damage or malfunction.
- Avoid exposing the device to extreme temperatures, direct sunlight for prolonged periods, or excessive moisture.
- Clean the lens and screen with a soft, dry cloth. Do not use abrasive cleaners or solvents.
- Adhere to all local traffic laws and regulations regarding the use of in-car cameras.
3. Package Contents
- Asawin 10-inch Rearview Mirror Dash Cam
- Rear Camera with Cable
- Car Charger
- Mounting Straps/Bands
- 64GB Storage Card
- User Manual
4. Setup
4.1 Installation Steps
- Mount the Dash Cam: Securely attach the Asawin mirror dash cam over your existing rearview mirror using the provided mounting straps. Ensure it is centered and stable.

Image: The main product view showing the mirror dash cam, a separate rear camera, and a 64GB microSD card.
- Connect Power: Plug the car charger into the dash cam's power input and then into your vehicle's cigarette lighter socket. Route the cable neatly to avoid obstruction.

Image: Components of the Asawin dash cam system, including the main mirror unit, the rear camera, and various connecting cables.
- Install Rear Camera: Mount the rear camera at the back of your vehicle, typically above the license plate or inside the rear window. Connect its cable to the main dash cam unit. Ensure the cable is routed safely and discreetly.

Image: The 10-inch mirror dash cam displaying a dual camera setup with 2.5K front and 1080P rear recording capabilities.
- Insert SD Card: Insert the provided 64GB storage card into the designated slot on the dash cam. Ensure it is inserted correctly until it clicks into place.
- Initial Power On: Start your vehicle. The dash cam should power on automatically. If not, press the power button.
5. Operating Instructions
5.1 Basic Operation
The device powers on automatically when the vehicle starts and powers off when the vehicle is turned off. Recording typically begins automatically upon power-on.
5.2 Screen Navigation and Settings
The 10-inch IPS screen is touch-sensitive, allowing for easy navigation. Swipe gestures provide quick access to various settings and views:
- Swipe Up/Down: Adjusts the vertical field of view (5x magnification).
- Swipe Left/Right: Switches between display modes (Front only, Rear only, Front and Rear split view).

Image: The dash cam screen illustrating how to use swipe gestures to adjust the field of view and switch between front, rear, or combined camera displays.
5.3 Recording Modes
- Loop Recording: The device automatically records video in segments. When the storage card is full, the newest video files will automatically overwrite the oldest un-locked files, ensuring continuous recording.
- 24-Hour Parking Monitoring: When the vehicle is parked and the ignition is off, the dash cam enters a sleep mode. If a vibration or motion is detected (via G-sensor or mobile detection), the camera will automatically wake up and record a short video, then return to sleep mode. This feature protects your vehicle while parked.

Image: A visual representation of the 24-hour parking monitoring feature, highlighted by a shield icon with '24' inside, indicating continuous protection.
5.4 Reverse Imaging Mode
When the vehicle is shifted into reverse gear, the dash cam automatically displays the rear camera's feed on the full screen. Parking assist lines will appear to help guide you, making reversing safer and easier.

Image: The dash cam screen showing the rear view with dynamic parking assist lines overlaid, aiding in safe reversing.
5.5 Night Vision and HDR
The dash cam features advanced image processing (WDR/HDR) and a high-sensitivity sensor to ensure clear video recording in various lighting conditions, including low light and night driving. It automatically adjusts to optimize visibility and image quality.
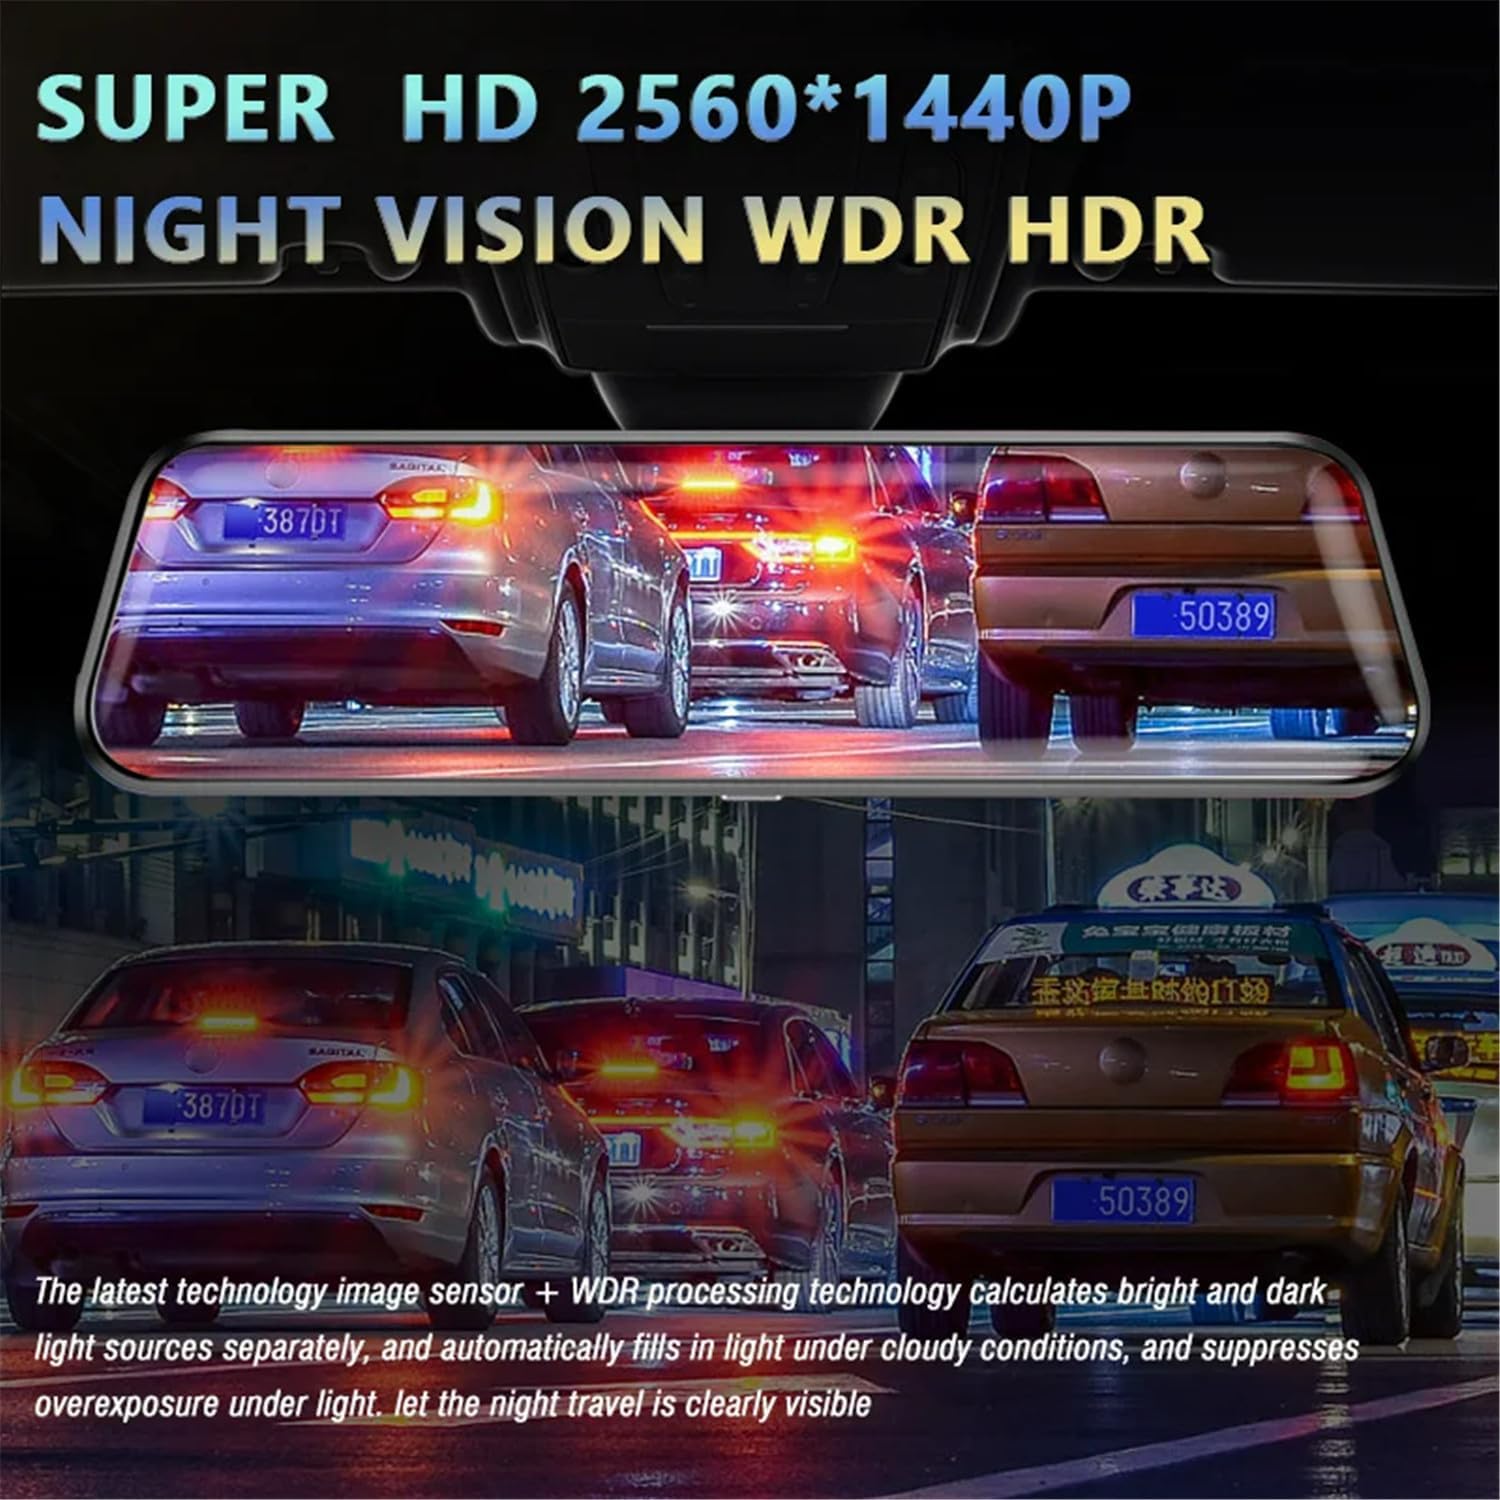
Image: The dash cam screen demonstrating its Super HD 2560x1440P resolution with Night Vision, WDR (Wide Dynamic Range), and HDR (High Dynamic Range) capabilities for enhanced clarity in challenging light conditions.
5.6 Mobile App Connection
Connect the dash cam to your mobile phone via Wi-Fi to view recorded videos, download files, and adjust settings directly from your smartphone. Refer to the specific app instructions for detailed connection steps.

Image: The dash cam screen indicating its WiFi connectivity, allowing users to view and manage videos on their mobile phones via a dedicated app.
6. Maintenance
- Cleaning: Gently wipe the screen and lens with a soft, lint-free cloth. Do not use liquid cleaners or sprays directly on the device.
- Storage: If storing the device for an extended period, remove it from the vehicle and store it in a cool, dry place away from direct sunlight.
- SD Card: Periodically format the microSD card (at least once a month) within the device's settings to maintain optimal recording performance and prevent data corruption. Back up any important videos before formatting.
7. Troubleshooting
| Problem | Possible Cause | Solution |
|---|---|---|
| Device does not power on. | No power supply; loose connection; faulty charger. | Check car charger connection; ensure vehicle's cigarette lighter socket is working; try a different power source if available. |
| Recording stops or freezes. | SD card full or corrupted; low-quality SD card; firmware issue. | Format the SD card; use a high-speed (Class 10 or U3) SD card; update firmware if available. |
| Poor video quality. | Dirty lens; incorrect resolution settings; low light conditions. | Clean the lens; check video resolution settings in the menu; ensure sufficient lighting. |
| Rear camera not displaying. | Loose cable connection; faulty rear camera. | Check the connection of the rear camera cable to the main unit; ensure the rear camera is properly installed. |
| Parking monitor not working. | Feature disabled; insufficient power supply in parking mode. | Enable parking monitor in settings; ensure continuous power supply (hardwire kit may be required for 24-hour monitoring). |
8. Specifications
| Feature | Description |
|---|---|
| Screen | 10-inch High-Definition IPS Touch Screen |
| Front Camera | 2K (2560 x 1440P) Resolution, 170° Wide Angle, 6-layer glass lens |
| Rear Camera | 1080P (1920 x 1080P) Resolution, 170° Wide Angle |
| Video Format | AVI |
| Photo Format | JPG |
| Storage | Supports up to 64GB TF Card (64GB included) |
| Special Features | Loop Recording, 24-Hour Parking Monitoring, G-Sensor, WDR/HDR, Reverse Imaging, Wi-Fi Connectivity |
9. Warranty and Support
This product comes with a standard manufacturer's warranty. Please refer to the warranty card included in your package for specific terms and conditions. For technical support, troubleshooting assistance, or warranty claims, please contact the retailer or manufacturer directly using the contact information provided with your purchase. Keep your purchase receipt as proof of purchase for warranty purposes.
Related Documents - 10-inch 2K DVR (B0F1TLVDCC)
 |
User Manual for 5MP Mirror Camera Car Dashcam DVR Detailed user manual for the 5MP Mirror Camera Car Touch Screen Video Recorder, covering product structure, button functions, shooting modes, playback, system settings, troubleshooting, and installation. This guide helps users understand and operate their dashcam effectively. |
 |
Installation Guide for Triple Lens Dash Cam System Detailed installation instructions and tips for a Triple Lens Front Interior Rear Dash Cam, covering main unit placement, rear camera wiring, and power connections. |
 |
MJDOUD 7-Inch Car Rear View Mirror Monitor System User Manual Comprehensive user manual for MJDOUD 7-inch car rear view mirror monitors and backup camera systems. Learn about installation, operation, features, and troubleshooting for enhanced vehicle safety. |
 |
Dash Camera Installation Guide: Front and Rear Camera Setup Comprehensive guide on how to install your car's dash camera, covering front and rear camera placement, wiring, and best practices for optimal performance. Includes tips for clear video recording. |
 |
FHD 1080P Car DVR 3-Inch Rearview Mirror User Manual Comprehensive user manual for the FHD 1080P Car DVR 3-Inch Rearview Mirror, covering setup, operation, features, technical specifications, troubleshooting, and warranty information. |
 |
VSYSTO Q6L Motorcycle Dash Cam User Manual Comprehensive user manual for the VSYSTO Q6L Motorcycle Dash Cam, detailing installation, operation, features like parking mode and Wi-Fi connectivity, and troubleshooting. |