
Introduction
This manual provides essential instructions for the safe and proper use of your VigorFun Model 630B Remote Control Train Set. Please read this manual thoroughly before assembly and operation to ensure optimal performance and longevity of your product. This train set features a locomotive with smoke, light, and sound effects, multiple carriages, and a remote control for interactive play.
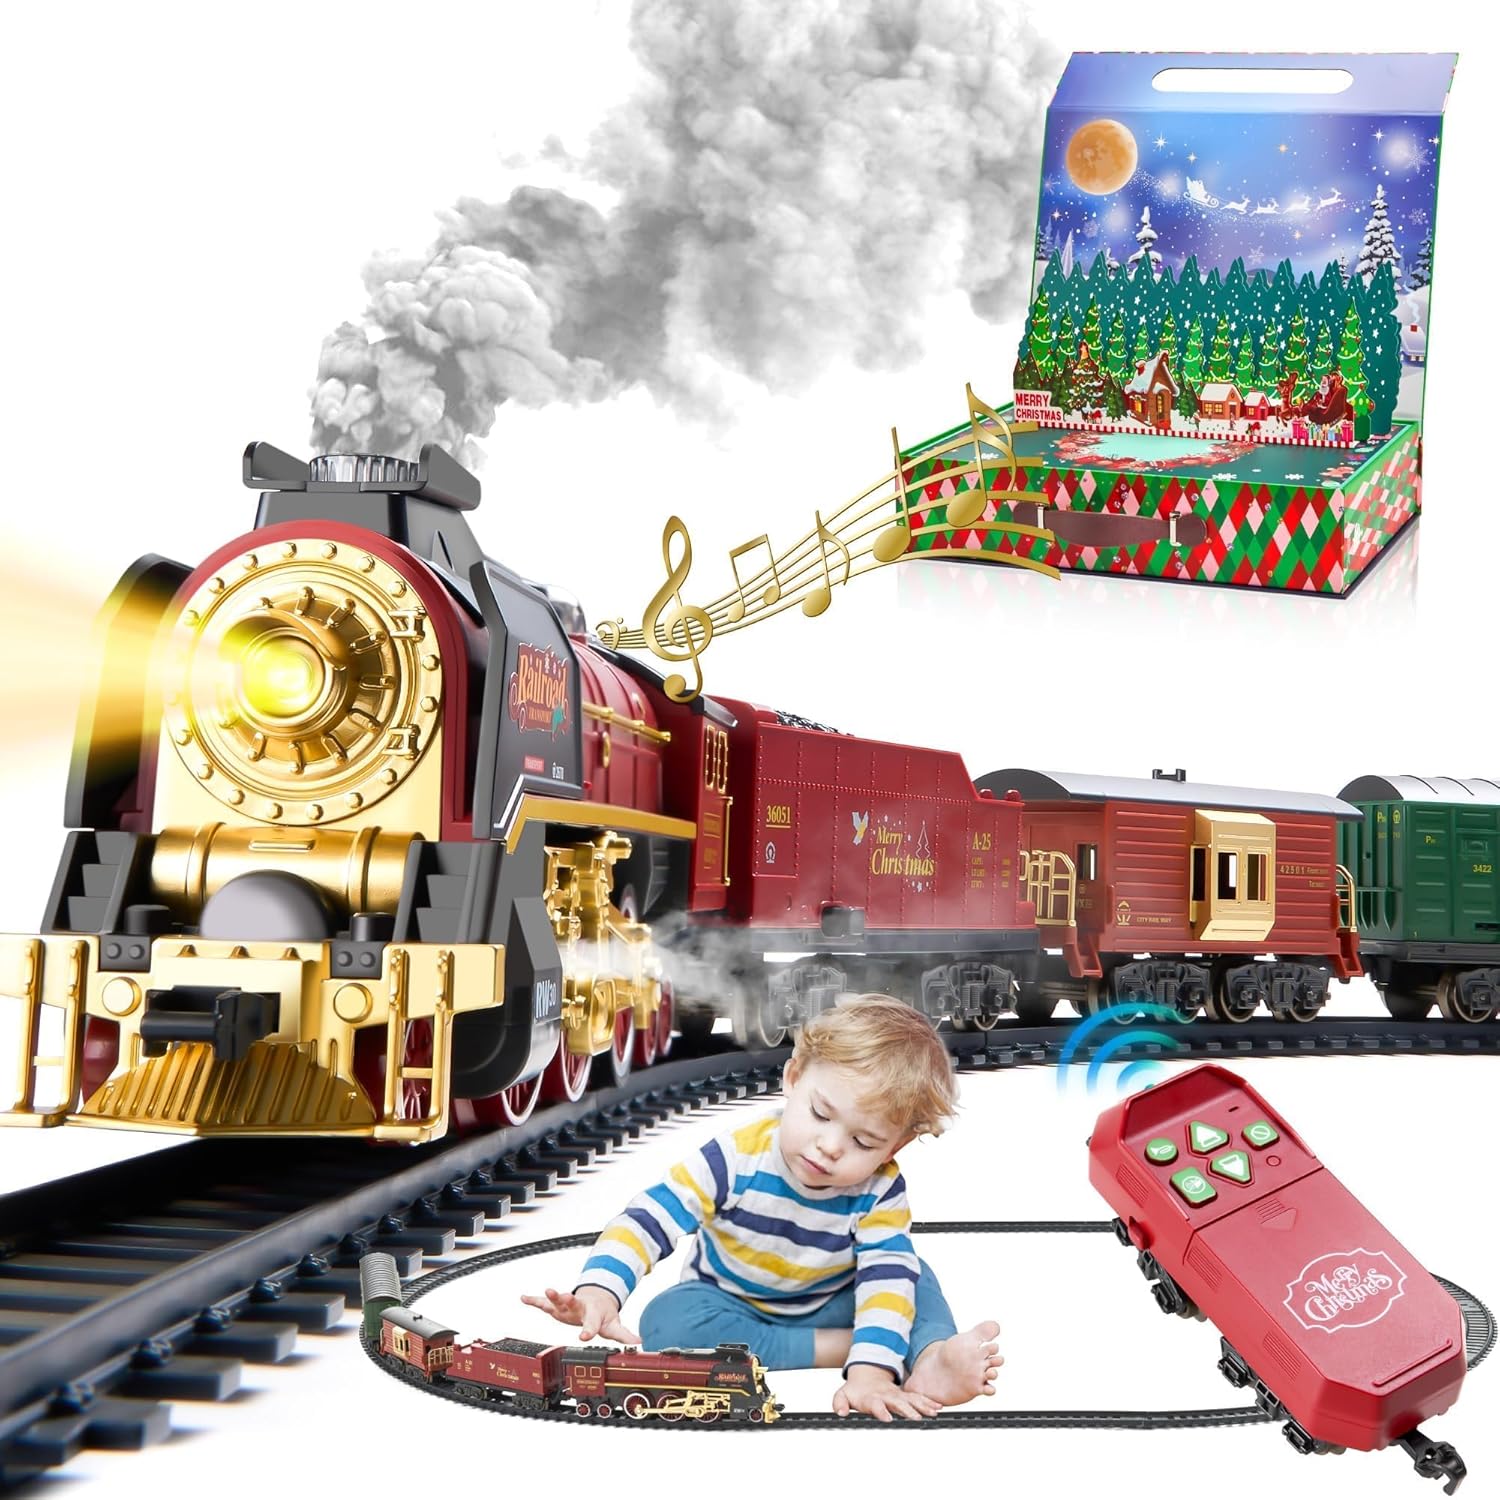
Image: The VigorFun Model 630B train set in operation, showing the locomotive, carriages, tracks, and remote control.
What's in the Box
Carefully unpack all components and verify that all items listed below are present and undamaged. If any parts are missing or damaged, please contact customer support.
- 1 x Locomotive Steam Engine
- 1 x Passenger Carriage
- 1 x Coal Carriage
- 1 x Cargo Carriage
- 1 x Remote Controller
- 16 x Curved Tracks
- 6 x Straight Tracks
- 2 x Y-shaped Tracks
- 2 x Decoration Trees
- 1 x Water Bottle (empty)
- Side Locks (quantity not specified, for track connection)
- Instruction Manual

Image: A visual representation of all included components, including the locomotive, various carriages, track pieces, remote control, and accessories.
Setup
- Battery Installation (Locomotive): The locomotive requires 1 Nonstandard Battery (included). Locate the battery compartment on the underside of the locomotive. Insert the battery, ensuring correct polarity. Secure the compartment cover.
- Battery Installation (Remote Control): The remote control requires 2 x 1.5V AA batteries (not included). Open the battery compartment on the remote control and insert the batteries, observing correct polarity. Close the compartment.
- Track Assembly: Connect the track pieces by aligning the connectors and pressing them firmly together. You can create various layouts using the curved, straight, and Y-shaped tracks. Ensure all connections are secure to prevent derailment. Refer to the track layout examples for inspiration.
- Connecting Carriages: Attach the carriages to the locomotive and to each other using the hooks and loops provided. Ensure each connection is secure.
- Adding Water for Smoke Effect: Locate the water inlet on the top of the locomotive. Use the provided empty water bottle to carefully add clean water into the inlet. Do not overfill. This water will be used to generate harmless, odorless smoke during operation.

Image: Visual instructions demonstrating how to connect track pieces, align train wheels, connect carriages, and add water for the smoke effect.

Image: Various track layouts that can be created with the included track pieces, illustrating different play configurations.
Operating Instructions
Once the train set is assembled and batteries are installed, you can begin operation using the remote control.
- Power On: Ensure the main power switch on the locomotive is in the 'ON' position.
- Remote Control Functions:
- Forward: Press the 'Forward' button to make the train move forward.
- Reverse: Press the 'Retreat' button to make the train move backward.
- Cease (Pause): Press the 'Cease' button to stop the train.
- Whistle: Tightly press the 'Whistle' button for a train whistle sound.
- Music On/Off: Press the music button to turn music on or off.
- Smoke On/Off: Press the spray button to activate or deactivate the smoke effect.
- Smoke Generation: If water has been added, the locomotive will emit harmless smoke when the smoke function is activated. Refill water as needed.
- Lights and Sounds: The locomotive's headlight will illuminate, and realistic train sounds will play during operation.
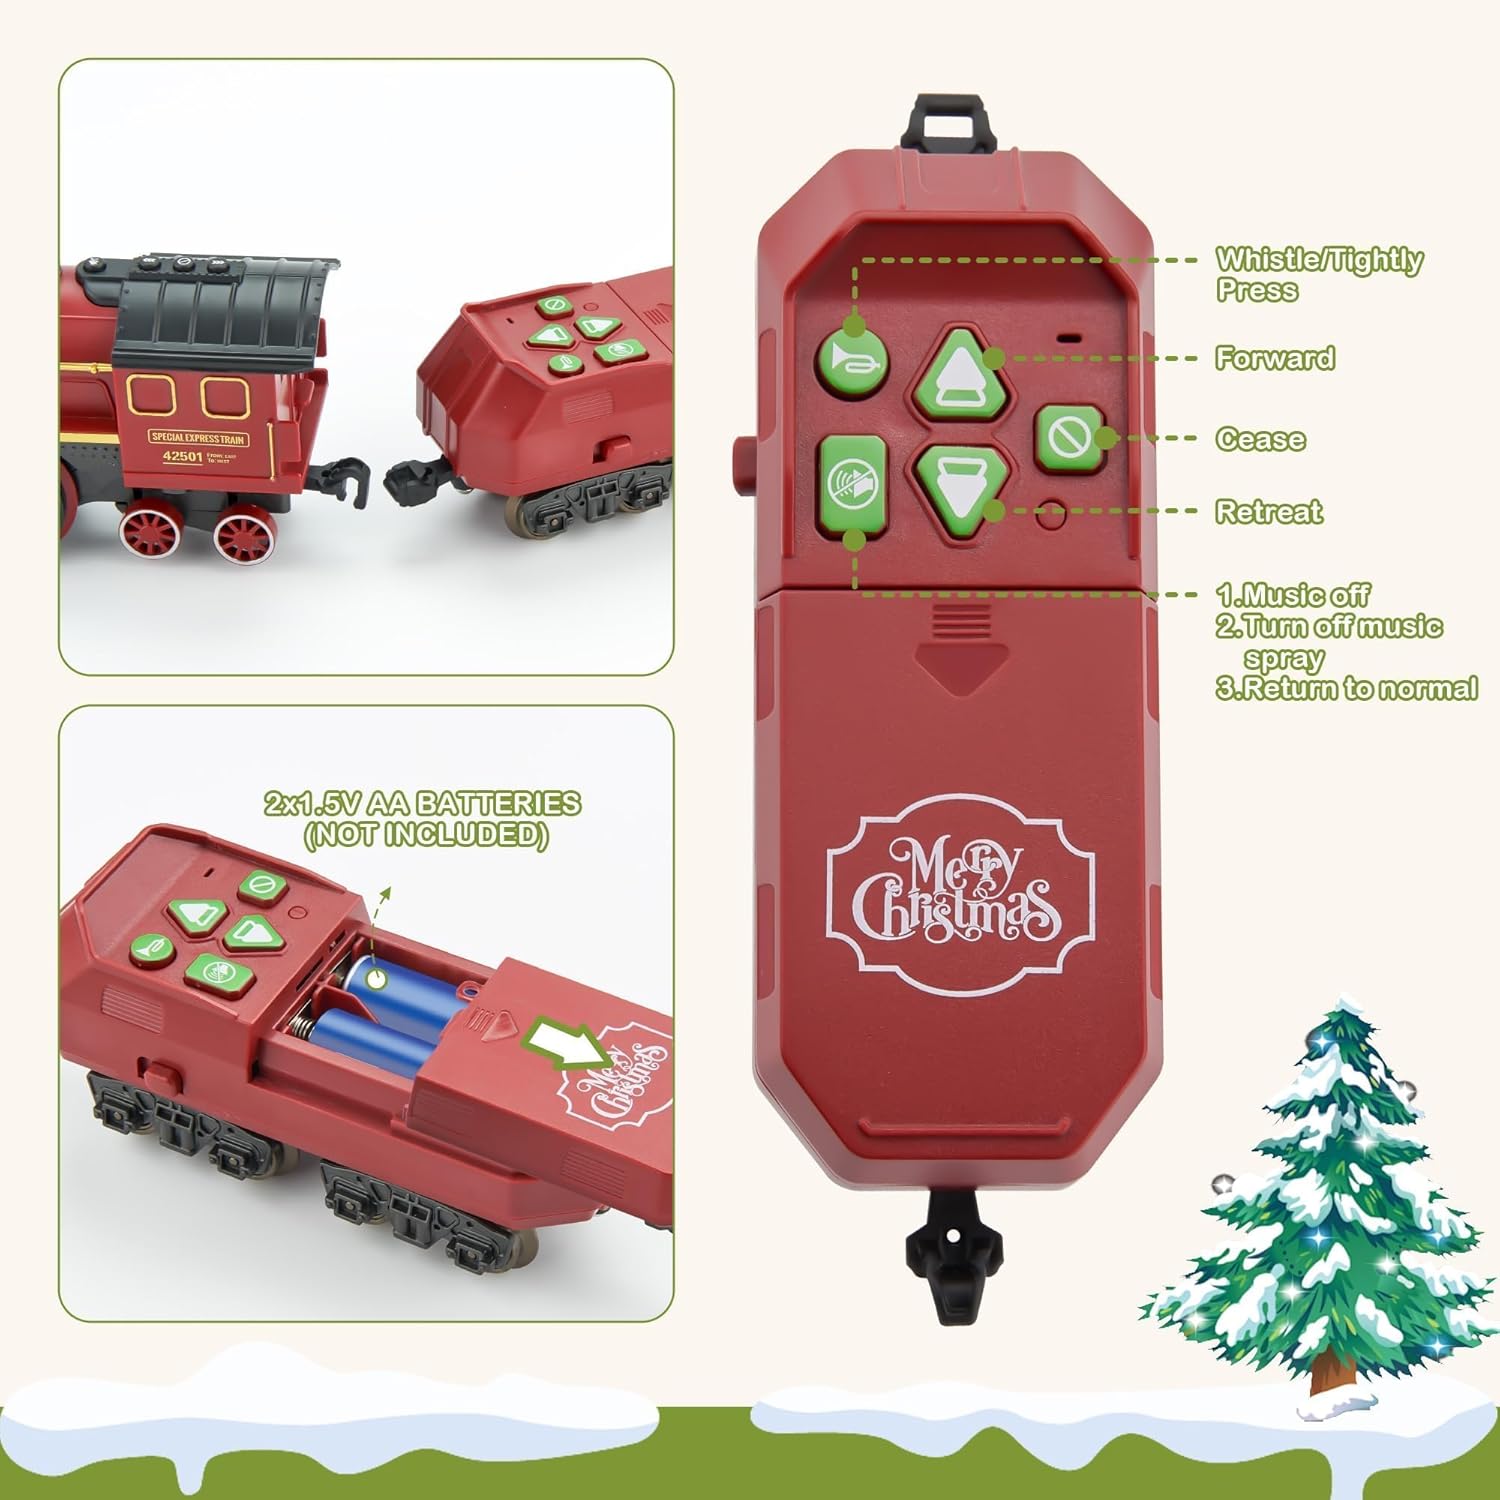
Image: A close-up view of the remote control, highlighting each button and its corresponding function for operating the train.

Image: An overview of the train's key features, including remote control capability, rechargeable power, working headlight, realistic sounds, and smoke effect.
Maintenance
- Cleaning: Wipe the train and tracks with a dry, soft cloth. Do not use harsh chemicals or abrasive cleaners.
- Storage: When not in use, store the train set in its original packaging or a clean, dry place away from direct sunlight and extreme temperatures.
- Battery Care: Remove batteries from the locomotive and remote control if the toy will not be used for an extended period to prevent leakage.
- Water Reservoir: Empty any remaining water from the smoke generator after each play session to prevent residue buildup.
Troubleshooting
- Train Not Moving:
- Check if the locomotive's power switch is 'ON'.
- Ensure batteries are correctly installed and not depleted in both the locomotive and remote control.
- Verify all track connections are secure and the train wheels are properly seated on the tracks.
- No Smoke Effect:
- Ensure water has been added to the locomotive's reservoir.
- Confirm the smoke function is activated via the remote control.
- Intermittent Operation:
- Check for loose track connections.
- Ensure the play surface is flat and stable.
- Replace batteries if they are low.
Specifications
| Model Number | 630B |
| Product Dimensions | 12.48 x 4.02 x 17.32 inches |
| Item Weight | 2.98 pounds |
| Recommended Age | 36 months - 8 years |
| Locomotive Battery | 1 Nonstandard Battery (included) |
| Remote Control Battery | 2 x 1.5V AA batteries (not included) |
| Manufacturer | VigorFun |
Warranty and Support
For warranty information or technical support, please refer to the contact details provided on the product packaging or visit the official VigorFun website. Keep your purchase receipt as proof of purchase for any warranty claims.