Introduction
This manual provides comprehensive instructions for the Awnlux Motorized Modular Retractable RV Awning. Designed for RVs, 5th wheels, travel trailers, toy haulers, and motorhomes, this awning offers convenient motorized operation and durable construction for enhanced outdoor living.
Product Features
Motorized Operation
The Awnlux RV Awning features a built-in motor for effortless opening and closing in under one minute. A simple push of a button expands or retracts the awning, with the option to stop at any desired extension. A hand crank is also included for manual operation in case of power loss.

This image shows the control switch for the motorized awning, featuring clear "OPEN" and "CLOSE" buttons for easy operation.

The awning is shown fully extended, providing shade and comfort for outdoor activities next to an RV.
This image highlights the emergency hand crank, which allows for manual operation of the awning if electrical power is unavailable.
Durable Fabric and Frame
The RV awning fabric is constructed from high-quality 16oz vinyl material, ensuring waterproof performance and thermal insulation for improved durability. The awning frame is made from aluminum alloy with a powder-coated finish for long-lasting resilience.
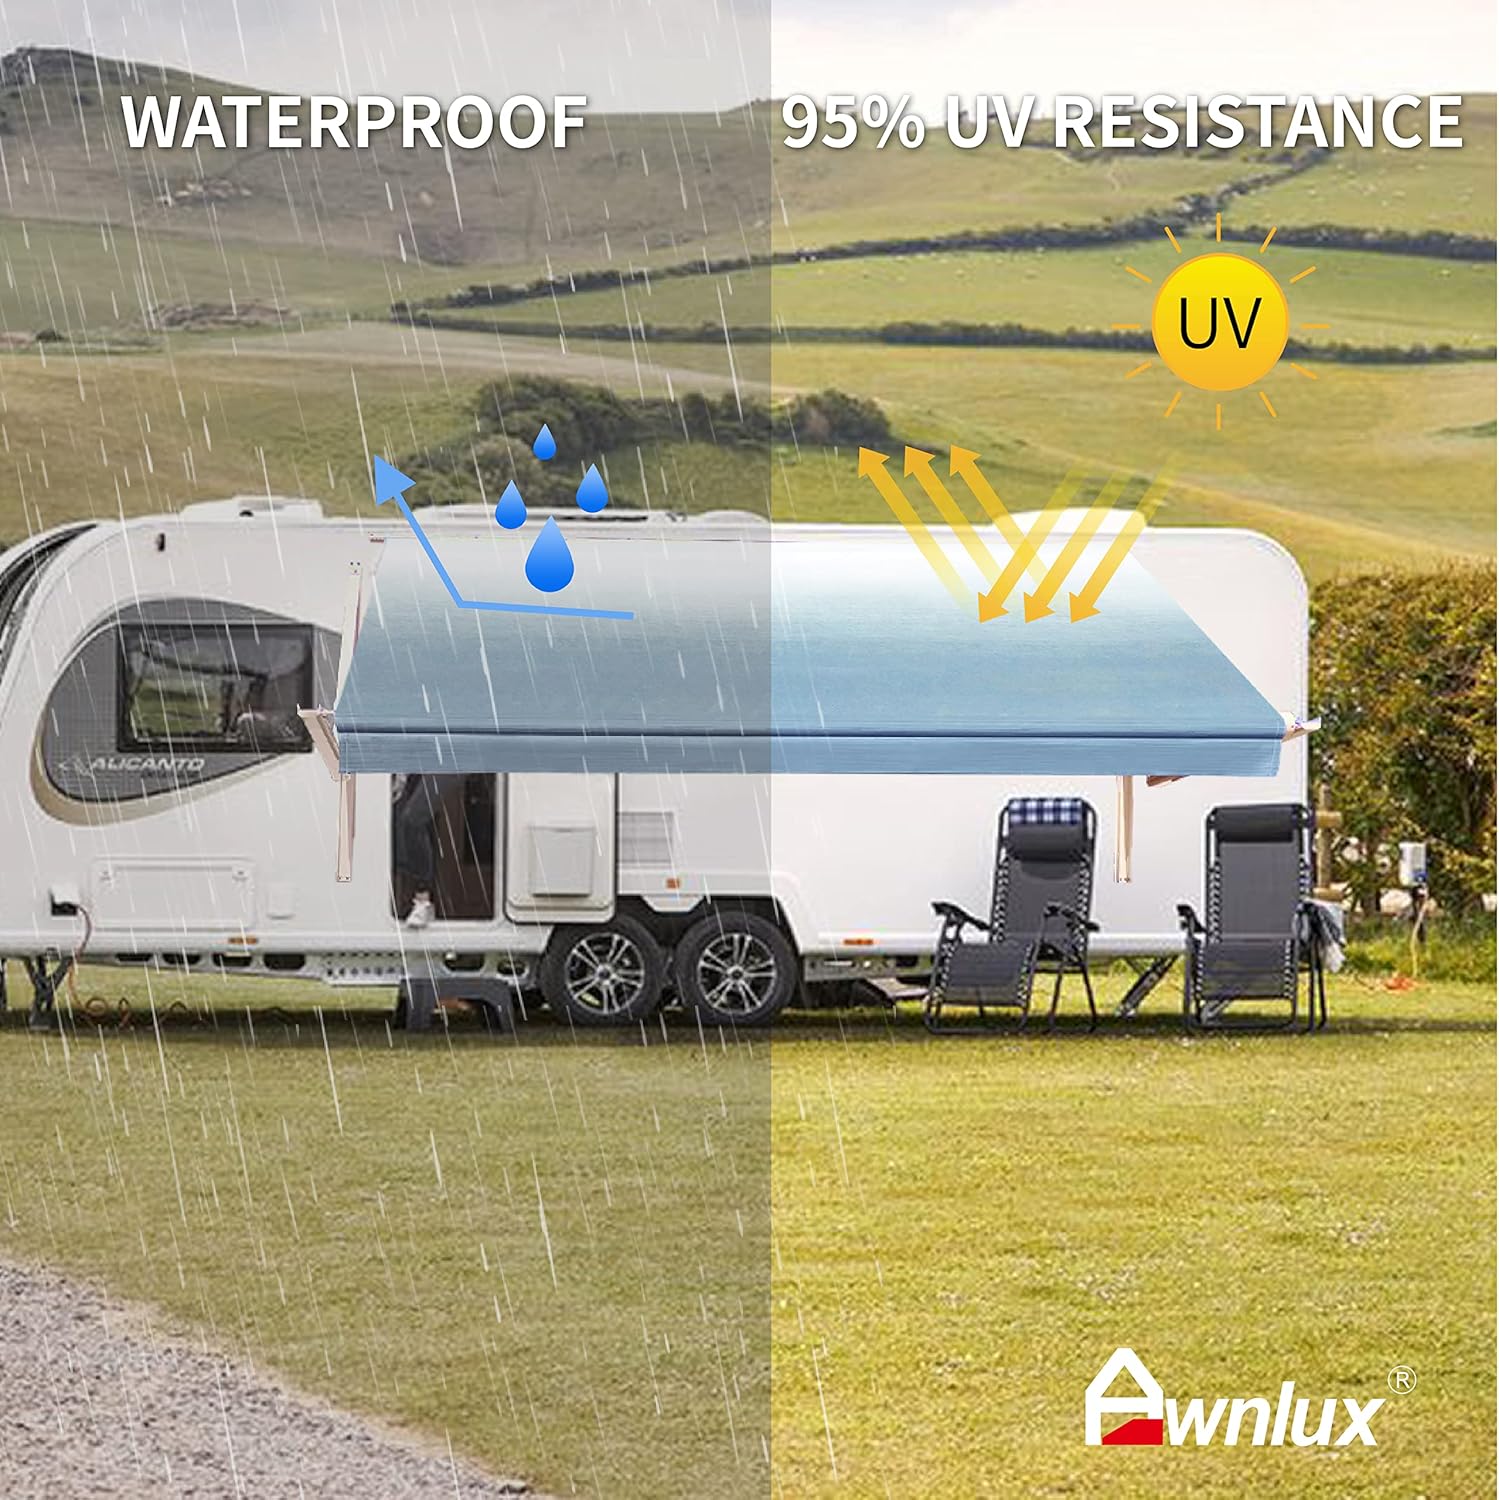
This visual demonstrates the fabric's waterproof capabilities, with water droplets beading and rolling off, and its 95% UV resistance, protecting from sun exposure.
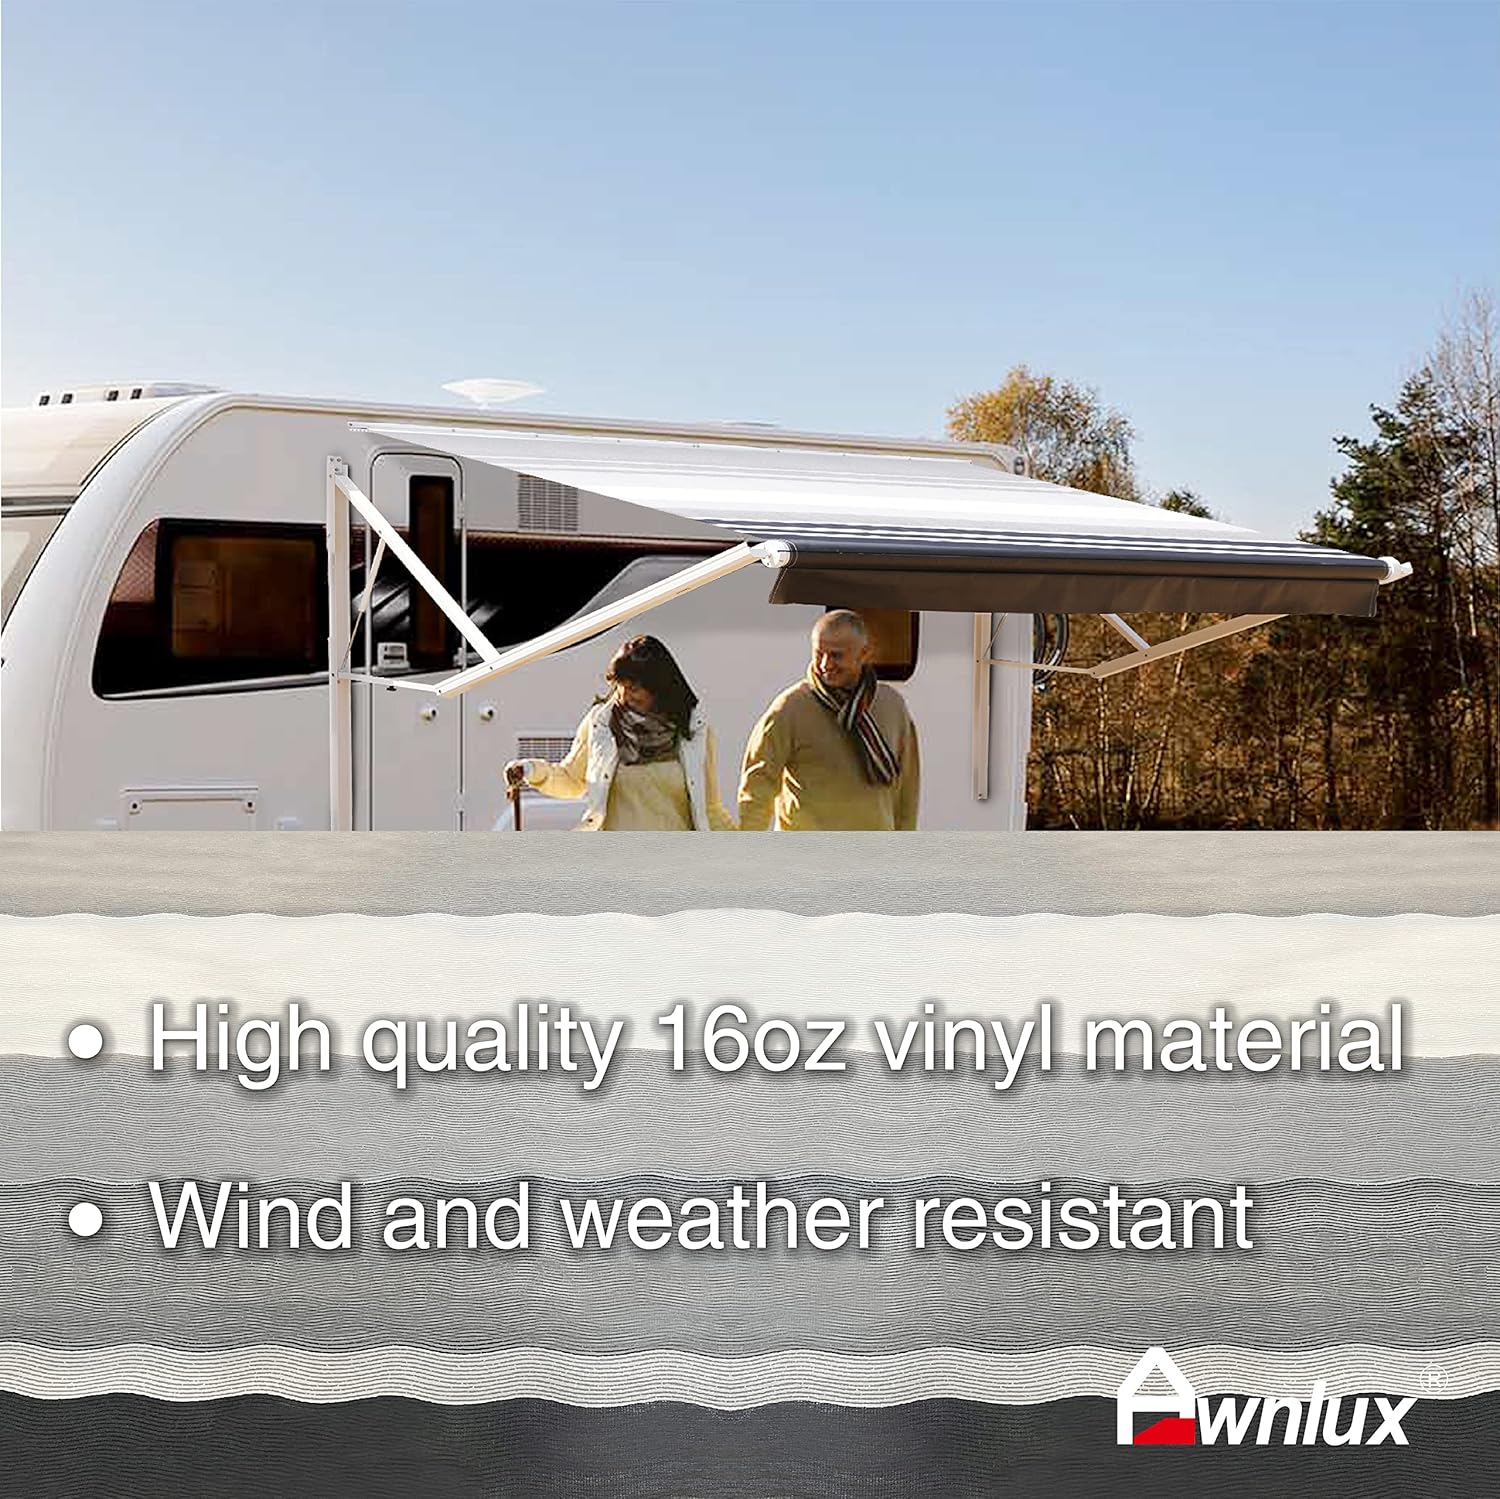
A detailed view of the 16oz vinyl fabric, emphasizing its quality and resistance to wind and various weather conditions.
Sizing and Customization
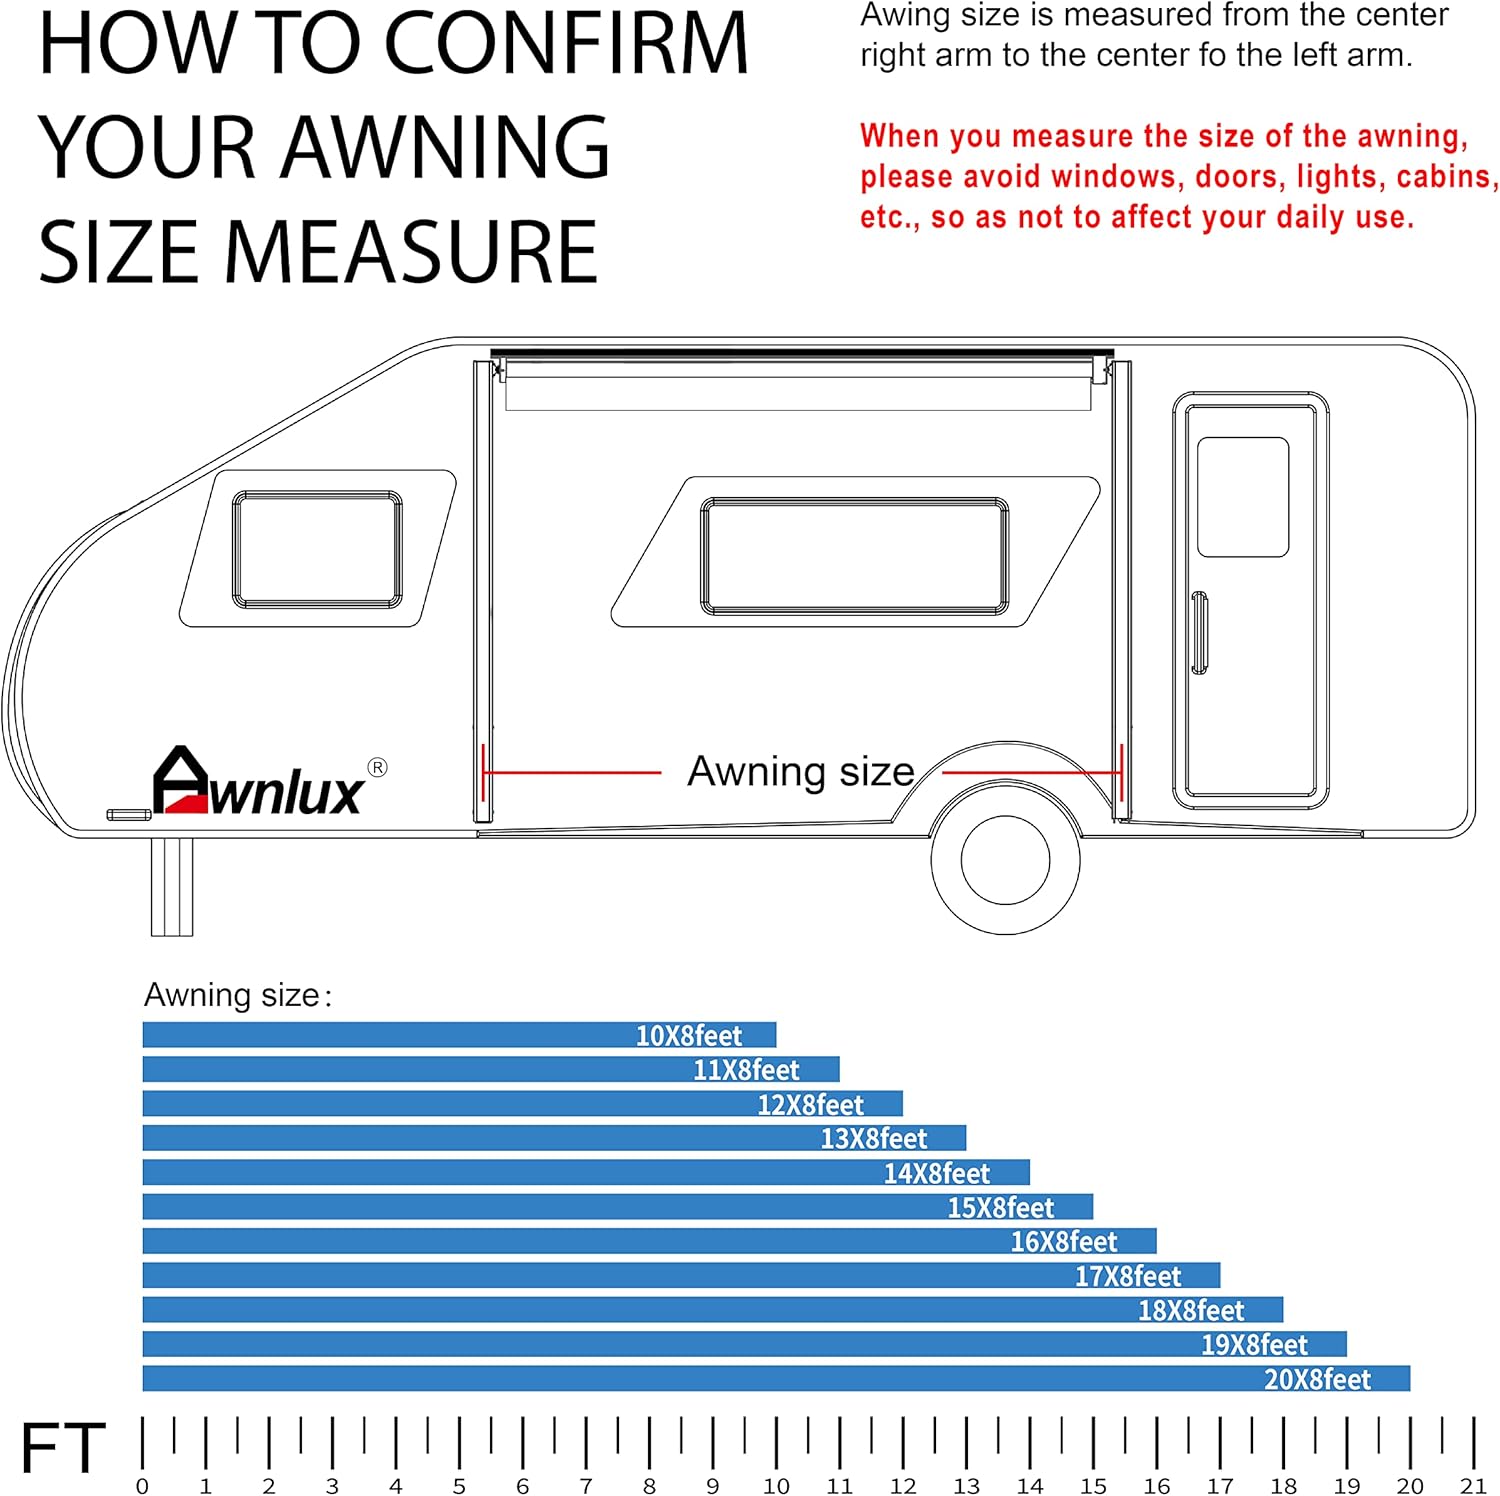
Awnlux offers a range of sizes from 10 to 20 feet, with actual fabric dimensions slightly less than the stated length. Multiple color fabrics are available to match your RV's aesthetic.

This diagram provides guidance on accurately measuring your RV for the correct awning size, with a chart of available lengths.
Setup and Installation
A detailed installation video is available from the manufacturer. Ensure all parts are present before beginning installation.
This video provides a step-by-step guide for installing the Awnlux Motorized RV Awning, covering preparation, assembly, and wiring.
Preparation
Before installation, ensure the front and rear of the vehicle body are at the same distance from the ground. Refer to the instruction manual for specific fixing point positions based on your canopy size.
Arm Installation
Install the Z-type brackets by punching holes at the marked positions and securing them with M6x16 screws. Insert the left arm into the Z-type bracket, confirm and mark the position, then punch holes and secure with M6x16 screws. Repeat for the right arm.
Fabric Tube Assembly
Arrange the fabric tube. Take out the roller connector from the tube (located in the left and right end caps). Connect the tube piece by piece, aligning the hole positions, and then fix with M6x16 screws. Our fabric roller connector has a prompt line for easy alignment.
Fabric Installation
Unpack the fabric. Insert the valance fabric with the grey polycord. Insert the fabric into the A port, use the pressing plate to press the fabric into the groove of the fabric tube, then insert the grey polycord into the A port. Ensure the fabric is in the middle of the fabric tube. Roll up the fabric as directed and place it on the trailer roof. Insert the top of the fabric into the fabric lock rail, then insert the black polycord into the fabric lock rail.
Connecting Arms to Fabric Tube
Connect the awning left arm with the left fabric tube. Take out the screw on the left fabric tube, align the hole, and insert the screw to connect to the arming left arm. Repeat for the right arm.
Wiring
Prepare a temporary 12V power supply. Connect the black wiring on the switch to the negative (-) of the temporary power supply. Connect the red wiring on the switch to the positive (+) of the temporary power supply. Remember to wrap the wires with electrical tape. Connect the blue wiring on the switch to the brown wire on the awning motor. Connect the white wiring on the switch to the blue wire on the awning motor.
Final Switch Installation
Open the hole in the car wall according to the switch bottom shell size. After connecting with the power supply in the camper, you can use your awning satisfactorily.
Operating Instructions
Extending the Awning
Turn the switch to the "OPEN" position. The awning will begin to extend. If the awning cannot be fully opened, insert the adjusting rod into the bottom hole of the motor and adjust it in the "+" direction until it is completely open.
This video demonstrates the motorized operation of the Awnlux awning, including extending and retracting, and highlights its key features.
Retracting the Awning
Turn the switch to the "CLOSE" position. The awning will start to retract. If the awning cannot be fully closed, insert the adjusting rod into the upper hole of the motor and adjust it in the "+" direction until the awning is completely closed.
Manual Operation
In case of power failure, use the provided hand crank for manual operation.
Adjusting Awning Pitch
The awning features adjustable arms to set the pitch, allowing water to run off effectively. You can press and stop the switch at any projection position you want.