Introduction
This manual provides detailed instructions for the safe and efficient operation of your SylvanSparkKitchen M12H Automatic Egg Incubator. Designed for optimal hatching conditions, this incubator features precise temperature and humidity control, automatic egg turning, and an integrated egg candler. Please read this manual thoroughly before first use to ensure successful incubation and longevity of your device.
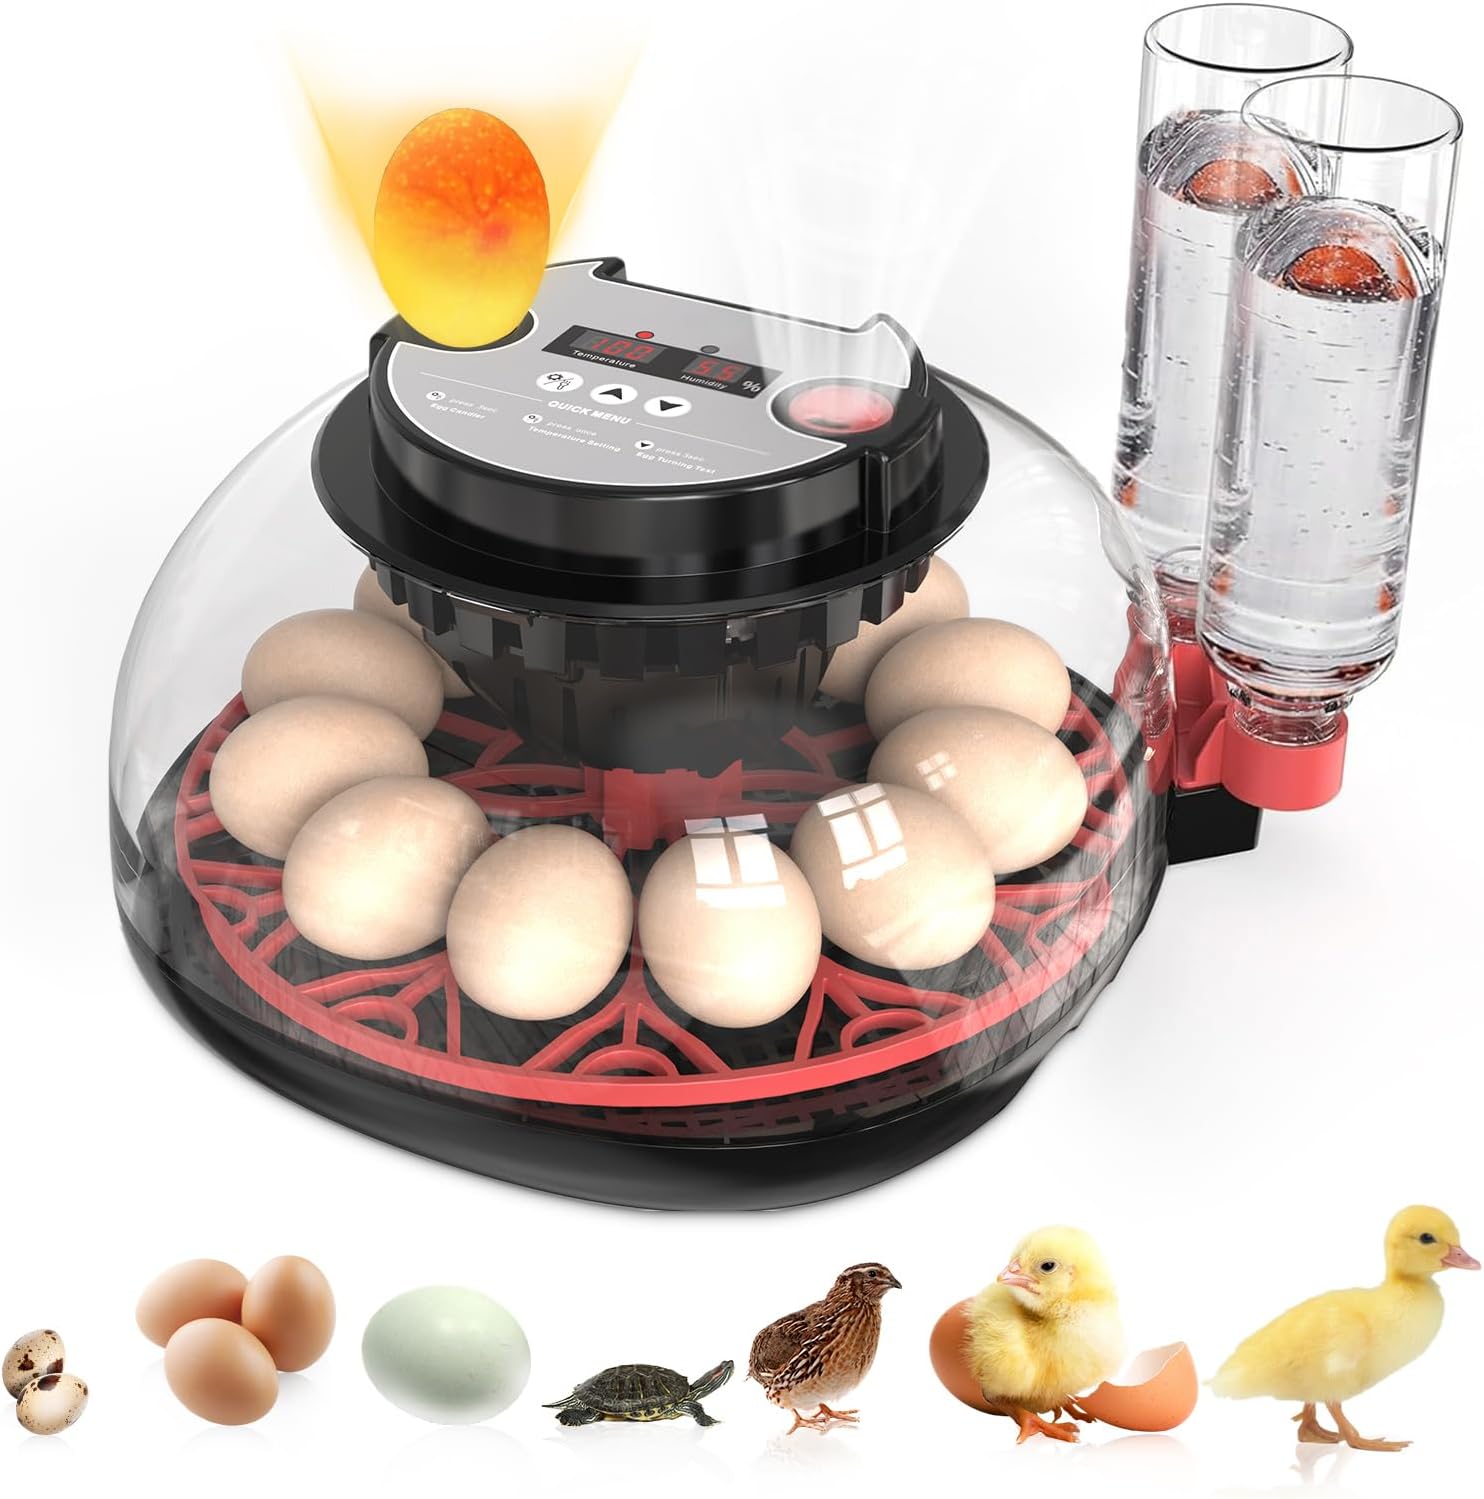
Figure 1: SylvanSparkKitchen M12H Automatic Egg Incubator
Product Features
- Precise 12-Egg Capacity & Intelligent Control: Optimized for 12 chicken/duck eggs (or 40+ quail eggs) with automatic egg turning and humidity control. The digital display monitors real-time temperature (77-103°F) and humidity (40-80% RH) with ±0.5°F accuracy.
- Auto-Temperature Stabilization System: Advanced PID temperature control maintains an optimal 99.5°F ±0.5°F through intelligent heating compensation. A 360° airflow circulation system prevents hot/cold spots, and automatic over-temperature protection ensures embryo safety. Compatible with various egg types via customizable presets.
- Smart Egg Turner & Hatch Assistant: Programmable automatic egg rotation cycles mimic natural hen behavior. The incubator automatically stops turning 72 hours prior to hatching, with audible reminders. An integrated LED candler allows non-invasive embryo monitoring through the viewing window.
- Self-Regulating Humidity Management: A patent-pending humidity control system with dual external 500ml water tanks requires only 2-3 refills per cycle. The anti-leak quick-connect system maintains 55-65% RH automatically, with adjustable vents for precise moisture optimization. Transparent water level indicators allow effortless monitoring.
- Professional-Grade Safety & Maintenance: Constructed with food-grade ABS and 5mm insulation walls. Features include a child-safe locking lid with silicone seal, removable 304 stainless steel trays (dishwasher-safe), emergency power-off memory function, error code diagnostics display, and an IP44 waterproof control panel.
Package Contents
Upon unpacking, please verify that all the following components are included:
- Control Panel (01)
- Egg Candler (02)
- Ventilation Hole (03)
- Power Socket (04)
- Top Cover (05)
- Egg Tray (06)
- Grid (07)
- Base (08)
- Adapter (09)
- Water-adding Hole A&B (10)
- Water Bottles (x2)
- User Manual
- Power Cable

Figure 2: Incubator Structure and Package Contents
Setup
- Assembly: Place the egg tray (06) onto the base (08). Ensure the grid (07) is securely positioned inside the base.
- Water Bottle Installation: Attach the two water bottles to the designated water-adding holes (10) on the side of the base. Fill the bottles with distilled water as needed for humidity control.
- Top Cover Placement: Carefully place the top cover (05) onto the base, ensuring it is properly sealed.
- Power Connection: Connect the power cable to the power socket (04) on the control panel (01) and then plug it into a suitable power outlet.
- Preheat: Turn on the incubator and allow it to preheat for at least 1 hour to stabilize the internal temperature and humidity before placing eggs.

Figure 3: Attaching Water Bottles
Operating Instructions
Temperature and Humidity Control
- The digital display on the control panel shows real-time temperature and humidity.
- To set the desired temperature, press the 'Temperature Setting' key once, then use the Up/Down keys to adjust.
- Humidity is automatically managed by the external water tanks. Ensure water levels are maintained. Adjustable vents allow for fine-tuning moisture levels.
Automatic Egg Turning
- The incubator features an automatic egg turning mechanism that rotates eggs periodically.
- To test the egg turning function, press and hold the 'Egg Turning Test' key for 3 seconds.
- The automatic turning will cease 72 hours before the expected hatch date, accompanied by an audible reminder.
Egg Candling
- To monitor embryo development, use the integrated LED egg candler.
- Press and hold the 'Egg Candler' key for 3 seconds to turn on the 3W inspection light. Press again to turn it off.
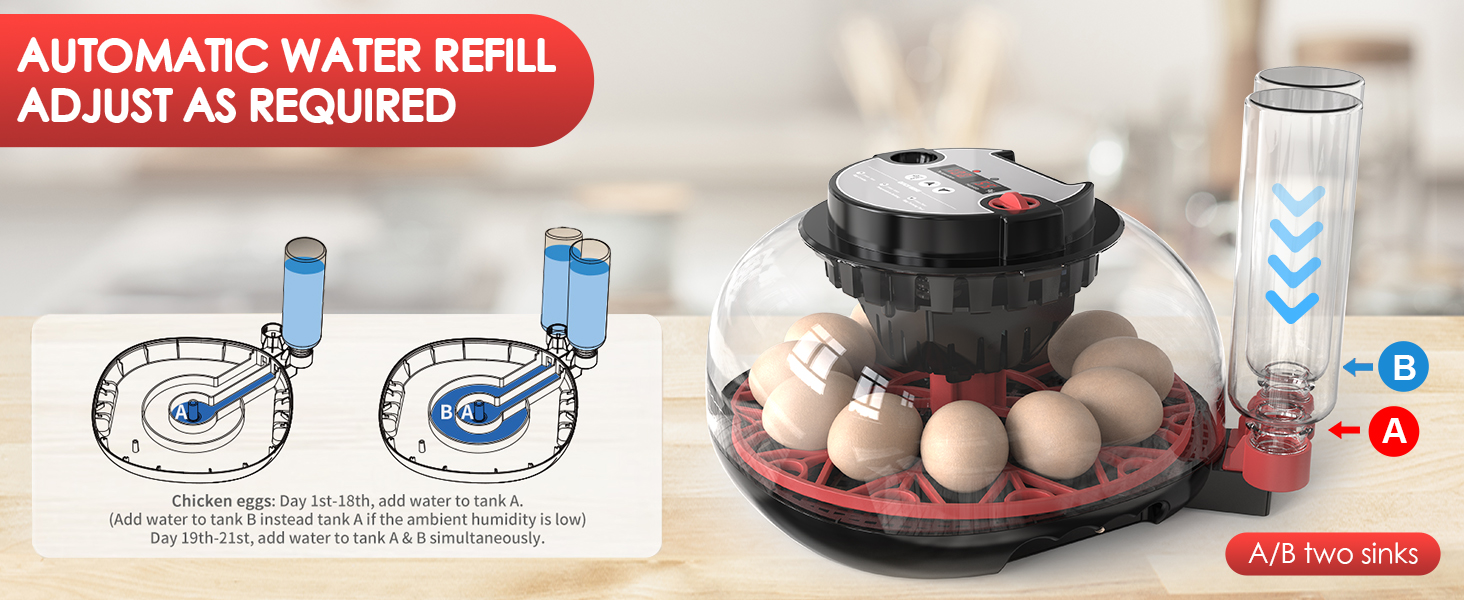
Figure 4: Automatic Water Refill System
Video 1: See The Features Of This Egg Incubator!
Incubation Tips
- Egg Selection: Choose fresh, fertilized eggs that are less than 7 days old for best results.
- Pre-incubation: Generally, eggs should be stored at room temperature for 1-2 days before incubation.
- Candling: Check the development of eggs regularly. The first candling is typically on day 4-6 to identify infertile or dead embryos. The second candling on day 12-14 helps monitor growth.
- Hatching Period: During the last 3 days (Day 19-21 for chickens), increase humidity to soften eggshells and prepare for hatching. Do not open the lid frequently during this period.
- Post-Hatch: Once chicks have hatched and are dry, move them to a brooder.
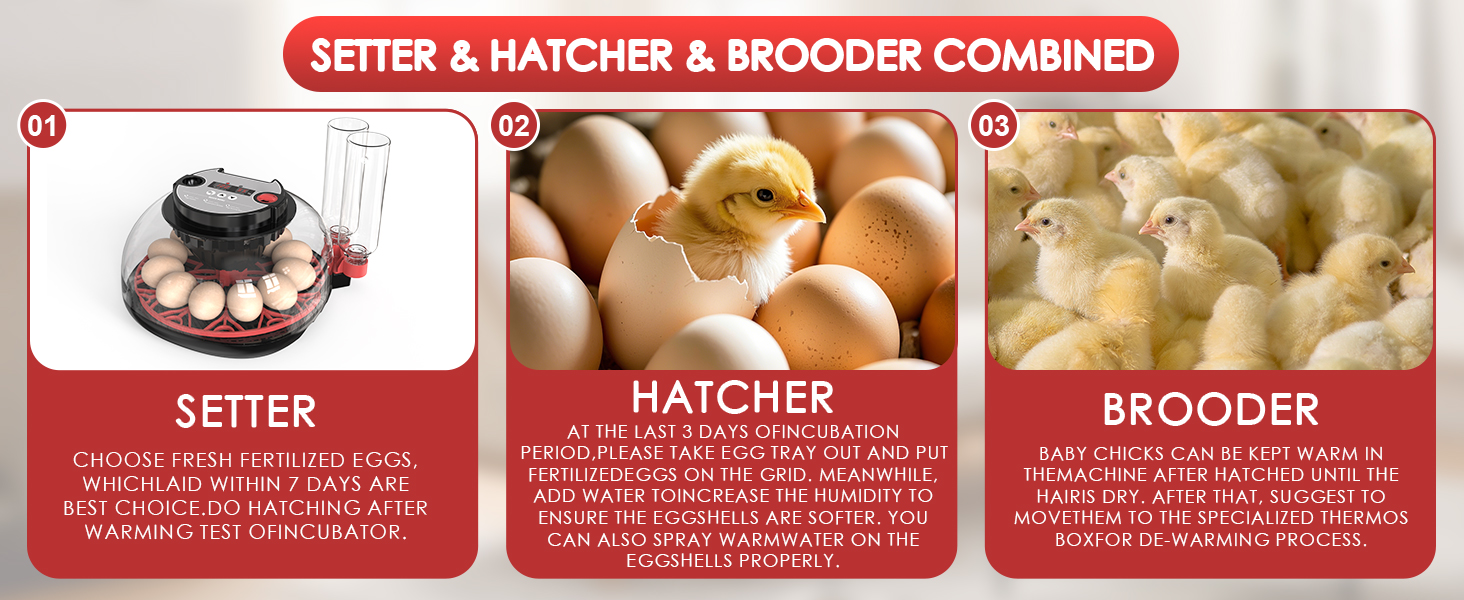
Figure 5: Setter, Hatcher, and Brooder Combined
Maintenance and Storage
- Cleaning: Disconnect the incubator from power before cleaning. Wipe the surface of the top cover with a wet cloth and disinfectant. Ensure all electrical components remain dry. The removable 304 stainless steel trays are dishwasher-safe. Do not immerse any electrical components in water.
- Storage: After cleaning, ensure the incubator is completely dry. Store in a cool, dry place away from direct sunlight.
Troubleshooting
If you encounter issues with your incubator, please consider the following:
- No Power: Check if the power cable is securely connected and the outlet is functional.
- Incorrect Temperature/Humidity: Verify that the settings are correct and that the water tanks have sufficient water. Ensure the incubator is not in a drafty area.
- Egg Turning Malfunction: Perform an 'Egg Turning Test' as described in the operating instructions. Ensure the egg tray is properly installed.
- Error Codes: Refer to the user manual for specific error code diagnostics displayed on the control panel.
If problems persist, please contact SylvanSparkKitchen customer support for assistance.
Specifications
| Feature | Detail |
|---|---|
| Product Dimensions | 12.5 x 12 x 8 inches |
| Item Weight | 3.5 pounds |
| Manufacturer | SylvanSparkKitchen |
| ASIN | B0F1TCC47K |
| Item Model Number | M12H |
| Power Supply | AC |
| Voltage | 110V/220V |
| Power | 35W |
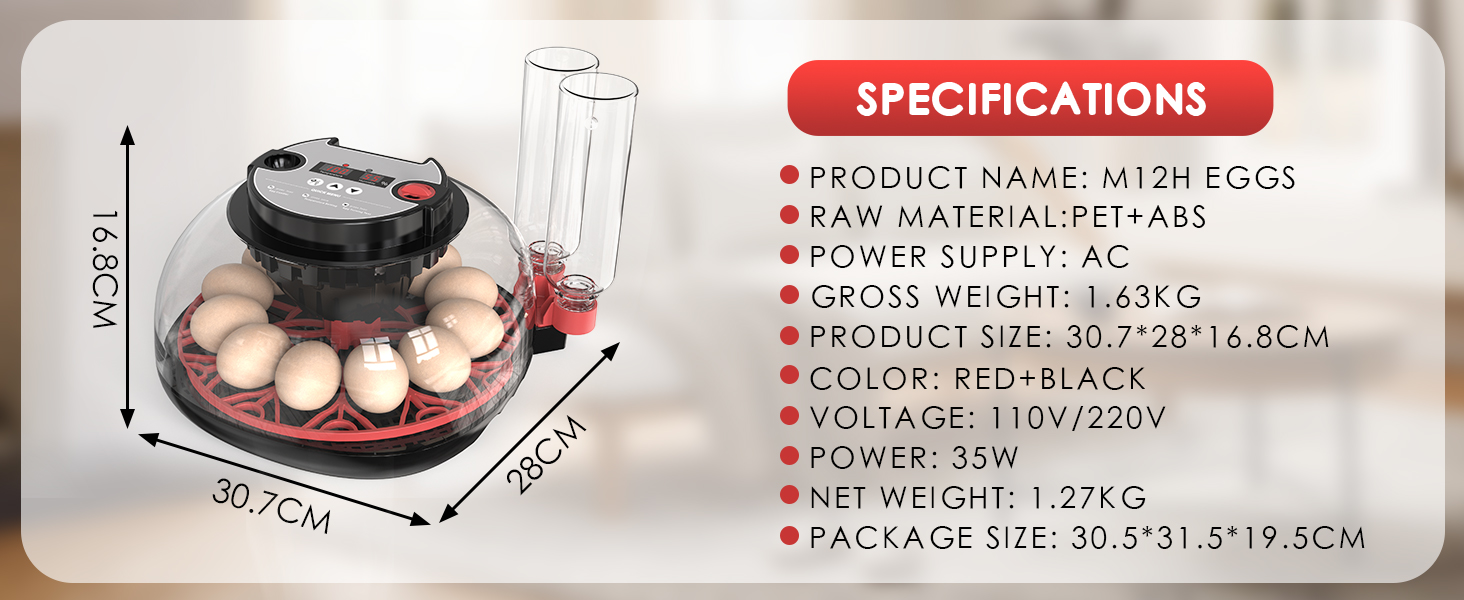
Figure 6: Product Specifications
Warranty and Support
For warranty information or technical support, please refer to the contact details provided with your purchase or visit the official SylvanSparkKitchen website. Keep your purchase receipt for warranty claims.