1. Introduction
Thank you for choosing the GREATMEET Shoe Cabinet. This wall-mounted metal shoe cabinet is designed to provide efficient and space-saving storage for your footwear in entryways, living rooms, bedrooms, or hallways. Constructed from durable alloy steel with a powder-coated finish, it features three flip drawers for organized storage. This manual provides detailed instructions for assembly, operation, maintenance, and troubleshooting to ensure optimal use and longevity of your product.
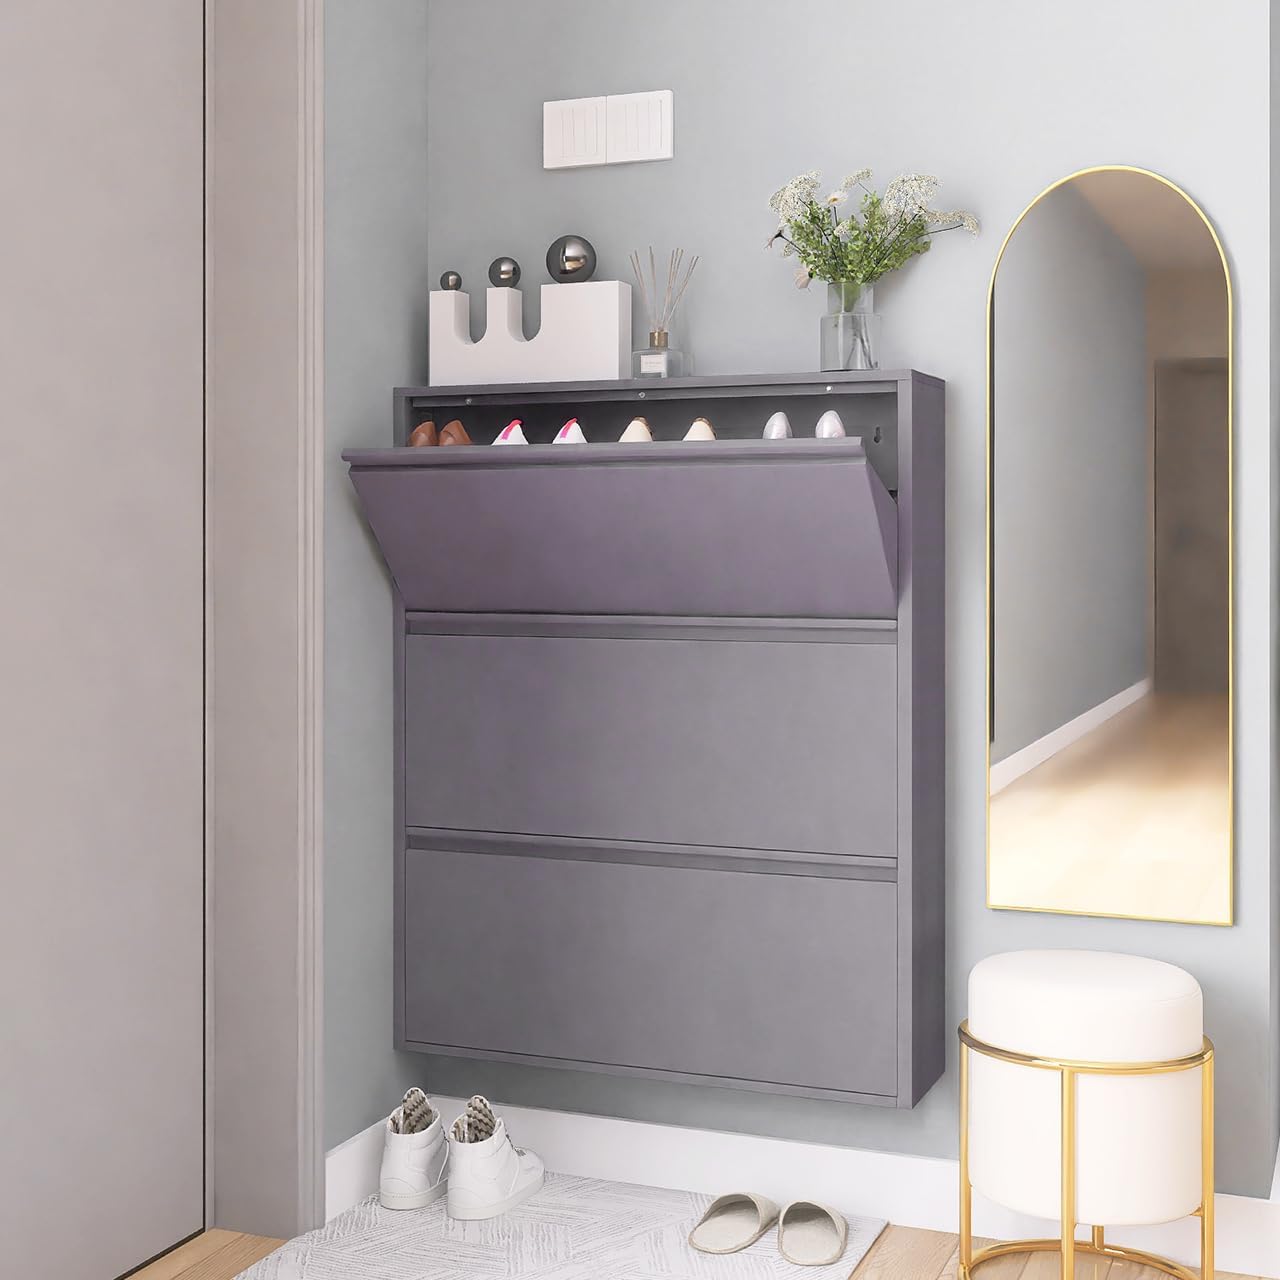
Image 1.1: The GREATMEET Shoe Cabinet with 3 flip drawers, shown installed in an entryway.
2. Safety Information
Please read and understand all safety instructions before assembly and use. Failure to follow these instructions may result in injury or product damage.
- Wall Mounting is Required: This shoe cabinet is designed to be wall-mounted to prevent tipping. Do not use the cabinet freestanding.
- Secure Installation: Ensure the cabinet is securely fastened to a sturdy wall using appropriate hardware for your wall type. Consult a professional if unsure about installation.
- Weight Capacity: Do not overload the drawers. Distribute weight evenly.
- Children and Pets: Keep children and pets away from the cabinet during assembly. Ensure all small parts are out of reach.
- Sharp Edges: Handle metal components with care during assembly to avoid cuts.
3. Package Contents
Verify that all components are present before beginning assembly. If any parts are missing or damaged, please contact customer support.
- Cabinet body
- Cover
- Instruction Manual
- Toolkit (includes necessary screws and wall anchors)
- Adjustable partition boards for each drawer
4. Assembly Instructions
Assembly of the GREATMEET Shoe Cabinet requires attention to detail. It is recommended to have a Phillips head screwdriver (#2) for optimal results. Lay out all parts on a soft, clean surface to prevent scratches.
- Prepare Components: Unpack all parts and identify them using the parts list in the included instruction manual.
- Assemble Cabinet Body: Follow the diagrams in the manual to connect the main panels of the cabinet body. Ensure all connections are secure but do not overtighten screws, as this can strip the holes in the sheet metal.
- Form Flip Drawers: The metal components for the flip drawers may require careful bending along scored lines. Ensure these bends are precise for proper drawer function.
- Install Drawer Mechanisms: Attach the flip drawer mechanisms to the cabinet body. Note that once the drawers are inserted and the spring hinge pins engage, they are designed to be difficult to remove. Ensure correct orientation before fully inserting.
- Attach Adjustable Partition Boards: Insert the adjustable partition boards into each flip drawer. These can be positioned to accommodate different shoe sizes.
- Wall Mounting:
- Determine the desired height and location for the cabinet.
- Mark the drilling points on the wall using the cabinet's mounting holes as a template.
- Drill pilot holes and insert appropriate wall anchors. For heavier loads or specific wall types, consider using more robust anchors than those provided, if necessary.
- Securely attach the cabinet to the wall using the provided screws. Ensure it is level and stable.

Image 4.1: Dimensions of the wall-mounted shoe cabinet (6"D x 31.5"W x 43.01"H).

Image 4.2: Details of the smooth powder-coated finish, magnetic door closure, ample storage, and adjustable partition board for shoe organization.
5. Operating Instructions
The GREATMEET Shoe Cabinet is designed for simple and efficient shoe storage.
- Opening Drawers: Gently pull the top edge of each drawer outwards to open. The flip mechanism will allow the drawer to tilt down, revealing the shoe compartments.
- Storing Shoes: Place shoes into the compartments. The adjustable partition boards allow for flexible storage. For optimal capacity, place shoes sole-to-sole, with one toe in and one toe out, or lying on their sides.
- Shoe Size Compatibility: The cabinet can accommodate shoes up to 5.9 inches in height and a maximum length of 10.8 inches. This includes sandals, flat shoes, and sneakers. High boots (over 5.9 inches) may not fit.
- Closing Drawers: Push the drawer upwards until it clicks securely into place. The magnetic closure will help keep the drawer shut.

Image 5.1: Illustration of suitable shoe types and maximum height capacity (up to 5.9 inches).
6. Maintenance
To maintain the appearance and functionality of your shoe cabinet, follow these simple maintenance guidelines:
- Cleaning: Wipe the cabinet surfaces with a soft, damp cloth. Avoid abrasive cleaners or harsh chemicals, which can damage the powder-coated finish.
- Ventilation: The cabinet design includes ventilation to help prevent odor buildup. Ensure the area around the cabinet allows for air circulation.
- Regular Checks: Periodically check the wall mounting screws to ensure they remain tight and secure.
7. Troubleshooting
If you encounter any issues with your GREATMEET Shoe Cabinet, refer to the following troubleshooting guide:
| Problem | Possible Cause | Solution |
|---|---|---|
| Cabinet feels unstable after wall mounting. | Improper wall anchors or loose screws. | Ensure appropriate wall anchors are used for your wall type. Tighten all mounting screws securely. If necessary, replace anchors with more robust options. |
| Drawers do not open/close smoothly. | Misaligned drawer components during assembly; obstruction. | Check for any obstructions inside the drawer. Review assembly steps for drawer mechanisms to ensure correct alignment. |
| Shoes do not fit in compartments. | Shoes exceed height/length capacity; partition board position. | Adjust the partition board to a suitable position. Ensure shoes are placed efficiently (e.g., sole-to-sole). Note maximum shoe height is 5.9 inches. |
| Screws strip during assembly. | Overtightening screws in sheet metal. | Use a hand screwdriver and apply gentle force. If a hole is stripped, use a slightly larger screw or a thread repair kit if possible. |
8. Specifications
| Feature | Detail |
|---|---|
| Brand | GREATMEET |
| Model Name | Shoe Cabinet |
| Color | Matt Grey |
| Product Dimensions | 6"D x 32"W x 43"H |
| Material | Alloy Steel |
| Finish Type | Powder Coated |
| Number of Drawers | 3 Flip Drawers |
| Mounting Type | Wall Mount |
| Item Weight | 28 Pounds |
| Assembly Required | Yes |
9. Warranty and Support
GREATMEET is committed to providing quality products and customer satisfaction. While specific warranty details are not provided in this manual, we stand behind our products and strive to meet customer needs. If you have any questions, require assistance with assembly, or need to report missing or damaged parts, please contact GREATMEET customer support through your retailer or the official brand channels. Please have your purchase information and model number ready when contacting support.