Introduction
Thank you for choosing the Rolife DIY Miniature House Kit, Baking Kitchen. This kit provides a rewarding building experience, allowing you to construct a detailed miniature kitchen diorama. This manual contains essential information for the assembly, operation, and maintenance of your kit. Please read it thoroughly before beginning assembly.

Image: The completed Rolife DIY Miniature Baking Kitchen, featuring a semi-open structure with detailed furniture and accessories.
Safety Information
WARNING: CHOKING HAZARD - Small Parts. This kit contains small components that may pose a choking hazard. Not suitable for children under 3 years. Adult supervision is recommended during assembly, especially for users under 14 years of age.
Package Contents
Your Rolife DIY Miniature House Kit (Baking Kitchen) includes approximately 359 pieces. Please verify that all components are present before starting assembly. The kit typically contains:
- Pre-cut wooden sheets for structural components and furniture.
- Various miniature accessories (e.g., kitchen utensils, food items, decor).
- LED light components and wiring.
- Detailed instruction manual with illustrations.
- Adhesive (if required for specific parts, though many parts are snap-fit).
Setup and Assembly
This kit is designed for easy assembly, primarily utilizing a snap-fit and glue-free construction method for many parts. The estimated assembly time is approximately 6 hours.
1. Preparation
- Clear a well-lit, spacious work area.
- Organize all components by type or number as indicated in the instruction manual.
- Ensure you have any necessary tools, such as small scissors, tweezers, or a craft knife (not included).
- Prepare 2 AAA batteries for the LED lighting (batteries not included).

Image: Illustrates the snap-fit, glue-free assembly process, highlighting the number of pieces (359), estimated build time (6 hours), and recommended age (14+).
2. Following the Instructions
Refer to the included beginner-friendly manual for step-by-step assembly guidance. Each step is illustrated to ensure clarity.

Image: A view of the open instruction manual, demonstrating its visual and step-by-step approach to assembly.
3. Detailed Component Assembly
Pay close attention to the details for each miniature component. Many pieces are designed to fit precisely. Handle delicate parts with care to avoid breakage.
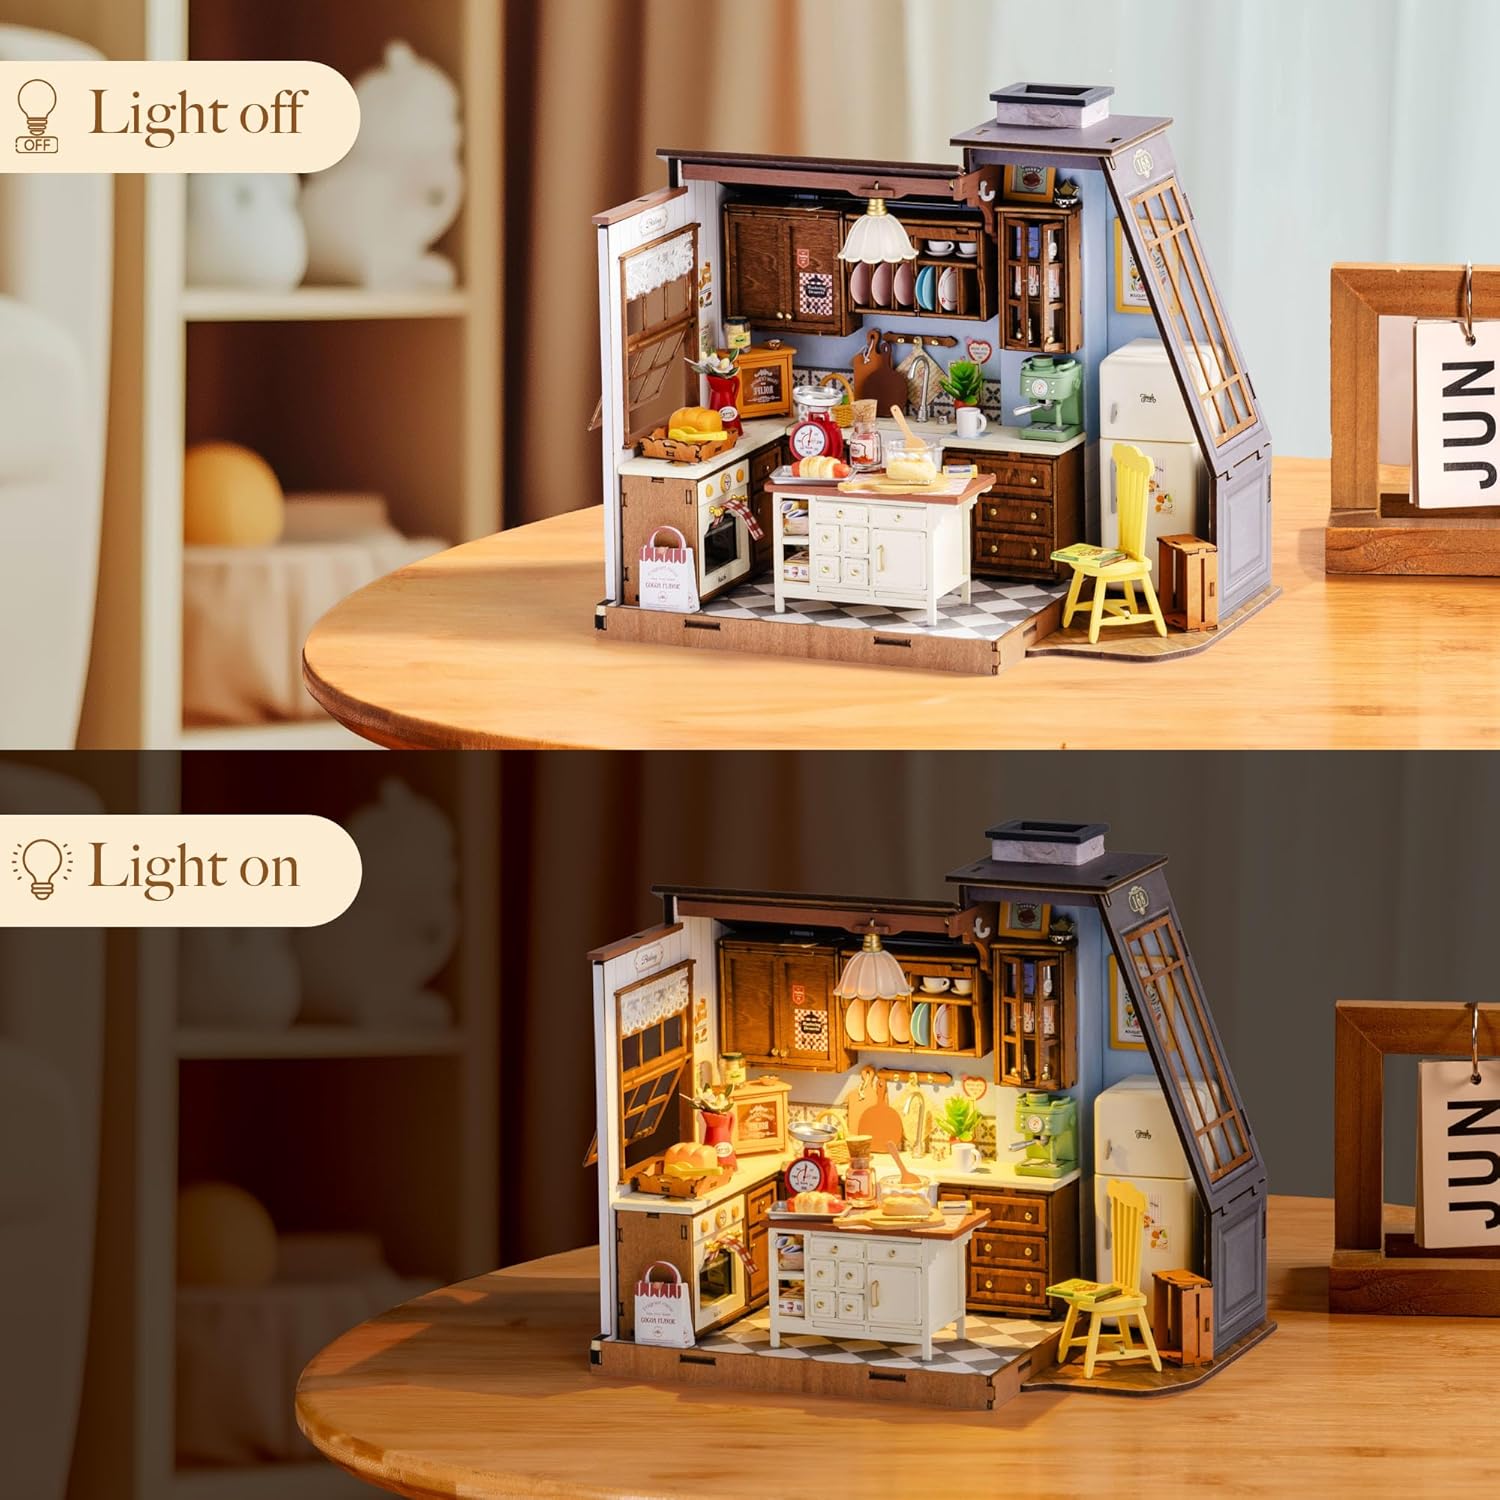
Image: A detailed shot of the miniature kitchen island, showcasing the intricate design of the baking accessories and scale.

Image: A collage highlighting various intricate details within the miniature kitchen, such as the window, sink, and coffee maker.
Operating Instructions
LED Lighting
The miniature house kit includes LED lighting to enhance its display. To operate the lights:
- Ensure 2 AAA batteries are correctly installed in the designated battery pack (refer to the assembly manual for location).
- Locate the power switch, typically found on the battery pack or a discreet location within the model.
- Toggle the switch to turn the LED lights on or off.

Image: Comparison showing the miniature kitchen with its LED lights off and then illuminated, highlighting the effect of the lighting.
Maintenance
- Cleaning: Use a soft, dry cloth or a small brush to gently remove dust from the miniature components. Avoid using liquids or harsh cleaning agents.
- Storage: Store the assembled kit in a dry environment, away from direct sunlight and extreme temperatures, to prevent material degradation.
- Battery Replacement: If the LED lights dim or stop working, replace the AAA batteries. Ensure correct polarity during installation.
Troubleshooting
| Problem | Possible Cause | Solution |
|---|---|---|
| Pieces do not fit together. | Incorrect orientation or misalignment. | Review the instruction manual carefully for the correct orientation and ensure proper alignment before applying pressure. Do not force pieces. |
| LED lights do not turn on. | Batteries are dead, incorrectly installed, or switch is off. | Check battery polarity, replace with fresh AAA batteries, and ensure the power switch is in the 'ON' position. Verify all wiring connections are secure. |
| Missing or damaged parts. | Manufacturing defect or oversight. | Contact Rolife customer support with your purchase details and a description of the missing/damaged part for assistance. |
Specifications
- Model: B0F1N349NP
- Brand: Rolife
- Product Dimensions: 3.5 x 3.5 x 5 inches (approximately 8.9 x 8.9 x 12.7 cm)
- Item Weight: 2.01 pounds (approximately 0.91 kg)
- Recommended Age: 8 years and up (Manufacturer recommended)
- Assembly Time: Approximately 6 hours
- Number of Pieces: 359
- Power Source for LED: 2 x AAA batteries (not included)
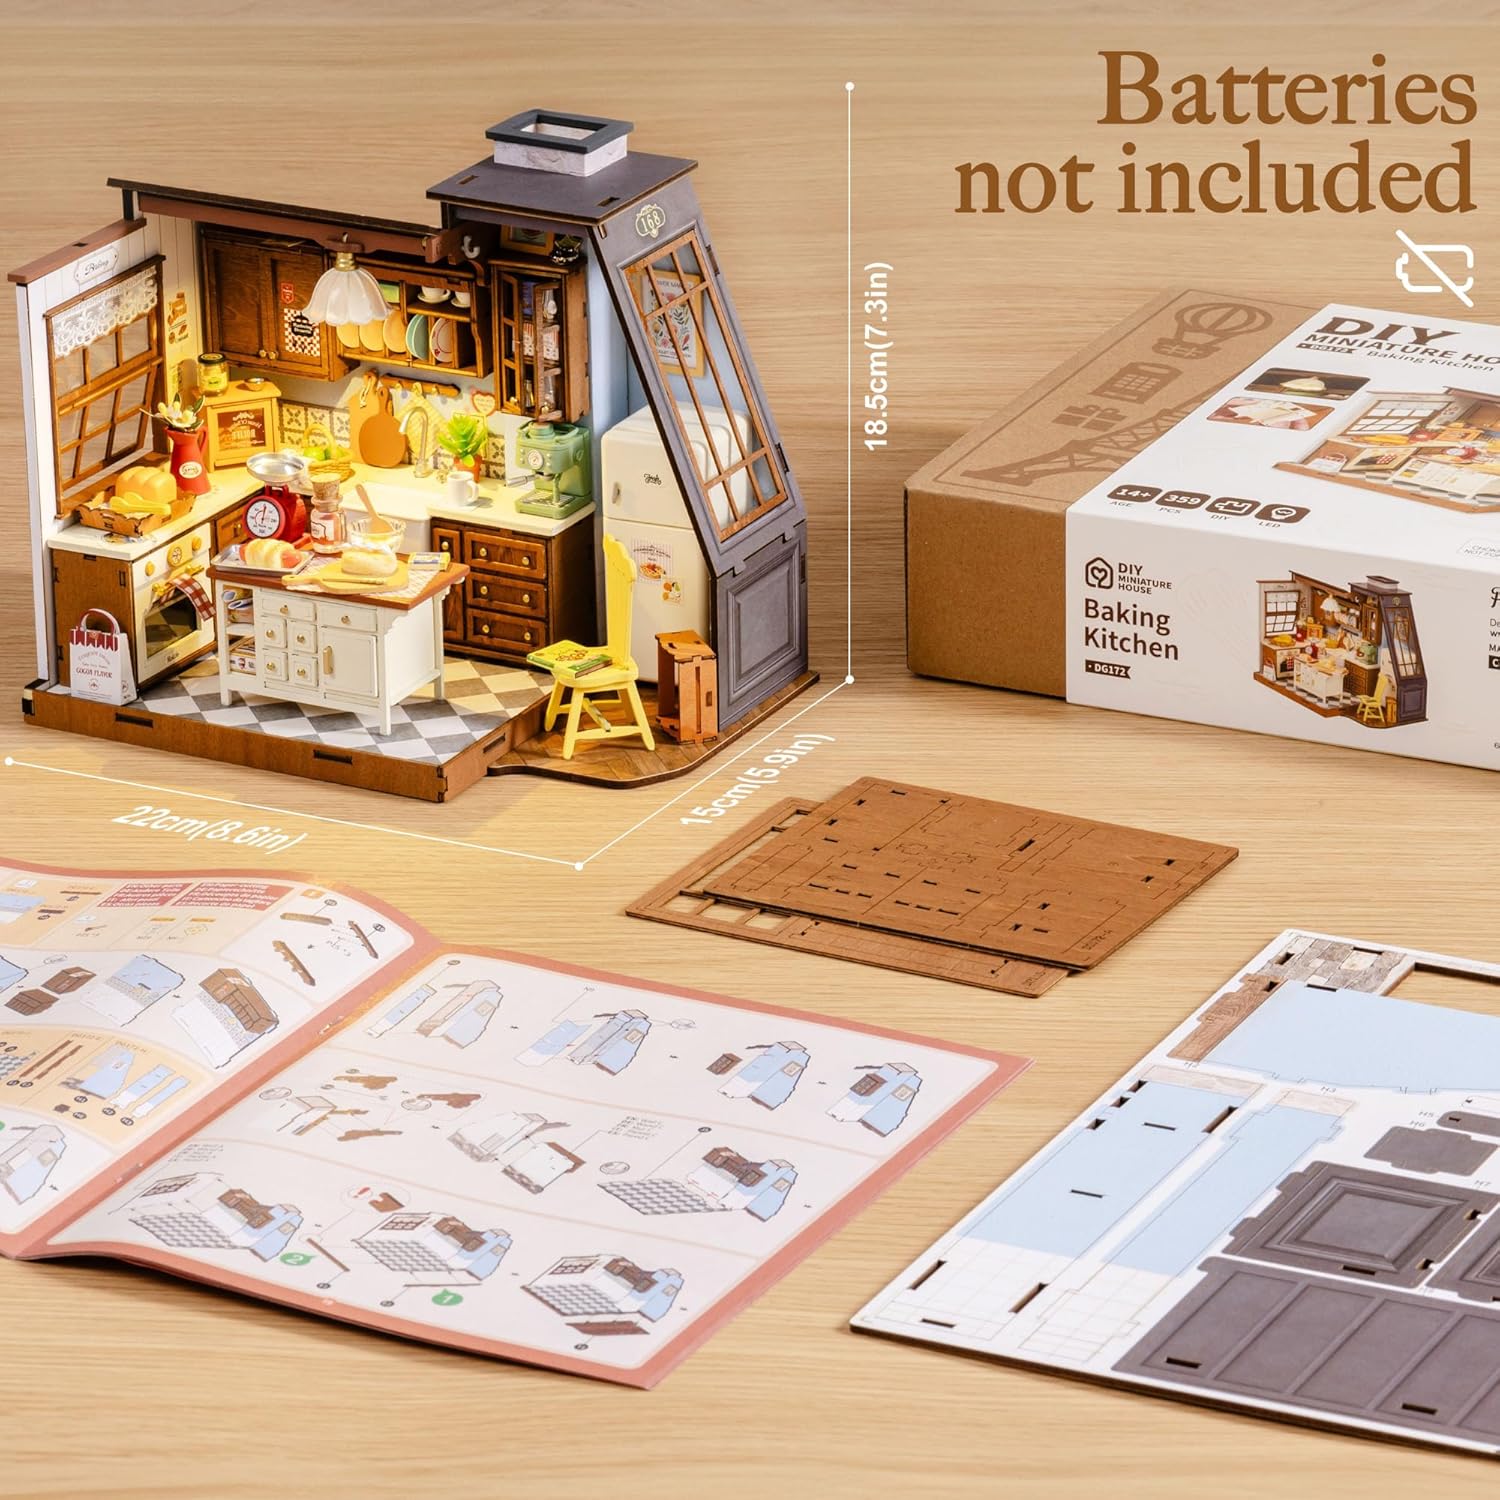
Image: Displays the kit's dimensions and explicitly states that batteries are not included, emphasizing the need for 2 AAA batteries.
Warranty and Support
For warranty information, replacement parts, or technical support, please refer to the contact details provided on the product packaging or visit the official Rolife website. Specific warranty terms may vary by region and retailer.


