avigator 5-Cup 12V Car Coffee Maker
User Manual: avigator 5-Cup 12V Car Coffee Maker
Model: 5-Cup 12V Car Coffee Maker
Brand: avigator
Introduction
Thank you for choosing the avigator 5-Cup 12V Car Coffee Maker. This portable drip brewer is designed for convenience on the go, perfect for road trips, RV adventures, and outdoor activities. This manual provides essential information for safe operation, setup, maintenance, and troubleshooting to ensure you enjoy fresh coffee wherever your journey takes you.
Important Safety Instructions
- Read all instructions before using the appliance.
- Do not touch hot surfaces. Use handles or knobs.
- To protect against fire, electric shock, and injury to persons, do not immerse cord, plugs, or coffee maker in water or other liquid.
- Close supervision is necessary when any appliance is used by or near children.
- Unplug from outlet when not in use and before cleaning. Allow to cool before putting on or taking off parts, and before cleaning the appliance.
- Do not operate any appliance with a damaged cord or plug or after the appliance malfunctions, or has been damaged in any manner.
- The use of accessory attachments not recommended by the appliance manufacturer may result in fire, electric shock, or injury to persons.
- Do not use outdoors.
- Do not let cord hang over edge of table or counter, or touch hot surfaces.
- Do not place on or near a hot gas or electric burner, or in a heated oven.
- Always attach plug to appliance first, then plug cord into the wall outlet. To disconnect, turn any control to "off", then remove plug from wall outlet.
- Do not use appliance for other than intended use.
- Ensure the coffee maker is placed on a stable, level surface during operation, especially in a moving vehicle.
- Only use with a 12V DC power source (vehicle cigarette lighter socket).
Parts Identification

Figure 1: Overview of the avigator 5-Cup 12V Car Coffee Maker and its components, including the main unit, glass carafe, reusable filter basket, and disposable paper filters.
- Main Unit (with water reservoir and heating element)
- Lid
- Filter Basket (removable)
- Glass Carafe with Handle
- Warming Plate
- Power Switch with Indicator Light
- 12V DC Car Cigarette Lighter Plug
- Coffee Scoop (may be included)
- Paper Filters (may be included)
Setup and First Use
- Unpack: Carefully remove all components from the packaging.
- Clean: Before first use, wash the glass carafe, filter basket, and lid in warm, soapy water. Rinse thoroughly and dry. Wipe the exterior of the main unit with a damp cloth.
- Initial Rinse Cycle:
- Fill the water reservoir with clean water up to the 5-cup mark.
- Place the empty filter basket into its position.
- Place the empty glass carafe on the warming plate.
- Plug the 12V DC plug into your vehicle's cigarette lighter socket.
- Press the power switch to turn on the coffee maker. Allow the full cycle of water to brew through.
- Once complete, turn off the coffee maker, unplug it, and discard the water. This cleans the internal components and removes any manufacturing residue.
- Prepare Filter: If using paper filters, fold the edges of the filter paper as shown in Figure 2 to ensure it fits properly in the filter basket.

Figure 2: Folding the edges of the filter paper (steps 1-5) to ensure a secure fit in the filter basket, which helps improve filtering and coffee extraction.
Operating Instructions
Follow these steps to brew a fresh pot of coffee:
- Fill Water Reservoir: Open the lid and fill the water reservoir with fresh, cold water. Do not exceed the maximum fill line (5 cups / 650ml).

Figure 3: The coffee maker is powered via a 12V cigarette lighter plug, allowing it to brew up to 5 cups (650ml) of coffee directly from your vehicle's power source.
- Add Coffee Grounds: Place a paper filter (if desired) into the filter basket, or use the reusable filter. Add your desired amount of ground coffee. A general guideline is one level scoop (approx. 1 tablespoon) per cup.
- Position Carafe: Ensure the glass carafe is properly placed on the warming plate.
- Connect Power: Insert the 12V DC plug firmly into your vehicle's cigarette lighter socket.
- Start Brewing: Press the power switch to the "ON" position. The indicator light will illuminate red, signifying that brewing has started.
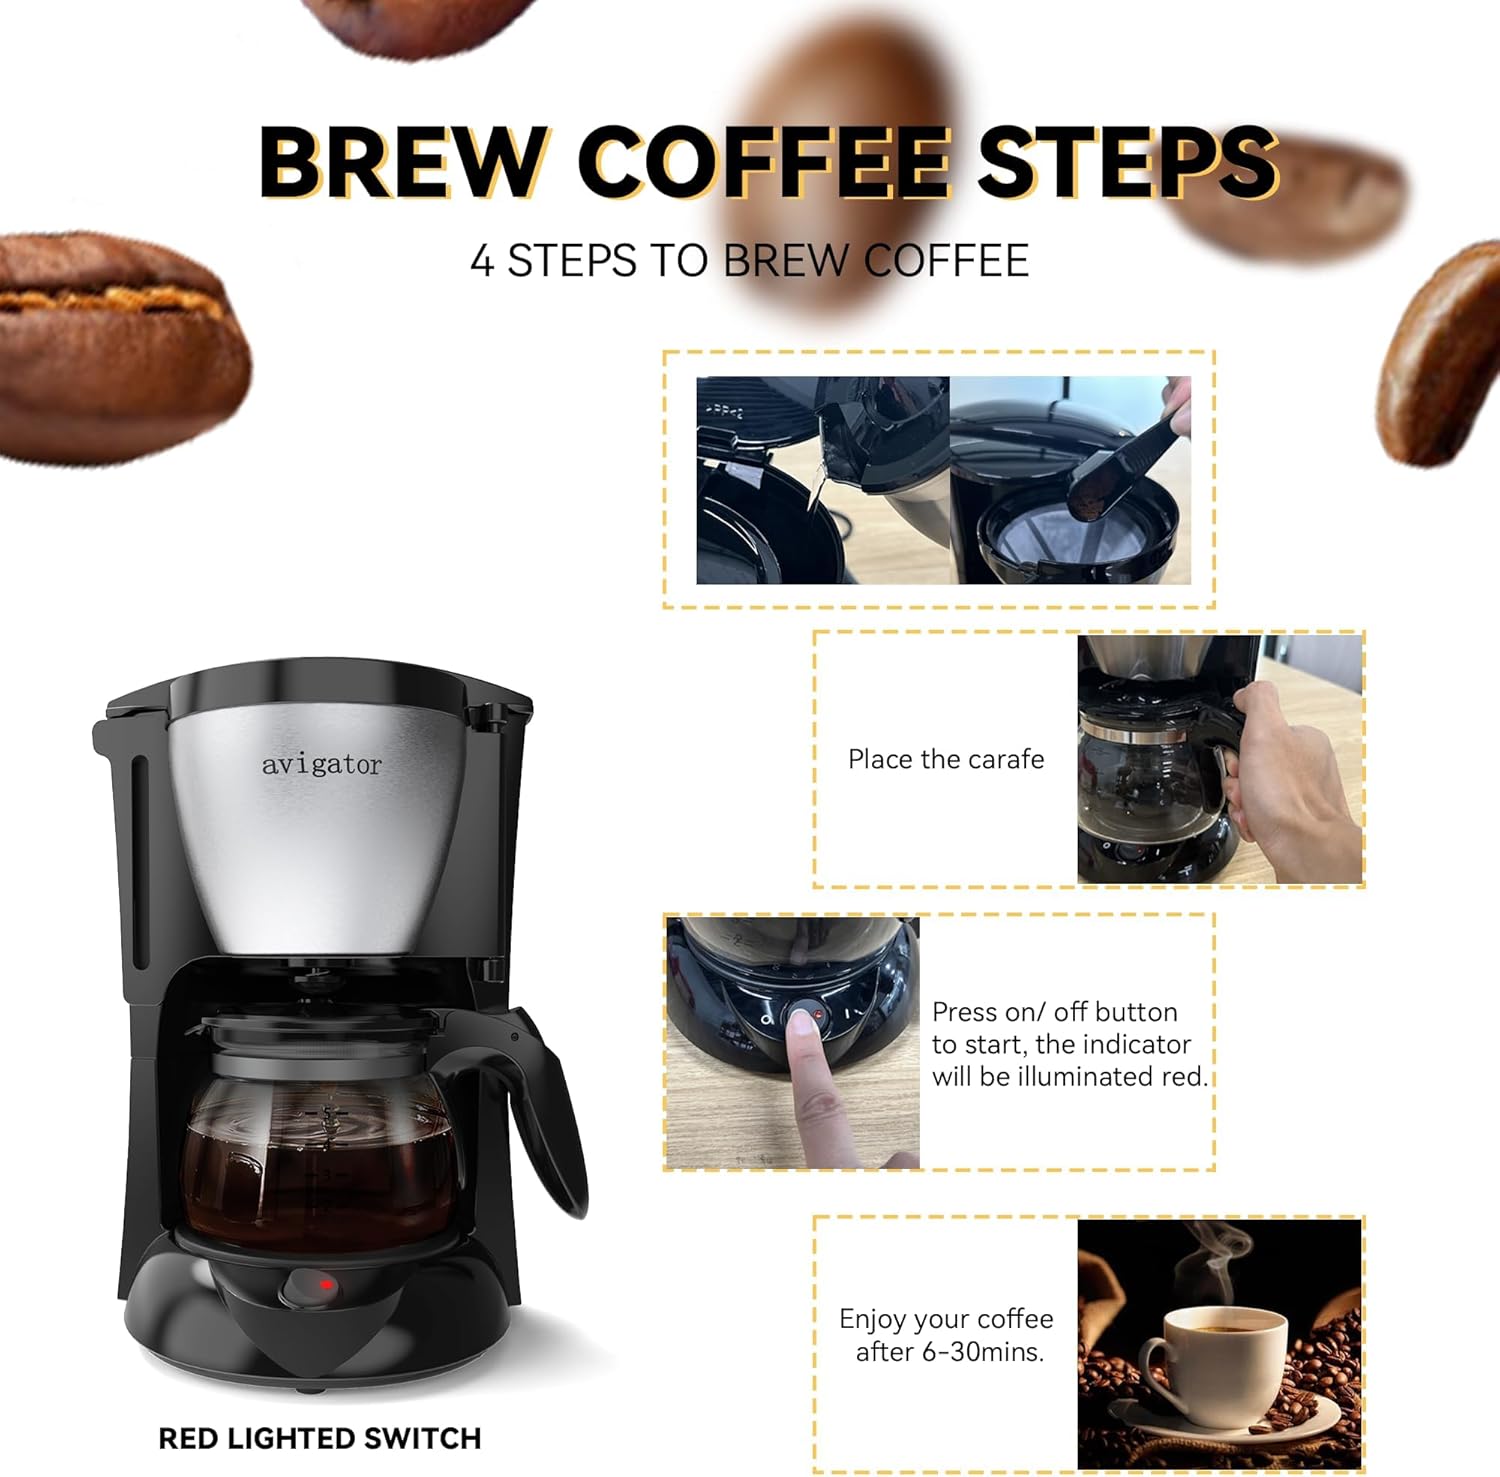
Figure 4: The brewing process involves placing the carafe, pressing the illuminated red power switch, and waiting for 6-30 minutes for your coffee to be ready.
- Brewing Time: Brewing typically takes 6-30 minutes, depending on the amount of water and ambient temperature.

Figure 5: The coffee maker utilizes a fast boil drip extract method, with brewing times varying from 6 to 30 minutes based on the volume of water used.
- Keep Warm Function: The coffee maker features an auto shut-off and anti-drip design. It will keep coffee warm as long as the power switch remains "ON" after brewing is complete.

Figure 6: Key features include automatic shut-off for safety, a 20-second anti-drip design to prevent messes, and a keep-warm function that activates when the unit is powered on.
- Serve: Once brewing is complete, carefully remove the carafe and pour your coffee.
- Turn Off: After serving, press the power switch to the "OFF" position and unplug the coffee maker from the 12V socket.
Maintenance and Cleaning
Regular cleaning ensures optimal performance and taste.
- Daily Cleaning:
- Always unplug the coffee maker and allow it to cool completely before cleaning.
- Remove the filter basket and discard used coffee grounds and filter.
- Wash the glass carafe, lid, and filter basket in warm, soapy water. These parts are detachable for easy cleaning. Rinse thoroughly and dry.
- Wipe the exterior of the coffee maker with a soft, damp cloth. Do not immerse the main unit in water.
- Descaling (Monthly or as needed): Mineral deposits from water can build up over time, affecting performance.
- Fill the water reservoir with a mixture of white vinegar and water (1:2 ratio).
- Place an empty paper filter in the filter basket.
- Place the empty carafe on the warming plate.
- Run a full brewing cycle with the vinegar solution.
- After the cycle, turn off the coffee maker, unplug it, and discard the solution.
- Run 2-3 cycles with clean water to rinse out any remaining vinegar smell or taste.
Troubleshooting
| Problem | Possible Cause | Solution |
|---|---|---|
| Coffee maker does not turn on. |
|
|
| Coffee brews too slowly or not at all. |
|
|
| Coffee tastes bad or weak. |
|
|
| Water leaks from unit. |
|
|
Specifications
| Model | 5-Cup 12V Car Coffee Maker |
| Brand | avigator |
| Power Source | 12V DC (Vehicle Cigarette Lighter Socket) |
| Capacity | 5 Cups / 650 ml |
| Brewing Time | Approx. 6-30 minutes (depending on water volume) |
| Features | Auto Shut-Off, 20s Anti-Drip Design, Keep Warm Function |
| Dimensions (Approx.) | 10 inches (Height) x 7.1 inches (Width) x 7.1 inches (Depth) Figure 7: Approximate dimensions of the coffee maker, highlighting its compact, space-saving design suitable for vehicles. |
| ASIN | B0F1N2X83T |
| First Available Date | March 17, 2025 |
Warranty and Customer Support
For warranty information, technical support, or any questions regarding your avigator 5-Cup 12V Car Coffee Maker, please contact the seller or manufacturer directly through the platform where you purchased the product. Please have your purchase details and product model information ready when contacting support.
You can often find contact information on the seller's page or within your order history.
Visit the avigator Store: avigator Store on Amazon
Ask a question about this manual
Ask about setup, troubleshooting, compatibility, parts, safety, or missing instructions. Manuals+ will review the question and use this page’s manual context to help answer it.