1. Introduction
Thank you for purchasing the Generic 17L Glass Air Fryer Oven, Model GV012. This appliance is designed to provide a versatile and efficient way to prepare a variety of meals with less oil. Featuring a transparent glass basket and intuitive controls, it offers a convenient cooking experience. Please read this manual thoroughly before operating the appliance to ensure safe and optimal use.
2. Important Safeguards
When using electrical appliances, basic safety precautions should always be followed to reduce the risk of fire, electric shock, and injury to persons. Read all instructions carefully.
- Do not touch hot surfaces. Use handles or knobs.
- To protect against electric shock, do not immerse cord, plugs, or the main unit in water or other liquid.
- Close supervision is necessary when any appliance is used by or near children.
- Unplug from outlet when not in use and before cleaning. Allow to cool before putting on or taking off parts.
- Do not operate any appliance with a damaged cord or plug, or after the appliance malfunctions or has been damaged in any manner.
- The use of accessory attachments not recommended by the appliance manufacturer may cause injuries.
- Do not use outdoors.
- Do not let cord hang over edge of table or counter, or touch hot surfaces.
- Do not place on or near a hot gas or electric burner, or in a heated oven.
- Extreme caution must be used when moving an appliance containing hot oil or other hot liquids.
- Always attach plug to appliance first, then plug cord into the wall outlet. To disconnect, turn any control to “off,” then remove plug from wall outlet.
- Do not use appliance for other than intended use.
- Ensure the glass basket is properly seated before operation.
- The appliance features a child-safe auto-lock mechanism that stops operation when the lid is opened.
3. Product Components
The Generic 17L Glass Air Fryer Oven comes with the following components:
- Main Unit (with control panel and heating element)
- Borosilicate Glass Basket (12L capacity)
- Capacity Expansion Ring (for 17L capacity)
- High Rack
- Low Rack
- Fetch Clip (Tongs)

Image 3.1: Overview of the Generic 17L Glass Air Fryer Oven and its accessories. The main unit sits atop the clear glass bowl, with a high rack, low rack, expansion ring, and fetch clip displayed below.
4. Specifications
| Feature | Detail |
|---|---|
| Model Name | GV012 (GAF121) |
| Materials | Borosilicate Glass, PC, Food-grade Metal |
| Color | White + Clear |
| Heating Method | 360° Vertical Heating, TurboHeat Pro Circulation Technology |
| Temperature Range | 60-250℃ / 140-482℉ |
| Voltage | 110V / 60HZ (US Standard) |
| Power | 1200W |
| Capacity | 12L (standard), 17L (with expansion ring) |
| Power Cord Length | 1m / 3.28ft |
| Product Dimensions (L*H) | 37 * 42cm / 14.6 * 16.5in |
| Control Method | Dual Knobs (Time & Temperature) |
| Dishwasher Safe Components | Yes (Glass Basket, Racks, Fetch Clip) |
5. Setup
5.1 Unpacking
- Carefully remove all components from the packaging.
- Remove any packaging materials, stickers, or labels.
- Retain the packaging for future storage or transport.
5.2 Initial Cleaning
Before first use, clean all parts that will come into contact with food:
- Wash the glass basket, high rack, low rack, and fetch clip with warm, soapy water. Rinse thoroughly and dry completely.
- Wipe the exterior of the main unit with a damp cloth. Do not immerse the main unit in water.
5.3 Assembly
- Place the glass basket securely on a stable, heat-resistant surface.
- If using the 17L capacity, place the capacity expansion ring on top of the glass basket before placing the main unit.
- Carefully place the main unit (with the heating element and control panel) onto the glass basket or expansion ring, ensuring it is seated properly.
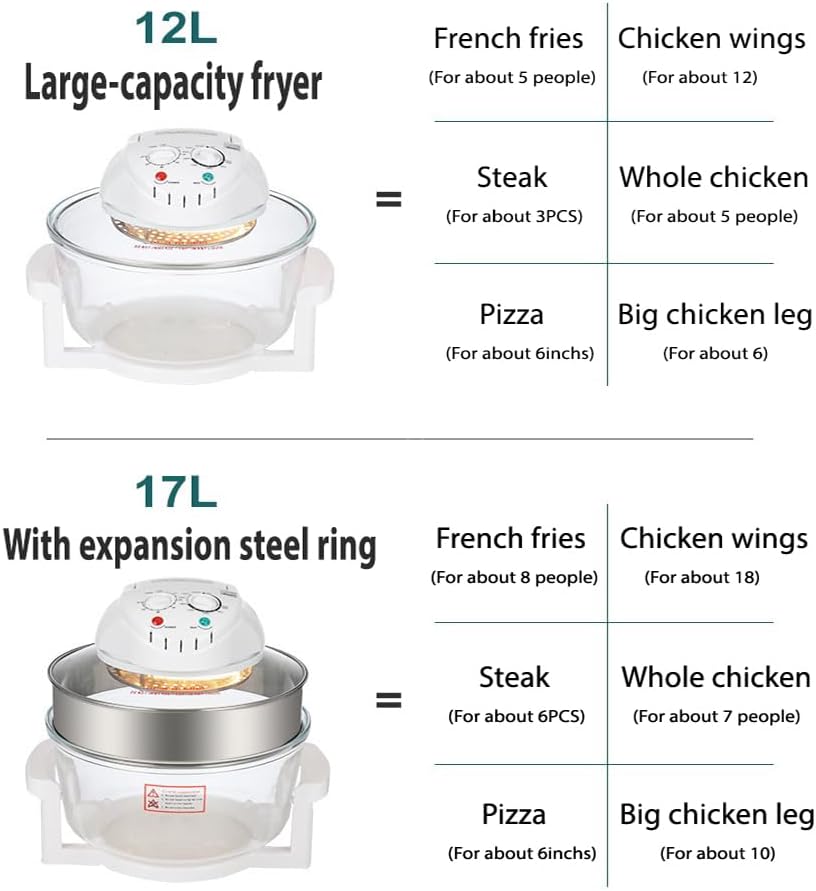
Image 5.1: Illustration demonstrating the standard 12L capacity of the glass air fryer and how to increase it to 17L by adding the expansion steel ring. Examples of food quantities for each capacity are also shown.
6. Operating Instructions
6.1 Control Panel Overview
The air fryer features a simple control panel with two rotary knobs for setting time and temperature, along with indicator lights.

Image 6.1: Detailed view of the control panel, highlighting the time setting knob (up to 60 minutes) and the temperature setting knob (ranging from 125°C to 250°C or 140°F to 482°F). Power and Heat indicator lights are also visible.
6.2 Preparing for Cooking
- Place food directly into the glass basket or on one of the racks. Do not overfill.
- Ensure the main unit is securely placed on the glass basket.
- Plug the power cord into a standard 110V / 60HZ electrical outlet.
6.3 Setting Time and Temperature
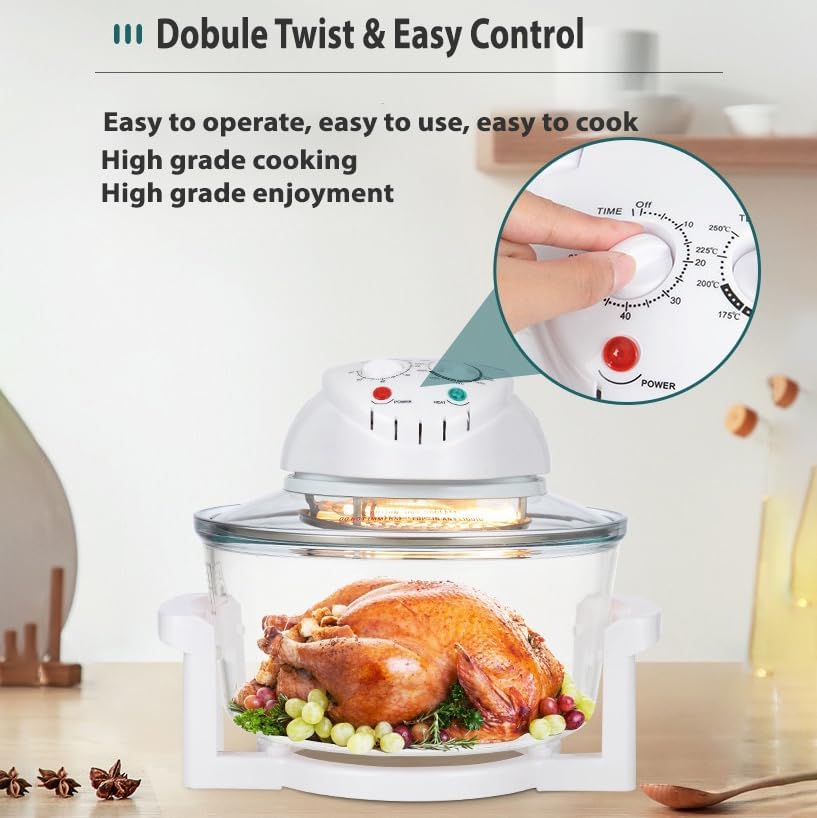
Image 6.2: A user's hand demonstrates adjusting the dual knobs on the control panel to set the desired cooking time and temperature for precise meal preparation.
- Temperature Control: Rotate the temperature knob to select the desired cooking temperature (60-250℃ / 140-482℉).
- Time Control: Rotate the time knob to set the cooking duration (up to 60 minutes). The appliance will begin heating once both settings are selected.
- The Power and Heat indicator lights will illuminate during operation.
6.4 Cooking Functions
The 12-in-1 smart cooking functions allow for versatile meal preparation:
- Air Fry: Ideal for crispy foods like fries, chicken wings, and vegetables.
- Bake: Suitable for cakes, muffins, and other baked goods.
- Dehydrate: Use lower temperatures (125-250°F) for dehydrating fruits and vegetables.
- Reheat: Warm up leftovers efficiently.
The transparent glass basket allows for easy monitoring of the cooking process without opening the lid.
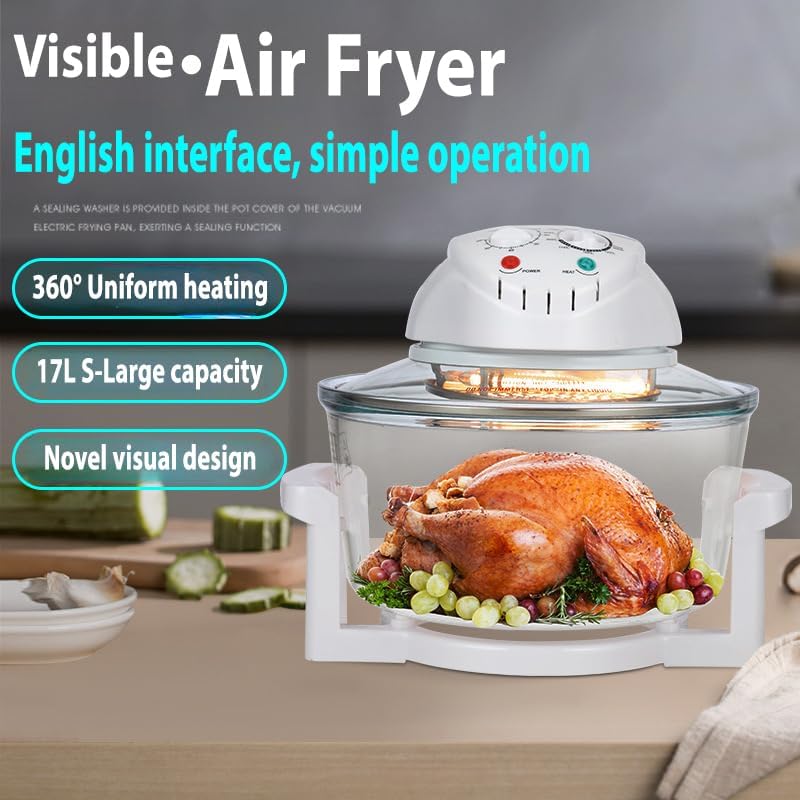
Image 6.3: The air fryer in use, showcasing a whole chicken being cooked within the transparent glass basket. This image emphasizes the 360° uniform heating and the visual monitoring capability.
6.5 After Cooking
- Once the timer reaches zero, the appliance will automatically turn off.
- Carefully lift the main unit using its handles. The child-safe auto-lock will stop operation when the lid is opened.
- Use the fetch clip to safely remove cooked food from the hot glass basket.
- Unplug the appliance from the wall outlet and allow it to cool completely before cleaning.
7. Cleaning and Maintenance
Regular cleaning ensures optimal performance and extends the life of your air fryer.
7.1 Cleaning the Glass Basket and Accessories
- The borosilicate glass basket, high rack, low rack, and fetch clip are dishwasher safe.
- Alternatively, wash them with warm, soapy water using a non-abrasive sponge. Rinse thoroughly and dry.
- For stubborn food residue, soak the glass basket in warm water before cleaning.
7.2 Cleaning the Main Unit
- Ensure the main unit is unplugged and completely cool before cleaning.
- Wipe the exterior of the main unit with a damp cloth.
- Do not use abrasive cleaners or scouring pads, as they may damage the surface.
- Never immerse the main unit (heating element and control panel) in water or any other liquid.
7.3 Storage
Store the cleaned and dried air fryer in a cool, dry place. Ensure all components are assembled or stored together to prevent loss.
8. Troubleshooting
If you encounter any issues with your air fryer, please refer to the following common problems and solutions:
| Problem | Possible Cause | Solution |
|---|---|---|
| Appliance does not turn on. | Not plugged in; power outlet issue; main unit not properly seated. | Ensure the power cord is securely plugged into a working outlet. Check if the main unit is correctly placed on the glass basket. |
| Food is not cooking evenly. | Overcrowding the basket; incorrect temperature/time settings. | Avoid overcrowding; cook in smaller batches. Adjust temperature and time as needed. Shake or flip food halfway through cooking. |
| White smoke coming from the appliance. | Grease or food residue on the heating element; cooking fatty foods. | Unplug and allow to cool. Clean the heating element area. For fatty foods, ensure proper ventilation. |
| Food is not crispy. | Too much moisture in food; insufficient cooking time/temperature. | Pat food dry before cooking. Increase cooking time or temperature slightly. Ensure food is not overcrowded. |
9. Warranty and Support
For warranty information or technical support, please refer to the documentation provided at the time of purchase or contact the retailer. Keep your purchase receipt as proof of purchase.


