Introduction
This manual provides detailed instructions for the installation, operation, and maintenance of your Lian Li Hydroshift II 360 TL RGB Liquid CPU Cooler. Please read this guide thoroughly before installation to ensure proper setup and optimal performance.
The Lian Li Hydroshift II 360 TL is an all-in-one (AIO) liquid CPU cooler featuring a 360mm radiator, three 120mm RGB fans, and a 2.1-inch IPS LCD screen. It is designed for efficient thermal management of high-performance desktop processors.

Image: The Lian Li Hydroshift II 360 TL RGB Liquid CPU Cooler, showcasing the radiator with three fans and the pump head with its integrated LCD screen.
Package Contents
Verify that all components are present in your package:
- Lian Li Hydroshift II Liquid Cooler (Radiator and Pump Assembly)
- 3x UNI FAN TL Wireless Fans (Pre-installed)
- Mounting Hardware for Intel (LGA 1851/1700)
- Mounting Hardware for AMD (AM5/AM4)
- USB Connection Cable
- PWM Power Cable
- User Manual (this document)
Setup and Installation
1. Compatibility
The Hydroshift II 360 TL is compatible with the following CPU sockets:
- Intel: LGA 1851, LGA 1700
- AMD: AM5, AM4
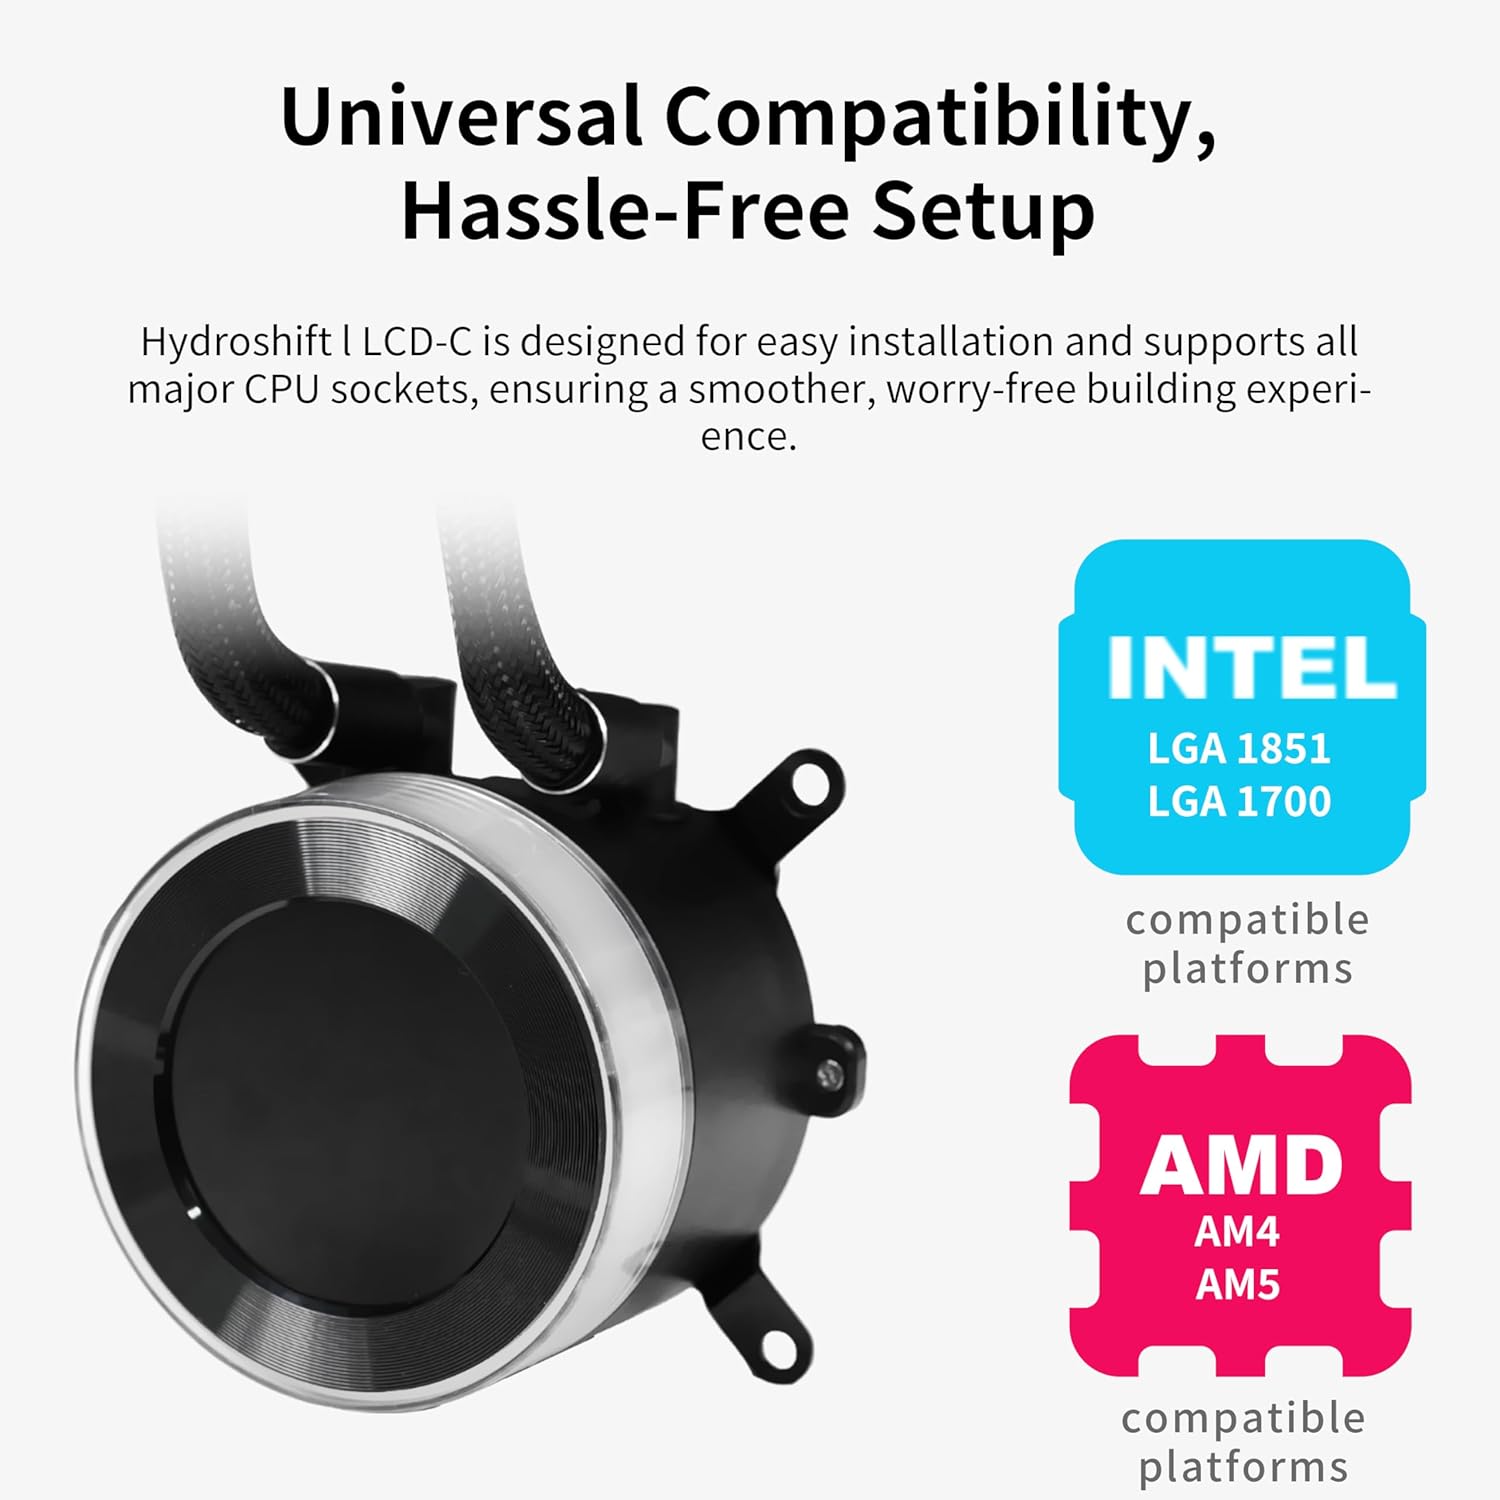
Image: Visual representation of compatible Intel and AMD CPU platforms.
2. Radiator and Fan Installation
The radiator has been compactly redesigned to 400mm x 122mm x 24mm, making it 3mm thinner, 3mm shorter, and 2.5mm narrower than previous generations. This reduced footprint improves compatibility with mainstream PC cases while maintaining thermal performance.
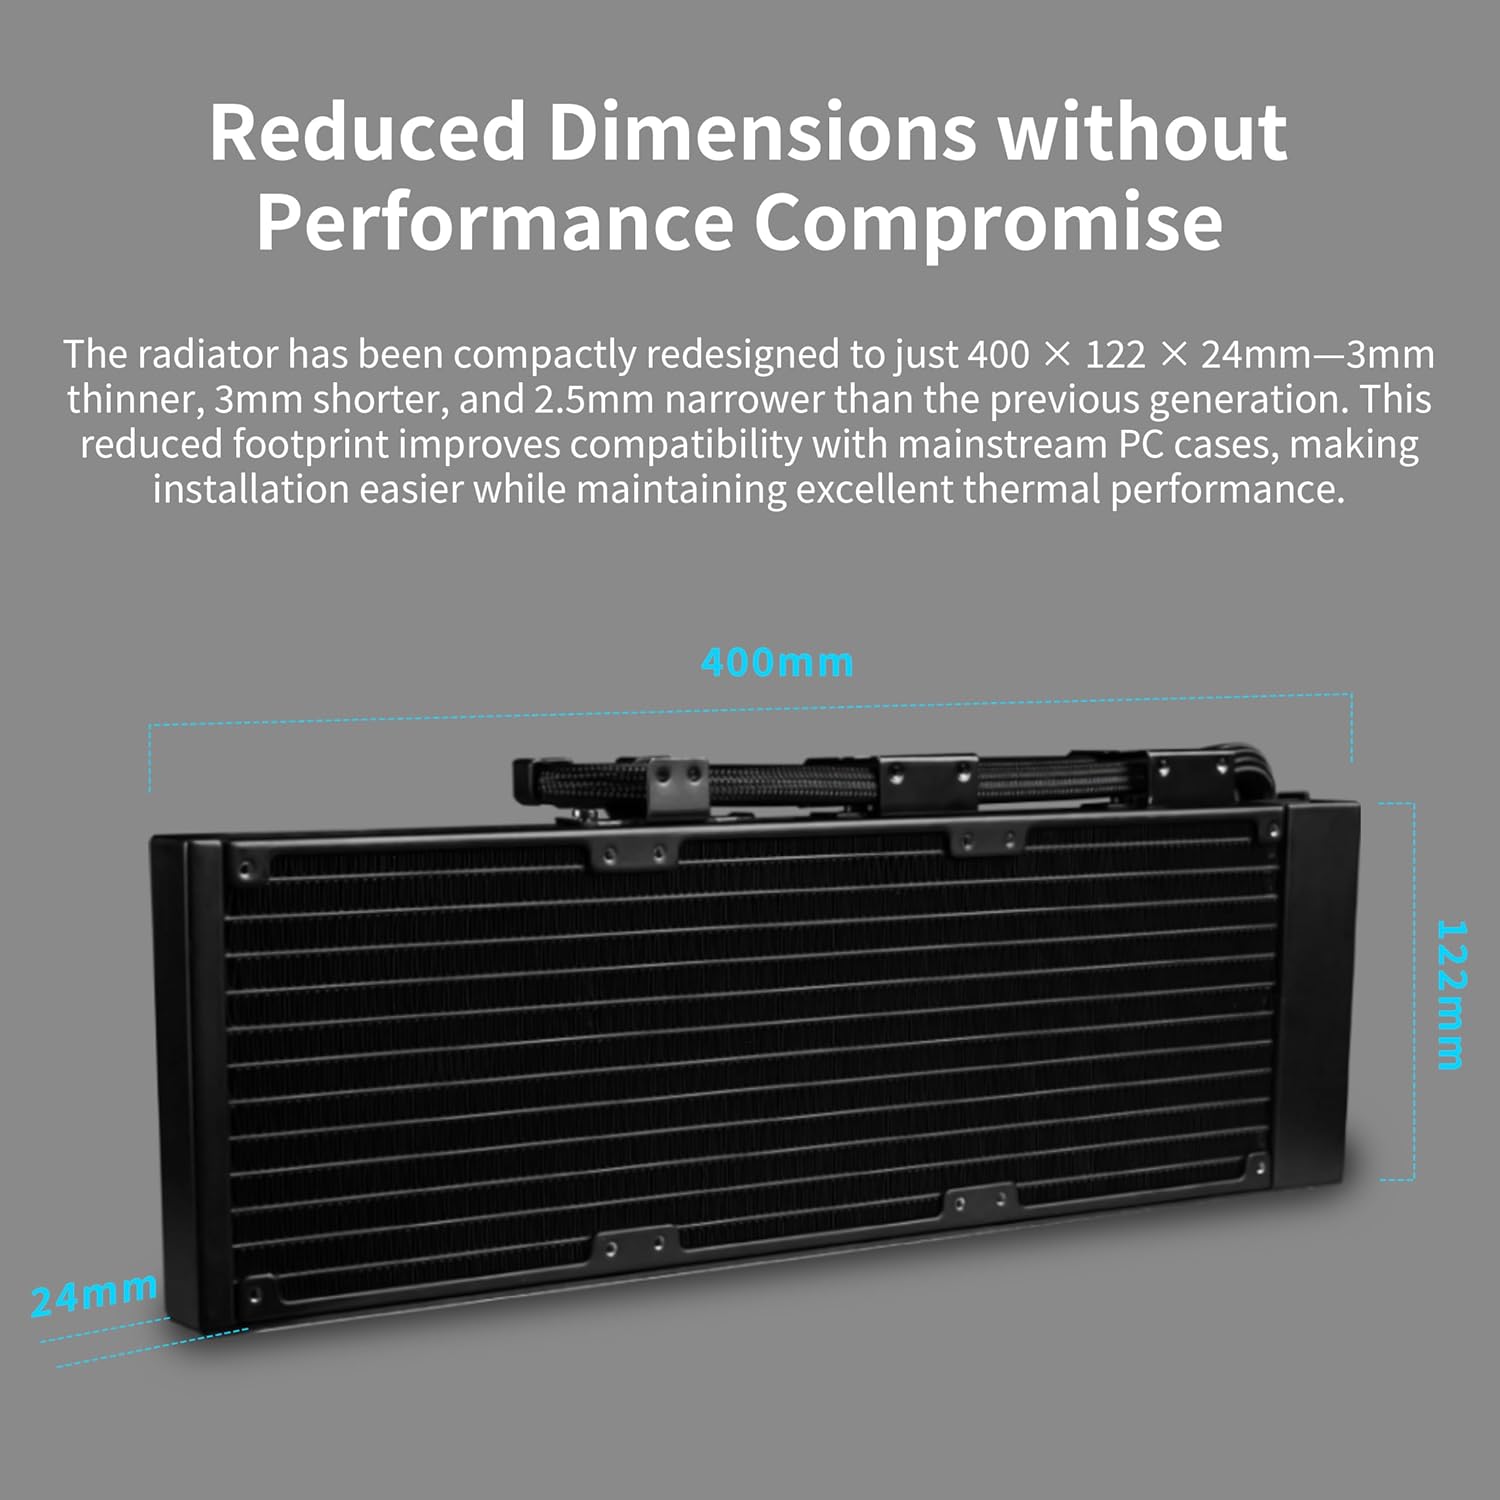
Image: Diagram illustrating the compact dimensions of the radiator.
The top mounting position for water cooling supports radiators up to 280mm wide and 400mm long. Depending on your case's top clearance, you may need to adjust or remove the vertical tubing support bracket if the radiator + fan thickness exceeds 55mm.
Flexible Layout Scenarios:
- Scenario 1 (Sufficient Clearance): If there is ample space between the radiator and motherboard (e.g., O11 Vision Compact case), you can use thumb screws to slightly adjust the bracket position around the 140mm mounting area on the radiator bracket.
- Scenario 2 (Limited Clearance): If clearance is limited (e.g., LANCOOL 216 case), the vertical bracket may need to be repositioned directly behind the CPU, and excess tubing routed behind the radiator. Tubing clips may not be usable in this layout.
- Scenario 3 (Tight Clearance): For very tight clearances (e.g., LANCOOL 207 case), you may need to remove both the vertical bracket and tubing support brackets. Excess tubing should be routed behind the radiator.

Image: Installation scenario with sufficient clearance, showing adjustable bracket.

Image: Installation scenario with limited clearance, showing repositioned bracket and tubing.

Image: Installation scenario with tight clearance, showing removed brackets and routed tubing.
3. Pump Head Installation
The Hydroshift II features a redesigned mounting bracket for easier and more intuitive installation. The adjustable tubing design allows for precise alignment directly to the CPU, optimizing cable routing and creating a cleaner internal layout.

Image: Step-by-step visual guide for installing the CPU cooler pump head.
- Install the CPU onto the motherboard.
- Mount the water block bracket, ensuring the notch is aligned.
- Use the included screwdriver to secure the bracket screws, ensuring the notch is on.
- Attach the pump head from right to left and tighten the screws to secure it.
4. Cable Connections
The USB power and data cables are integrated directly into the cooling tubes, making your computer's interior more organized. Pre-installed with three tube support brackets, the water cooling tubes are neatly concealed.

Image: Illustration of the integrated USB and power cables for a clean setup.
- PWM Power Cable: Connect the 4-pin cable to the AIO_PUMP or CPU_FAN header on your motherboard for stable power. If L-Connect 3 shows USB not detected and HydroShift II is not in Device Manager, it may be due to insufficient power. Enter your BIOS and set the connected PWM port (recommended CPU_FAN or AIO_PUMP or PUMP) to PWM/DC mode instead of Auto. Ensure the port is set to full speed.
- USB 2.0 Cable: Used for transferring media in Streaming Mode and advanced Wireless Mode. Basic wireless mode only supports JPG uploads. Users can choose to remove the USB 2.0 cable and operate in Offline or Wireless Mode only. The cover on the right side of the radiator can be removed to access cable connectors.

Image: Detailed view of the PWM power cable and USB 2.0 cable connections.
Operating Instructions
The 2.1-inch round IPS LCD display features 480x480 resolution and 500-nit brightness for clear display. A 60Hz refresh rate ensures smooth animations.
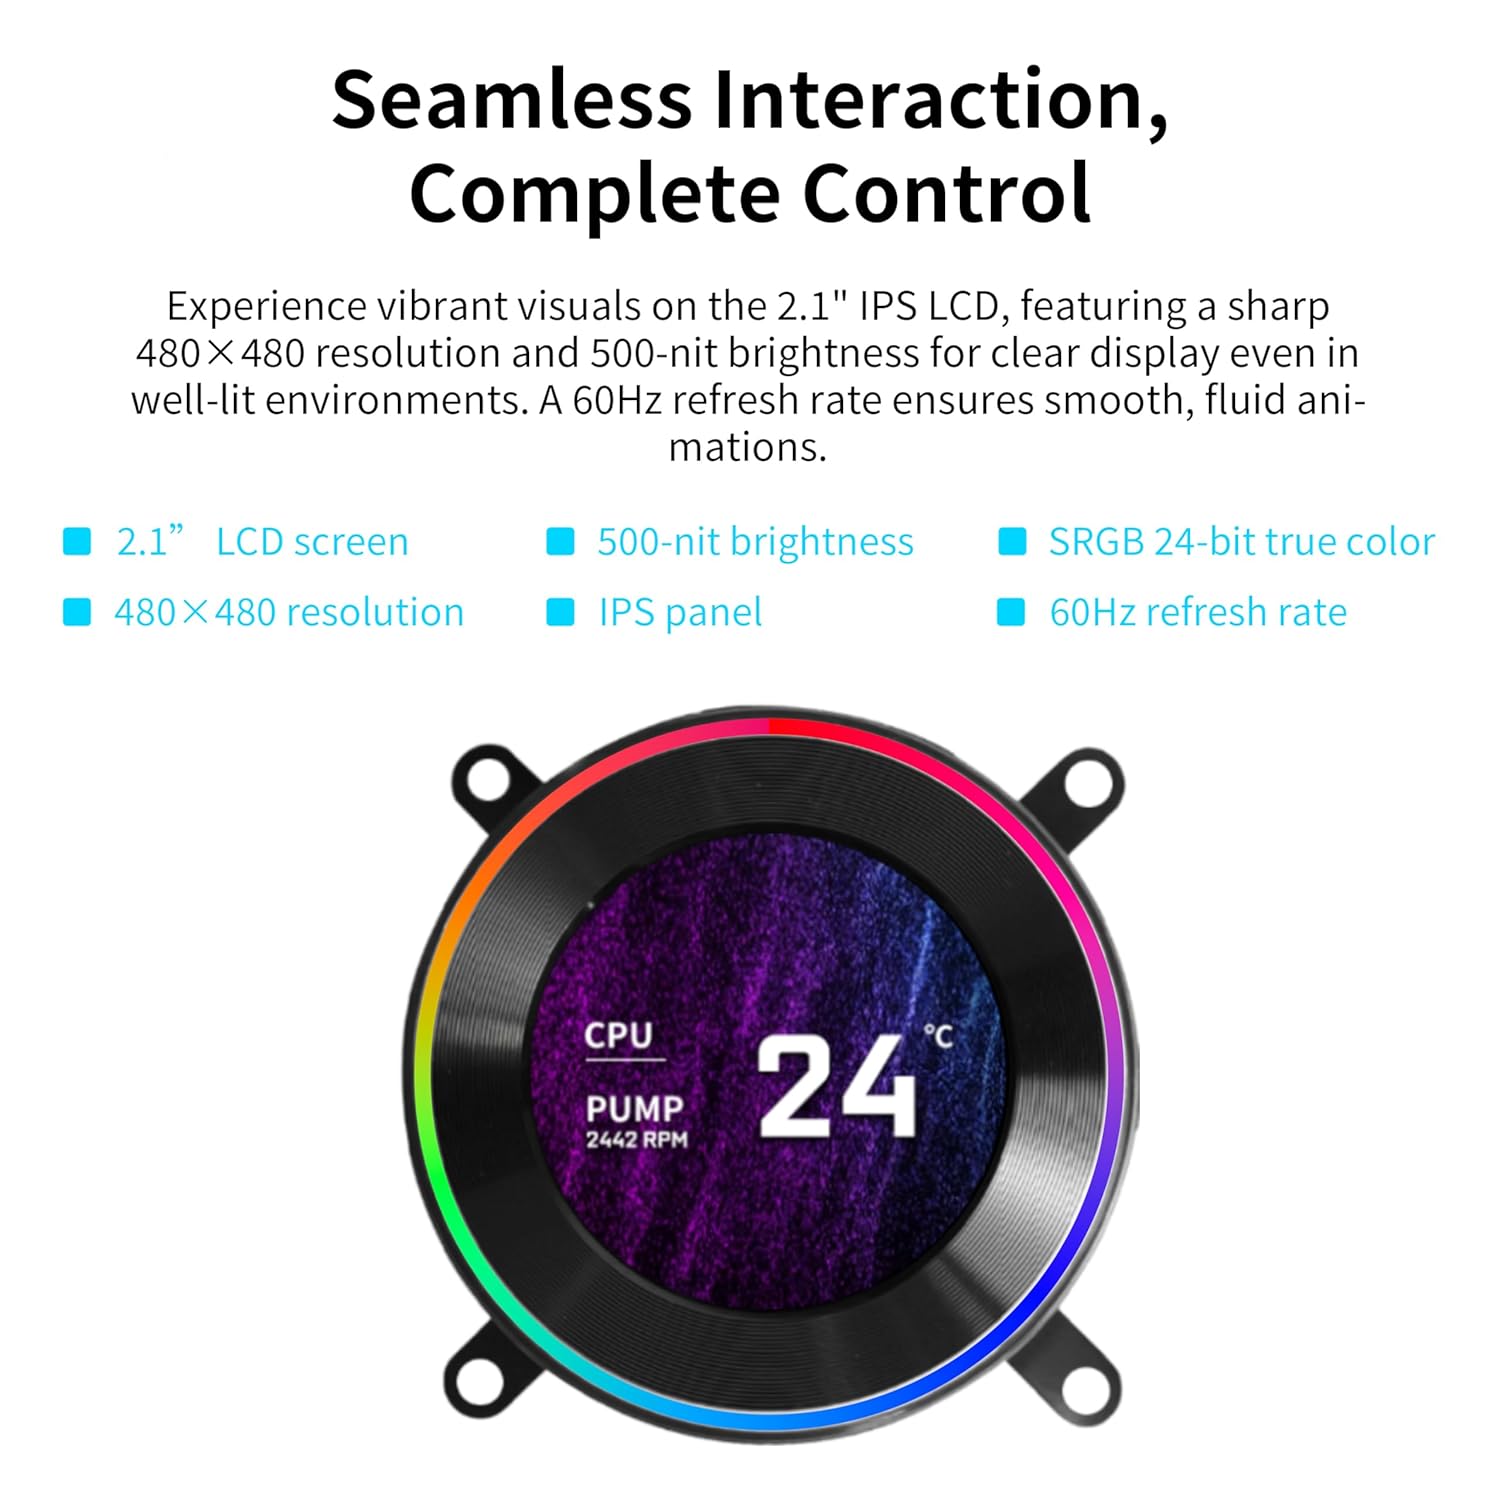
Image: The 2.1-inch IPS LCD screen on the pump head, showing CPU temperature and pump RPM.
Control Modes:

Image: Overview of the three distinct control modes for the cooler's LCD and lighting.
- Offline Mode (No USB Connection Required): Adjust LED and LCD content using the rotatable cap. Rotating clockwise switches screen themes, and counter-clockwise adjusts lighting effects. Displays coolant temperature and pump speed.
- Wireless Mode (No USB Connection): Adjust screen hardware info, background themes, and cap lighting effects wirelessly with the L-Wireless Controller. This mode allows syncing with other Lian Li wireless devices.
- Streaming Mode (USB Connected): Connect via USB to fully customize settings using L-Connect 3 software. This mode supports various media formats like MP4 and GIF for personalized displays, offering full customization capabilities including video and photo uploads.
Maintenance
To ensure the longevity and optimal performance of your liquid CPU cooler, consider the following general maintenance practices:
- Dust Removal: Periodically clean dust from the radiator fins and fans using compressed air. Ensure the system is powered off before cleaning.
- Cable Inspection: Regularly check all cables (PWM, USB) for secure connections and any signs of wear or damage.
- Tubing Inspection: Inspect the corrugated tubing for any kinks, leaks, or damage. The durable and flexible server-grade corrugated tubing is designed for reliability.
- Coolant Level: As this is a sealed AIO unit, there is no user-serviceable coolant refill. If you suspect a significant loss of coolant or performance degradation, contact customer support.
Specific maintenance instructions beyond general cleaning are not typically required for sealed AIO liquid coolers. Avoid disassembling the unit as this may void your warranty.
Troubleshooting
1. L-Connect 3 Software Not Detecting Cooler
If the L-Connect 3 software does not detect the Hydroshift II, and it is not visible in Device Manager, this often indicates insufficient power from the connected PWM port.
- Action: Enter your motherboard's BIOS settings.
- Action: Locate the connected PWM port (e.g., CPU_FAN, AIO_PUMP, or PUMP header).
- Action: Change the port's control mode from 'Auto' to 'PWM/DC Mode'.
- Action: Ensure the port is set to deliver full speed/power.
2. Unstable Background Scenarios / Firmware Issues
Some users have reported occasional instability with background scenarios or firmware. Ensure your L-Connect 3 software and cooler firmware are updated to the latest versions available from the Lian Li official website. Regular updates often address such issues.
3. Fans Ramping Up Randomly / System Freezing
If fans randomly ramp to full speed and the computer locks up, and re-applying the fan profile in L-Connect 3 temporarily resolves it, this suggests a software communication issue. Ensure:
- The USB 2.0 connection is secure and properly seated.
- The PWM cable is correctly connected to a motherboard header configured for full power (as described in '1. L-Connect 3 Software Not Detecting Cooler').
- L-Connect 3 software is up-to-date.
- No conflicting fan control software is running.
If issues persist, consider reinstalling the L-Connect 3 software or contacting Lian Li technical support.
Specifications
| Feature | Specification |
|---|---|
| Product Dimensions | 15.75 x 4.8 x 0.86 inches |
| Weight | 6.64 Pounds |
| Model Number | HS2LCD36TB |
| Brand | Lian Li |
| Power Connector Type | 4-Pin |
| Cooling Method | Water |
| Compatible Devices | Desktop |
| Noise Level | 31 dB |
| Material | Aluminum |
| Maximum Rotational Speed | 2400 RPM |
| UPC | 840353048775 |
| Number of Items | 1 (Liquid cooler, UNI FAN TL Wireless x3) |
Warranty and Support
For warranty information, please refer to the documentation included with your product or visit the official Lian Li website. If you encounter any issues not covered in this manual or require technical assistance, please contact Lian Li customer support through their official channels.