1. Introduction
This manual provides instructions for the setup, operation, and maintenance of your Hztyyier Digital Hygrometer. This device accurately measures temperature and humidity, offering real-time monitoring and smart home integration capabilities.
Please read this manual thoroughly before using the product to ensure correct operation and to maximize its lifespan.
2. Product Overview
2.1 Package Contents
- 1 x Hztyyier Digital Temperature and Humidity Meter
- 1 x User Manual (this document)
2.2 Key Features
- Accurate Measurements: Professional-grade sensors for precise temperature and humidity readings.
- Large LCD Display: Clear and easy-to-read screen with ultra-high contrast and wide viewing angle.
- App Remote Control: Monitor and adjust settings via smartphone apps (Smart Life or Tuya).
- Real-time Monitoring: Stay informed about environmental changes in your space.
- Smart Linkage: Enable automatic control of other smart devices based on temperature and humidity conditions (requires a ZigBee gateway).
2.3 Device Layout

Image 1: Front view of the Digital Hygrometer. The display shows current temperature and humidity, battery level, and network status.

Image 2: The device's LCD display, designed for clear visibility from various angles.
3. Setup
3.1 Powering On the Device
- Locate the battery compartment on the back of the device.
- Insert the specified battery (240MAH, typically a button cell or similar) according to the polarity markings.
- The device LCD will power on and display current temperature and humidity.
3.2 App Installation and Pairing (Smart Linkage)
To utilize remote control and smart linkage features, you will need to install a compatible smart home application and pair the device.
Note: A Tuya ZigBee gateway (hub) is required for smart linkage functionality and is not included with this product.
- Download the "Smart Life" or "Tuya Smart" app from your smartphone's app store (iOS or Android).
- Register or log in to your account.
- Ensure your ZigBee gateway is powered on and connected to your home Wi-Fi network.
- In the app, tap "+" to add a new device.
- Select the appropriate device category (e.g., "Sensor" or "Temperature and Humidity Sensor").
- Follow the on-screen instructions to put the hygrometer into pairing mode (this usually involves pressing and holding a button on the device for a few seconds until an indicator light flashes).
- Once detected, confirm the device in the app and assign it to a room or location.

Image 3: Smart ZigBee Temperature Humidity setup diagram.
4. Operating Instructions
4.1 Real-time Monitoring
Once powered on, the device will immediately begin displaying the current temperature and humidity on its LCD screen. The readings update regularly to provide accurate environmental data.
4.2 App Remote Control
After successful pairing with the Smart Life or Tuya Smart app:
- Open the app and select your hygrometer from the device list.
- View real-time temperature and humidity data from anywhere with an internet connection.
- Access historical data logs, often presented as graphs for daily, monthly, or yearly trends.

Image 4: App remote control interface showing current readings.

Image 5: Data log review in the Smart Life app.
4.3 Smart Linkage and Automation
Leverage the smart linkage feature to create automated routines within the Smart Life or Tuya Smart app. This requires a ZigBee gateway and other compatible smart devices (e.g., smart humidifier, smart heater).
- In the app, navigate to the "Smart" or "Automation" section.
- Create a new automation rule.
- Set a condition based on the hygrometer's readings (e.g., "When temperature rises above 25°C" or "When humidity drops below 40%").
- Set an action for a linked device (e.g., "Turn on smart fan" or "Turn on smart humidifier").

Image 6: Example of smart linkage for home automation.

Image 7: Monitoring whole house conditions with multiple sensors.
5. Maintenance
- Cleaning: Wipe the device with a soft, dry cloth. Do not use abrasive cleaners or immerse the device in water.
- Battery Replacement: When the battery indicator on the LCD shows low power, replace the battery promptly to ensure continuous accurate readings.
- Placement: For accurate readings, place the hygrometer in a central location away from direct sunlight, heat sources, or drafts.
6. Troubleshooting
- Device not powering on:
- Check if the battery is inserted correctly with the right polarity.
- Replace the battery with a new one.
- Inaccurate readings:
- Ensure the device is not placed near heat sources, vents, or in direct sunlight.
- Allow the device to stabilize for at least 30 minutes after placement or battery change.
- Cannot connect to app/gateway:
- Ensure your ZigBee gateway is powered on and connected to the internet.
- Confirm the hygrometer is in pairing mode.
- Make sure the device is within range of the ZigBee gateway.
- Restart the app and try pairing again.
- Verify that a ZigBee gateway is present, as this device requires one for smart features.
- App not showing real-time data:
- Check your internet connection.
- Ensure the device is still paired and connected to the gateway.
- Refresh the app.
7. Specifications
| Feature | Detail |
|---|---|
| Model Number | Hztyyierf7vx30ob4t--1 |
| Brand | Hztyyier |
| Material | ABS |
| Color | WHITE #-1 |
| Battery | 240MAH (Type not specified, typically button cell) |
| Item Size | 6 x 6 x 1.67 cm (2.36 x 2.36 x 0.66 inches) |
| Weight | 59g (2.08 ounces) |
| Connectivity | ZigBee (requires ZigBee gateway) |
| Display | Large LCD with ultra-high contrast and wide viewing angle |
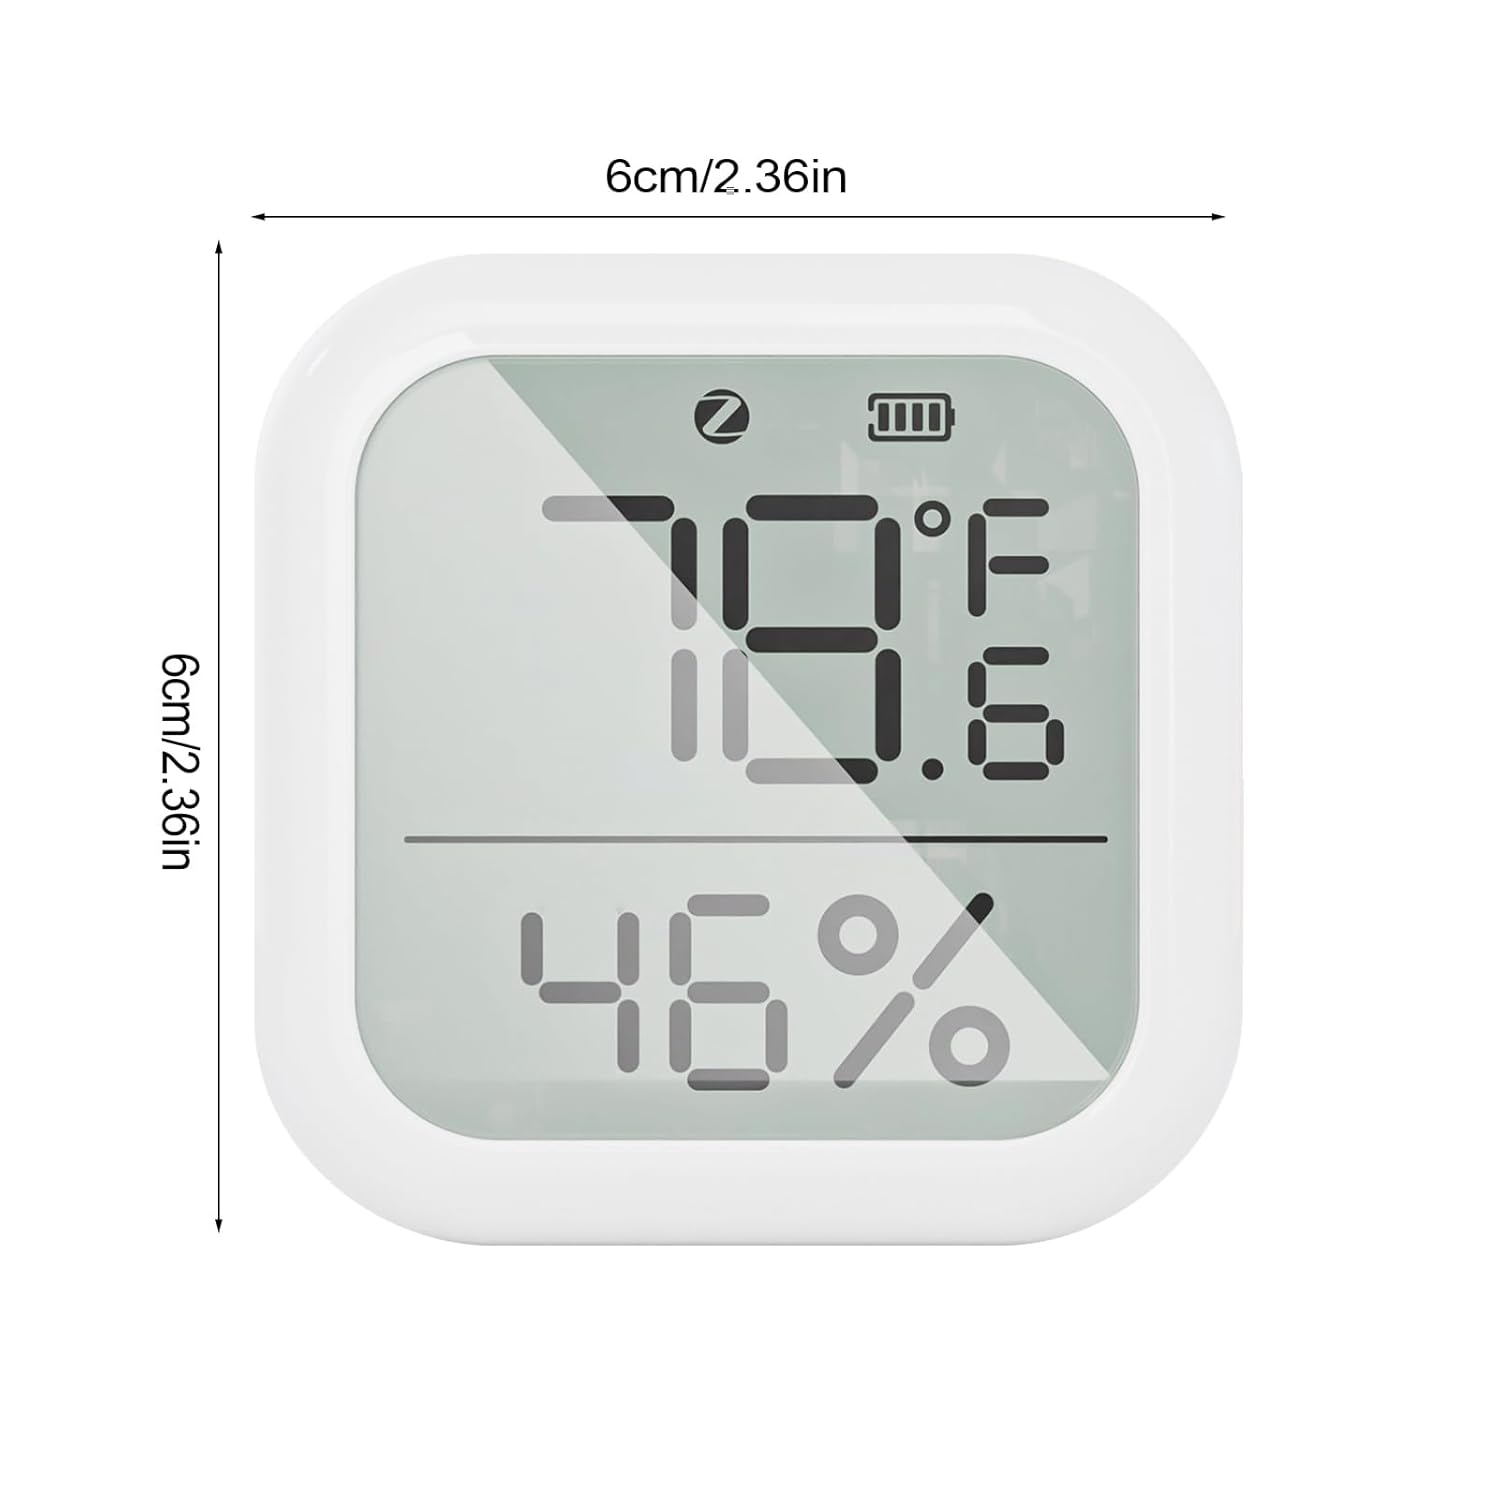
Image 8: Device dimensions.
8. Warranty and Support
Warranty information for this product is not explicitly detailed in the provided product description. For specific warranty terms and conditions, please refer to the product packaging or contact Hztyyier customer support directly.
For technical support or inquiries, please visit the official Hztyyier website or contact their customer service department.