Introduction
This manual provides detailed instructions for the setup, operation, maintenance, and troubleshooting of your ZERFUN G8 Rechargeable 4-Channel Wireless Microphone System. Please read this manual thoroughly before using the product to ensure optimal performance and longevity.
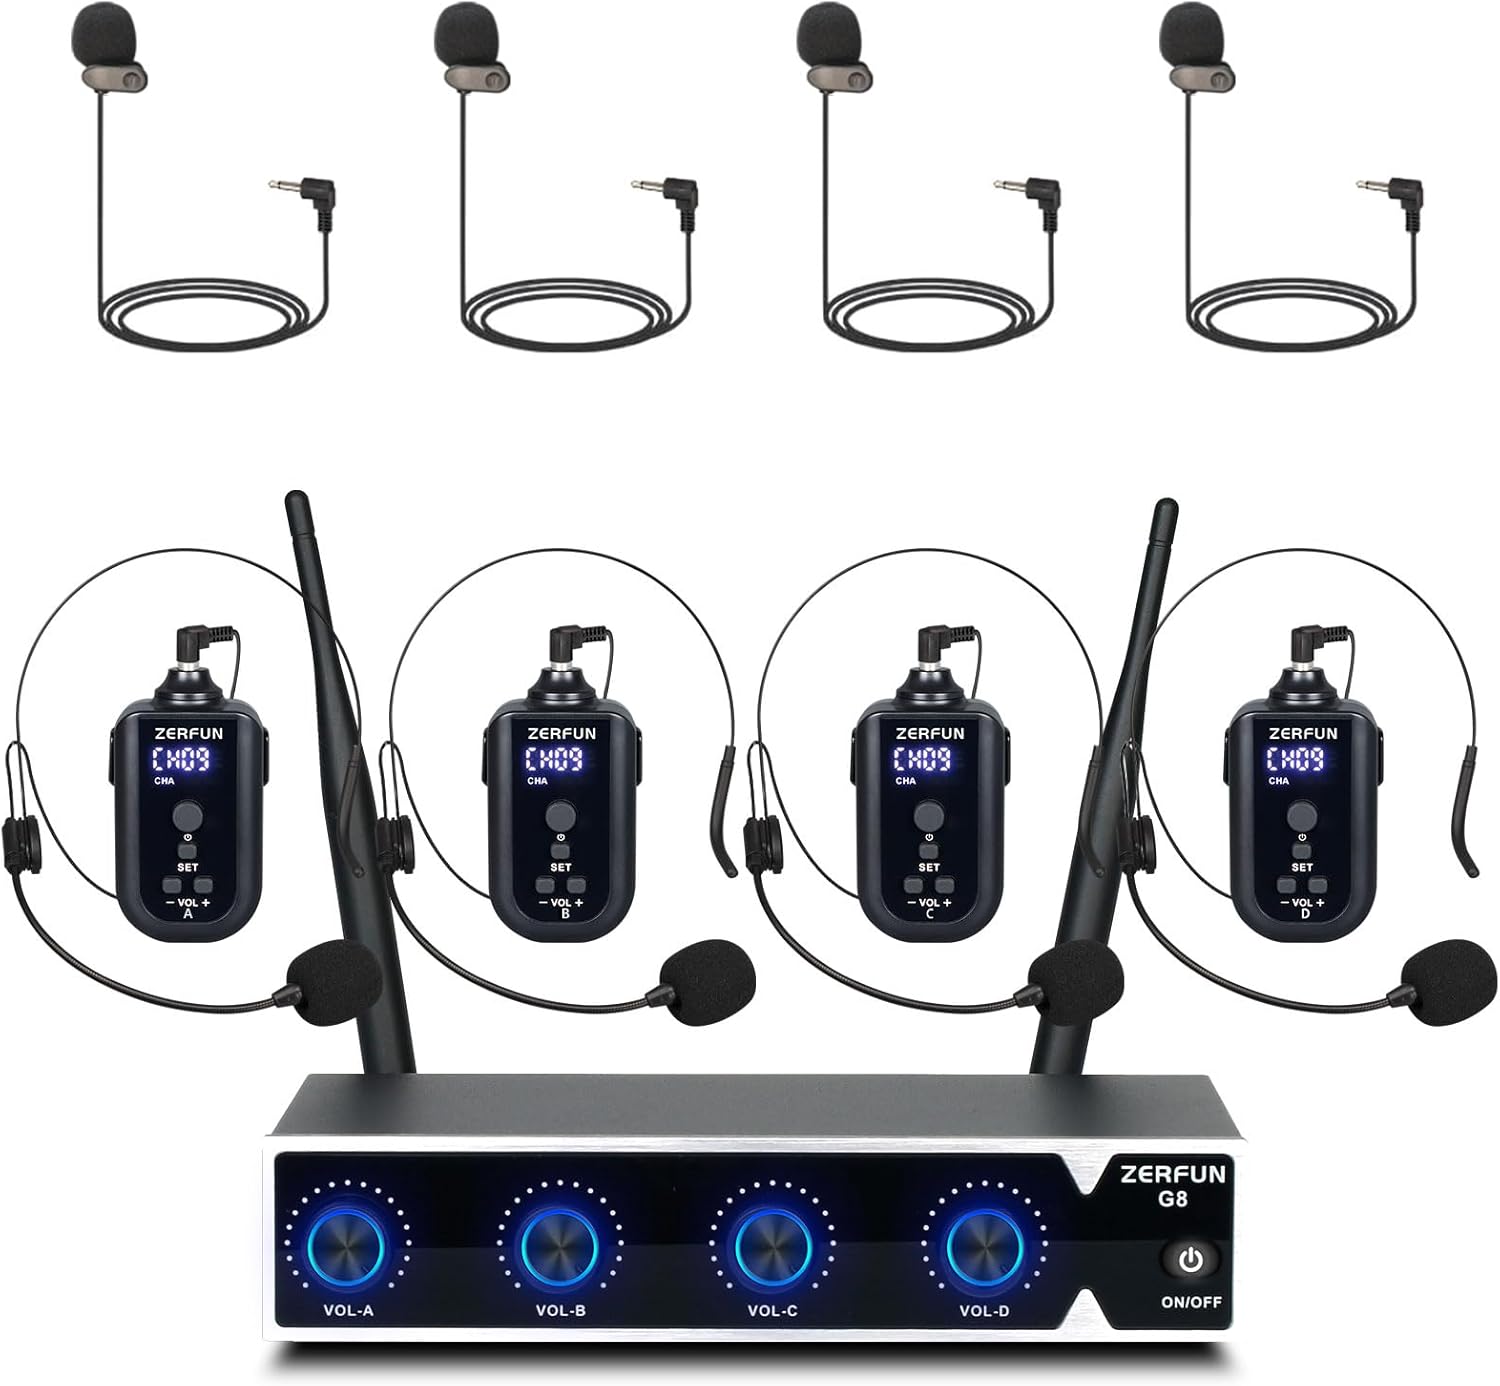
Image: Overview of the ZERFUN G8 4-Channel Wireless Microphone System components.
Package Contents
Verify that all items listed below are included in your package:
- ZERFUN G8 Receiver Box x 1
- ZERFUN Rechargeable Bodypack x 4
- Headset Microphone x 4
- Lavalier Lapel Microphone x 4
- Antenna x 2
- Power Adapter x 1
- 6.35mm to 6.35mm Cable x 1
- 3.5mm to 3.5mm Cable x 1
- Audio Cable (RCA to 3.5mm) x 1
- User Manual x 1

Image: Visual representation of the ZERFUN G8 system's package contents.
Setup Instructions
1. Receiver Placement and Antenna Connection
Place the receiver on a stable surface, away from potential sources of interference such as large metal objects or other wireless devices. Connect the two antennas to the designated ANT ports on the rear of the receiver.
2. Power Connection
Connect the provided power adapter to the DC12V input on the receiver and then plug it into a power outlet.
3. Connecting to Audio Devices
The ZERFUN G8 receiver offers multiple output options for connecting to an amplifier, audio mixer, or speaker system.
Using XLR Outputs (Balanced)
For professional audio setups, use the balanced XLR outputs. Each channel (1-4) has its own XLR output. Connect an XLR cable (not included) from the receiver's XLR output to the corresponding input on your audio mixer or amplifier.

Image: Connection diagram for XLR outputs to an audio mixer and speaker.
Using Mixed 1/4-Inch or 1/8-Inch Outputs
For simpler setups, use the mixed 1/4-inch or 1/8-inch outputs. These outputs combine all four microphone channels into a single stereo or mono signal. Connect the appropriate cable (6.35mm to 6.35mm or 3.5mm to 3.5mm/RCA) from the receiver's "MIC OUT" port to the "MIC" input on your amplifier or speaker.

Image: Connection options for the receiver to an amplifier or speaker.

Image: Connection diagram for mixed outputs to a TV or speaker.
4. Microphone Preparation
Attach either a headset microphone or a lavalier lapel microphone to each bodypack transmitter. Ensure the connection is secure.

Image: Headset and lavalier microphone connection to the bodypack.
Operating Instructions
1. Powering On the System
- Optimum Boot Order: Turn on your Audio Mixer, then Audio Amplifier, then Speaker, then Receiver, and finally the Microphones.
- Press the power button on the receiver to turn it on.
- Press and hold the power button on each bodypack transmitter to turn them on. The LED display on the bodypack will illuminate.
2. Automatic Frequency Synchronization
The ZERFUN G8 system features automatic frequency scanning and automatic transmitter setup for easy synchronization. Once the receiver and bodypacks are powered on, they should automatically pair. If pairing does not occur, refer to the "Channel Adjustment" section below.

Image: Illustration of the system's 200 ft UHF wireless range and frequency capabilities.
3. Bodypack Transmitter Controls

Image: Front view of the bodypack transmitter with labeled controls.
- LED Display: Shows the current channel (CHA) and battery status.
- Power Button: Press and hold to turn on/off. Short press to mute/unmute.
- SET Button (Channel Adjust): Used to manually change the operating frequency if interference occurs. Press SET, then use VOL+/- to select a new frequency, then press SET again to confirm.
- VOL+/- Buttons: Adjust the input volume level of the microphone.
- Mic Connector: Connects headset or lavalier microphones.
- USB-C Charging Port: For recharging the internal battery.
- Back Clip: For attaching the bodypack to clothing.
4. Receiver Controls

Image: Front and rear panels of the receiver with labeled controls and ports.
- Individual Volume Controls (VOL-A, VOL-B, VOL-C, VOL-D): Adjust the output volume for each of the four microphone channels independently.
- Power Button: Turns the receiver on or off.
- DC12V Input: For connecting the power adapter.
- ANT Ports: For connecting the antennas.
- Balanced XLR Outputs (1-4): Individual balanced audio outputs for each microphone channel.
- MIC OUT (1/4-Inch & 1/8-Inch): Mixed audio outputs combining all channels.
5. Powering Off the System
Optimum Shutdown Order: Turn off the Microphones, then Receiver, then Speaker, then Audio Amplifier, and finally Audio Mixer.
Maintenance
1. Cleaning
Wipe the receiver and bodypacks with a soft, dry cloth. Do not use liquid cleaners or solvents, as they may damage the finish or internal components.
2. Battery Charging
Each bodypack transmitter contains a built-in rechargeable battery. When the battery indicator on the LED display is low, connect the bodypack to a USB power source using a USB-C cable (not included for charging, but the system comes with audio cables). A full charge provides approximately 7+ hours of working time.

Image: Side view of the bodypack transmitter showing the USB-C charging port.
3. Storage
When not in use for extended periods, store the system in a cool, dry place. Ensure bodypack batteries are partially charged (around 50%) before long-term storage to preserve battery health.
Troubleshooting
If you encounter issues with your ZERFUN G8 system, please refer to the following common solutions:
- No Sound Output:
- Ensure all components (receiver, bodypacks, amplifier, speakers) are powered on.
- Check all cable connections between the receiver and your audio system.
- Verify that the volume controls on the receiver and bodypacks are not set to minimum or muted.
- Confirm that the audio system's input is correctly selected.
- Interference or Dropouts:
- Ensure the receiver and bodypacks are within the 200-foot operating range.
- Check for other wireless devices operating on similar frequencies nearby.
- Try changing the frequency channel on the affected bodypack transmitter using the SET and VOL+/- buttons. The system supports 50 compatible frequencies per channel.
- Ensure antennas on the receiver are properly connected and positioned for optimal reception.
- Microphone Not Pairing:
- Ensure both the receiver and the specific bodypack are powered on.
- Perform a manual frequency scan and synchronization as described in the "Operating Instructions" under "Channel Adjustment".
- Check bodypack battery level.
- Short Battery Life:
- Ensure bodypacks are fully charged before use.
- Battery performance may degrade over time with repeated charging cycles.
Specifications
| Feature | Specification |
|---|---|
| Brand | ZERFUN |
| Model Number | G8 |
| Number of Channels | 4 |
| Connectivity Technology | UHF |
| UHF Frequency Range | 500 - 599 MHz (FCC compliant) |
| Compatible Frequencies | 4 x 50 (200 total) |
| Transmission Range | Up to 200 feet (line of sight) |
| Microphone Form Factor | Headset, Lavalier Lapel |
| Bodypack Battery Type | Built-in Rechargeable Lithium Ion |
| Bodypack Working Time | 7+ Hours (fully charged) |
| Receiver Material | Metal |
| Recommended Uses | Conference, Karaoke, Speech |
| Compatible Devices | Amplifier, Audio Interface, Audio Mixer, Karaoke Machine, Speaker |
| Connector Types | 6.35 mm Jack, XLR |
| Polar Pattern | Unidirectional |
| Item Weight | 4.4 pounds (2 Kilograms) |
| Package Dimensions | 12.28 x 10.12 x 4.53 inches |
Warranty and Support
ZERFUN products come with a 12-month Manufacturer Assurance. For any product-related inquiries or support, please contact ZERFUN Customer Service. They offer 24-Hours After-Sales Customer Service.
For further assistance, please refer to the contact information provided with your purchase or visit the official ZERFUN website.


