1. Introduction
This manual provides essential information for the safe and effective operation, setup, and maintenance of your VECTOR WELDING MIG 160 SET2 welding machine. This versatile unit supports both Gas-Free MIG (Flux-Cored) and MMA (Stick) welding processes, making it suitable for various applications from DIY projects to light industrial use. Please read this manual thoroughly before operating the welder to ensure your safety and optimize performance.
2. Safety Instructions
WARNING: Welding can be dangerous. Always follow safety precautions to prevent injury or death.
- Personal Protective Equipment (PPE): Always wear a welding helmet with appropriate shade, flame-resistant clothing, welding gloves, and safety shoes.
- Ventilation: Ensure adequate ventilation to remove welding fumes, which can be hazardous to health.
- Electrical Safety: Never operate the welder in wet conditions. Ensure all electrical connections are secure and properly grounded. Do not touch live electrical parts.
- Fire Prevention: Keep flammable materials away from the welding area. Have a fire extinguisher readily available.
- Arc Rays: Welding arc rays can cause eye and skin burns. Protect yourself and bystanders.
- Work Area: Keep the work area clean and free of clutter.
3. Package Contents
Upon unpacking, verify that all items listed below are included in your package. If any items are missing or damaged, contact your supplier immediately.
- 1 x VECTOR WELDING MIG 160 Combined Welding Machine
- 1 x Cored Wire Torch (AK-14) with 1.5m cable
- 1 x Earth Clamp with 2m cable
- 1 x Electrode Holder with 2m cable
- 1 x 1mm NoGas Cored Wire (0.5 kg)
- 1 x Welding Helmet
- 1 x Brush
- 1 x Instruction Manual

Figure 3.1: VECTOR WELDING MIG 160 SET2 with all included accessories.

Figure 3.2: Visual representation of included accessories.
4. Product Overview
The VECTOR WELDING MIG 160 SET2 is a compact and powerful welding machine featuring IGBT inverter technology for stable arc and deep penetration. It offers a digital display for precise parameter control and multiple safety protections.
4.1. Control Panel and Display
The welder features a high-resolution digital screen that provides a clear view of all welding parameters. A multifunction wheel and three intelligent buttons allow for quick and easy adjustments, suitable for both beginners and experienced welders.

Figure 4.1: Digital display showing welding parameters.
4.2. Multi-Process Capability
This machine supports two primary welding processes:
- Gas-Free MIG (Flux-Cored Arc Welding): Ideal for outdoor use as it does not require an external gas cylinder. Uses flux-cored wire to create a protective gas shield.
- MMA (Manual Metal Arc Welding / Stick Welding): Suitable for various materials and thicknesses using coated electrodes.

Figure 4.2: The welder's multi-process capabilities (MIG and MMA).
5. Setup
5.1. Unpacking and Placement
- Carefully remove the welder and all accessories from the packaging.
- Place the welder on a stable, level surface, ensuring adequate space for ventilation around the unit.
5.2. Power Connection
Connect the welder to a suitable power supply. The machine operates on 230V with a tolerance of ±15%. Ensure the power outlet is properly grounded and can handle the required current for 160A welding.
5.3. Wire Spool Installation (for Gas-Free MIG)
- Open the side panel of the welder to access the wire feed mechanism.
- Place the 0.5 kg (1mm) NoGas cored wire spool onto the spool holder. Ensure it is seated correctly and can rotate freely.
- Thread the wire through the guide tube and into the wire feed rollers.
- Close the wire feed roller tension arm and adjust the tension. The tension should be firm enough to feed the wire without slipping, but not so tight that it deforms the wire.
- Close the side panel.

Figure 5.1: Wire spool installation components (spool block, spring, spool spacer, spool, mandrel).
5.4. Torch and Ground Clamp Connection
- MIG Torch (AK-14): Connect the MIG torch cable to the appropriate connector on the front panel of the welder. Ensure it is securely fastened.
- Earth Clamp: Connect the earth clamp cable to the designated ground terminal on the front panel. Attach the earth clamp securely to the workpiece or welding table, ensuring good electrical contact.
- Electrode Holder (for MMA): If performing MMA welding, connect the electrode holder cable to the positive (+) terminal and the earth clamp to the negative (-) terminal.

Figure 5.2: Connections for MIG torch, ground clamp, and electrode holder.
6. Operating Instructions
6.1. Power On/Off
Turn the main power switch located on the rear panel of the welder to the 'ON' position. The digital display will illuminate.
6.2. Mode Selection
Use the control panel buttons to select your desired welding mode: MIG (Gas-Free) or MMA. The selected mode will be indicated on the digital display.
6.3. Parameter Adjustment
Adjust the welding parameters (current, voltage, wire feed speed for MIG) using the multifunction wheel and intelligent buttons. The digital display provides real-time feedback on your settings. Refer to welding charts for recommended settings based on material type and thickness.
6.4. Gas-Free MIG Welding
- Ensure the cored wire spool is correctly installed and the MIG torch is connected.
- Select MIG mode.
- Adjust current and wire feed speed.
- With the welding helmet on, position the torch nozzle approximately 10-15mm from the workpiece.
- Press the torch trigger to initiate the arc and feed the wire. Maintain a consistent travel speed and arc length for optimal results.
6.5. MMA Welding
- Ensure the electrode holder and earth clamp are correctly connected.
- Insert a suitable electrode into the electrode holder.
- Select MMA mode.
- Adjust the welding current according to the electrode type and diameter.
- With the welding helmet on, strike the arc by lightly touching and then quickly lifting the electrode from the workpiece. Maintain a consistent arc length and travel speed.
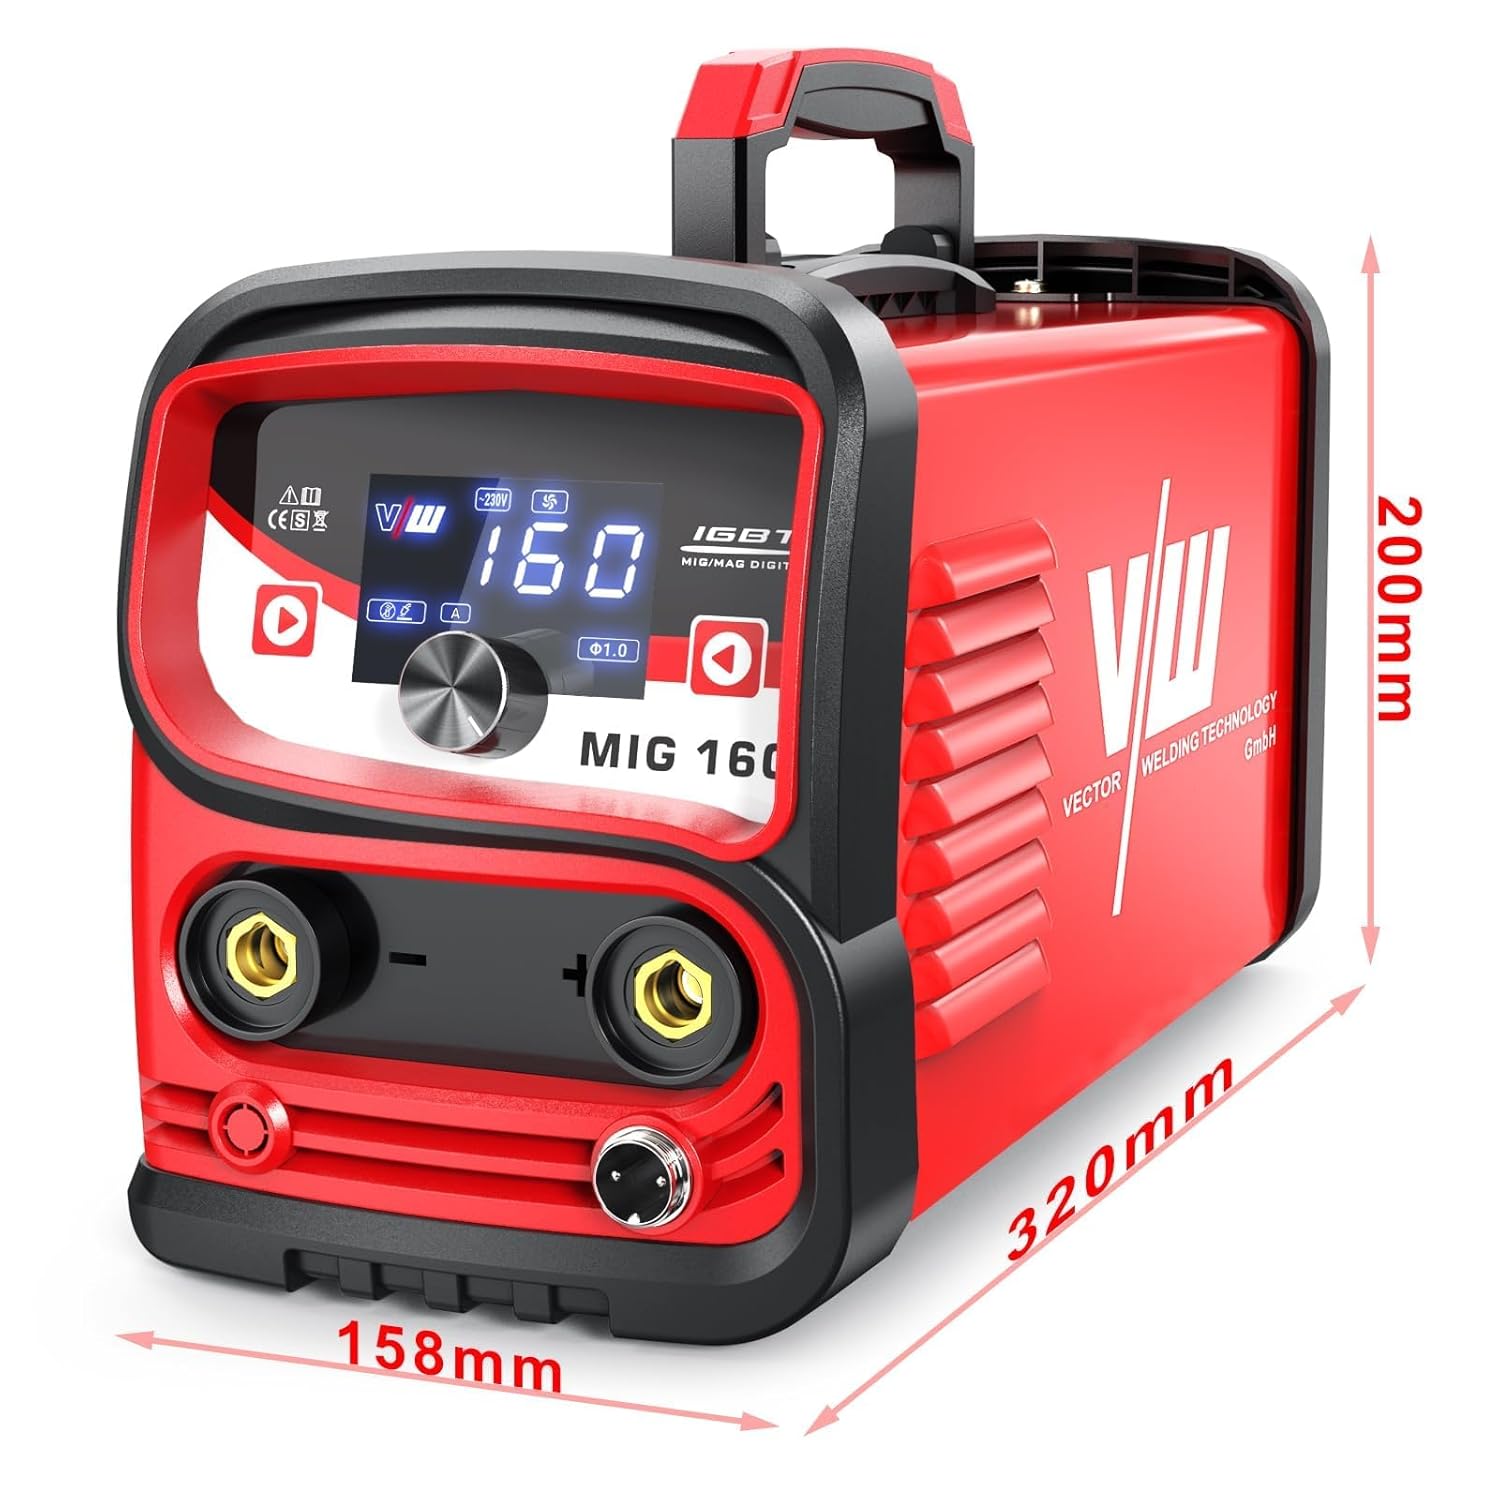
Figure 6.1: Examples of welding applications for the MIG 160 SET2.
7. Maintenance
Regular maintenance ensures the longevity and safe operation of your welding machine.
- Cleaning: Periodically clean the welder's exterior with a dry cloth. Use compressed air to blow out dust from the ventilation openings. Ensure the machine is unplugged before cleaning.
- Cable Inspection: Regularly inspect all welding cables, torch, and earth clamp for damage, cuts, or loose connections. Replace damaged components immediately.
- Wire Feed Mechanism: Keep the wire feed rollers clean and free of debris. Check for proper tension.
- Storage: Store the welder in a dry, clean environment, away from direct sunlight and extreme temperatures.
8. Troubleshooting
This section addresses common issues you might encounter. The MIG 160 SET2 includes built-in protections for overheating, over-voltage, and undervoltage, which may temporarily shut down the unit.
| Problem | Possible Cause | Solution |
|---|---|---|
| Welder does not power on | No power supply; Main switch off; Faulty power cable | Check power connection; Turn on main switch; Inspect/replace power cable |
| No welding arc (MIG) | Poor earth connection; Wire feed issue; Incorrect settings; Torch trigger not pressed | Ensure good earth contact; Check wire spool/feed rollers; Adjust settings; Press trigger fully |
| No welding arc (MMA) | Poor earth connection; Incorrect current; Wet electrode | Ensure good earth contact; Adjust current; Use dry electrodes |
| Wire not feeding (MIG) | Wire tangled; Rollers too loose/tight; Clogged liner; Incorrect wire size | Untangle wire; Adjust roller tension; Clean/replace liner; Use correct wire |
| Overheating protection activated | Exceeded duty cycle; Poor ventilation | Allow welder to cool down; Ensure clear ventilation paths |
If you encounter problems not listed here or if solutions do not resolve the issue, please contact VECTOR WELDING customer support.
9. Specifications
| Feature | Specification |
|---|---|
| Model Number | MIG 160 SET2 |
| Manufacturer | VECTOR WELDING |
| Product Dimensions (LxWxH) | 32 x 15.8 x 20 cm |
| Item Weight | 5 kg |
| Input Voltage | 230V ±15% |
| Welding Processes | Gas-Free MIG, MMA |
| Technology | IGBT Inverter |
| Wire Diameter (MIG) | 0.8mm / 1.0mm (0.5 kg spool included) |
| Applicable Spool Diameter | 100 mm |
| Welding Thickness | 0.5 - 3 mm |
| Protections | Overheating, Over-voltage, Undervoltage |

Figure 9.1: Physical dimensions of the MIG 160 SET2 welder.
10. Warranty and Support
For warranty information, technical support, or service inquiries, please refer to the warranty card included with your product or contact your retailer or VECTOR WELDING directly. Keep your purchase receipt as proof of purchase.