
xiaowm N707P185531
User Manual for xiaowm 53-inch Large Kitchen Island
Model: N707P185531
1. Important Safety Information
Please read this manual carefully before assembly and use. Keep it for future reference.
- Ensure all parts are present and undamaged before assembly. Do not use if any parts are missing or broken.
- Assemble the unit on a soft, clean surface to prevent scratches.
- Always use the correct tools for assembly. Do not overtighten screws.
- Do not exceed the maximum weight capacity of the countertop (400 lbs) or shelves (110 lbs per shelf).
- Keep children and pets away from the assembly area.
- Ensure the power outlet is properly grounded and used with compatible appliances. Do not overload the power strip.
- Regularly check all connections and fasteners to ensure they remain tight.
2. Product Overview
The xiaowm 53-inch Large Kitchen Island is a versatile and stylish addition to any kitchen or dining area, offering extensive storage and functional features. It combines classic design with modern conveniences, including a built-in power outlet and mobile capabilities.
Key Features:
- Internal Storage Racks: Two barn doors with 2-tier shelf racks, ideal for condiments and small items, optimizing storage space.
- Large Countertop with Drop Leaf: A 50-inch wide countertop with an 11.8-inch deep drop leaf, expandable for additional workspace or dining.
- Built-in Power Outlet: Integrated charging station with 3 AC outlets and 2 USB ports for convenient appliance use.
- Ample Storage Space: Features 3 deep drawers, 2 side open shelves with bamboo sticks for spices/bottles, and height-adjustable shelves inside cabinets.
- Mobile & Stationary Design: Equipped with five concealed 360° rotation wheels, two of which are lockable, allowing for easy movement or stable placement. Wheels are optional during assembly.
- Durable Construction: Crafted from CARB Phase II certified MDF boards with a scratch-proof laminate finish tabletop, supporting up to 400 lbs.
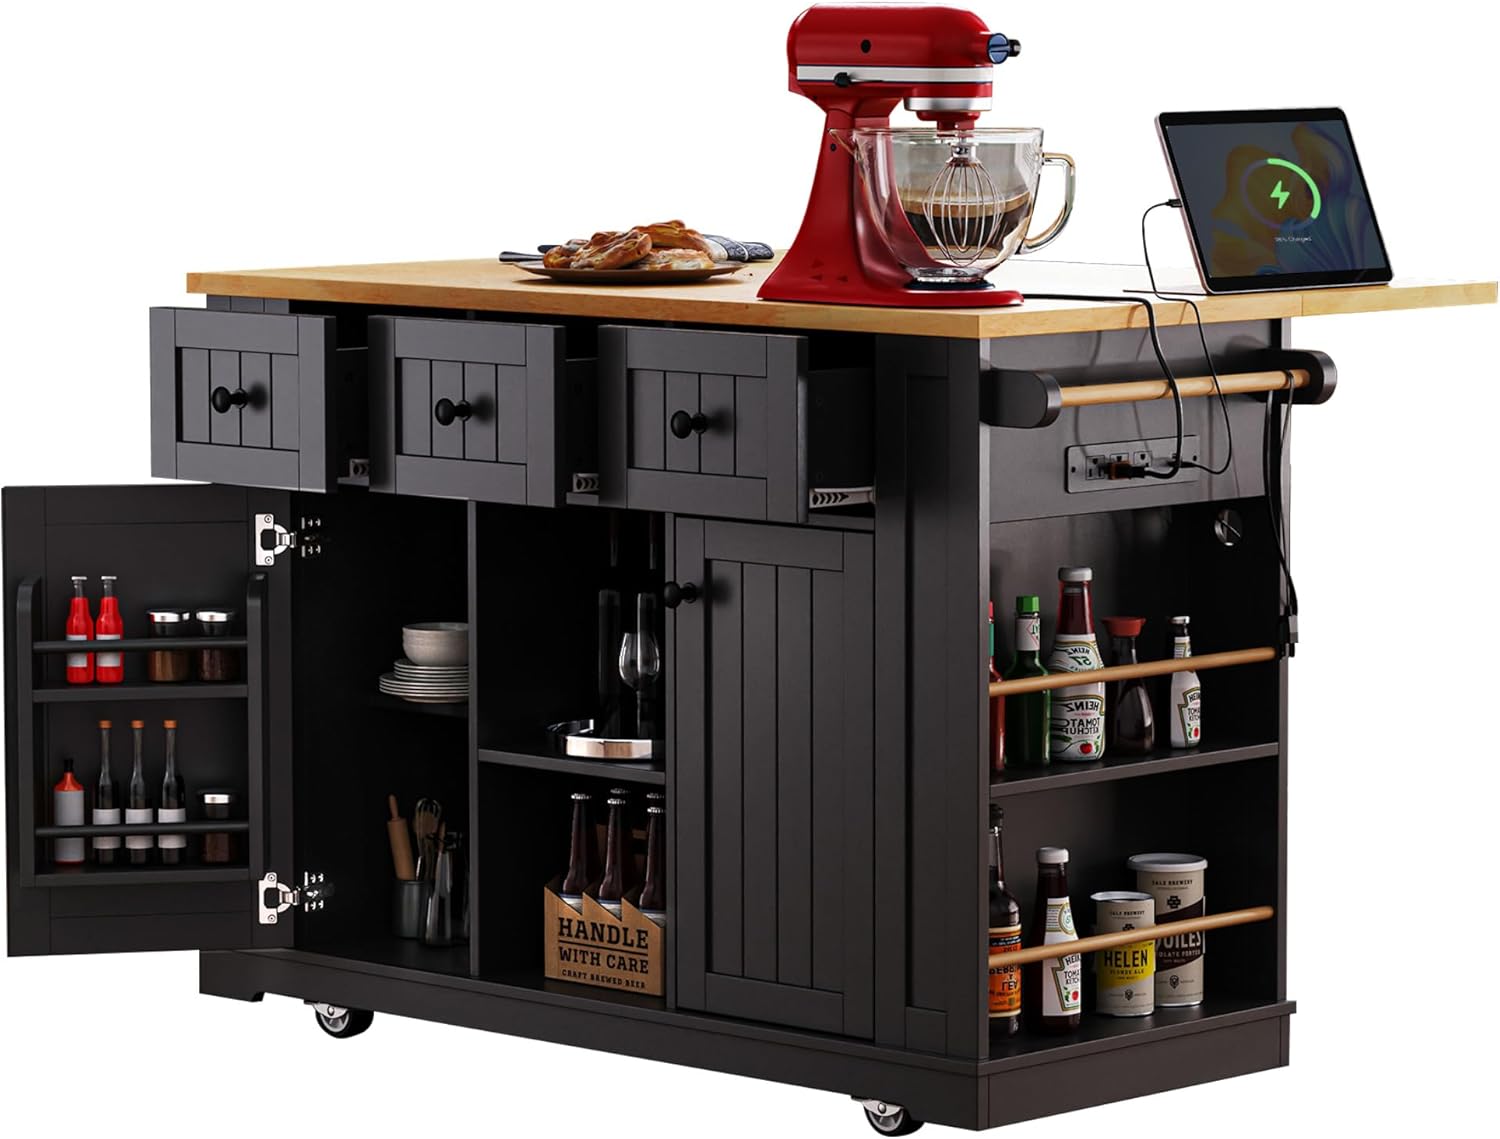
Figure 2.1: The xiaowm 53-inch Large Kitchen Island in black, showcasing its extended drop leaf, power outlet, and various storage options including drawers and cabinet shelves.

Figure 2.2: The kitchen island integrated into a kitchen environment, demonstrating its use as a functional workspace and dining area.
3. Package Contents
Before beginning assembly, verify that all components listed below are present and undamaged. If any parts are missing or damaged, please contact customer support.
- Kitchen Island Main Body (pre-assembled sections)
- Drop Leaf Extension
- 5 x Concealed Wheels (2 with locks)
- Assembly Hardware (screws, dowels, cam locks, etc.)
- Bamboo Sticks for Side Racks
- Power Outlet Unit with 3.3ft (1m) Power Cord
- Assembly Tools (e.g., Allen wrench, screwdriver - may not be included, prepare your own)
- Instruction Manual (this document)
4. Specifications
| Attribute | Value |
|---|---|
| Product Dimensions (D x W x H) | 29.52"D x 53.14"W x 36.4"H |
| Countertop Dimensions (W x D) | 50" W x 11.8" D (drop leaf) |
| Item Weight | 128.8 pounds |
| Maximum Weight Recommendation (Countertop) | 400 lbs |
| Maximum Weight Recommendation (Each Shelf) | 110 lbs |
| Brand | xiaowm |
| Model Number | N707P185531 |
| Color | Black |
| Frame Material | Wood (CARB Phase II certified MDF boards) |
| Shelf Type | Tiered Shelf |
| Power Outlet | 3 AC Outlets (120V/12A), 2 USB Ports (5V/2A) |
| Assembly Required | Yes |

Figure 4.1: Detailed dimensions and load capacities of the kitchen island.
5. Setup and Assembly
Assembly is required for this product. Follow these steps carefully. It is recommended to have two people for assembly.
5.1 Unpacking and Preparation
- Choose a spacious, clean, and soft area (e.g., carpeted floor) for assembly to prevent damage to the product.
- Carefully unpack all components and hardware. Refer to the "Package Contents" section to ensure all parts are present.
- Separate and identify all hardware pieces.
5.2 Main Body Assembly
The main body of the kitchen island comes in pre-assembled sections. Your primary task will be connecting these sections and installing internal components.
- Follow the detailed diagrams provided in the separate assembly instruction sheet (if included) to connect the main cabinet sections.
- Install the internal adjustable shelves into the cabinet compartments as desired. Ensure shelf pins are securely seated.
- Attach the internal storage racks to the inside of the cabinet doors.
- Install the drawers into their respective slides. Ensure they glide smoothly.
5.3 Wheel Installation (Optional)
The kitchen island can be used with or without wheels. If mobility is desired, install the wheels as follows:
- Carefully tilt the kitchen island onto its side, ensuring it is stable and supported.
- Locate the pre-drilled holes on the bottom of the island for wheel attachment.
- Attach each of the five concealed wheels using the provided screws. Ensure the two lockable wheels are positioned where they are easily accessible for locking.
- Once all wheels are securely attached, carefully return the island to an upright position.

Figure 5.1: Detail of side racks and hidden wheels for assembly reference.
5.4 Drop Leaf and Power Outlet Installation
- Attach the drop leaf extension to the main countertop using the provided hinges and support brackets. Ensure the mechanism operates smoothly.
- Secure the built-in power outlet unit into its designated slot on the side of the island. Ensure all connections are firm.
- Plug the power cord into a standard wall outlet.

Figure 5.2: Drop leaf mechanism for extension and retraction.

Figure 5.3: Built-in power outlet for convenient access.
6. Operating Instructions
6.1 Extending and Retracting the Drop Leaf
The drop leaf provides additional countertop space when needed and can be folded down to save space.
- To Extend: Locate the latch or support mechanism underneath the drop leaf. Simply open or release the latch, and gently lift the drop leaf until it is fully extended and supported by the mechanism. Ensure it is stable before placing items on it.
- To Retract: Clear all items from the drop leaf. Release the support mechanism, and gently lower the drop leaf until it rests flush with the side of the island. Secure the latch if applicable.
6.2 Using the Power Outlet
The integrated power outlet provides convenient access to power for your kitchen appliances and devices.
- Ensure the kitchen island's power cord is securely plugged into a functional wall outlet.
- Plug your appliances or USB devices into the 3 AC outlets or 2 USB ports.
- Do not exceed the maximum electrical load capacity of the power strip. Avoid plugging in high-power appliances simultaneously if it risks overloading the circuit.
6.3 Utilizing Storage Compartments
The kitchen island offers various storage solutions:
- Drawers: Use the three deep drawers for utensils, dinnerware, or other kitchen essentials.
- Cabinet Storage: The two main cabinets feature adjustable shelves. Adjust the shelf height to accommodate items of different sizes, from pots and pans to small appliances.
- Internal Door Racks: The 2-tier racks inside the cabinet doors are perfect for organizing spices, sauces, and smaller bottles, keeping them easily accessible.
- Side Open Shelves: The two open shelves on the side, equipped with bamboo sticks, are designed for frequently used spices, bottles, or decorative items. The bamboo sticks help prevent items from falling.

Figure 6.1: Internal storage compartments and adjustable shelves.
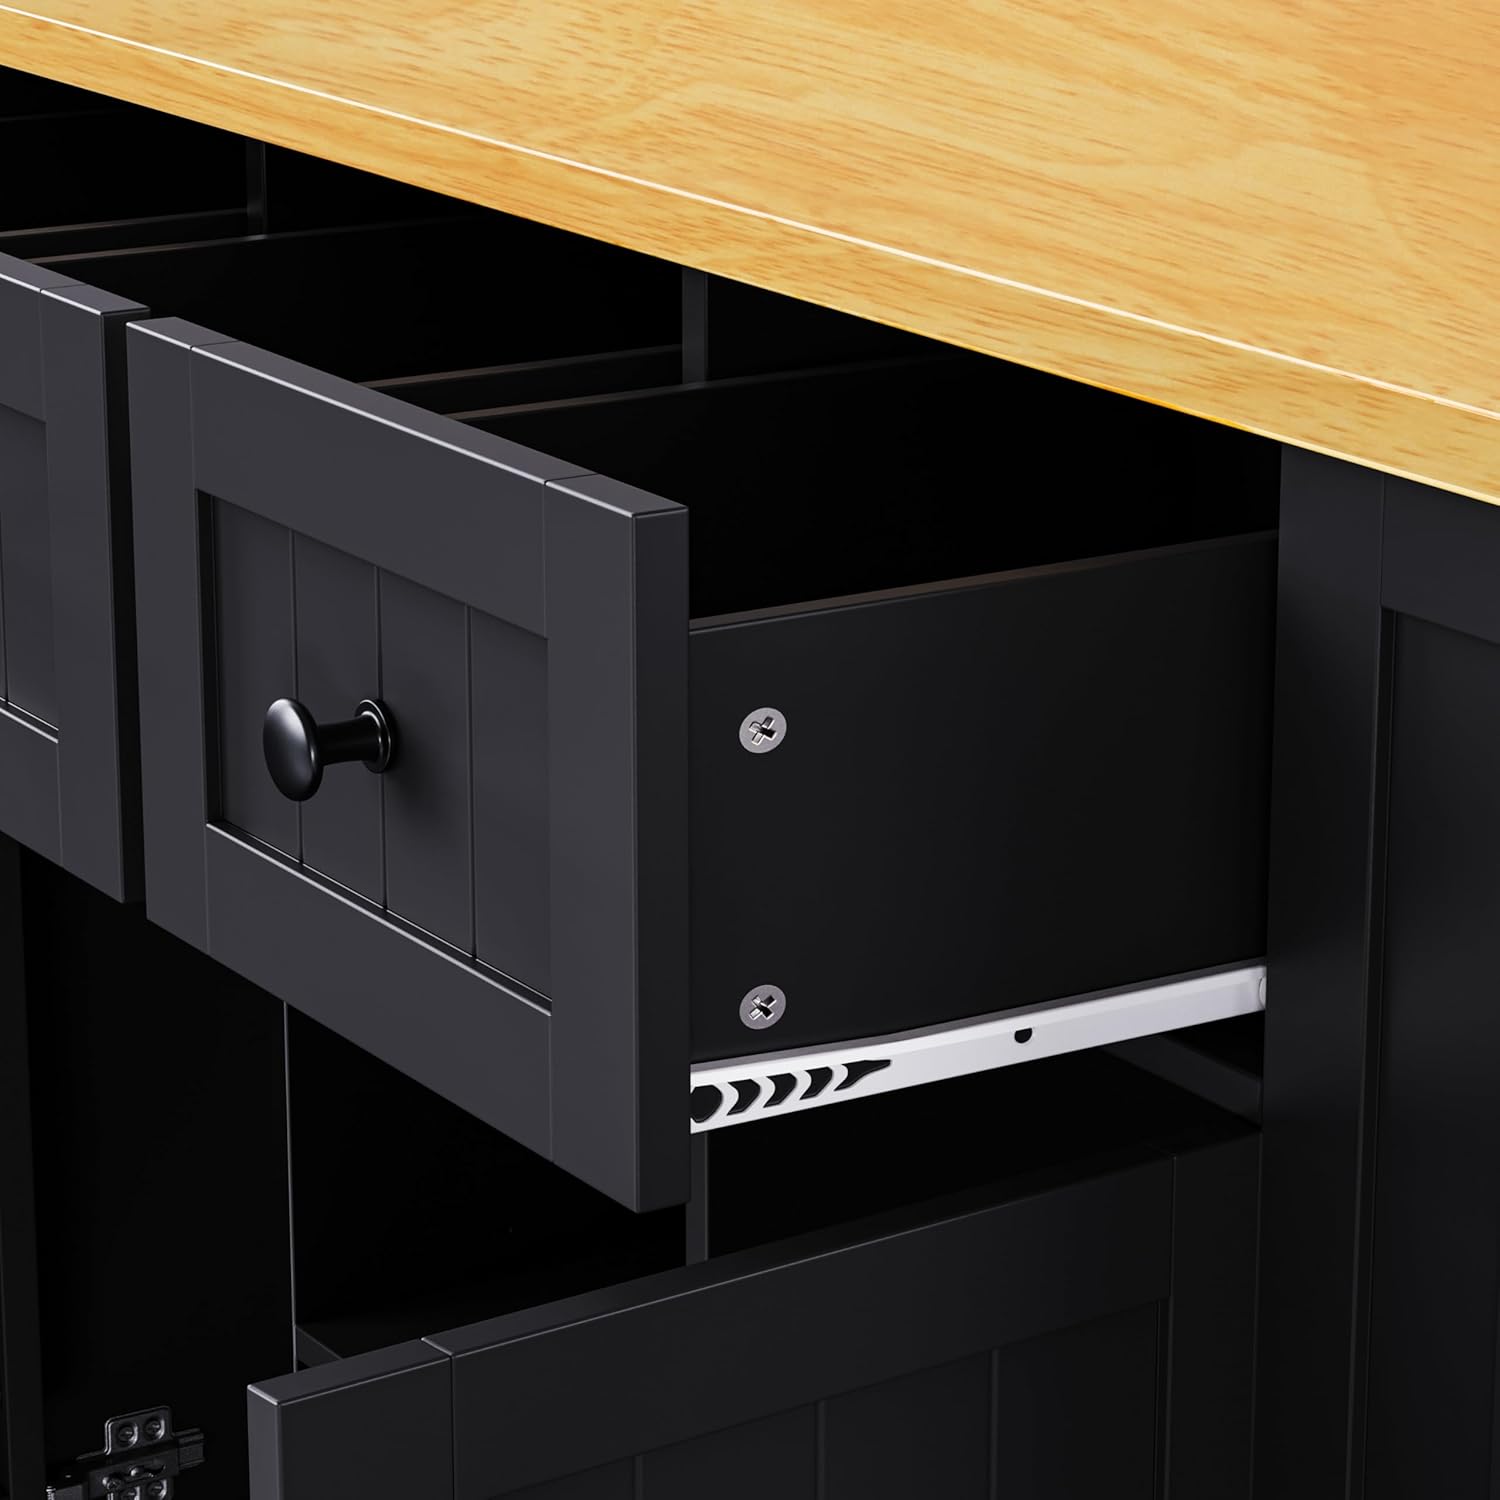
Figure 6.2: Detail of a smoothly operating drawer.
6.4 Moving and Locking the Wheels
If the wheels are installed, you can easily move the island or secure it in place.
- To Move: Ensure both lockable wheels are in the unlocked position. Gently push the island to your desired location.
- To Lock: Once the island is in position, press down on the locking mechanism on the two lockable wheels until they click into place. This will prevent the island from rolling.
- To Unlock: Lift the locking mechanism on the two lockable wheels to release them.
7. Maintenance
Proper care and maintenance will extend the life and appearance of your kitchen island.
- Cleaning: Wipe surfaces with a soft, damp cloth. For stubborn stains, use a mild, non-abrasive cleaner. Avoid harsh chemicals or abrasive materials that could damage the finish.
- Countertop Care: The laminate finish is scratch-proof, but it is still recommended to use cutting boards for food preparation to protect the surface. Avoid placing extremely hot items directly on the countertop without protection.
- Hardware: Periodically check all screws, bolts, and fasteners to ensure they are tight. Retighten as necessary to maintain stability.
- Wheels: Keep the wheels free of debris to ensure smooth movement. If they become stiff, clean them and apply a small amount of silicone lubricant if needed.
- Spills: Wipe up spills immediately to prevent moisture damage, especially on the wood components.
8. Troubleshooting
If you encounter any issues with your kitchen island, refer to the following common problems and solutions:
| Problem | Possible Cause | Solution |
|---|---|---|
| Island is wobbly or unstable. | Loose fasteners; uneven floor; wheels not locked. | Check and tighten all screws and bolts. Ensure the island is on a level surface. If on wheels, ensure lockable wheels are engaged. |
| Drawers do not slide smoothly. | Misaligned slides; debris in tracks; overtightened screws. | Check drawer slide alignment. Clean tracks of any debris. Loosen screws slightly if overtightened. |
| Drop leaf does not extend/retract properly. | Mechanism jammed; support bracket issues. | Ensure no objects are obstructing the mechanism. Check if the support brackets are properly aligned and secured. |
| Power outlet is not working. | Island not plugged in; wall outlet issue; tripped breaker; overloaded. | Ensure the island's power cord is fully plugged into a working wall outlet. Check your home's circuit breaker. Reduce the number of devices plugged in. |
| Wheels are difficult to move or lock. | Debris in wheels; locking mechanism stuck. | Clean any hair or debris from the wheel casters. Apply a small amount of lubricant if necessary. Ensure the locking mechanism is free of obstruction. |
If the problem persists after attempting these solutions, please contact customer support for further assistance.
9. Warranty and Support
This product is manufactured by K&K under the xiaowm brand. For any questions, concerns, or warranty claims, please contact the seller or manufacturer directly through your purchase platform.
Please retain your proof of purchase for any warranty-related inquiries.
Manufacturer: K&K
Brand: xiaowm
Ask a question about this manual
Ask about setup, troubleshooting, compatibility, parts, safety, or missing instructions. Manuals+ will review the question and use this page’s manual context to help answer it.