lxrnqcey lxrnqcey
User Manual
4-Pin Watch Hand Installation Tool
Model: lxrnqcey
Introduction
This manual provides detailed instructions for the proper use, maintenance, and troubleshooting of the lxrnqcey 4-Pin Watch Hand Installation Tool. Designed for watchmakers and repair professionals, this tool facilitates precise and efficient installation of watch hands, reducing manual errors and improving productivity.
Please read this manual thoroughly before operating the device to ensure safe and effective use.
Product Overview
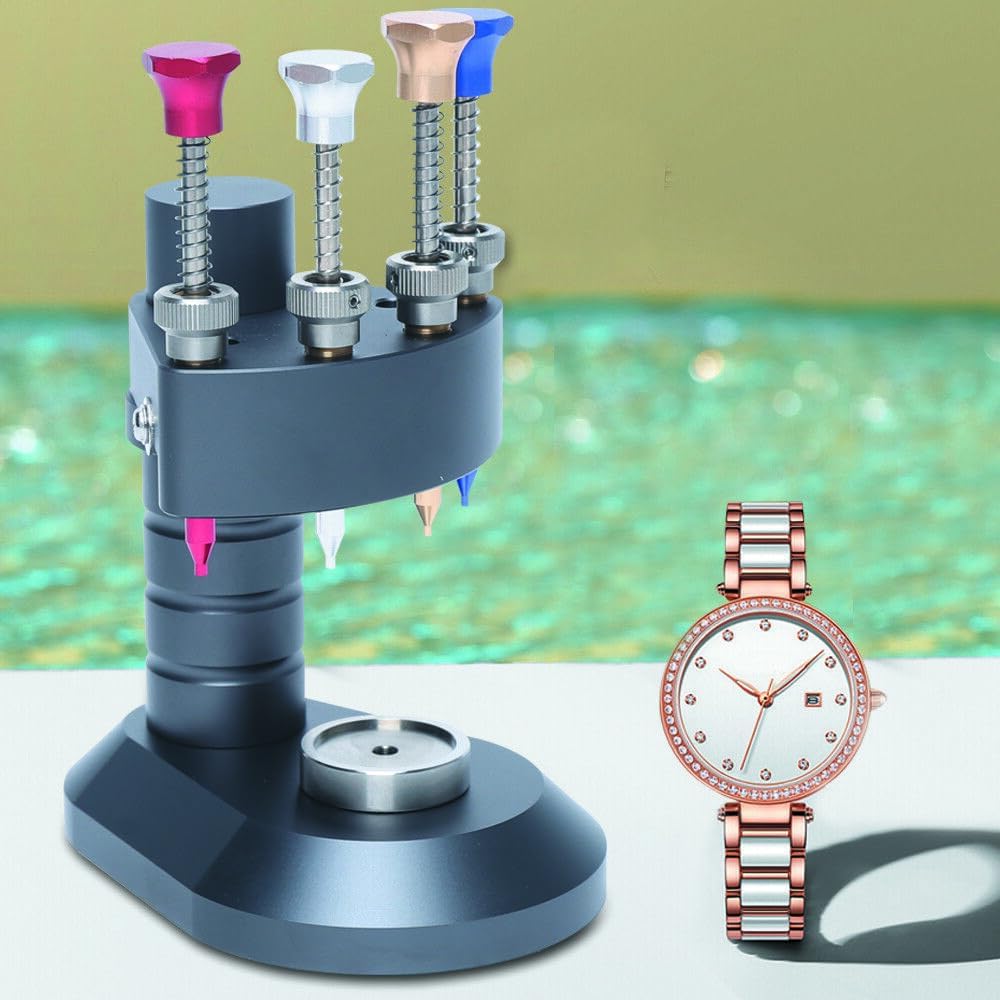
The lxrnqcey 4-Pin Watch Hand Installation Tool is an indispensable assistant for watch assembly and repair. It features a robust design with high-precision components to ensure accurate hand placement and a wide machine base for enhanced stability.


Package Contents
Verify that all items listed below are present in your package:
- 1x 4-Pin Watch Hand Installation Tool
- 3x Movement Bases
- 4x Acrylic Needle Tips
- 4x Steel Needle Tips (Note: Some steel tips may be hidden inside the turn knob on top of the press.)
Specifications
| Feature | Detail |
|---|---|
| Color | Black Grey |
| Material | Metal, Steel, Acrylic |
| Process | Oxidation, Sanding |
| Style | Modern |
| Mounting Type | Tabletop Mount |
| Needle Tips Aperture | 0.6mm/0.024in, 1.2mm/0.047in, 1.6mm/0.063in, Solid |
| Movement Bases Specification | 2035, 2824/2892, 3135 |
| Number of Steel Needle Tips | 4 |
| Number of Acrylic Needle Tips | 4 |
| Number of Movement Bases | 3 |
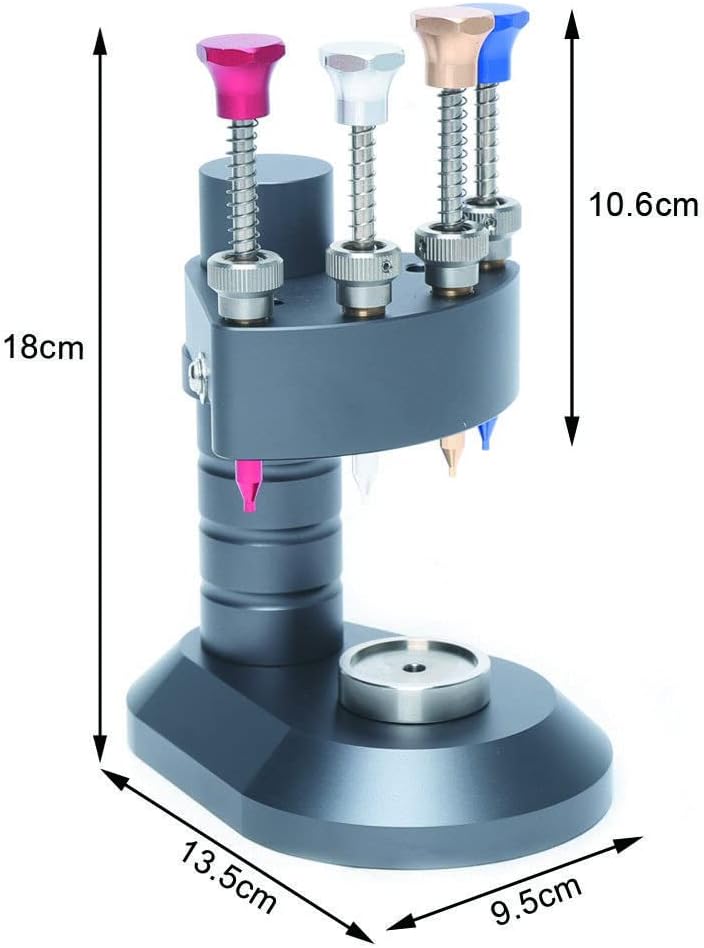
| Needle Shaft Length | 10.6cm/4.17in |
| Product Size (L*W*H) | 13.5*9.5*18cm / 5.31*3.74*7.09in |
| Net Weight | 1.4kg / 3.09lbs |
Setup
The lxrnqcey 4-Pin Watch Hand Installation Tool comes pre-assembled and requires minimal setup. Follow these steps to prepare the tool for use:
- Unpacking: Carefully remove the tool and all accessories from the packaging. Inspect for any signs of damage during transit.
- Placement: Place the tool on a stable, flat, and clean workbench. Ensure adequate lighting for precision work.
- Needle Tip Selection: Identify the appropriate needle tip for the watch hands you intend to install. The tool includes both acrylic and steel needle tips with various apertures. The four steel tips are often found inside the turn knob on top of the press.
- Movement Base Selection: Choose the correct movement base from the three provided (2035, 2824/2892, 3135) that matches your watch movement. If your movement is not listed, a universal base may be required (not included).
Operating Instructions
Follow these steps for precise and efficient watch hand installation:
- Prepare the Watch: Ensure the watch movement is clean and properly seated within the chosen movement base. Place the watch dial (if separate) onto the movement base.
- Position the Watch: Carefully place the movement base with the watch onto the designated platform of the installation tool. Ensure it is centered and stable.
- Select Hand and Plunger: Choose the watch hand you wish to install (e.g., hour, minute, second). Identify the corresponding plunger on the tool that aligns with the hand's pivot point on the watch movement.
- Align the Hand: Gently place the watch hand onto its respective pivot on the watch movement. Use tweezers if necessary for precise alignment.
- Press the Hand: Align the selected needle tip of the tool directly over the center of the watch hand. Apply gentle, even pressure downwards on the plunger. The spring mechanism will assist in a controlled press. Continue pressing until the hand is securely seated.
- Repeat for All Hands: Repeat the process for the remaining watch hands, typically starting with the hour hand, then minute, and finally the second hand.
- Verify Installation: After all hands are installed, visually inspect their alignment and ensure they are securely fastened and do not touch each other or the dial.


Note: Always ensure the watch dial (if applicable) is properly supported and protected during the hand installation process to prevent damage.
Maintenance
Proper maintenance ensures the longevity and continued precision of your lxrnqcey 4-Pin Watch Hand Installation Tool:
- Cleaning: After each use, wipe down the tool with a soft, lint-free cloth to remove any dust, debris, or fingerprints. For stubborn marks, a slightly damp cloth can be used, followed by immediate drying.
- Storage: Store the tool in a clean, dry environment, away from direct sunlight and extreme temperatures. Keep it covered to prevent dust accumulation.
- Inspection: Periodically inspect the needle tips and movement bases for wear or damage. Replace any worn components to maintain precision.
- Lubrication: The moving parts of the plungers are designed for smooth operation. Avoid applying excessive lubricants unless specifically recommended by the manufacturer, as this can attract dust.
Troubleshooting
This section addresses common issues you might encounter and their solutions.
| Problem | Possible Cause | Solution |
|---|---|---|
| Watch hands not seating properly. | Incorrect needle tip size; insufficient pressure; misaligned hand/pivot; incorrect movement base. | Ensure the needle tip aperture matches the hand's pivot. Apply firm, even pressure. Verify hand and pivot alignment. Use the correct movement base for your watch. |
| Hands appear scratched or damaged after installation. | Using a steel tip on delicate hands; excessive force; misaligned press. | Use acrylic needle tips for more delicate hands. Ensure the needle tip is perfectly aligned with the hand's center before pressing. Apply only necessary pressure. |
| Tool feels stiff or sticky. | Dust or debris accumulation; lack of lubrication. | Clean the plungers and shafts thoroughly. If necessary, apply a very small amount of watch oil to the moving parts, but generally, this tool requires minimal lubrication. |
| Missing needle tips. | Tips are often stored inside the turn knob. | Check inside the turn knob on top of the press; some tips are designed to be stored there. |
Warranty and Support
For warranty information or technical support, please contact lxrnqcey customer service through the retailer where the product was purchased. Please have your purchase receipt and product model number (lxrnqcey) ready when contacting support.
While specific warranty details are not provided in this manual, standard consumer rights and warranties apply. Refer to your purchase documentation for specific terms and conditions.