rowood Pink Tulip
rowood Wooden Flower 3D Puzzle Assembly Manual - Pink Tulip (Model TW082)
Detailed instructions for assembling your rowood Pink Tulip 3D wooden flower puzzle kit.
Introduction
This manual provides comprehensive instructions for assembling your rowood Pink Tulip 3D wooden flower puzzle. This kit is designed to offer an engaging and creative building experience, resulting in a beautiful decorative wooden flower. Please read all instructions carefully before beginning assembly.
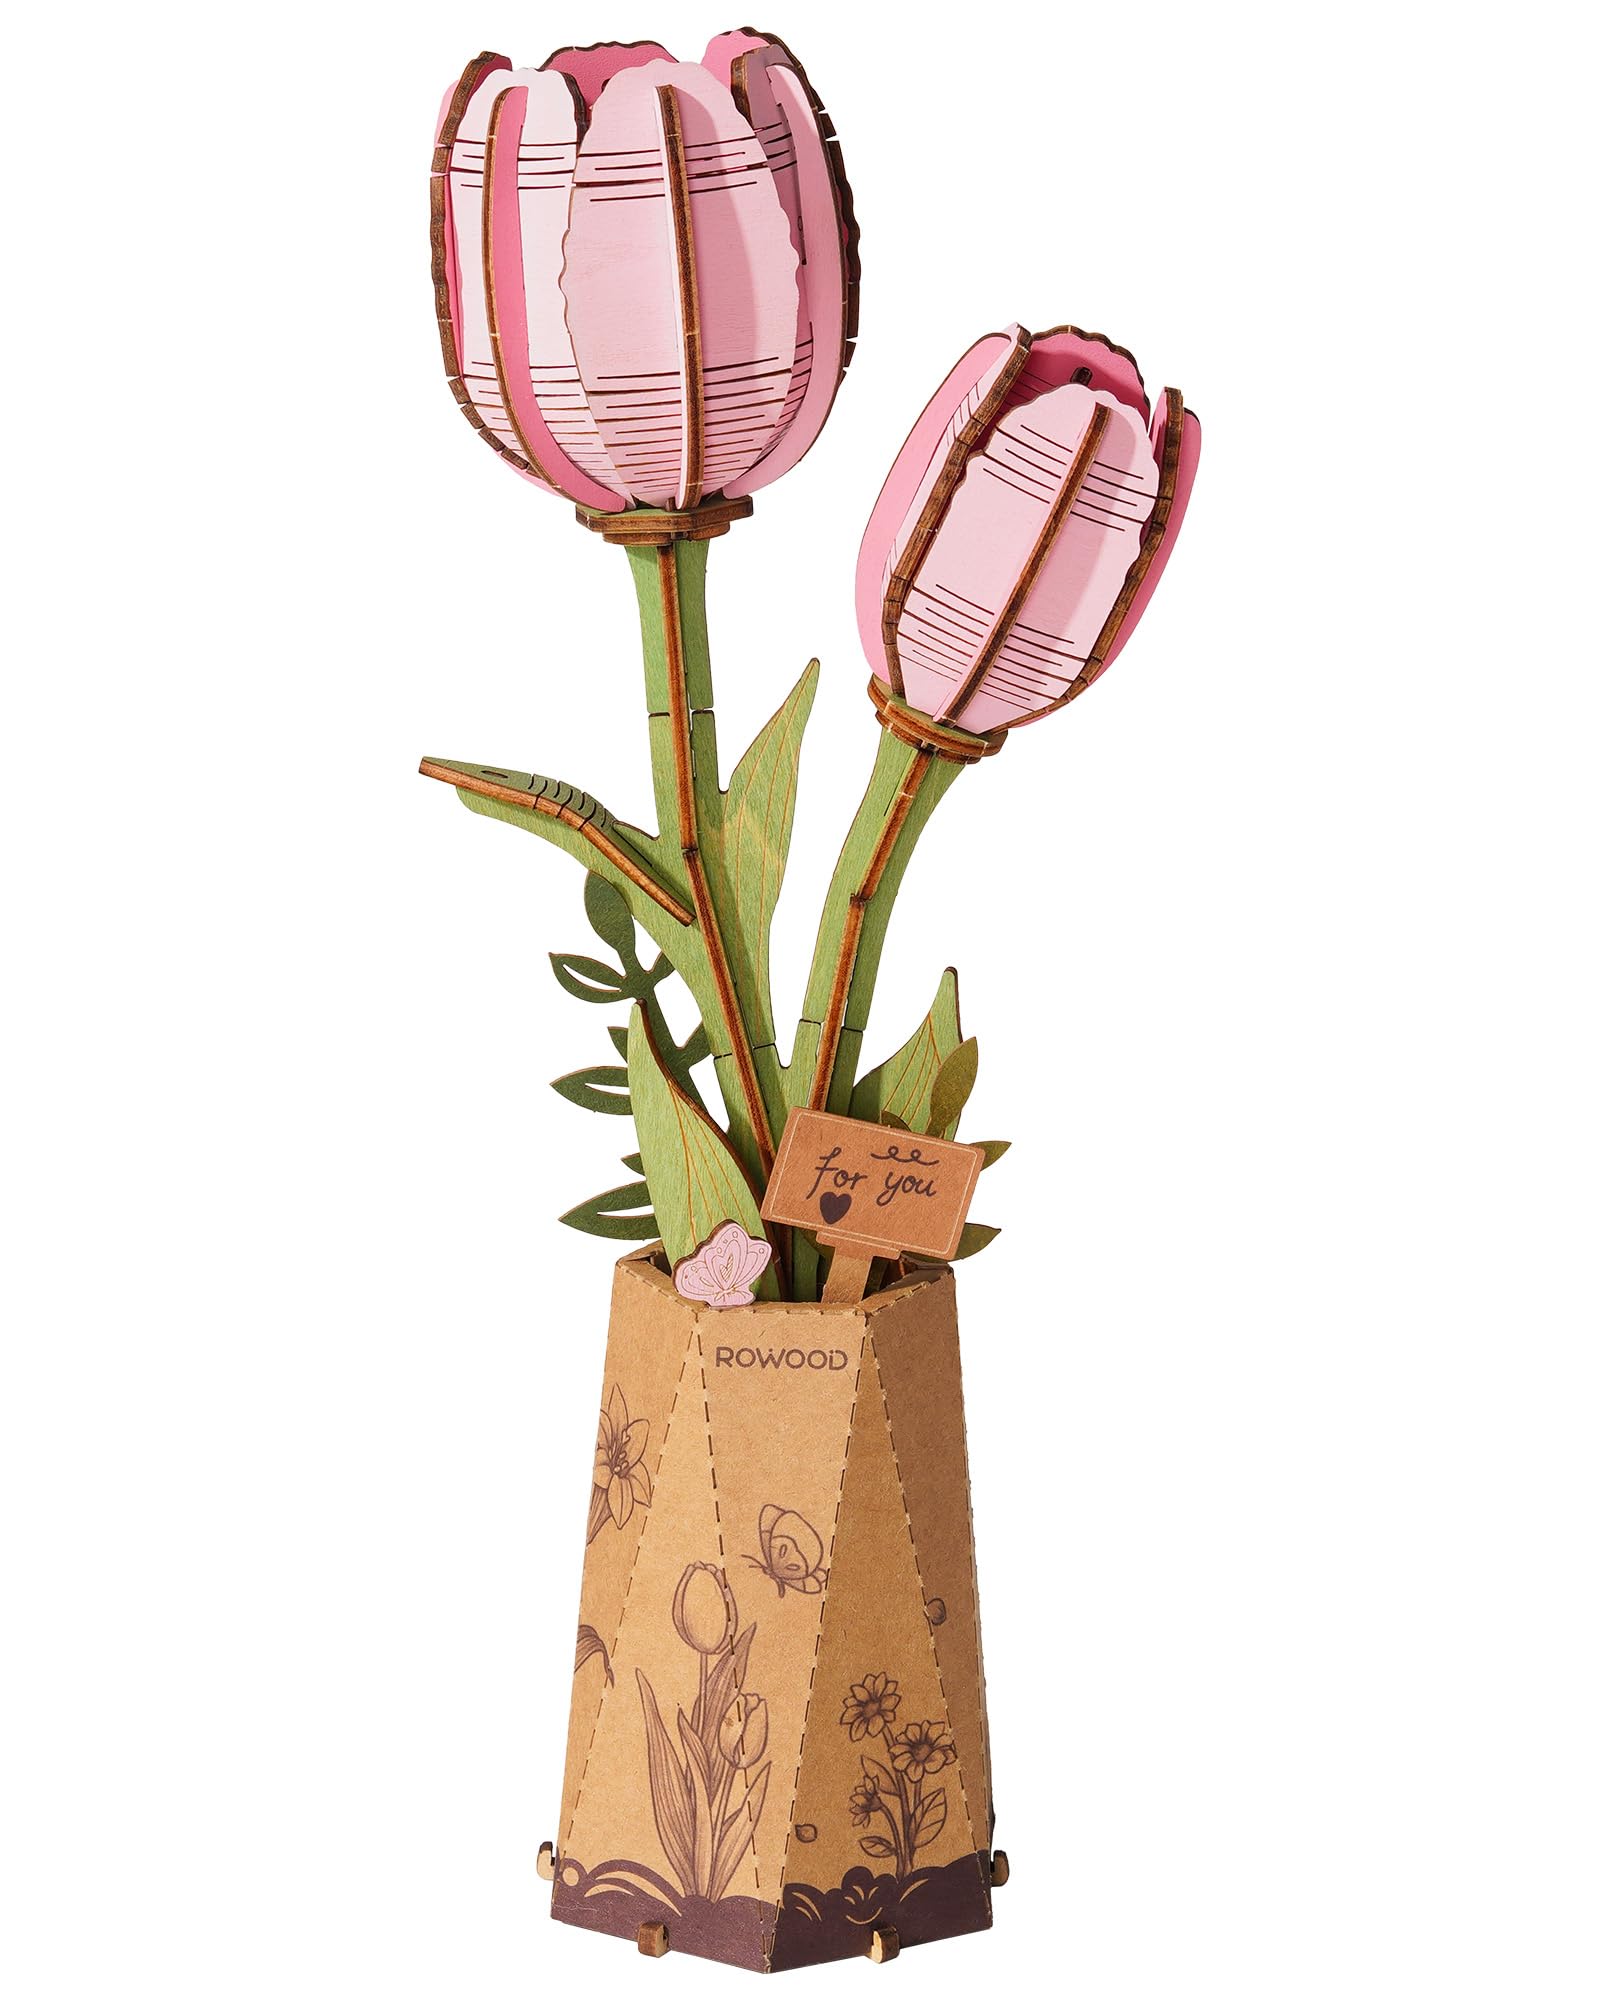
Image: Fully assembled rowood Pink Tulip 3D wooden flower puzzle, showcasing its delicate design and vibrant pink petals.
What's in the Box
Before you begin, ensure all components are present. Your kit should contain the following:
- Wooden flower parts (pre-cut sheets)
- Cardboard base (for display)
- Instruction manual (this document)
- Insect-shaped greeting cards (for customization)

Image: Overview of the kit contents, including pre-cut wooden sheets for flower parts, the cardboard base, and the instruction manual.
Assembly Instructions
Follow these steps carefully to assemble your Pink Tulip wooden flower puzzle. Take your time and apply gentle pressure during assembly.
- Prepare the Pieces: Carefully detach all wooden parts from their sheets. Some pieces may have small connection points; gently twist or use a craft knife if necessary. Inspect each piece for any rough edges and use fine-grit sandpaper (not included, but recommended) to smooth them if needed.
- Identify Components: Refer to the included diagram in your physical manual to identify the different parts for the petals, stem, leaves, and base.
- Assemble the Petals: Begin by interlocking the individual petal pieces according to the numerical or alphabetical sequence indicated in the manual. Ensure they fit snugly.
- Construct the Stem and Leaves: Attach the assembled flower head to the main stem. Then, connect the leaf pieces to the stem at the designated slots. The stem height can be adjusted by selecting different connection points if multiple options are provided.
- Form the Base: Fold and assemble the cardboard base as instructed. This will serve as a pot for your wooden flower.
- Final Assembly: Insert the assembled flower and stem into the cardboard base. Ensure it stands upright and is stable.
- Customization: Use the included insect-shaped greeting cards to add a personal touch. You may color them or write messages before placing them with your flower.

Image: Close-up of hands carefully assembling the stem and leaf components of the wooden flower puzzle.

Image: An assembled Pink Tulip showing its approximate dimensions and structural details.
Assembly Video Guide
Video: Official Rowood video showcasing the assembly process for various wooden flowers in the series, including the Pink Tulip. This provides a visual guide to the construction steps.
Usage and Display
Once assembled, your rowood Pink Tulip can be displayed in various ways:
- Potted Display: Use the included cardboard base to display your flower as a potted plant on any flat surface.
- Vase Arrangement: For a more elegant presentation, place your assembled wooden flower in your favorite vase. The adjustable stem allows for varied arrangements.
- Combine with Other Flowers: Integrate your Pink Tulip with other wooden flower kits from rowood to create a unique and lasting botanical arrangement.

Image: Two assembled Pink Tulips elegantly displayed in a clear glass vase on a windowsill, demonstrating a display option.

Image: A close-up of an assembled Pink Tulip, highlighting its adjustable stem height and the DIY paper flower pot.
Maintenance
To ensure the longevity and appearance of your wooden flower:
- Cleaning: Dust gently with a soft, dry cloth. Avoid using water or chemical cleaners, as these may damage the wood or paint.
- Handling: While durable, the wooden pieces can be delicate. Handle with care to prevent breakage, especially during cleaning or repositioning.
- Storage: If disassembling for storage, keep all pieces in a dry, cool place away from direct sunlight to prevent warping or fading.
Troubleshooting
- Pieces are difficult to detach: Apply gentle, consistent pressure. If a piece is stubborn, use a craft knife to carefully cut the connection points. Avoid forcing, as this can cause breakage.
- Pieces break during assembly: The wooden pieces are delicate. If a small piece breaks, a small amount of wood glue can be used to repair it. Allow sufficient drying time before continuing assembly.
- Assembled flower is unstable: Ensure all interlocking pieces are fully seated. For the base, confirm all tabs are securely in place. If using a vase, ensure it is appropriately sized and weighted for stability.
- Missing pieces: In the rare event of missing components, please contact rowood customer support with your purchase details.
Specifications
| Brand | rowood |
| Model Name | Pink Tulip |
| Model Number | TW082 |
| Color | Pink |
| Material Type | Wood |
| Item Dimensions (L x W x H) | 3.2 x 2.4 x 8.8 inches |
| Item Weight | 4.16 ounces |
| Age Range (Description) | All |
| Included Components | Wooden flower parts, Cardboard base |
Warranty and Support
rowood products are crafted from eco-friendly, non-toxic materials. For any questions, concerns, or assistance with your product, please contact rowood customer service. Refer to your purchase documentation for specific contact information or visit the official rowood website for support details.
Ask a question about this manual
Ask about setup, troubleshooting, compatibility, parts, safety, or missing instructions. Manuals+ will review the question and use this page’s manual context to help answer it.