commowner HX18
commowner HX18 Electric Pressure Washer User Manual
Model: HX18
Introduction
Thank you for choosing the commowner HX18 Electric Pressure Washer. This manual provides essential information for the safe operation, assembly, maintenance, and troubleshooting of your new pressure washer. Please read this manual thoroughly before operating the unit and keep it for future reference.
Important Safety Instructions
When using this product, basic precautions should always be followed, including:
- Always wear appropriate personal protective equipment, such as safety goggles, gloves, and hearing protection.
- Never point the spray gun at people, pets, or electrical devices.
- Ensure all connections are secure before starting the pressure washer to prevent leaks.
- Do not operate the unit if the power cord or pressure hose is damaged.
- Keep children and pets away from the operating area.
- Always disconnect the power supply before performing any maintenance or cleaning.
- Use only approved accessories and replacement parts.
- The machine's pressure rating is a maximum value obtained in controlled laboratory environments. Actual performance may vary based on external factors like faucet location, hose length, and nozzle type.
Safety Lock: The spray gun is equipped with a safety lock to prevent unintentional triggering. Always engage the safety lock when the unit is not in use or when changing nozzles.

Image: Close-up of the spray gun with the safety lock engaged, indicating its function to prevent accidental operation.
Package Contents
Verify that all items listed below are included in your package:
- commowner HX18 Electric Pressure Washer Unit
- 33ft Extended Pressure Hose
- Spray Gun
- 500ML Detergent Tank (Foam Cannon)
- Garden Adapter
- 4 Quick-Connect Nozzles (0°, 15°, 25°, 40°)
- Cleaning Pin
- User Manual
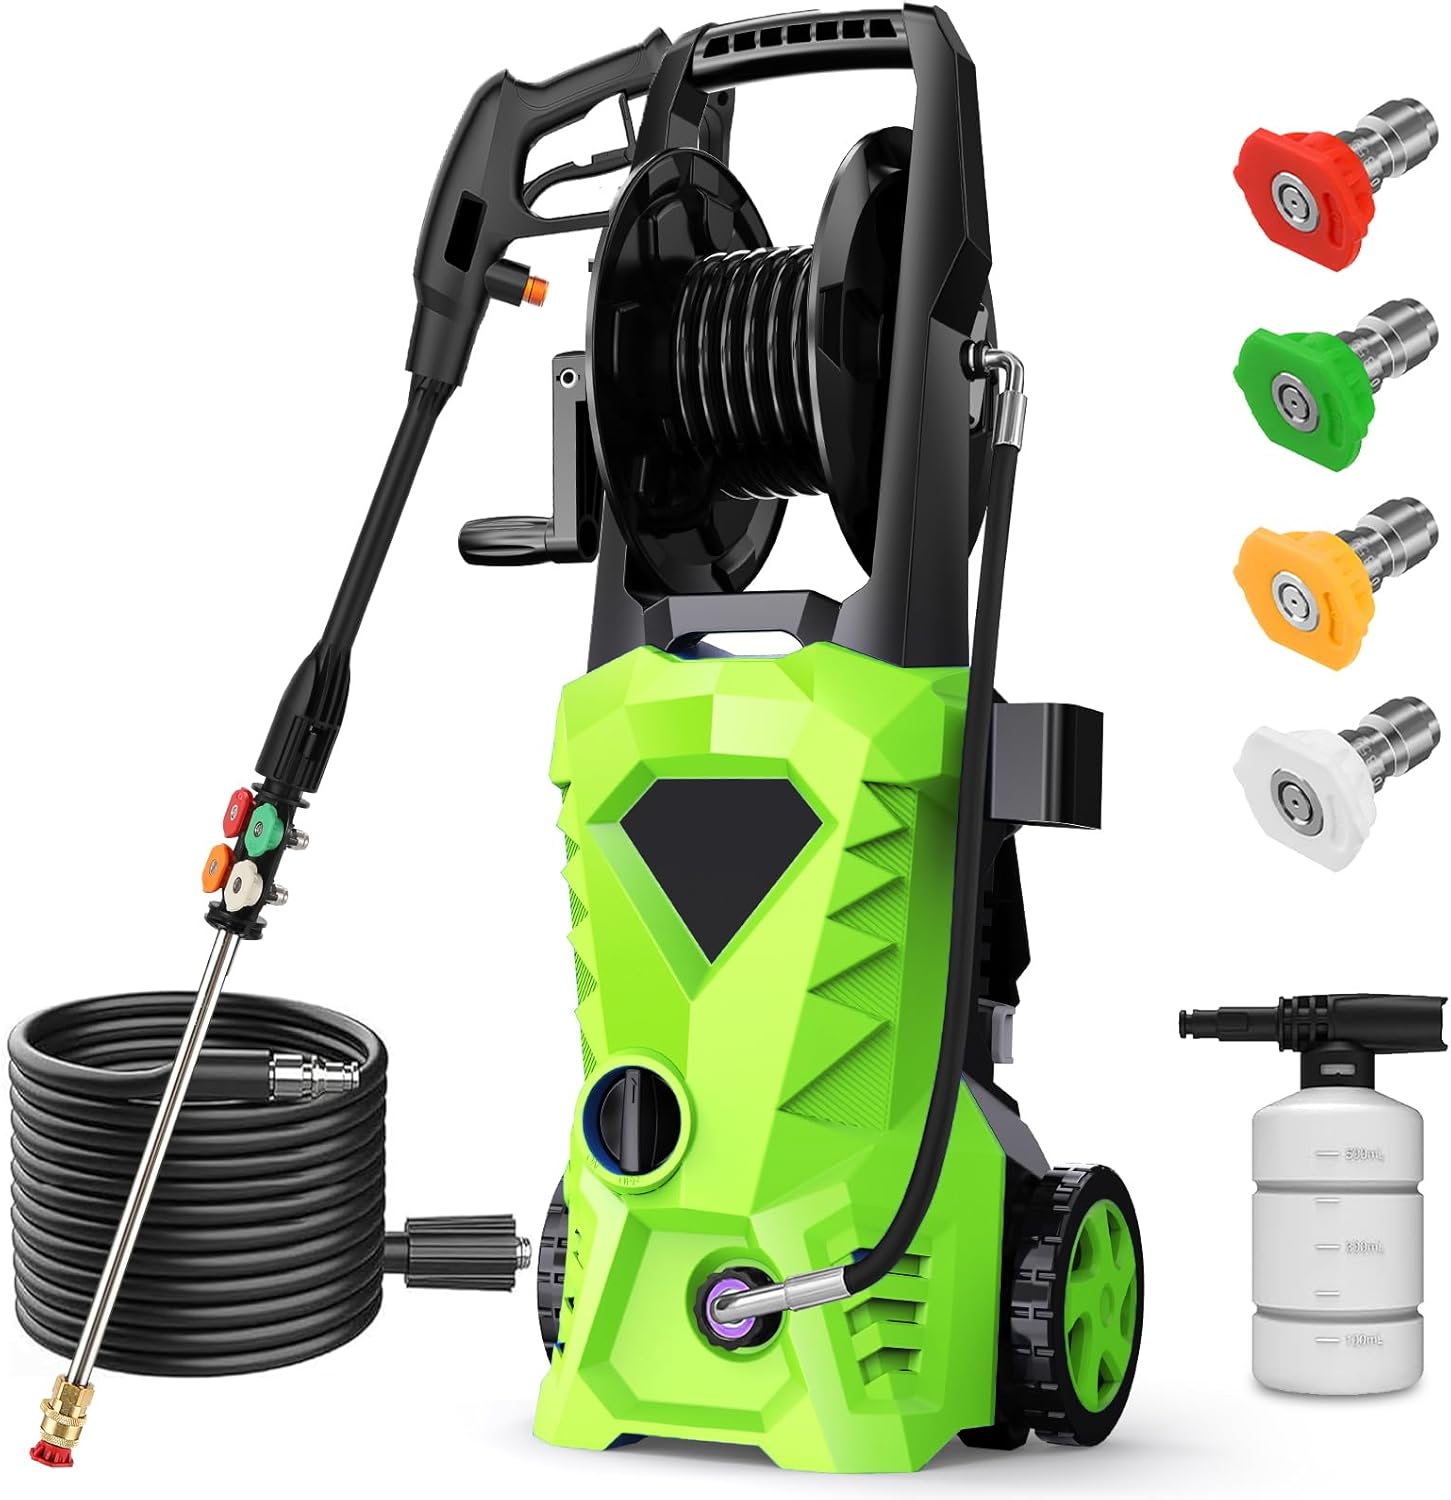
Image: The commowner HX18 Electric Pressure Washer with all its included accessories laid out, including the main unit, spray gun, hose, foam cannon, and various nozzles.
Assembly Instructions
Follow these steps to assemble your pressure washer:
- Attach the Wheels: Securely attach the wheels to the base of the pressure washer unit. Ensure they are firmly in place for stability.
- Install the Handle: Insert the handle into the designated slots on the top of the unit until it clicks into place. The handle is telescopic for adjustable height.
- Connect the High-Pressure Hose to the Unit: Connect one end of the 33ft high-pressure hose to the high-pressure outlet on the front of the pressure washer unit. Ensure the connection is tight to prevent leaks. The unit features an upgraded metal two-way fitting for enhanced durability and leak prevention.
- Connect the High-Pressure Hose to the Spray Gun: Connect the other end of the high-pressure hose to the inlet on the spray gun.
- Attach the Spray Wand: Connect the spray wand to the spray gun.
- Mount the Hose Reel: The unit includes a hose reel for organized storage. Ensure the hose reel is properly mounted and the auxiliary hose connects the reel to the water outlet on the unit.

Image: An illustration detailing the assembly of the pressure washer, highlighting the 16ft power cord, 33ft extension pressure hose, and the integrated hose reel for organized storage.

Image: Detailed view of the upgraded metal two-way fitting on the hose reel and the O-ring in the hose connection, designed to prevent water leakage.
Setup for Operation
- Connect Water Supply: Attach a standard garden hose to the water inlet on the pressure washer unit. Ensure the connection is tight.
- Turn on Water: Fully open the water faucet to allow water to flow through the unit and hose, expelling any air. Squeeze the spray gun trigger to release air until a steady stream of water emerges.
- Connect Power: Plug the 16ft power cord into a grounded electrical outlet. Ensure the outlet meets the power requirements of the pressure washer.
- Power On: Turn the power switch on the unit to the "ON" position. The motor will start briefly and then shut off, indicating the Total Stop System (TSS) is active and the unit is pressurized.

Image: A person operating the pressure washer, demonstrating the extensive reach provided by the 33ft extension pressure hose and 16ft power cord.
Operating the Pressure Washer
Nozzle Selection
The commowner HX18 comes with 4 quick-connect nozzles and a foam cannon for various cleaning tasks. Always ensure the pressure washer is off and the safety lock is engaged before changing nozzles.
- 0° (Red) Nozzle: Provides a concentrated, powerful stream for tough, localized stains and impact cracks. Use with extreme caution.
- 15° (Yellow) Nozzle: Offers a focused spray for cleaning hard surfaces like concrete and brick.
- 25° (Green) Nozzle: Delivers a general cleaning spray, suitable for painted surfaces, wood siding, and fences.
- 40° (White) Nozzle: Provides a wide, gentle spray for cleaning cars, windows, and delicate surfaces.
- Foam Cannon: For applying detergent. Fill the 500ML detergent tank with appropriate pressure washer soap.

Image: Visual representation of the five spray modes: 0° (red), 15° (yellow), 25° (green), 40° (white) nozzles, and the foam cannon for soap application, illustrating their respective spray patterns.
Using the Foam Cannon
- Fill the detergent tank with pressure washer-compatible soap.
- Attach the foam cannon to the spray gun.
- Engage the safety lock, then turn on the pressure washer.
- Squeeze the trigger to apply foam to the desired surface.
- After applying soap, switch to a rinse nozzle (e.g., 25° or 40°) and rinse the surface thoroughly.
Total Stop System (TSS)
The pressure washer is equipped with a Total Stop System (TSS) which automatically shuts off the pump when the trigger is not engaged. This feature saves energy, prolongs pump life, and reduces noise.

Image: A graphic representation of the Total Stop System (TSS) technology, explaining its function to automatically shut off the pump when the trigger is released, saving energy and extending pump life.
Maintenance
After Each Use
- Flush the System: Disconnect the detergent tank (if used) and run clean water through the system for a few minutes to remove any soap residue.
- Turn Off Water and Power: Turn off the water supply and then the pressure washer unit.
- Release Pressure: Squeeze the spray gun trigger to release any remaining pressure in the system.
- Disconnect Hoses: Disconnect the garden hose and high-pressure hose.
- Clean Nozzles: Use the included cleaning pin to clear any blockages from the nozzle tips.
- Wipe Down: Wipe the unit and accessories with a damp cloth to remove dirt and grime.
Storage
- Store the pressure washer in a dry, frost-free area.
- Drain all water from the pump, hoses, and spray gun to prevent freezing and damage.
- Wrap the high-pressure hose and power cord neatly using the integrated hose reel and cord storage.
- Store nozzles and the foam cannon in their designated storage areas on the unit.
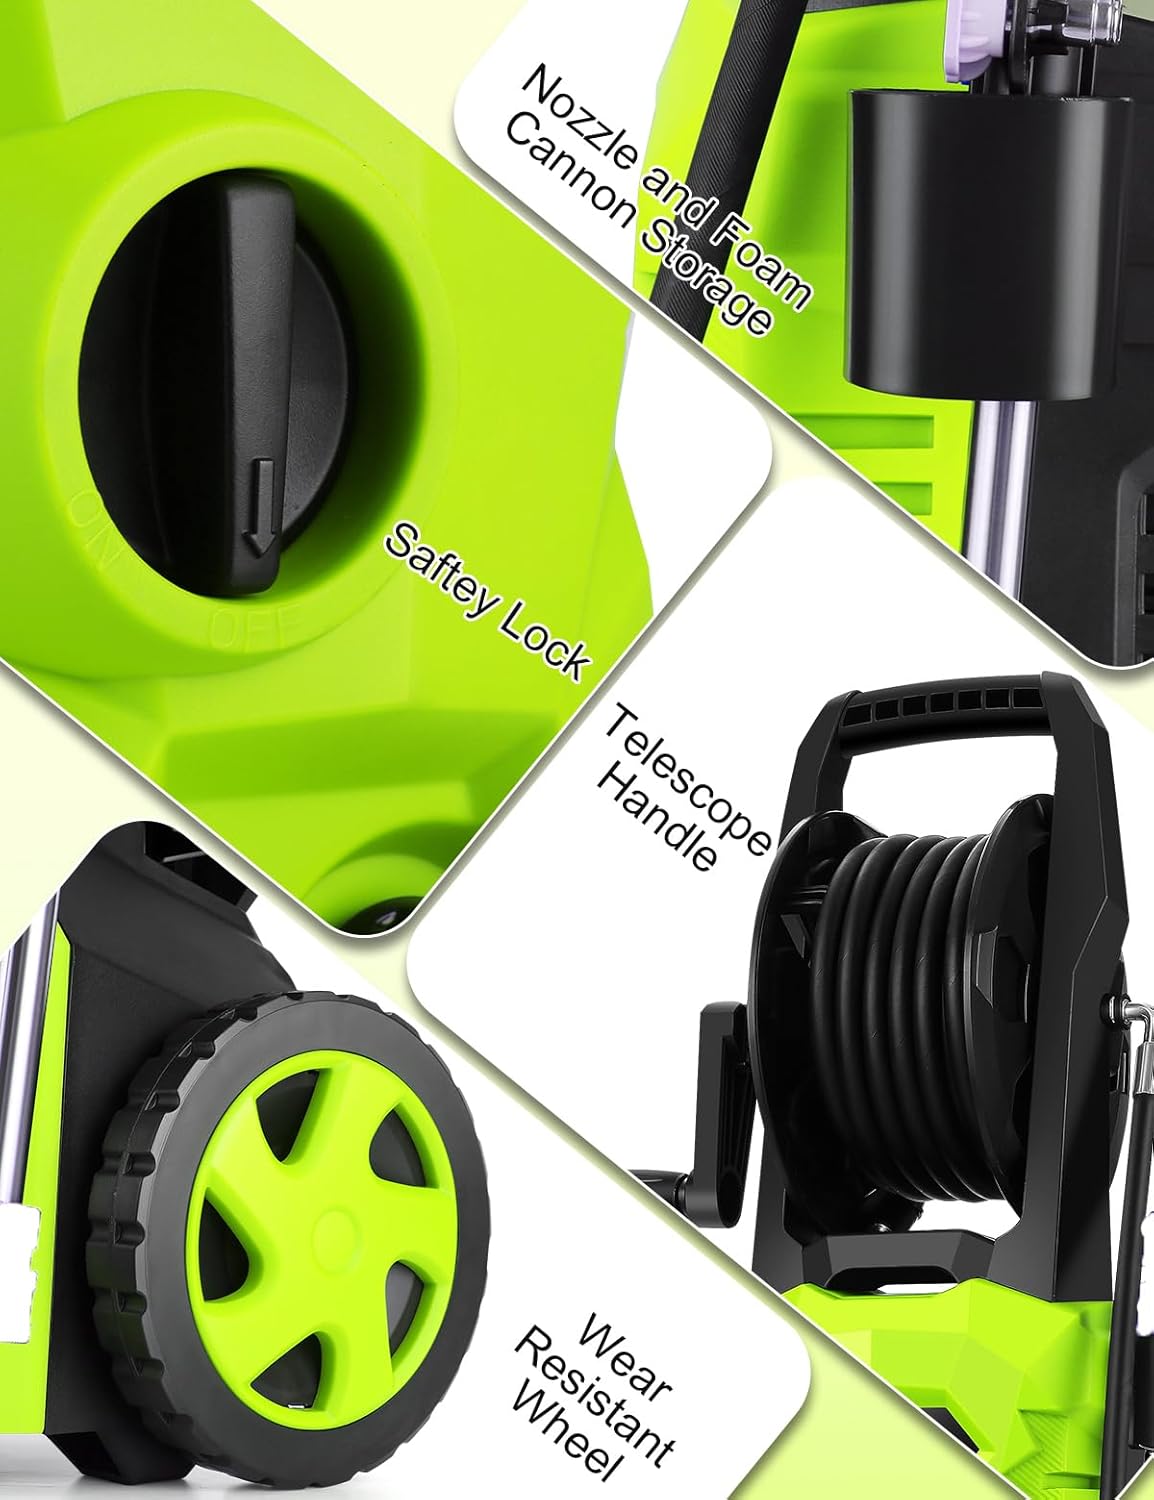
Image: A composite image highlighting key features of the pressure washer, including the nozzle and foam cannon storage, safety lock, telescopic handle, and wear-resistant wheels, all contributing to ease of maintenance and storage.
Troubleshooting
Refer to the table below for common issues and their solutions:
| Problem | Possible Cause | Solution |
|---|---|---|
| Unit does not start | No power supply; Power switch off; Thermal overload activated | Check power cord connection and outlet; Turn power switch ON; Allow unit to cool down for 30 minutes. |
| Low pressure | Insufficient water supply; Clogged nozzle; Air in pump; Leaks in connections | Ensure water faucet is fully open; Clean nozzle with cleaning pin; Bleed air from pump (see Setup); Tighten all connections. |
| Water leaks | Loose connections; Damaged O-rings | Tighten all hose and gun connections; Inspect and replace damaged O-rings (M22*14mm hose connector, O-ring inner diameter 9*2.65mm). |
| Motor runs continuously when trigger is not pressed | Air in pump; Leaks in system; TSS malfunction | Bleed air from pump; Check for and fix leaks; Contact customer service if TSS issue persists. |
Specifications
| Feature | Detail |
|---|---|
| Model | HX18 |
| Power Source | Electric (AC) |
| Motor Power | 1600 Watts |
| Maximum Pressure | 5000 PSI |
| Maximum Flow Rate | 3.0 GPM |
| High-Pressure Hose Length | 33 Feet |
| Power Cord Length | 16 Feet |
| Detergent Tank Capacity | 500 ML |
| Nozzle Types | 0°, 15°, 25°, 40° Quick-Connect |
| Item Weight | 18 Pounds |
| Product Dimensions (L x W x H) | 11" x 9" x 22" |
Warranty and Customer Support
The commowner HX18 Electric Pressure Washer is backed by a 15-Months Limited Service, Labor, and Parts Coverage. For any issues regarding compatibility with existing accessories, product operation, or warranty claims, please contact commowner customer service.
Please visit the official commowner store or contact their support channels for assistance. Keep your purchase receipt for warranty validation.
Contact Information: Refer to your purchase documentation or the commowner official website for the most current customer service contact details.
Related Documents - HX18
 |
Pressure Washer Hose Reel NTG-SA15B User Manual Comprehensive guide for the NTG-SA15B Pressure Washer Hose Reel, covering technical specifications, installation, operation, maintenance, and troubleshooting. Essential for efficient hose management with pressure washers. |
 |
Giraffe Tools TA15B-G20PRO Retractable Pressure Hose Reel User Manual User manual for the Giraffe Tools TA15B-G20PRO Retractable Pressure Hose Reel, detailing product information, installation, operation, troubleshooting, maintenance, safety guidelines, and warranty. |
 |
Giraffe Tools Stainless Steel Garden Hose Reel Model SW-8 User Manual Comprehensive user manual for the Giraffe Tools Stainless Steel Garden Hose Reel, Model SW-8. Includes product information, installation guide, testing, troubleshooting, maintenance, and warranty details. |
 |
VEVOR Pressure Washer Hose Reel Cart GT0707A - Assembly and User Guide Comprehensive assembly instructions, safety guidelines, and specifications for the VEVOR Pressure Washer Hose Reel Cart (Model GT0707A). Learn how to set up and safely use your hose reel. |
 |
VEVOR ALQ-200-2 Water Hose Reel Cart: Assembly and Safety Guide Detailed assembly instructions, safety precautions, and parts list for the VEVOR ALQ-200-2 Water Hose Reel Cart. Ensure safe and proper setup for your garden or pressure washer hose. |
 |
VEVOR Welding Hose Reels WDHRS02-RTW14100A User Manual | Operation & Installation Guide Comprehensive user manual for the VEVOR Welding Hose Reels, model WDHRS02-RTW14100A. This guide details operating procedures, installation steps, product specifications, and essential safety warnings and precautions for proper use of the hose reel with acetylene, oxygen, propane, and other gases. |
Ask a question about this manual
Ask about setup, troubleshooting, compatibility, parts, safety, or missing instructions. Manuals+ will review the question and use this page’s manual context to help answer it.