1. Product Overview
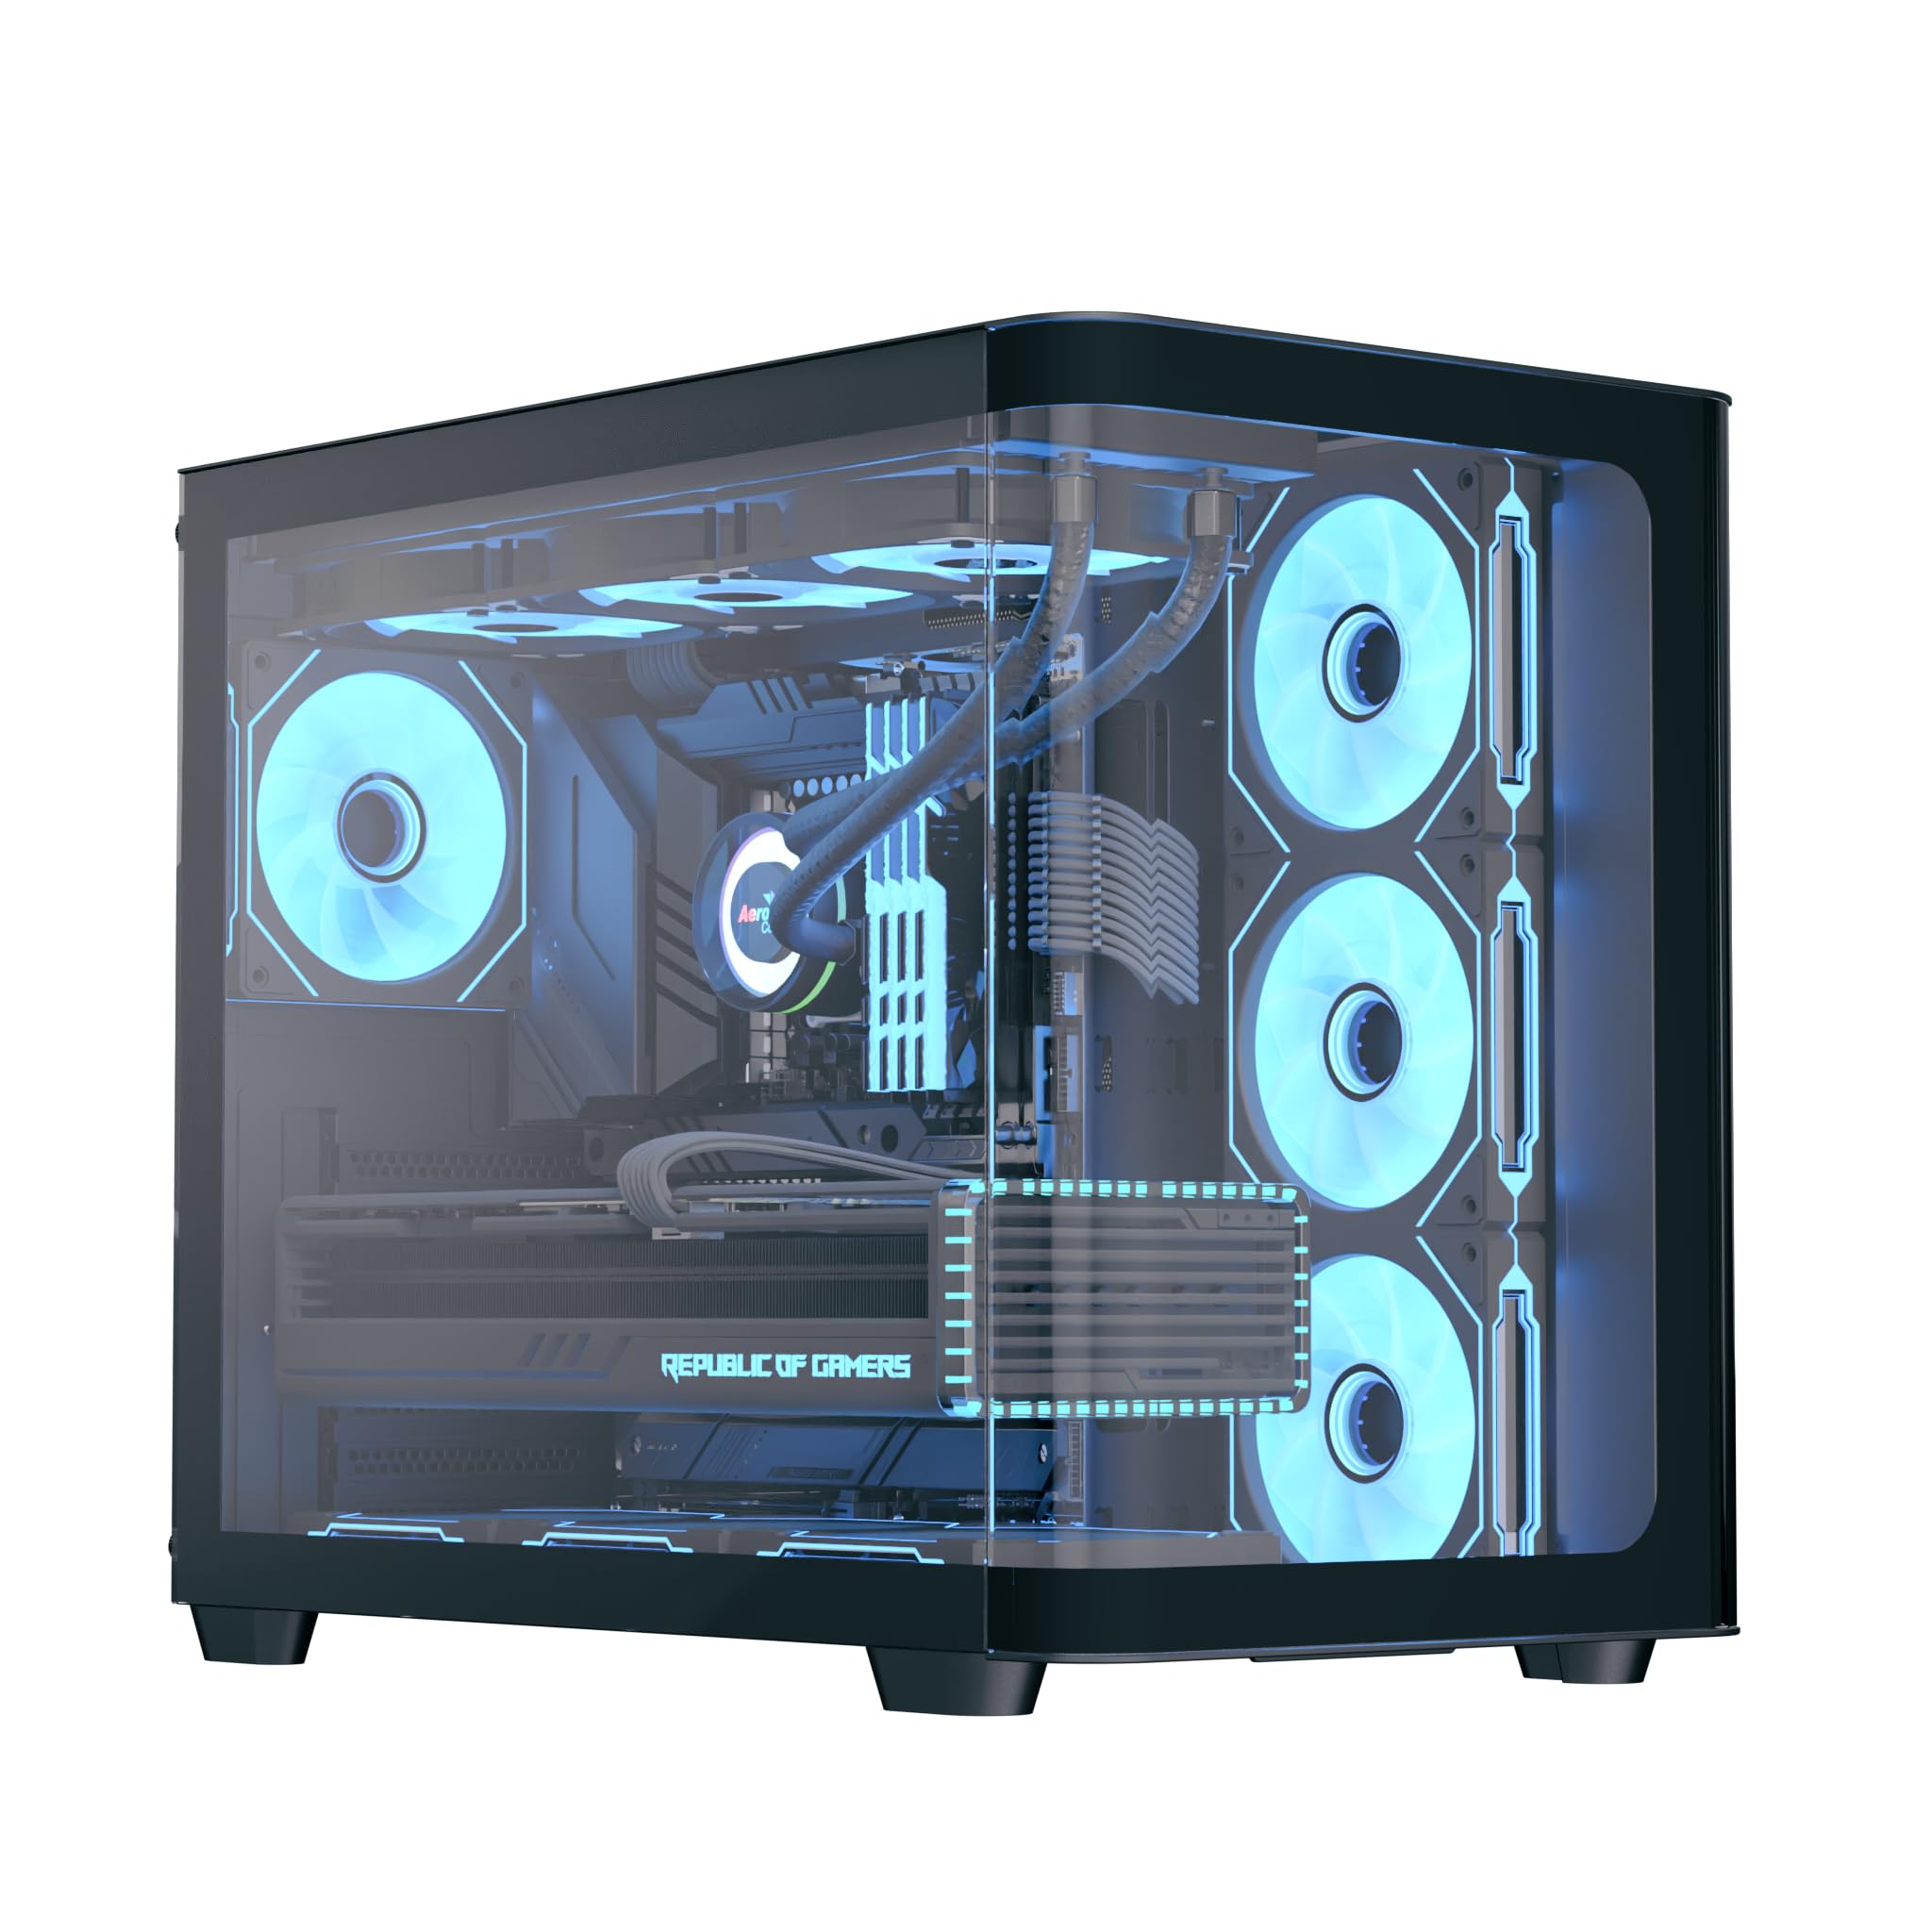
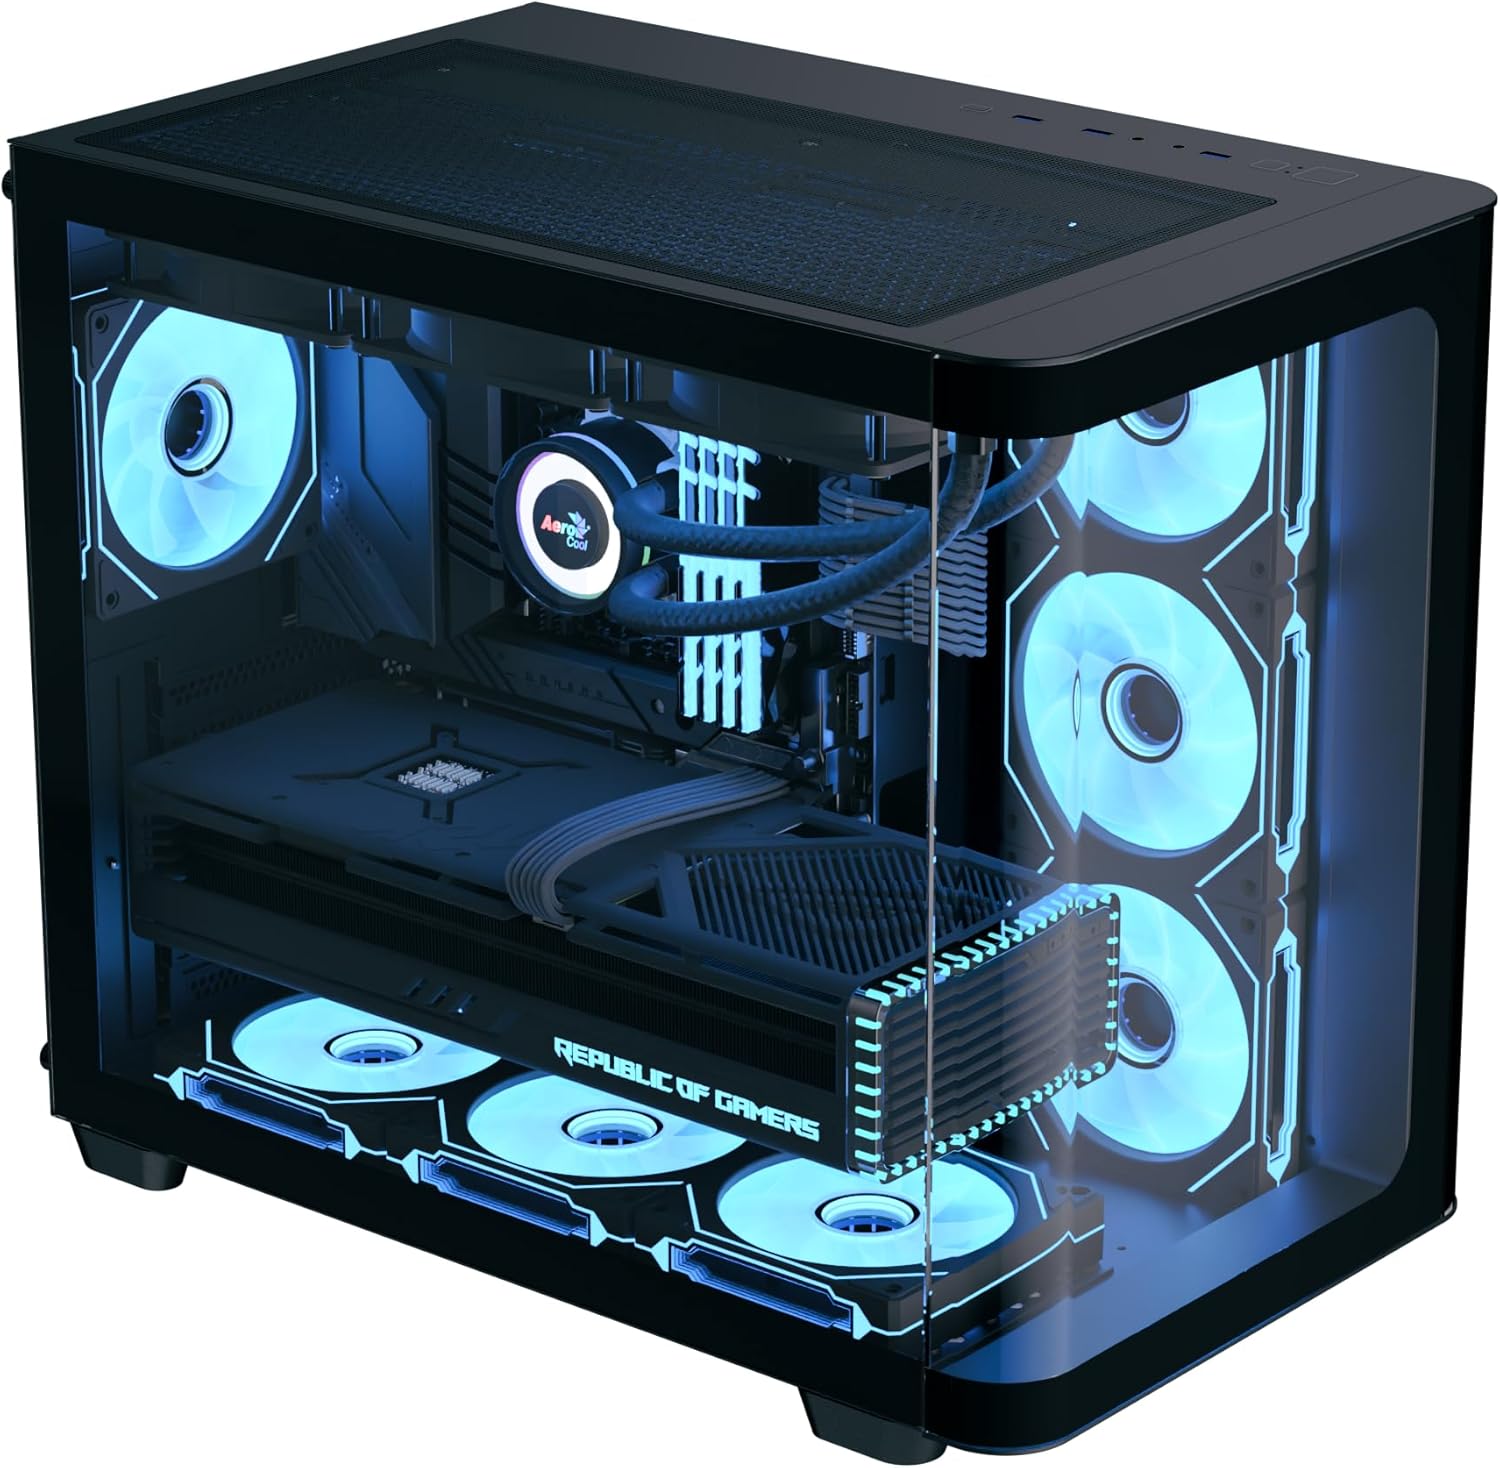
The AeroCool P500C is a mid-tower PC case designed with a dual-chamber layout. It features full tempered glass panels on the front and side, providing a clear view of internal components. The case includes four pre-installed ARGB fans, with three reverse-blade fans on the side and one standard fan at the rear, all featuring a "mirage" infinity mirror lighting effect. This case supports various cooling configurations, including air and liquid cooling systems up to 360mm radiators. It is compatible with ATX, micro-ATX, and mini-ITX motherboards, and accommodates high-end graphics cards up to 450mm in length and CPU coolers up to 162mm in height. Storage options include three SSD slots and two HDD drive bays. For ease of maintenance, the case is equipped with magnetic dust filters on the top and bottom.
2. Key Features
- Mid-tower dual chamber design with full tempered glass front and side panels.
- Four pre-installed ARGB fans: three 12cm reverse-blade fans on the side and one 12cm fan at the rear.
- "Mirage" infinity mirror lighting effect on all included fans.
- Extensive cooling support for radiators up to 360mm (top and bottom) and up to 10 total fan slots.
- Compatibility with high-end graphics cards up to 450mm in length.
- Supports ATX, micro-ATX, and mini-ITX motherboards.
- Includes a 4-port PWM ARGB fan hub for centralized control.
- Equipped with top and bottom magnetic dust filters for easy maintenance.
3. Package Contents
Please verify that all components are present in the package:
- AeroCool P500C Mid-Tower PC Case
- Four pre-installed 12cm ARGB fans (3 reverse-blade, 1 standard)
- 4-port PWM ARGB fan hub
- Accessory box with screws, standoffs, and cable ties
- User Manual (this document)
4. Setup and Installation
This section provides general guidelines for installing components into your AeroCool P500C PC case. Always refer to the specific manuals for your motherboard, power supply, and other components for detailed installation instructions.
4.1 Preparing the Case
- Remove Side Panels: Carefully remove the tempered glass side panel(s) by unscrewing the thumb screws and gently sliding them off. Place them on a soft, flat surface to prevent scratches.
- Accessory Box: Locate the accessory box inside the case, which contains all necessary screws and mounting hardware.
4.2 Motherboard Installation
- Install Standoffs: Ensure the correct standoffs are installed for your motherboard form factor (ATX, micro-ATX, mini-ITX). The P500C typically has pre-installed standoffs for ATX. Adjust as needed.
- Install I/O Shield: If your motherboard requires a separate I/O shield, install it into the rear opening of the case before mounting the motherboard.
- Mount Motherboard: Carefully align your motherboard with the standoffs and I/O shield, then gently lower it into place. Secure it with the provided screws.
4.3 Storage Device Installation
The P500C supports three SSDs and two HDDs.
- 2.5" SSDs: Mount 2.5" SSDs onto the dedicated SSD trays, typically located behind the motherboard tray or in the PSU shroud area. Secure with screws.
- 3.5" HDDs: Install 3.5" HDDs into the drive bays, usually found in the lower chamber. Slide the drives into the trays and secure them.
4.4 Graphics Card (GPU) Installation
The case supports graphics cards up to 450mm in length.
- Remove PCIe Slot Covers: Remove the necessary PCIe slot covers from the rear of the case corresponding to your GPU's size.
- Insert GPU: Align your graphics card with the PCIe slot on the motherboard and press firmly until it clicks into place. Secure it with screws.

4.5 Cooling System Installation
The P500C supports up to 360mm radiators at the top and bottom, and a total of 10 fans.
- Radiators: Mount radiators to the designated top or bottom brackets using the appropriate screws.
- Additional Fans: Install any additional fans in available slots (e.g., front, top, bottom, rear) as needed for optimal airflow.
- Fan Hub: Connect the pre-installed fans and any additional ARGB/PWM fans to the included 4-port PWM ARGB fan hub. Connect the hub to your motherboard's ARGB header and a PWM fan header for control.
4.6 Cable Management
Utilize the cable routing cutouts and tie-down points behind the motherboard tray to manage cables. This improves airflow and aesthetics.
4.7 Front I/O Panel Connections
Connect the front panel cables (USB, audio, power switch, reset switch, LED indicators) to the corresponding headers on your motherboard. Refer to your motherboard manual for header locations.

5. Operating Instructions
- Power On: After all components are installed and cables connected, close the side panels. Connect your power supply to a wall outlet and flip the PSU switch to the ON position. Press the power button on the front panel of the case to start your system.
- ARGB Lighting Control: The pre-installed ARGB fans are connected to a 4-port PWM ARGB fan hub. If this hub is connected to your motherboard's ARGB header, you can control the lighting effects using your motherboard's RGB software (e.g., ASUS Aura Sync, MSI Mystic Light Sync, Gigabyte RGB Fusion, ASRock Polychrome Sync).
- Fan Speed Control: The PWM functionality of the fan hub allows your motherboard to control fan speeds based on system temperatures, optimizing cooling performance and noise levels.
6. Maintenance
Regular maintenance helps ensure optimal performance and longevity of your PC components.
- Dust Filters: The AeroCool P500C is equipped with magnetic dust filters on the top and bottom. Regularly remove and clean these filters to prevent dust buildup inside the case, which can impede airflow and component cooling.
- Internal Cleaning: Periodically open the case and use compressed air to remove dust from fans, heatsinks, and other components. Ensure the system is powered off and unplugged before cleaning.
- Cable Management: Periodically check cable routing to ensure no cables are obstructing airflow or fan operation.
7. Troubleshooting
If you encounter issues, consider the following common troubleshooting steps:
- System Not Powering On:
- Ensure the power supply is properly connected to the wall outlet and the PSU switch is ON.
- Verify all power cables (24-pin ATX, 8-pin CPU, PCIe power) are securely connected to the motherboard and components.
- Check that the front panel power switch cable is correctly connected to the motherboard header.
- Fans Not Spinning/ARGB Not Lighting Up:
- Confirm that the fans are properly connected to the fan hub.
- Ensure the fan hub is connected to a power source (e.g., SATA power) and the motherboard's ARGB/PWM headers.
- Check your motherboard's BIOS/UEFI settings or RGB software for fan control and lighting settings.
- Overheating Issues:
- Verify that all case fans are spinning and oriented correctly for optimal airflow (intake/exhaust).
- Clean dust filters and internal components to ensure unrestricted airflow.
- Ensure CPU cooler and GPU fans are functioning correctly.
8. Specifications
| Feature | Specification |
|---|---|
| Brand | AeroCool |
| Case Type | Mid Tower |
| Model Name | P500C |
| Color | Black |
| Motherboard Support | ATX, Micro-ATX, Mini-ITX |
| Pre-installed Fans | 4 x 12cm ARGB (3 reverse-blade side, 1 rear) |
| Radiator Support | Up to 360mm (Top, Bottom) |
| Max GPU Length | 450mm |
| Max CPU Cooler Height | 162mm |
| Drive Bays | 3 x 2.5" SSD, 2 x 3.5" HDD |
| I/O Ports | USB, Audio (specifics not detailed in source) |
| Item Weight | 9.12 Kilograms |
| UPC | 810189570009 |
9. Warranty and Support
The AeroCool P500C PC Case comes with a Limited Warranty. Please retain your proof of purchase for warranty claims.
For technical support, warranty inquiries, or further assistance, please visit the official AeroCool website or contact their customer service department. Contact information can typically be found on the AeroCool website or on the product packaging.