HIRALIY 91220d7c-c488-45af-8417-6a96de724182
HIRALIY Solar Automatic Drip Irrigation System User Manual
Model: 91220d7c-c488-45af-8417-6a96de724182
Introduction
This manual provides detailed instructions for the setup, operation, and maintenance of your HIRALIY Solar Automatic Drip Irrigation System. This device is designed to provide efficient and automated watering for your potted plants, gardens, and other irrigation needs, utilizing solar power and offering flexible scheduling options.
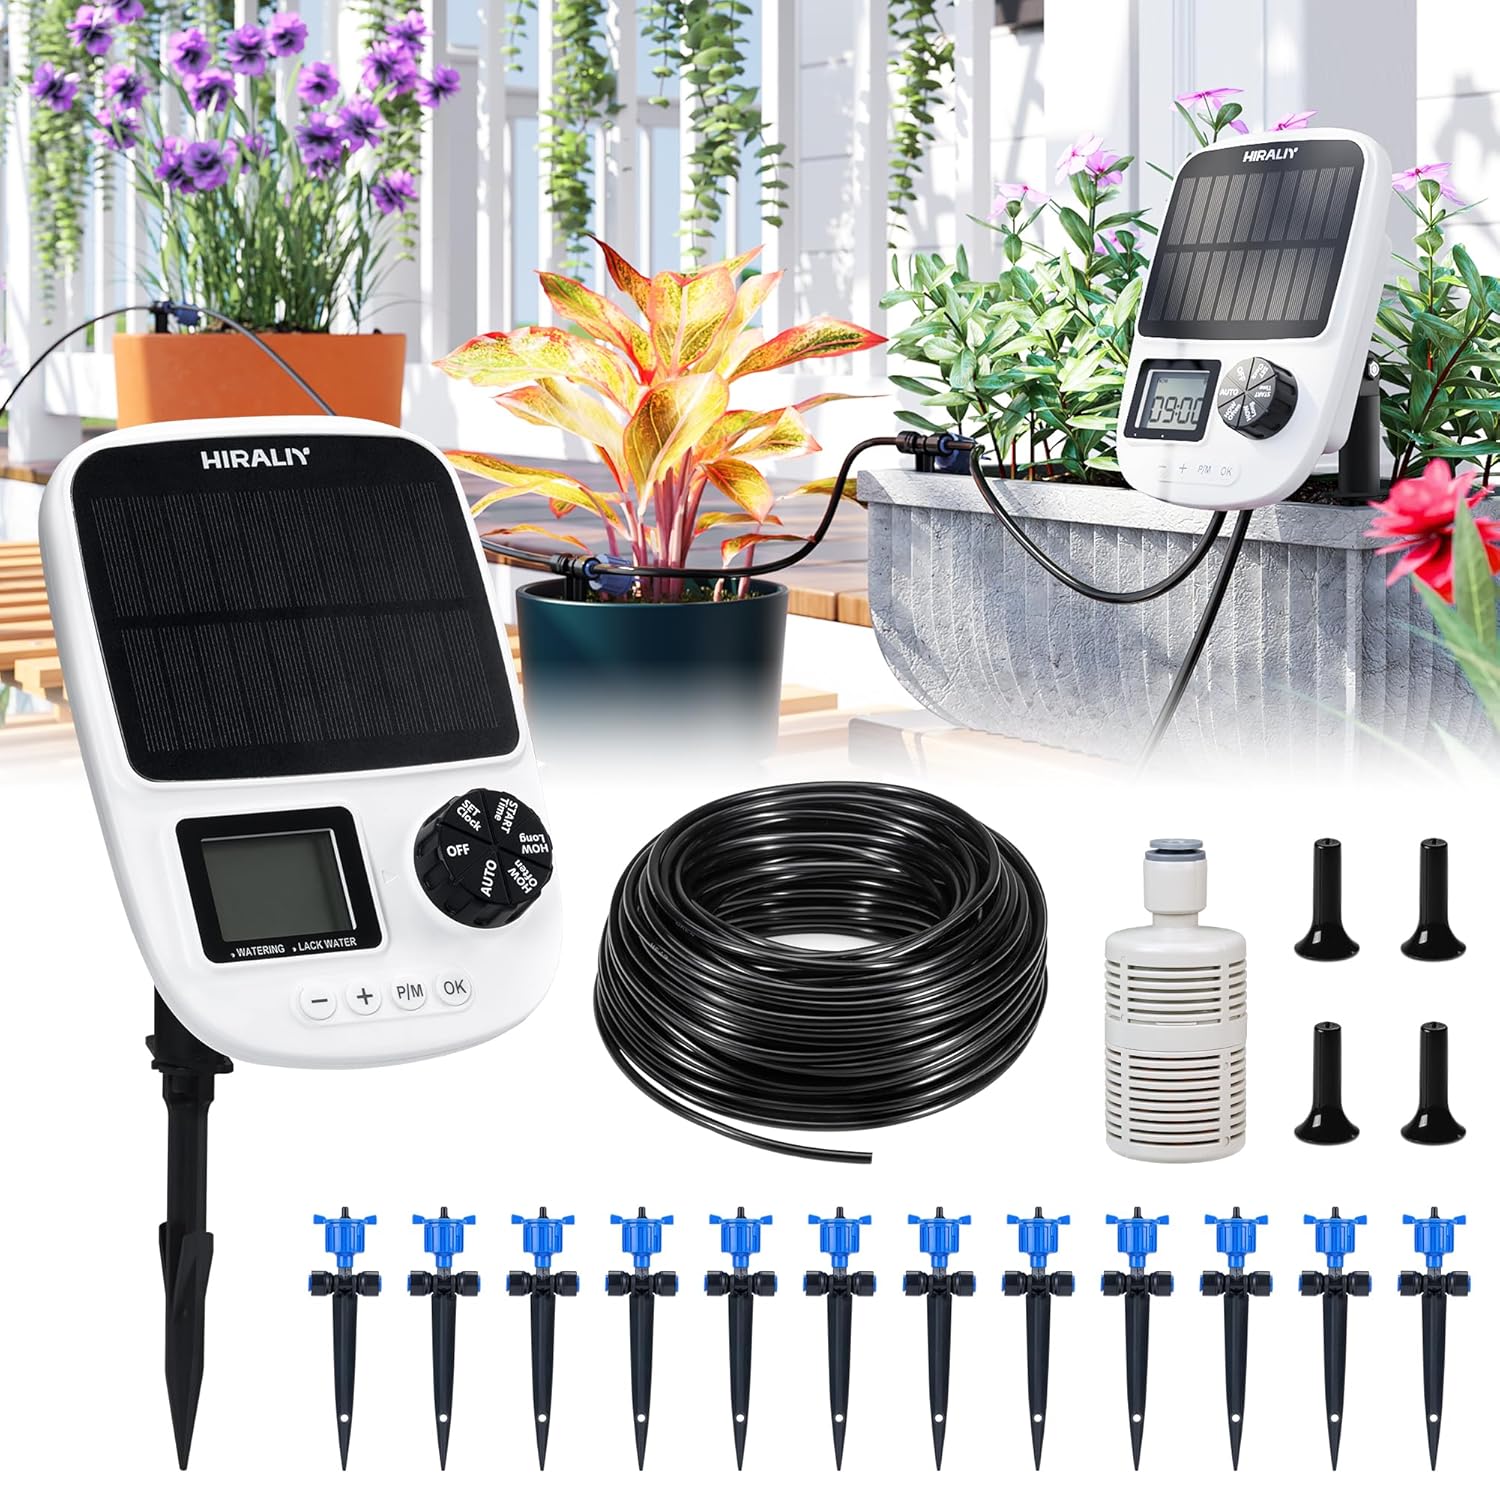
Image: Overview of the HIRALIY Solar Automatic Drip Irrigation System and its included components.
Package Contents
Verify that all the following components are included in your package:
- 1x Main Machine (Solar Powered Watering Device)
- 12x Pressure Balanced Drippers
- 1x 40 ft (1/4 inch) Black PVC Tube
- 4x Plugs
- 1x Ground Stake
- 1x Filter

Image: Visual representation of all included parts: main unit, ground stake, filter, tubing, drippers, and plugs.
Setup and Installation
Initial Power-On
For first-time use, press and hold the OK button on the device for approximately 5 seconds until the full screen display activates.
Assembling the Drip System
The system is designed for simple installation without the need for heating or softening tubes. Follow these steps:
- Attach one end of the tubing to the filter and place the filter into your water container.
- Insert the other end of the tubing into the water inlet (IN) port on the main unit.
- Cut the remaining tubing to your desired lengths for connecting drippers.
- Insert one end of the cut tubing into the water outlet (OUT) port on the main unit.
- Connect the drippers by cutting the tubing at appropriate intervals and inserting the drippers.
- Insert a plug into the end of the last dripper line to seal the system.

Image: Step-by-step guide for assembling the drip irrigation system, including connecting tubing to the filter, main unit, and drippers.
Tube Connection Guidelines
Ensure tubes are fully inserted into connectors to prevent leakage and ensure proper pump function. Insert the tube into the connector about 15mm (5/8"). To remove a tube, press the blue ring on the connector before pulling the tube out.

Image: Visual guide on how to properly insert and remove tubing from the dripper connectors.

Image: Illustration of fully inserting the tube into the main unit's port by 15mm (5/8") to prevent pump failure.
Mounting Options
The main unit can be mounted in two ways:
- Mounted on Wall: Use screws (not included) to secure the unit to a wall or fence.
- Mounted in Soil: Use the provided ground stake for easy insertion into soil.

Image: Depiction of the two primary installation methods for the main unit: wall-mounted and ground-mounted.
Operating Instructions
Setting Watering Schedules
The system allows for customizable watering plans. You can set up to 3 watering plans per day (P1, P2, P3) with specific start times, durations, and frequencies.
- Watering Duration: Adjustable from 1 second to 90 minutes.
- Watering Frequency: Adjustable from 1 day to 14 days.
- To disable a watering plan, set its 'HOW OFTEN' parameter to OFF.

Image: Detailed explanation of the control dial functions for setting local time, start time, watering duration, and frequency, along with AUTO mode operation.
Adjusting Dripper Flow
The pressure-compensating drippers ensure even water distribution. You can adjust the flow rate of individual drippers to meet the specific needs of different plants.

Image: Visual guide demonstrating how to adjust the blue dripper mechanism for either slow or fast water delivery.
Dual Power Options
The system is primarily solar-powered. For periods of insufficient sunlight, especially during autumn and winter or for indoor use, the device can be charged via its USB port.

Image: The main unit showcasing its solar panel for charging, indicating an expected charge duration of 60-90 days.

Image: The main unit connected to a USB charger, demonstrating its suitability for indoor irrigation and charging.
Maintenance
Pump Longevity
The system features a premium quality pump designed for consistent water delivery over an extended period, even after 3 years of continuous use. The pump delivers 800 ml/min.
Water Resistance
The device has high water resistance, but it is important not to fully immerse the main unit in water. Ensure the unit is positioned where it will not be submerged.

Image: The main unit enduring water splashes, highlighting its high water resistance while advising against full immersion.
Filter Cleaning
Regularly check and clean the water filter to prevent blockages and ensure optimal pump performance. A clogged filter can reduce water flow and strain the pump.
Troubleshooting
- No Water Flow: Check if the water source is empty. Ensure the filter is clean and not clogged. Verify all tube connections are secure and fully inserted. Check if the pump is running.
- Uneven Water Distribution: Adjust individual drippers to balance the flow. Ensure the water source is sufficiently elevated if gravity assist is desired, though the pump is designed for consistent pressure.
- Device Not Powering On: Ensure the device has sufficient charge. If solar charging, place it in direct sunlight. If indoors, connect it to a USB power source. Perform the initial power-on sequence (hold OK button for 5 seconds).
- Leakage: Re-check all tube connections, ensuring they are fully inserted (15mm or 5/8"). Ensure plugs are securely in place at the end of the lines.
- Watering Schedule Not Activating: Verify that the current time is set correctly. Ensure the watering plan's 'HOW OFTEN' setting is not set to OFF.
Specifications
| Feature | Specification |
|---|---|
| Brand | HIRALIY |
| Model Number | 91220d7c-c488-45af-8417-6a96de724182 |
| Power Source | Solar Powered, USB Charging |
| Hose Length | 40 Feet (1/4 inch PVC tube) |
| Watering Duration | 1 second to 90 minutes |
| Watering Frequency | 1 day to 14 days |
| Max Watering Plans | 3 per day |
| Pump Flow Rate | 800 ml/min |
| Battery | 1 Lithium Ion battery (included) |
| Materials | ABS, Plastic, PP, PVC |
Warranty and Support
For warranty information, technical support, or assistance with your HIRALIY Solar Automatic Drip Irrigation System, please refer to the contact details provided with your product packaging or visit the official HIRALIY website. Keep your purchase receipt for warranty claims.