1. Introduction
This manual provides instructions for the assembly, operation, and maintenance of your LITFAD L-Shape Reception Desk. Please read these instructions carefully before beginning assembly or use to ensure proper function and longevity of your product. Keep this manual for future reference.
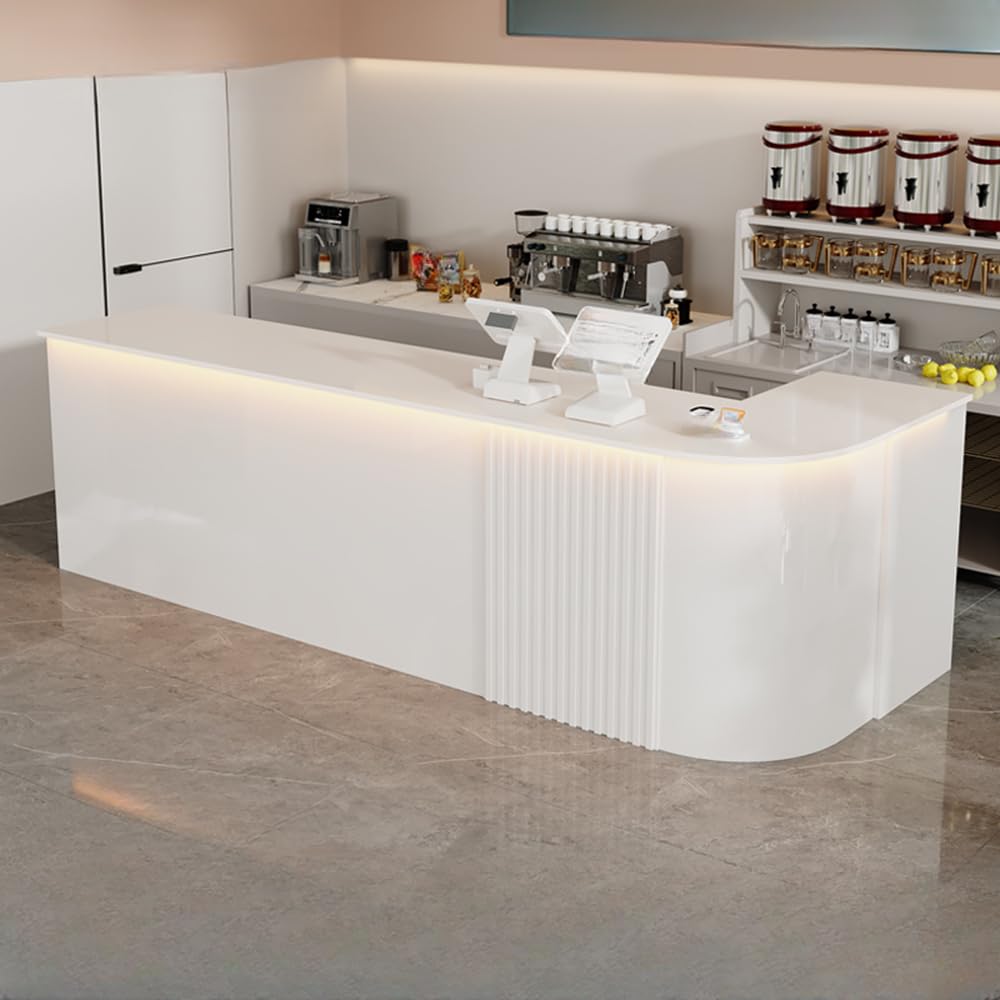
Image 1.1: Front view of the LITFAD L-Shape Reception Desk. This image displays the overall design of the desk, highlighting its L-shape and white finish, suitable for various reception areas.
2. Safety Information
- Ensure all components are present and undamaged before assembly. Do not proceed with assembly if any parts are missing or damaged.
- Assemble the desk on a soft, clean surface to prevent scratches.
- Always use the provided tools and hardware. Do not substitute with other tools or fasteners unless specified.
- Two people are recommended for assembly to ensure safety and ease of handling larger components.
- Do not overload drawers or shelves. Distribute weight evenly.
- Keep small parts and packaging materials away from children.
3. Package Contents
Verify that all the following items are included in your package:
- 1 x LITFAD L-Shape Reception Desk (disassembled components)
- 1 x Assembly Tool Kit (includes necessary wrenches, screwdrivers, etc.)
- 1 x Instruction Manual (this document)
- All required hardware (screws, dowels, cam locks, etc.)
4. Setup and Assembly
Assembly of the LITFAD L-Shape Reception Desk is designed to be straightforward. Follow the step-by-step diagrams and instructions provided in the included assembly manual. Ensure all connections are secure before use.
4.1 Pre-Assembly Checklist
- Unpack all components and lay them out on a protected surface.
- Identify each part using the component list in the separate assembly guide.
- Confirm all hardware is present.
4.2 Assembly Steps
- Begin by attaching the main support panels as indicated in the assembly guide.
- Secure the desk surface to the support structure.
- Install the drawer slides and assemble the drawer box.
- Attach the locker door and hinges.
- Install any additional shelving or cabinet components.
- Ensure all screws and fasteners are tightened. Do not overtighten.
5. Operating Instructions
The LITFAD L-Shape Reception Desk is designed for functional use in various professional environments, offering integrated storage solutions.
5.1 Drawer and Cabinet Use
- Drawer Storage: The desk includes a drawer for storing office supplies, documents, or personal items. The drawer features a safety lock design for securing valuables.
- Under-Counter Storage: Utilize the open and closed compartments beneath the counter for additional storage of larger items or equipment.
- Filing Cabinet Area: A dedicated area is provided for filing, allowing for organized document storage.

Image 5.1: Close-up view of an open drawer within the reception desk. The image highlights the drawer's construction and the safety lock mechanism, designed to secure contents.
5.2 Work Surface
The large platform table provides ample space for computers, monitors, and other business equipment, facilitating efficient workflow.
6. Maintenance
Proper care will ensure the longevity and appearance of your reception desk.
- Cleaning: Wipe surfaces with a soft, damp cloth. Avoid abrasive cleaners or harsh chemicals, which can damage the finish.
- Spills: Clean spills immediately to prevent staining or damage to the manufactured wood.
- Protection: Use coasters or mats under hot items or items that may scratch the surface.
- Inspection: Periodically check all fasteners and connections to ensure they remain tight. Retighten if necessary.
7. Troubleshooting
If you encounter any issues with your reception desk, consider the following common solutions:
- Wobbly Desk: Ensure all assembly screws are fully tightened. Check that the desk is on a level surface. Adjust any leveling feet if present.
- Drawer Not Closing Smoothly: Verify that the drawer slides are correctly installed and free of obstructions. Check for any misaligned components.
- Surface Scratches: Minor scratches may be minimized with furniture polish or repair kits designed for manufactured wood. For deeper scratches, professional repair may be required.
For issues not resolved by these steps, please contact customer support.
8. Specifications
Detailed specifications for the LITFAD L-Shape Reception Desk (Model LT1452016W):
| Feature | Detail |
|---|---|
| Model Number | LT1452016W |
| Overall Dimensions (L x W x H) | 47" x 19.5" x 35.5" (120cm x 50cm x 90cm) |
| Material | E1 Environmentally Friendly Manufactured Wood / Engineered Wood |
| Color | White |
| Number of Drawers | 1 (with safety lock) |
| Assembly Required | Yes |
| Usage | Office, Lobby, Beauty Salon, Store, Hotel, Companies |

Image 8.1: Dimensional diagram of the LITFAD L-Shape Reception Desk. This illustration provides key measurements including length (47 inches), width (19.5 inches), and height (35.5 inches).
9. Warranty Information
LITFAD products are manufactured to high-quality standards. For specific warranty details regarding your L-Shape Reception Desk, please refer to the warranty card included with your purchase or visit the official LITFAD website. Keep your proof of purchase for warranty claims.
10. Customer Support
If you have any questions, require assistance with assembly, or need to report missing/damaged parts, please contact LITFAD customer support through the following channels:
- Online: Visit the LITFAD store on Amazon or the official LITFAD website for FAQs and contact forms.
- Email: Refer to your purchase documentation for the customer service email address.
Please have your model number (LT1452016W) and purchase date ready when contacting support.