1. Introduction
Thank you for choosing the MONSGA MS1 MAX Robot Vacuum and Mop Combo. This manual provides essential information for the safe operation, setup, maintenance, and troubleshooting of your device. Please read it thoroughly before use and retain it for future reference.
2. Package Contents
Ensure all items are present and in good condition upon unpacking:
- MONSGA MS1 MAX Robot Vacuum
- Charging Dock / Self-Emptying Station
- Power Adapter
- Main Brush
- Side Brushes (2 pairs)
- Dustbin
- Water Tank
- Mop Cloths (2 pre-installed, 2 extra replacements)
- Cleaning Tool
- User Manual (this document)
3. Safety Instructions
Read and follow all safety instructions to prevent injury or damage.
- This appliance can be used by children aged 8 years and above and persons with reduced physical, sensory or mental capabilities or lack of experience and knowledge if they have been given supervision or instruction concerning use of the appliance in a safe way and understand the hazards involved.
- Children should be supervised to ensure that they do not play with the appliance.
- Cleaning and user maintenance shall not be made by children without supervision.
- Do not use the robot in environments with open flames or fragile objects.
- Do not allow the robot to pick up large or sharp objects.
- Keep hair, loose clothing, fingers, and all parts of body away from openings and moving parts.
- Use only as described in this manual. Use only manufacturer’s recommended attachments.
- Do not immerse the robot or charging dock in water.
4. Product Overview
The MONSGA MS1 MAX is a versatile robot vacuum and mop designed for efficient floor cleaning.
4.1 Key Features
- Strong Suction Power: Designed for efficient vacuuming, leaving no dust behind.
- Vacuum and Mop Combo: Switchable modes for vacuuming only, mopping only, or both simultaneously.
- Intelligent Lidar Navigation: 360° efficient mapping for faster and more accurate room navigation.
- Self-Emptying Station: Automatic dust collection, holding up to 60 days of debris for hands-free cleaning.
- Customizable Cleaning: Exclusive cleaning programs for different rooms and floors via the app.
- Auto Recharge and Resume: Automatically returns to the charging dock when battery is low and resumes cleaning after recharging.
- Multiple Smart Control Methods: Control via app, touch buttons, or voice assistants (Apple Siri, Amazon Alexa, Google Assistant).
4.2 Robot Components

Figure 1: Underside view of the robot vacuum, highlighting its suction capabilities, main brush, side brushes, and swing-arm wheels for effective cleaning.

Figure 2: The robot vacuum utilizing its 360° efficient intelligent Lidar navigation system to map and plan cleaning routes across multiple floor levels.

Figure 3: The robot vacuum connected to its self-emptying station, which automatically transfers collected dust into a sealed bag, providing up to 60 days of hands-free dust disposal.
5. Setup
5.1 Preparing the Robot
- Remove all protective films and packaging materials from the robot and charging dock.
- Install the side brushes by pressing them onto the posts until they click into place.
- Ensure the dustbin and water tank are correctly inserted.
5.2 Positioning the Charging Dock / Self-Emptying Station
- Place the charging dock against a wall on a hard, level surface.
- Ensure there is at least 0.5 meters (1.6 feet) of clear space on both sides and 1.5 meters (4.9 feet) in front of the dock.
- Connect the power adapter to the charging dock and plug it into a wall outlet.
- Ensure the dock is in an area with good Wi-Fi coverage for app connectivity.
5.3 Initial Charging
Place the robot onto the charging dock. The robot will automatically power on and begin charging. For first-time use, fully charge the robot before its initial cleaning cycle (approximately 4-6 hours).
5.4 App Connection (2.4Ghz WiFi Only)
- Download the "Smart Life" app from your mobile app store.
- Register or log in to your account.
- Follow the in-app instructions to add your MONSGA MS1 MAX robot. Ensure your phone is connected to a 2.4GHz Wi-Fi network during the pairing process.

Figure 4: Control options for the robot vacuum, including remote, on-device buttons, and smart home integration via the app.
6. Operating Instructions
6.1 Starting a Cleaning Cycle
- Via Robot Button: Press the power button on the robot once to start a general cleaning cycle. Press again to pause. Hold to send back to dock.
- Via App: Open the "Smart Life" app, select your robot, and tap "Start Cleaning". You can also choose specific cleaning modes or areas.
- Via Voice Assistant: If integrated, use voice commands like "Hey Google, start cleaning with MONSGA."
6.2 Cleaning Modes

Figure 5: The robot vacuum supports three distinct cleaning modes: Vacuum Only, Mop Only, and a combined Vacuum & Mop mode, adaptable for various floor types.
- Vacuum Only: For dry debris on carpets and hard floors.
- Mop Only: For wet cleaning hard floors. Ensure the water tank is filled and mop cloth is attached.
- Vacuum & Mop: Simultaneous vacuuming and mopping for comprehensive hard floor cleaning.
6.3 Customizing Cleaning (App Features)

Figure 6: The mobile app allows users to customize cleaning schedules, define specific cleaning zones, and set 'no-go' zones for different rooms, optimizing cleaning efficiency.
- Map Management: The robot creates a map of your home. Use the app to edit maps, divide rooms, or merge areas.
- Zone Cleaning: Select specific areas on the map for the robot to clean.
- No-Go Zones/Virtual Walls: Set virtual boundaries to prevent the robot from entering certain areas.
- Scheduling: Set daily or weekly cleaning schedules for automated cleaning.
6.4 Auto Recharge and Resume

Figure 7: The robot vacuum's auto-recharge feature, where it returns to the charging dock when its battery is low and automatically resumes cleaning from where it left off after recharging.
The robot will automatically return to its charging dock when the battery is low. Once sufficiently charged, it will resume cleaning from where it left off to complete the task.
7. Maintenance
Regular maintenance ensures optimal performance and extends the lifespan of your robot vacuum.
7.1 Emptying the Dustbin and Self-Emptying Station Bag
- Robot Dustbin: Open the robot's top cover, remove the dustbin, and empty its contents. Clean the filter regularly.
- Self-Emptying Station Bag: The station will alert you when the dust bag is full (approximately every 60 days). Replace the bag as instructed in the station's specific manual.
7.2 Cleaning Mop Cloths and Water Tank
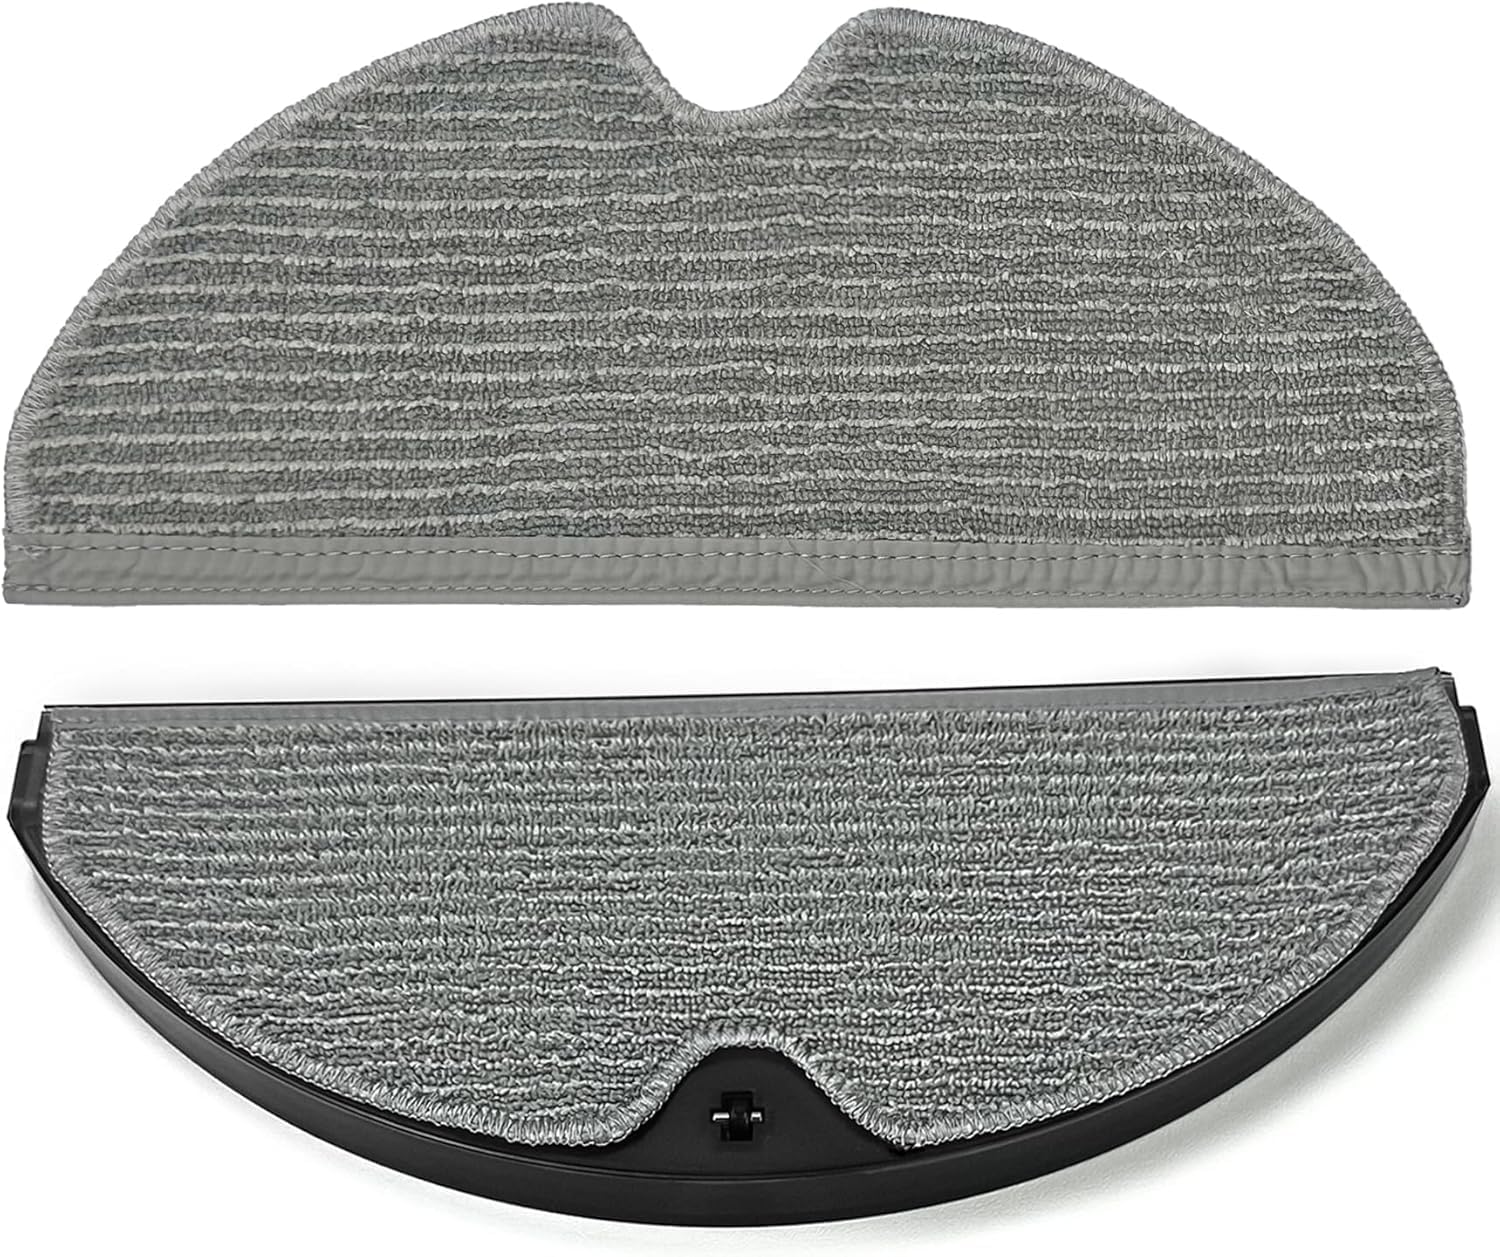
Figure 8: Detachable mop cloths for the robot vacuum, illustrating how they attach to the water tank for mopping functions.
- Remove the mop cloth from the water tank after each mopping session.
- Hand wash the mop cloth with mild detergent and air dry. Do not tumble dry.
- Empty any remaining water from the water tank and rinse it thoroughly. Allow it to air dry before reinserting.
7.3 Cleaning Brushes
- Main Brush: Remove the main brush cover and lift out the brush. Use the provided cleaning tool to remove hair and debris. Cut tangled hair with scissors if necessary.
- Side Brushes: Periodically check side brushes for wear or tangles. Remove any hair or debris. Replace worn brushes to maintain cleaning efficiency.
7.4 Cleaning Sensors and Charging Contacts
- Wipe all sensors (cliff sensors, wall sensor, lidar sensor window) and charging contacts on both the robot and the dock with a clean, dry cloth.
8. Troubleshooting
| Problem | Possible Cause | Solution |
|---|---|---|
| Robot does not turn on | Low battery; Power switch off | Place robot on charging dock; Ensure power switch is on. |
| Robot cannot charge | Charging contacts dirty; Dock not powered | Clean charging contacts; Ensure dock is plugged in and powered. |
| Robot gets stuck frequently | Obstacles; Cliff sensors dirty | Clear obstacles from cleaning path; Clean cliff sensors. |
| Poor cleaning performance | Dustbin full; Brushes tangled; Filter clogged | Empty dustbin; Clean/replace brushes; Clean/replace filter. |
| App connection failed | Incorrect Wi-Fi (not 2.4GHz); Robot not in pairing mode | Ensure 2.4GHz Wi-Fi; Follow app instructions for pairing mode. |
9. Specifications
| Feature | Detail |
|---|---|
| Brand | MONSGA |
| Model | MS1 MAX |
| Surface Recommendation | Hardwood, Tile, Low-pile Carpet |
| Filter Type | Cloth |
| Power Source | Battery Powered |
| Control Method | App, Touch, Voice (Apple Siri, Amazon Alexa, Google Assistant) |
| Wi-Fi Connectivity | 2.4GHz Only |
10. Warranty and Support
MONSGA is committed to providing excellent customer service and product support.
- 24-Month Unlimited Support: Enjoy comprehensive support for two years from the date of purchase.
- 30-Day Hassle-Free Return: Return your product within 30 days for a full refund if not satisfied.
- 24/7 Customer Support: Contact our support team anytime for assistance.
- 5-Year Accessories Supply: We ensure the availability of replacement accessories for five years.
For further assistance, please visit the official MONSGA website or contact our customer support team.