Introduction
Thank you for purchasing the Generic 48MP 1080P Digital Camera. This compact and versatile camera is designed for ease of use, making it ideal for daily travel, student use, and capturing memorable moments. It features 48MP photo resolution, 1080P video recording, 8x digital zoom, auto focus, and a built-in fill light. This manual provides essential information on how to set up, operate, and maintain your camera.
Safety Information
- Do not expose the camera to water or moisture.
- Avoid dropping the camera or subjecting it to strong impacts.
- Keep the camera away from extreme temperatures and direct sunlight.
- Use only the specified charging cable and battery.
- Do not attempt to disassemble or repair the camera yourself. Contact customer support if issues arise.
- Keep out of reach of small children.
Package Contents
Please check that all items are present in your package:
- 1 x Digital Camera
- 1 x USB Charging Cable
- 1 x Lanyard
- 1 x User Manual (this document)
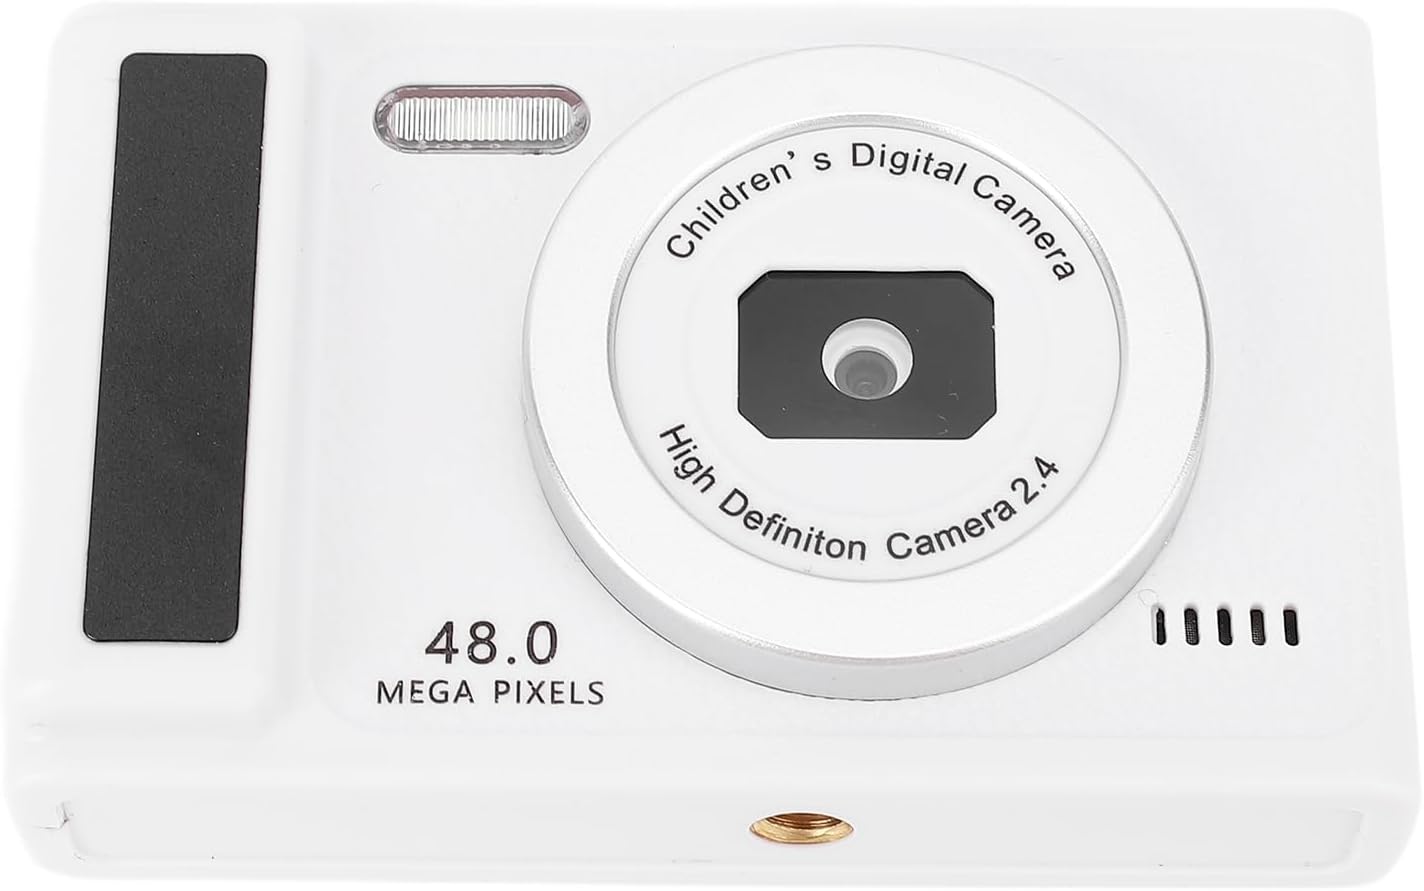
Image: The digital camera, its USB charging cable, and a white lanyard, representing the complete package contents.
Product Overview
Familiarize yourself with the main components of your camera.

Image: Front view of the digital camera, showing the 2.4-inch display screen, power button, mode button, and navigation buttons on the right side. The lens is visible above the screen.

Image: Rear view of the digital camera, highlighting the main camera lens, the built-in flash, and text indicating '48.0 MEGA PIXELS'.
Setup
1. Inserting the Memory Card
The camera supports external storage up to 64GB (Memory Card Not Included). Locate the memory card slot, usually on the side or bottom of the camera. Insert the memory card with the gold contacts facing the correct direction until it clicks into place.
2. Inserting the Battery
Open the battery compartment cover, typically located on the bottom of the camera. Insert the 550mAh battery according to the polarity indicators (+/-). Close the battery compartment cover securely.
3. Charging the Camera
Connect the provided USB charging cable to the camera's USB port and the other end to a USB power adapter or computer. The charging indicator light will typically illuminate during charging and turn off or change color when fully charged.

Image: A close-up view of the USB charging cable, showing the USB-A and USB-C connectors.
Operating Instructions
1. Power On/Off
To turn on the camera, press and hold the power button (usually marked with a power symbol) for approximately 3 seconds. To turn off, press and hold the power button again.
2. Taking Photos
- Resolution: The camera captures photos up to 48MP.
- Zoom: Utilize the 8x digital zoom for closer shots. Use the zoom buttons (often marked with 'W' and 'T' or '+' and '-') to adjust.
- Auto Focus: The camera features automatic focus. Half-press the shutter button to allow the camera to focus before fully pressing to capture the image.
- Fill Light: The built-in fill light can be activated in low-light conditions. Refer to the on-screen menu for activation options.
- Photo Frames: Experiment with the 12 available photo frames to add creative effects to your pictures.
3. Recording Videos
- Resolution: The camera supports up to 1080P video recording.
- Switch to video mode using the mode button. Press the shutter button to start recording and press it again to stop.
- Recording Frames: The camera offers 9 types of recording frames for video customization.
4. Using the 2.4 Inch Screen
The 2.4-inch HD display screen allows for clear framing of your shots and reviewing captured photos and videos. Navigate through menus and settings using the directional buttons.
5. White Balance
Adjust the white balance setting (Auto/Manual) through the camera's menu to ensure accurate color representation under different lighting conditions.
6. Connecting to a Computer
Use the provided USB cable to connect the camera to a computer. The camera will typically appear as a removable disk, allowing you to transfer photos and videos.
Maintenance
- Cleaning the Lens: Use a soft, lint-free cloth specifically designed for camera lenses to gently wipe the lens. Avoid using harsh chemicals.
- Cleaning the Screen: Use a microfiber cloth to clean the display screen.
- Storage: When not in use for extended periods, remove the battery and store the camera in a cool, dry place away from dust and direct sunlight.
- Battery Care: Fully charge the battery before first use. Avoid completely draining the battery frequently to prolong its lifespan.
Troubleshooting
| Problem | Solution |
|---|---|
| Camera does not turn on. | Ensure the battery is correctly inserted and fully charged. Press and hold the power button for 3 seconds. |
| Cannot take photos/videos. | Check if a memory card is inserted and has sufficient free space. Ensure the camera is in the correct mode (photo/video). |
| Images are blurry. | Ensure the lens is clean. Allow the camera to auto-focus by half-pressing the shutter button before fully pressing. |
| Camera not recognized by computer. | Ensure the USB cable is securely connected. Try a different USB port or cable. Restart both the camera and computer. |
Specifications
- Maximum Image Resolution: 48MP
- Maximum Video Resolution: 1080P
- Zoom: 8x Digital Zoom
- White Balance: Auto/Manual
- Auto Focus: Supported
- Lens: Fixed 100 Degree Angle
- Battery Type: 550mAh (Built-in)
- Storage Support: Up to 64GB (Memory Card Not Included)
- Connection Type: USB
- WiFi Connection: Not Supported
- Fill Light: Supported
- Display Screen: Approx. 2.4 inches
- Bottom Interface: 1/4 inch Screw Interface (for tripod mounting)
- Photo Frames: 12 Types
- Recording Frames: 9 Types
- Model Name: generic8cph51osfa-12
- Brand: generic
Warranty and Support
For warranty information or technical support, please refer to the retailer's policy or contact the seller directly. Keep your purchase receipt as proof of purchase.