1. Introduction
Thank you for choosing the Cazeboo FAZZIO 500L300 Motorized Semi-Cassette Awning. This manual provides essential information for the safe installation, operation, and maintenance of your awning. Please read these instructions carefully before installation and retain them for future reference. Proper installation and use will ensure optimal performance and longevity of your product.
The FAZZIO 500L300 awning features a durable aluminum frame, a high-quality 320 g/m² grey fabric with UV50+ protection, and a motorized system for easy extension and retraction. It includes a wind sensor for automatic retraction during strong winds, enhancing safety and product protection.
2. Safety Information
WARNING: Failure to follow these safety instructions may result in injury or damage to the product.
- Read all instructions thoroughly before installation and operation.
- Installation must be performed by competent individuals, adhering to local building codes and electrical regulations.
- Ensure the mounting surface is structurally sound and capable of supporting the awning's weight and wind loads.
- Keep children and pets away from the awning during operation.
- Do not operate the awning in strong winds, heavy rain, or snow. The integrated wind sensor will automatically retract the awning in high winds, but manual retraction is recommended if adverse weather is anticipated.
- Disconnect power before performing any maintenance or cleaning.
- Do not hang objects from the awning or allow anyone to climb on it.
- Regularly inspect the awning for wear, damage, or loose components.
3. Package Contents
Verify that all components are present and undamaged before beginning installation:
- Cazeboo FAZZIO 500L300 Motorized Semi-Cassette Awning Unit
- Mounting Brackets (x4)
- Remote Control
- Wind Sensor
- Power Cable
- Manual Crank Handle (for emergency override)
- Installation Hardware (screws, anchors - quantity may vary based on wall type)
- Instruction Manual
4. Setup and Installation
Proper installation is crucial for the safety and functionality of your awning. If you are unsure about any step, consult a professional installer.
4.1. Site Preparation
- Location: Choose a suitable wall location, ensuring sufficient clearance. The awning requires at least 15 cm of vertical space above the top of the window or door it will shade.
- Wall Type: Ensure the wall material (e.g., concrete, brick, solid wood) is strong enough to support the awning. Use appropriate anchors for your wall type.
- Clearance: The awning projects 300 cm (3 meters) when fully extended. Ensure there are no obstructions in its path.
4.2. Mounting Bracket Installation
The awning comes with 4 mounting brackets. Distribute them evenly along the awning's width (495 cm) for stable support.

Image 4.1: Overall diagram illustrating the awning's dimensions (495 cm width, 300 cm projection) and the required 15 cm clearance above the mounting point. It also shows the adjustable tilt angle from 30 to 100 degrees.

Image 4.2: Detailed illustration of the mounting brackets (x4) and their attachment to the wall. This image provides a visual guide for securing the brackets.
- Measure and mark the desired height and horizontal positions for the brackets on the wall. Ensure the marks are level.
- Drill pilot holes according to the bracket specifications and your chosen anchors.
- Securely fasten the 4 mounting brackets to the wall using appropriate screws and anchors. Ensure they are firmly attached and can bear the weight of the awning.
4.3. Mounting the Awning
- With assistance, carefully lift the awning unit and hook it onto the installed mounting brackets.
- Secure the awning to the brackets using the provided locking mechanisms or bolts, ensuring it is stable and cannot be dislodged.
4.4. Electrical Connection

Image 4.3: Illustration detailing the electrical wiring connection for the awning motor and the remote control's operational range.
- Connect the awning's power cable to a suitable outdoor power supply, following all local electrical codes. It is recommended to have this step performed by a qualified electrician.
- Ensure all connections are waterproof and secure.
4.5. Adjusting the Awning Angle

Image 4.4: Diagram illustrating the adjustable tilt angle of the awning, ranging from a minimum of 30 degrees to a maximum of 100 degrees.
The awning's tilt angle can be adjusted between 30 and 100 degrees to optimize shade coverage. Refer to the specific adjustment mechanism on your awning (usually located on the arms near the mounting points) and use the appropriate tool to set the desired angle.
5. Operating Instructions
5.1. Remote Control Operation
Image 5.1: This image shows the remote control with a 30-meter range and the manual crank handle for emergency operation. It also indicates an approximate extension/retraction time of 53 seconds.
- Pairing: If the remote is not pre-paired, follow the instructions provided with the remote control to pair it with your awning motor.
- Extend: Press the 'UP' or 'EXTEND' button on the remote to extend the awning. The awning will take approximately 53 seconds to fully extend.
- Retract: Press the 'DOWN' or 'RETRACT' button to retract the awning.
- Stop: Press the 'STOP' button to halt the awning at any desired position.
- The remote control has an operational range of approximately 30 meters.
5.2. Wind Sensor Functionality
The integrated wind sensor automatically monitors wind speed. If the wind speed exceeds a pre-set threshold, the sensor will trigger the awning to retract automatically, protecting it from potential damage. Ensure the wind sensor is installed in an open area where it can accurately detect wind.
5.3. Manual Override
In case of a power outage or motor malfunction, the awning can be manually retracted or extended using the provided crank handle. Locate the manual override port (typically on the motor side of the awning) and insert the crank handle to operate the awning.
6. Maintenance
Regular maintenance will prolong the life and appearance of your Cazeboo awning.
- Fabric Cleaning: Clean the awning fabric periodically with mild soap and lukewarm water. Use a soft brush or sponge. Rinse thoroughly with clean water and allow to air dry completely before retracting. Do not use harsh chemicals or abrasive cleaners.
- Frame Cleaning: Wipe the aluminum frame with a damp cloth to remove dirt and dust.
- Inspection: Annually inspect all bolts, screws, and moving parts for tightness and wear. Lubricate moving joints with a silicone-based spray if necessary.
- Winter Storage: In areas with heavy snow or ice, it is recommended to keep the awning retracted during winter months to prevent damage.
7. Troubleshooting
If you encounter issues with your awning, refer to the following common problems and solutions:
- Awning does not extend or retract:
- Check if the awning is connected to power.
- Ensure the remote control batteries are not depleted.
- Verify there are no obstructions preventing movement.
- If the wind sensor is active, it may prevent operation. Check wind conditions.
- Awning retracts unexpectedly:
- The wind sensor may have detected high winds. Check local weather conditions.
- Ensure the wind sensor is clean and unobstructed.
- Motor makes unusual noise:
- This could indicate a mechanical issue. Discontinue use and contact customer support.
For issues not listed here or if troubleshooting steps do not resolve the problem, please contact Cazeboo customer support.
8. Specifications
| Model | FAZZIO 500L300 |
| Dimensions (Width x Projection) | 500 cm x 300 cm (5m x 3m) |
| Material (Frame) | Aluminum |
| Material (Fabric) | 320 g/m² Polyester |
| Color | Anthracite Grey (RAL 7016) |
| Motorization | Electric |
| Features | Semi-cassette design, UV50+ protection, Wind Sensor, Remote Control, Manual Override |
| Adjustable Tilt Angle | 30° - 100° |

Image 8.1: The Cazeboo FAZZIO 500L300 awning shown in its extended position, highlighting its full projection.
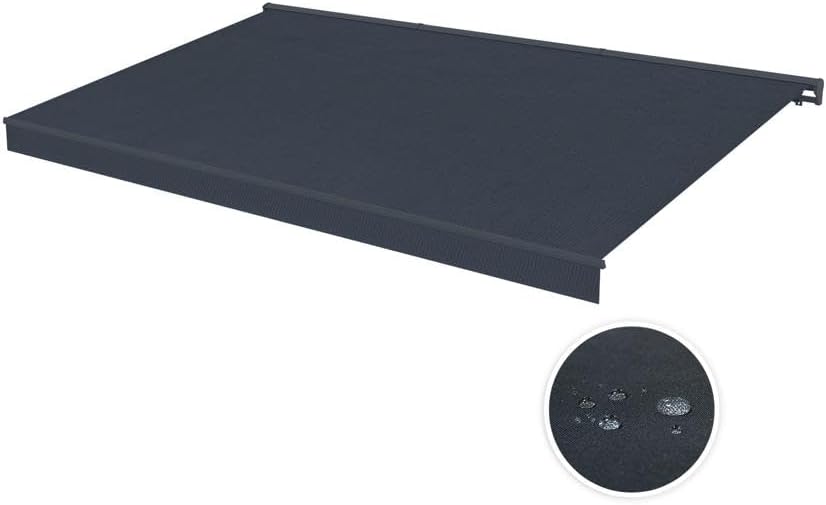
Image 8.2: The Cazeboo FAZZIO 500L300 awning in its retracted, semi-cassette state, with an inset showing the water-resistant fabric.

Image 8.3: Side view of the Cazeboo FAZZIO 500L300 awning when fully retracted, showing the compact semi-cassette design and the power cable connection.

Image 8.4: A close-up view of the awning's arm mechanism, displaying the robust construction and the Cazeboo branding.
9. Warranty and Support
Your Cazeboo FAZZIO 500L300 Motorized Semi-Cassette Awning is covered by a manufacturer's warranty. Please refer to the warranty card included with your purchase for specific terms and conditions. For technical support, spare parts, or warranty claims, please contact Cazeboo customer service through the retailer where you purchased the product or visit the official Cazeboo website.