Introduction
This manual provides comprehensive instructions for the assembly, operation, and maintenance of your KKL Sleeper Sofa Bed. Please read thoroughly before beginning assembly or use to ensure proper setup and longevity of your product.
Important Safety Information
- For ease and safety, two people are recommended for assembly.
- Ensure all parts are present and in good condition before assembly. Do not proceed with damaged parts.
- Do not allow children to play on or around the sofa during assembly. Keep small parts and tools out of reach.
- Do not exceed the maximum weight limit of 700 pounds.
- Always ensure the sofa bed mechanism is fully locked in place before sitting or sleeping to prevent injury.
- Use only the provided hardware for assembly. Substituting parts may compromise stability and safety.
Refer to the assembly video for visual guidance on safe handling and assembly steps.
Package Contents
Your KKL Sleeper Sofa Bed will arrive in multiple packages. Please verify all components are present against the packing list before beginning assembly. Delivery times for individual packages may vary.

Image: Two packages containing the sofa components. Ensure all packages are received before starting assembly.
Based on the assembly video, the parts are organized into sections: Chaise, Two Seats, and Mattress components.
Assembly Instructions
The entire assembly process is estimated to take approximately 1.5 to 2 hours with two people. Follow the steps carefully.
Video: Official KKL Sofa Bed Assembly Guide. This video provides a detailed visual walkthrough of the assembly process, demonstrating each step.
Section 1: Chaise Assembly (Approx. 40 mins)
This section involves assembling the chaise component. Ensure you have all blue-labeled parts as indicated in the video.
- Install the four legs (M) onto the two A-6 iron pipes.
- Take out the A-L and A-R side panels. Insert the two A-6 iron pipes upwards into the pre-embedded screws and tighten them securely.
- Embed the two A-7 iron pipes into the middle of the pre-embedded screws and tighten them. This completes the installation of the bottom four bars.
- Assemble the two K to the top of the A-1 (Backrest) using two H (M6*16) screws.
- Link the components from the previous steps (Step 2 and Step 3) with four H (M6*16) screws, and insert the lower A-6 (Iron Pipe) into the screws of A-1 (Backrest).
- Insert A-4 (Bottom Panel) into the assembled frame, ensuring it sits flush.
- Fix A-2 (Batten) to the back of A-3 (Front Panel) with two pieces of I (M6*40) screws.
- Assemble J-L (Sofa Connectors) and J-R (Sofa Connectors) to the bottom of A-5 (Frame) with four H (M6*16) screws each.
- Assemble the parts from the previous steps to the finished parts in Step 7 with six H (M6*16) screws to complete the Chaise installation.
Section 2: Two Seats Assembly (Approx. 20 mins)
This section focuses on assembling the two-seat component. Ensure you have all red-labeled parts.
- Connect B-L (Side Panel) and B-R (Side Panel) with B-1 (Backrest) using four K (Sofa Connectors) and eight H (M6*16) screws.
- Take out two B-2 (Iron Pipe) and reserve screw combinations on both sides of B-L (Side Panel) and B-R (Side Panel) at the top.
- Take out 20 B-5 (Plastic) and put them together with 10 B-3 (Wooden Strips). Insert 10 assembled B-5 (Plastic), B-3 (Wooden Strips), and two B-2 (Iron Pipe) into the assembly through the snap holes one by one.
- Inlay O (Roller) is mounted on the front of both side panels to complete the two seats assembly.
Section 3: Mattress Assembly (Approx. 30 mins)
This section covers the mattress frame assembly. Ensure you have all green-labeled parts.
- Connect C-2 (Batten) to C-1 (Front Panel) with four I (M6*40) screws.
- Take out C-3 (Iron Base) and connect C-3 (Iron Base) with eight T (M6*50) screws through C-4 (Roller) at the bottom.
- The side of C-3 (Iron Base) is connected to C-1 (Front Panel) through I (M6*40) screws.
- Adjust the support frame by pulling the cable to ensure it is properly aligned and stable.
Section 4: Connecting Components (Approx. 30 mins)
This final section connects the assembled components to form the complete sofa. Ensure you have all yellow-labeled parts.
- Attach four legs (M) to the bottom of the left (L) and right (R) armrests using four N screws. Warning: There are accessories inside the armrest.
- Option 1: Chaise on the Right Side
- Insert the chaise into the right armrest.
- Insert the two-seat component into the chaise.
- Insert the left armrest into the two-seat component.
- Option 2: Chaise on the Left Side
- Insert the two-seat component into the right armrest.
- Insert the chaise into the two-seat component.
- Insert the left armrest into the chaise.
- Lift up the hook and push the chaise into the two-seat component to complete the combination, and pull up the lifting accessories in sequence until fully extended.
- Put in C-5 (Cushion) and put the ears into the Iron Frame to finish the installation.
- Open A-8 (Seat Cushion), B-4 (Seat Cushion), D-1 (Back Cushion), D-2 (Pillow) vacuum package and put it in place to complete the product assembly. Allow 48 hours for cushions to fully expand and regain their shape.
Operating Instructions
Converting to a Sofa Bed
The KKL Sleeper Sofa Bed features a convenient pull-out design for quick conversion from sofa to bed.
- Locate the pull-out handle on the front of the sofa's base.
- Gently pull the bed frame outwards until it fully extends and locks into place. Ensure it is stable before use.
- Ensure the mattress cushions are properly aligned and secured for comfortable sleeping.
Utilizing Storage Space
The chaise longue features a convenient storage compartment, perfect for blankets, pillows, or other items.
- Lift the top cushion of the chaise from the front edge to reveal the spacious storage area.
- Place your desired items neatly inside the compartment.
- Gently lower the cushion to close the compartment, ensuring it is fully seated.
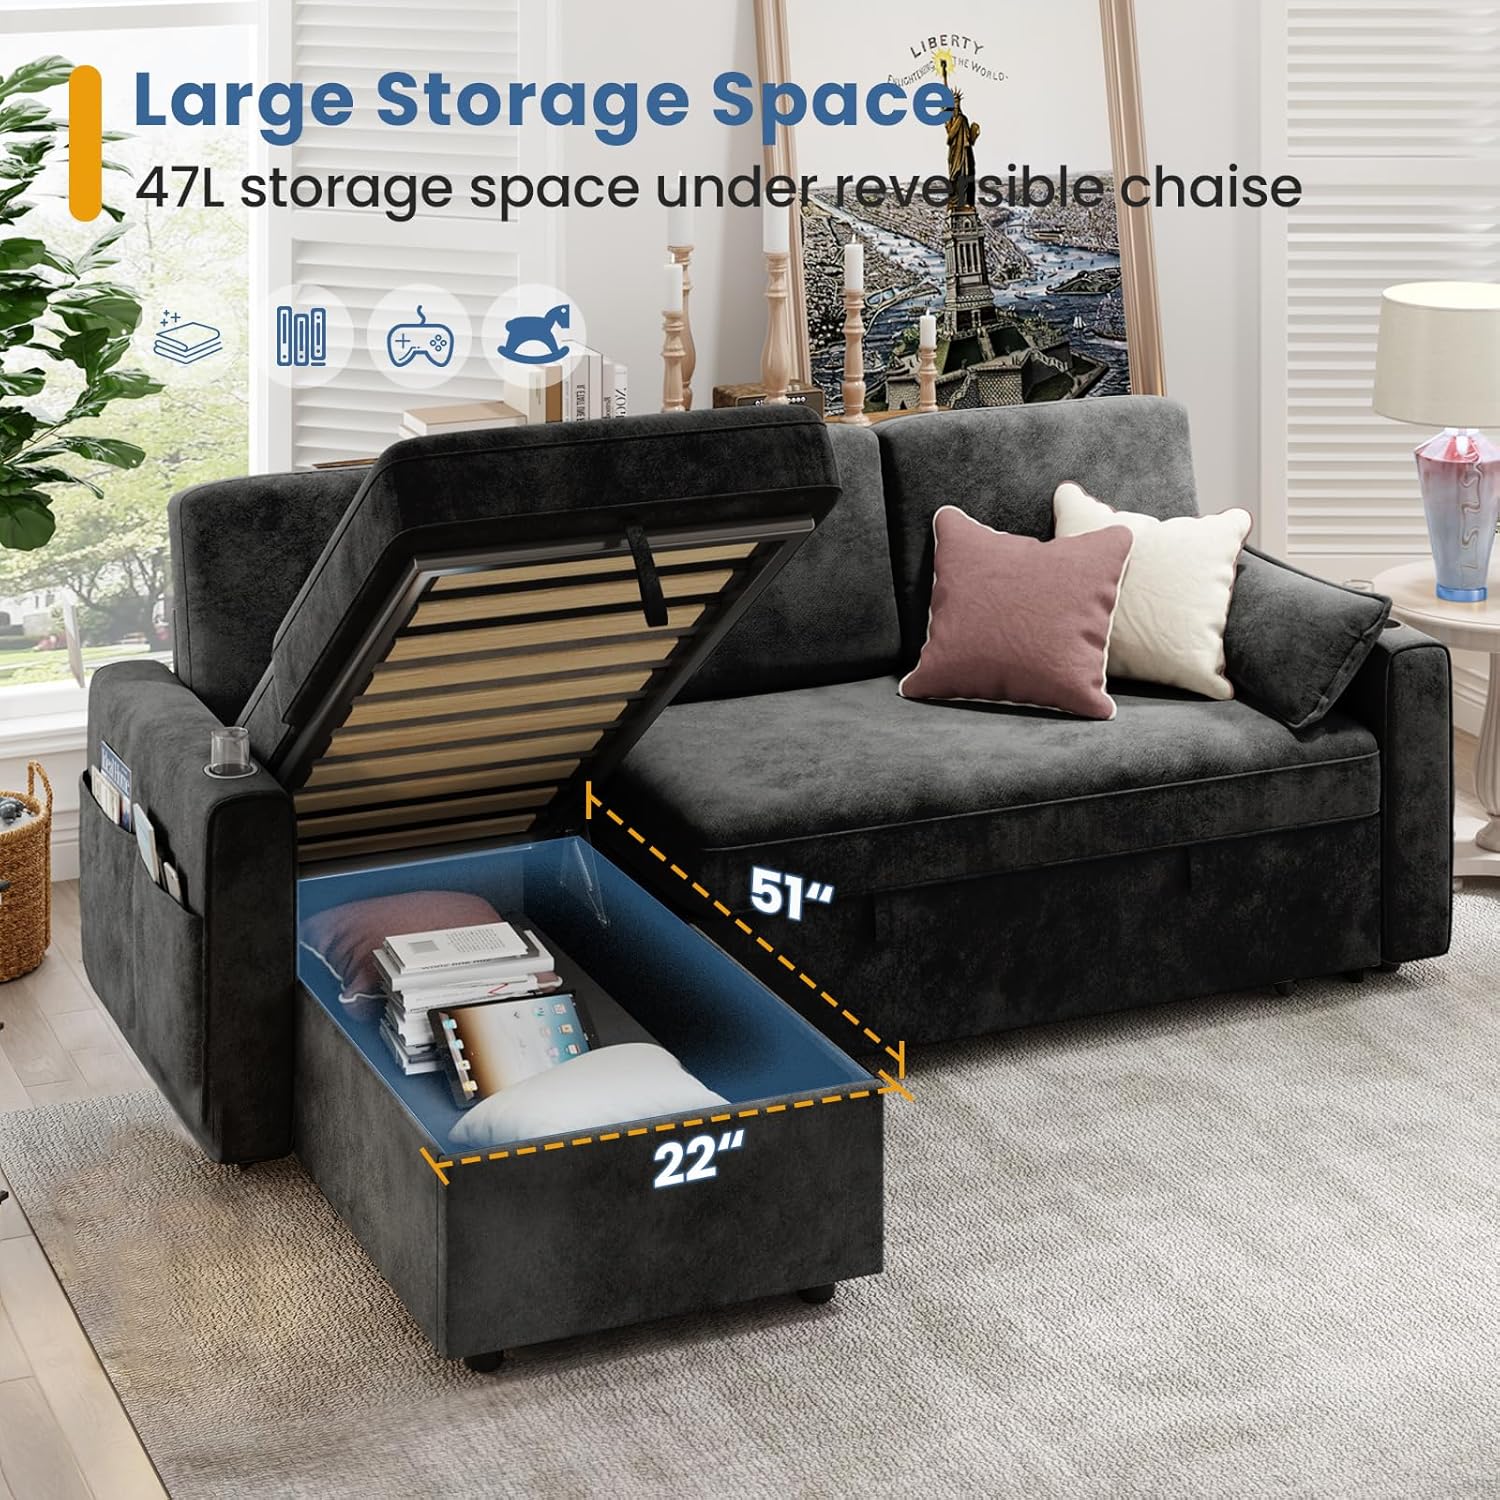
Image: The chaise storage compartment, ideal for blankets and other living room essentials, demonstrating its accessibility.
Care and Maintenance
Proper care and maintenance will help extend the life and appearance of your KKL Sleeper Sofa Bed.
- Fabric Care: The chenille fabric is designed to be skin-friendly. For spills, blot immediately with a clean, dry cloth. For general cleaning, use a soft brush or vacuum with an upholstery attachment to remove dust and debris. Cushion covers are removable and easy to wash; follow care label instructions.
- Frame Care: Periodically check all screws and connections to ensure they remain tight. Tighten if necessary using the provided tools.
- Cushion Care: Allow vacuum-packed cushions to fully decompress for up to 48 hours after unpacking. Gently fluff and knead them to aid expansion. Rotate cushions regularly to ensure even wear and maintain their shape.
- Avoid Direct Sunlight: Prolonged exposure to direct sunlight can cause fabric fading and material degradation. Position your sofa away from direct sun exposure.
Troubleshooting
If you encounter any issues with your KKL Sleeper Sofa Bed, please refer to the following common solutions. If the problem persists, contact customer support.
- Difficulty with Assembly: Ensure all parts are correctly oriented as per the instructions and video. Do not force components. If screws do not fit, double-check part numbers and alignment. Refer back to the specific assembly section.
- Sofa Bed Mechanism Sticking: Ensure no obstructions (e.g., blankets, pillows) are present in the pull-out mechanism. Apply a silicone-based lubricant to moving metal parts if necessary (avoid oil-based lubricants on fabric).
- Unstable Components: Re-tighten all screws and connections. Ensure the sofa is placed on a flat, even surface. Uneven flooring can cause wobbling.
- Cushions Not Fully Expanding: Allow up to 48 hours for vacuum-packed cushions to fully decompress. Gently fluff and knead them to aid expansion. Placing them in a warm room can also help.
Product Specifications
| Feature | Detail |
|---|---|
| Brand | KKL |
| Model | B0F18CXCL8 |
| Product Dimensions | 55"D x 85"W x 37"H |
| Item Weight | 189 Pounds |
| Weight Limit | 700 Pounds |
| Color | Chenille Black |
| Material Type | Metal (Frame), Foam, Cotton (Fill) |
| Assembly Required | Yes |
| Special Features | Convertible, Storage, Cup Holder, Side Pocket |
Warranty and Customer Support
For any questions regarding assembly, missing parts, or product issues, please contact KKL customer support. We are committed to providing assistance and ensuring your satisfaction.
Please refer to your purchase documentation for specific warranty details and contact information.
You can also visit the official KKL Store on Amazon for more information and support: KKL Store
If you have any questions about the assembly or arrival time, please contact our team; we will respond and help you within 24 hours.