1. Introduction
Thank you for choosing the BRILONER LED RGBW Wireless Table Lamp. This versatile lamp combines warm white illumination with vibrant RGB colors, offering flexible lighting for various environments. Its cordless design, touch control, and IP44 splash protection make it suitable for both indoor and outdoor use. Please read this manual carefully before use to ensure proper operation and maintenance.
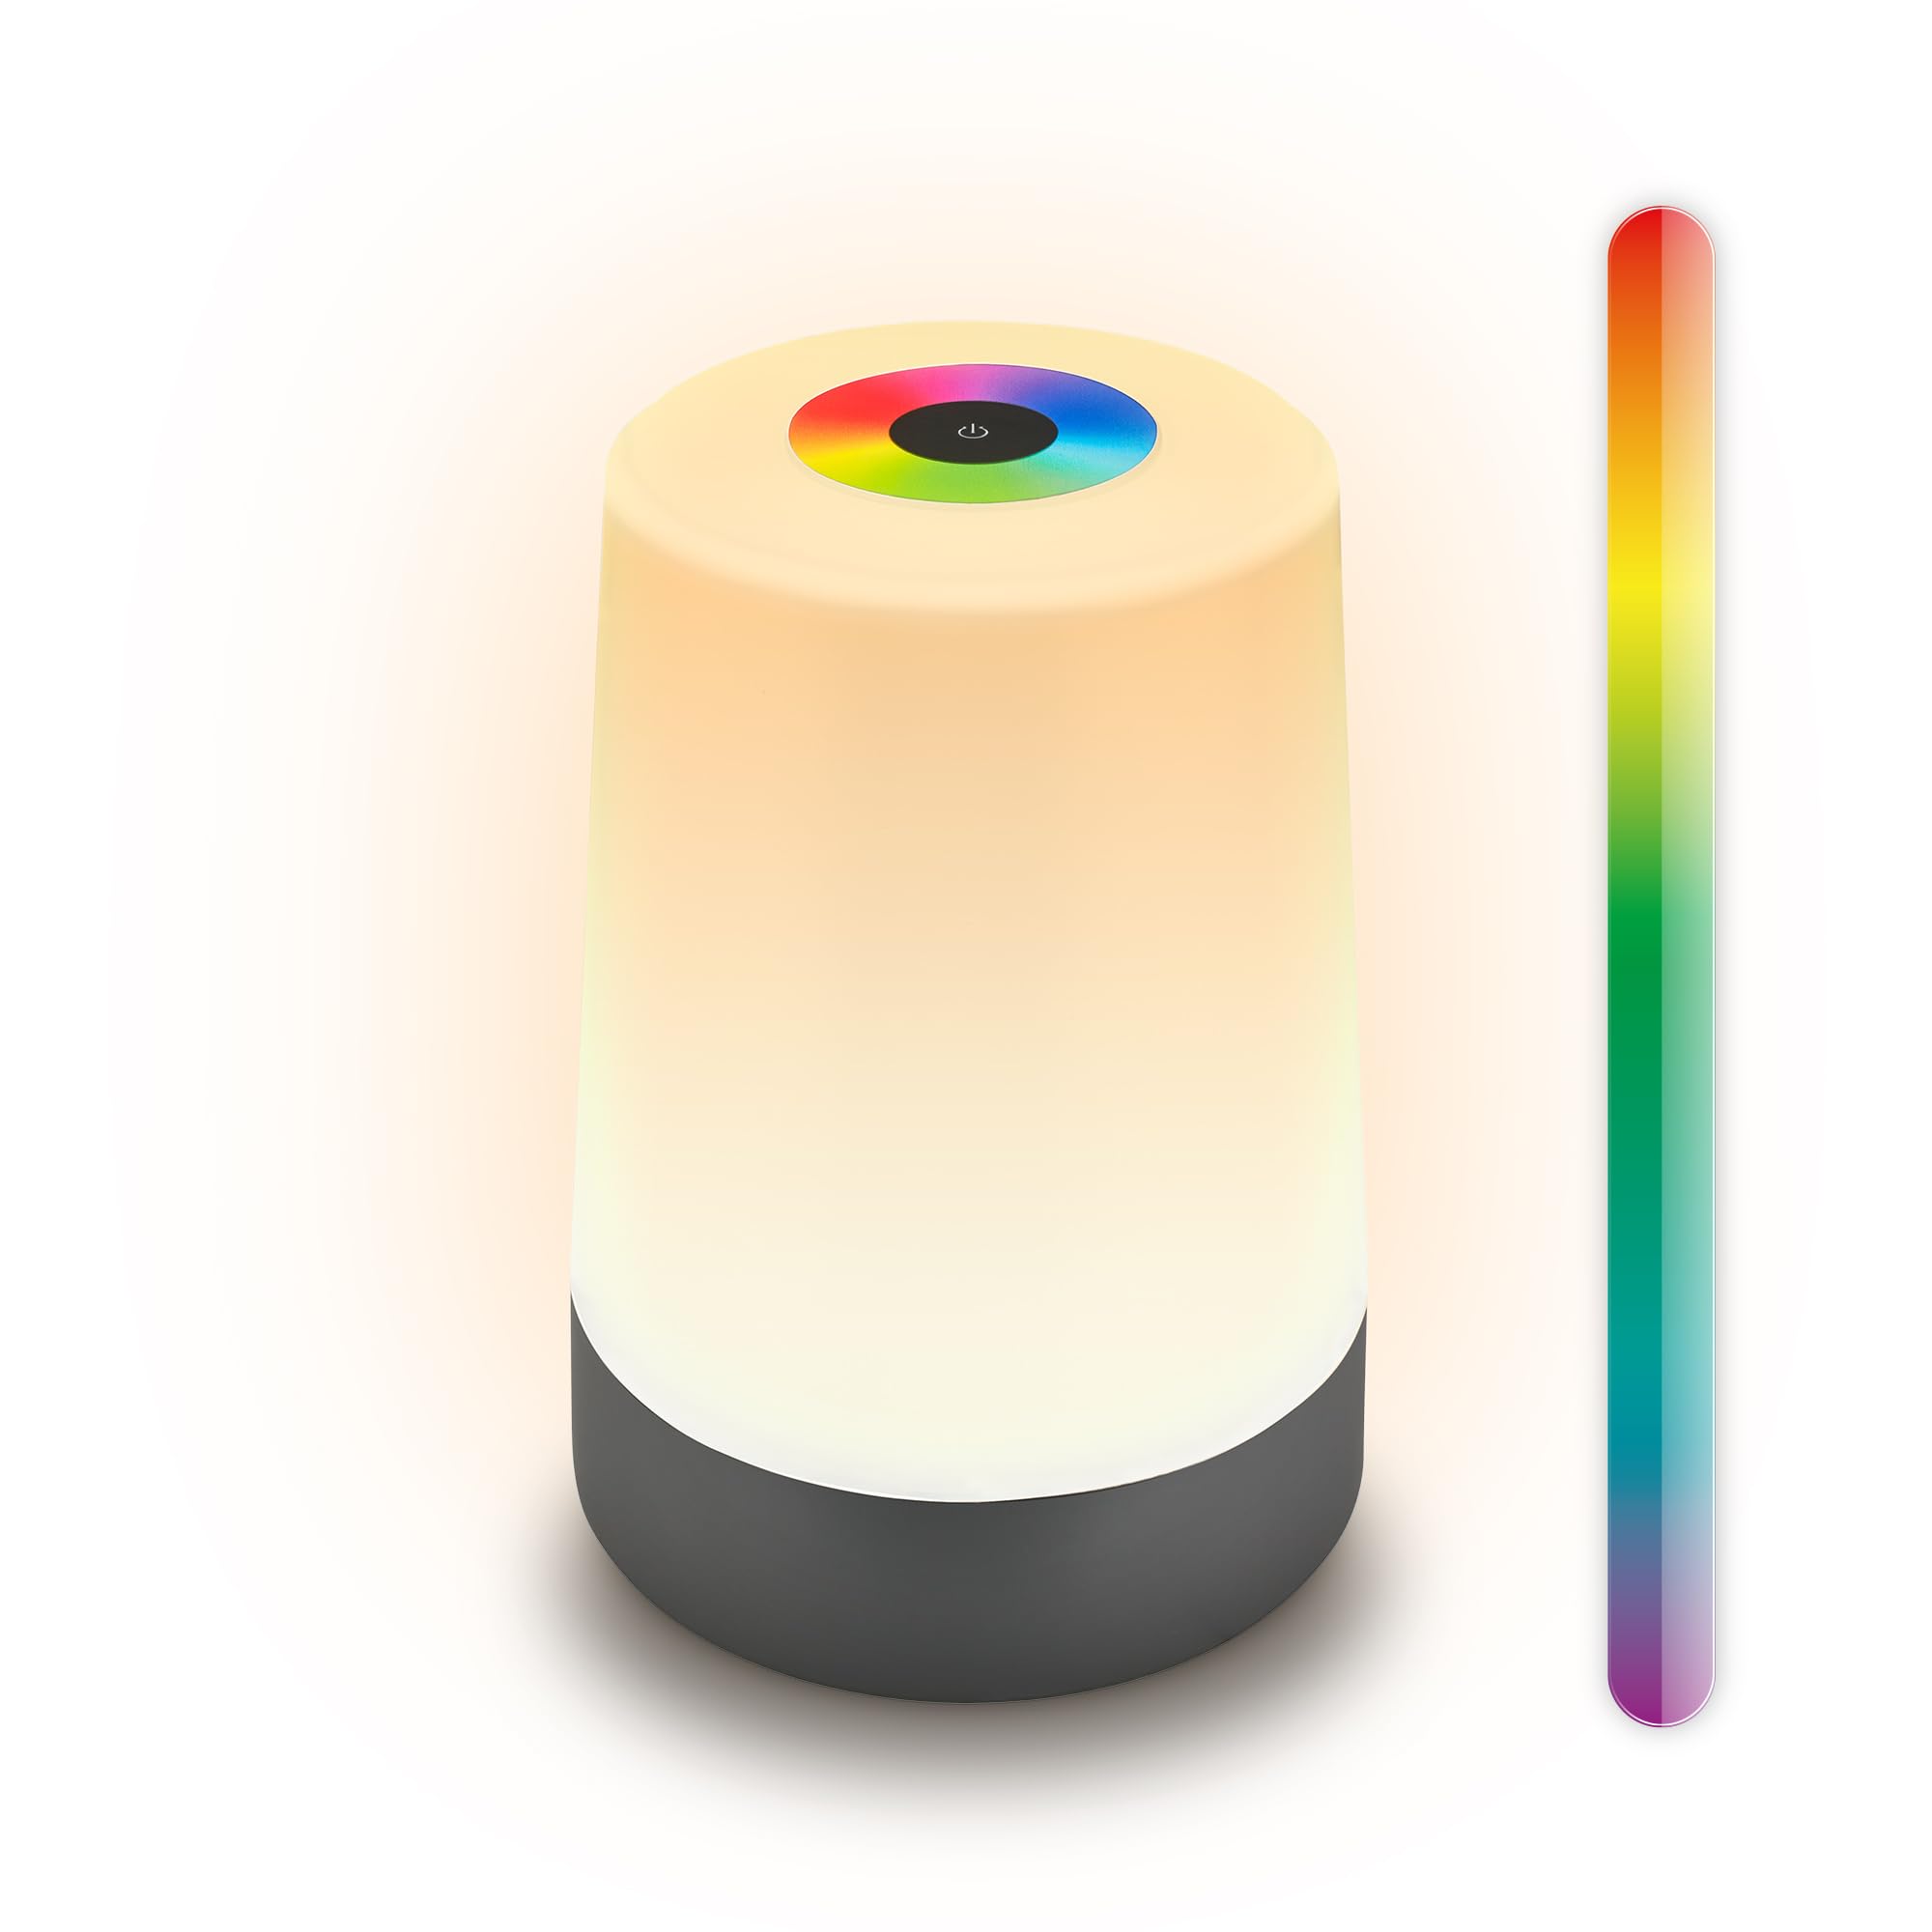
This image displays the BRILONER LED RGBW Wireless Table Lamp, highlighting its key features such as cordless operation, warm white (2700K) and RGB color options, IP44 splash protection, and dimmable brightness from 10% to 100%.
2. Safety Instructions
- Read all instructions before using the lamp.
- Keep the lamp away from extreme temperatures, direct sunlight, and moisture.
- Do not disassemble or modify the lamp, except for battery and light source replacement as instructed in the maintenance section.
- Use only the provided USB-C cable or a certified equivalent for charging.
- Ensure the charging port is dry before connecting the USB-C cable.
- The IP44 rating protects against splashing water from any direction. Do not immerse the lamp in water or expose it to strong jets of water.
- Dispose of batteries according to local regulations.
3. Package Contents
- BRILONER LED RGBW Wireless Table Lamp (Model 7554015)
- USB-C to A Charging Cable (0.5m)
- Instruction Manual
4. Setup
4.1 Initial Charging
Before first use, fully charge the lamp. Connect the provided USB-C cable to the charging port located on the underside of the lamp and the other end to a suitable USB power adapter (not included). The charging indicator (if present) will show the charging status. A full charge typically takes several hours.
4.2 Mechanical On/Off Switch
The lamp features a mechanical On/Off switch on its underside. This switch helps prevent deep discharge of the battery during long periods of inactivity and extends battery life. Ensure this switch is in the "ON" position for the touch controls to function and for charging.

A close-up view of the lamp's base, illustrating the USB-C charging port, the mechanical On/Off switch designed to prevent deep discharge, and indicating that both the battery and light source are replaceable.
5. Operating Instructions
5.1 Power On/Off
With the mechanical switch on the underside set to "ON", gently tap the power symbol on the top touch panel to turn the lamp ON or OFF.
5.2 Adjusting Brightness (Stepless Dimming)
When the lamp is in warm white mode, press and hold the power symbol on the touch panel. The brightness will gradually increase or decrease. Release your finger when the desired brightness is reached. The lamp offers stepless dimming from approximately 10% to 100%.
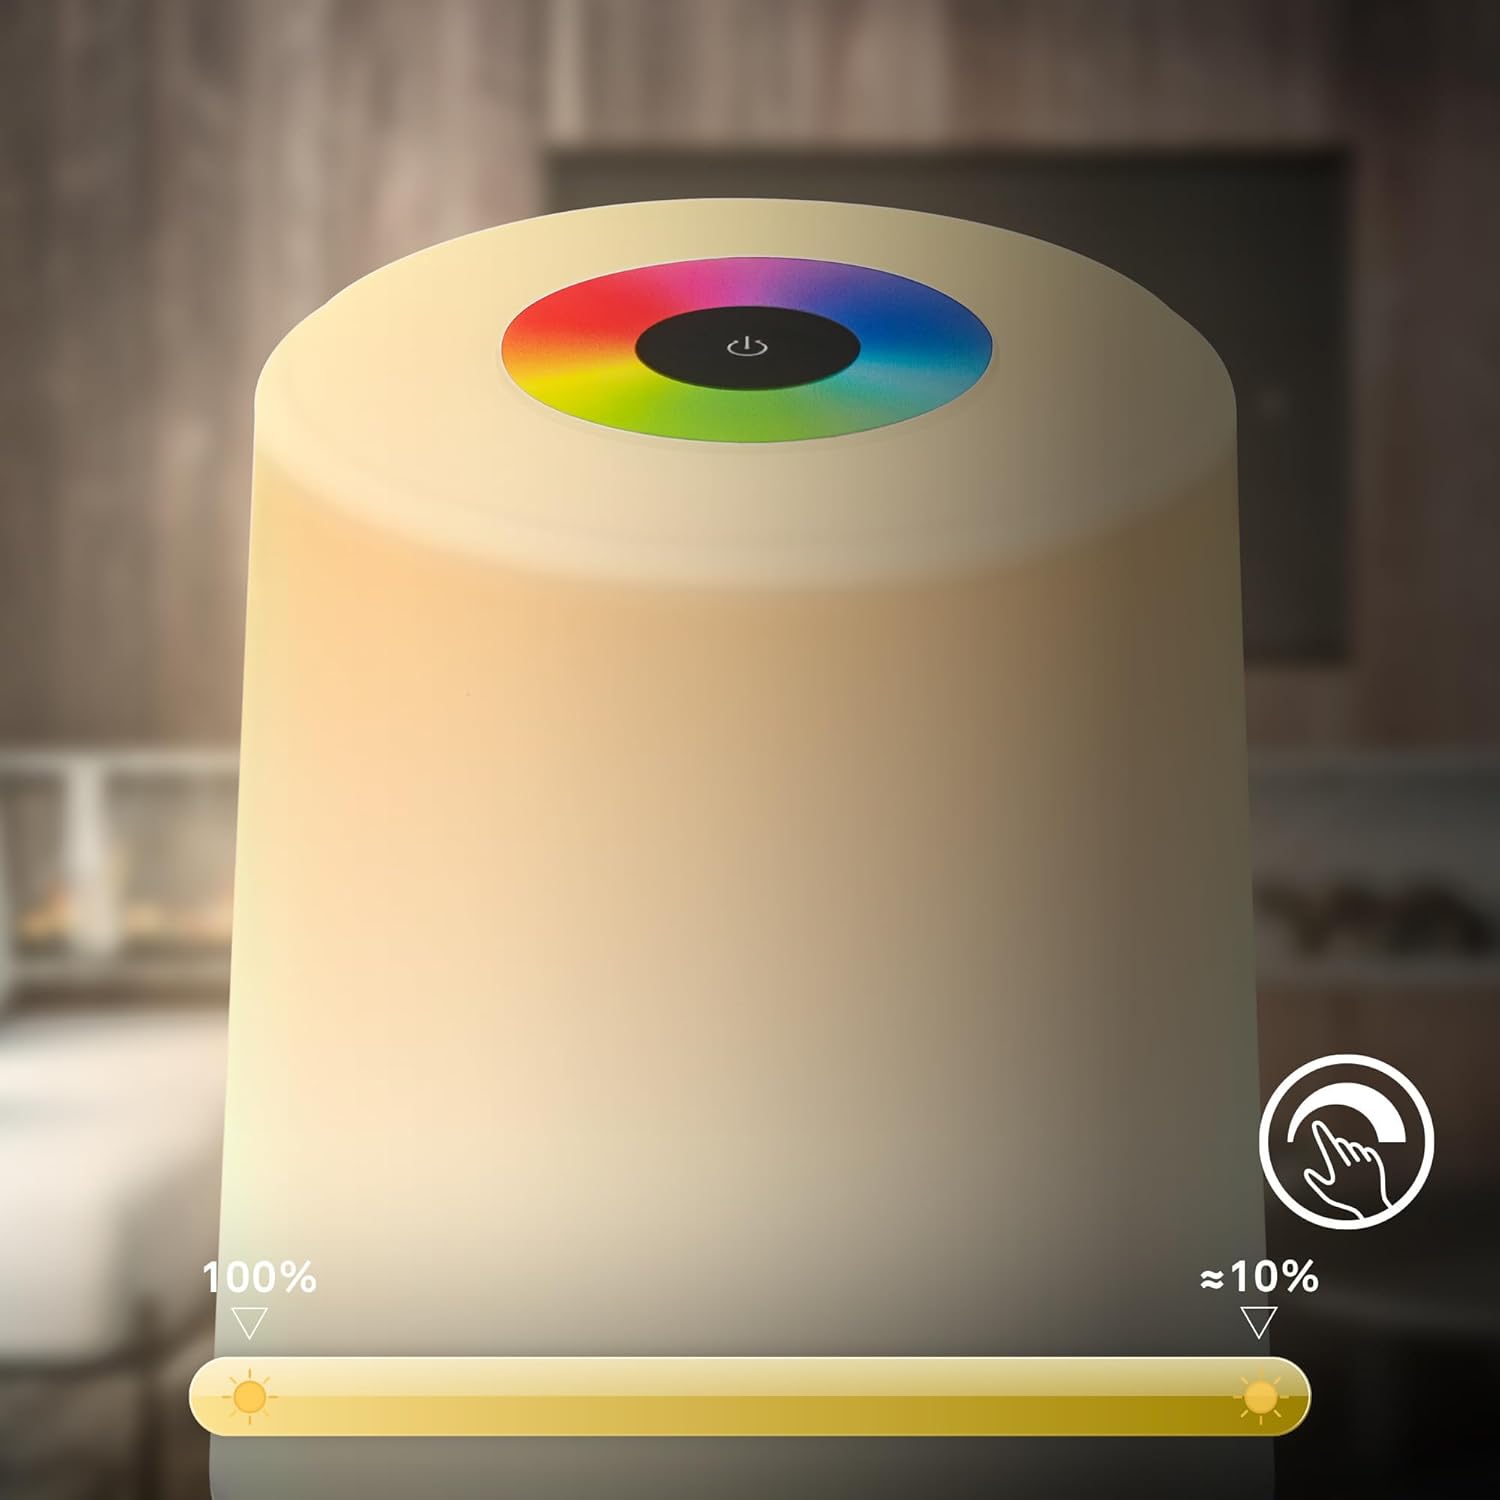
An illustration showing the lamp's stepless dimming capability, allowing users to adjust the light intensity from 10% to 100% using the touch interface.
5.3 Changing Colors (RGB Mode)
To switch to RGB color mode, tap the color wheel symbol on the top touch panel. To select a specific color, slide your finger around the color wheel. The lamp will display the corresponding color. To cycle through colors automatically, tap the color wheel symbol again.
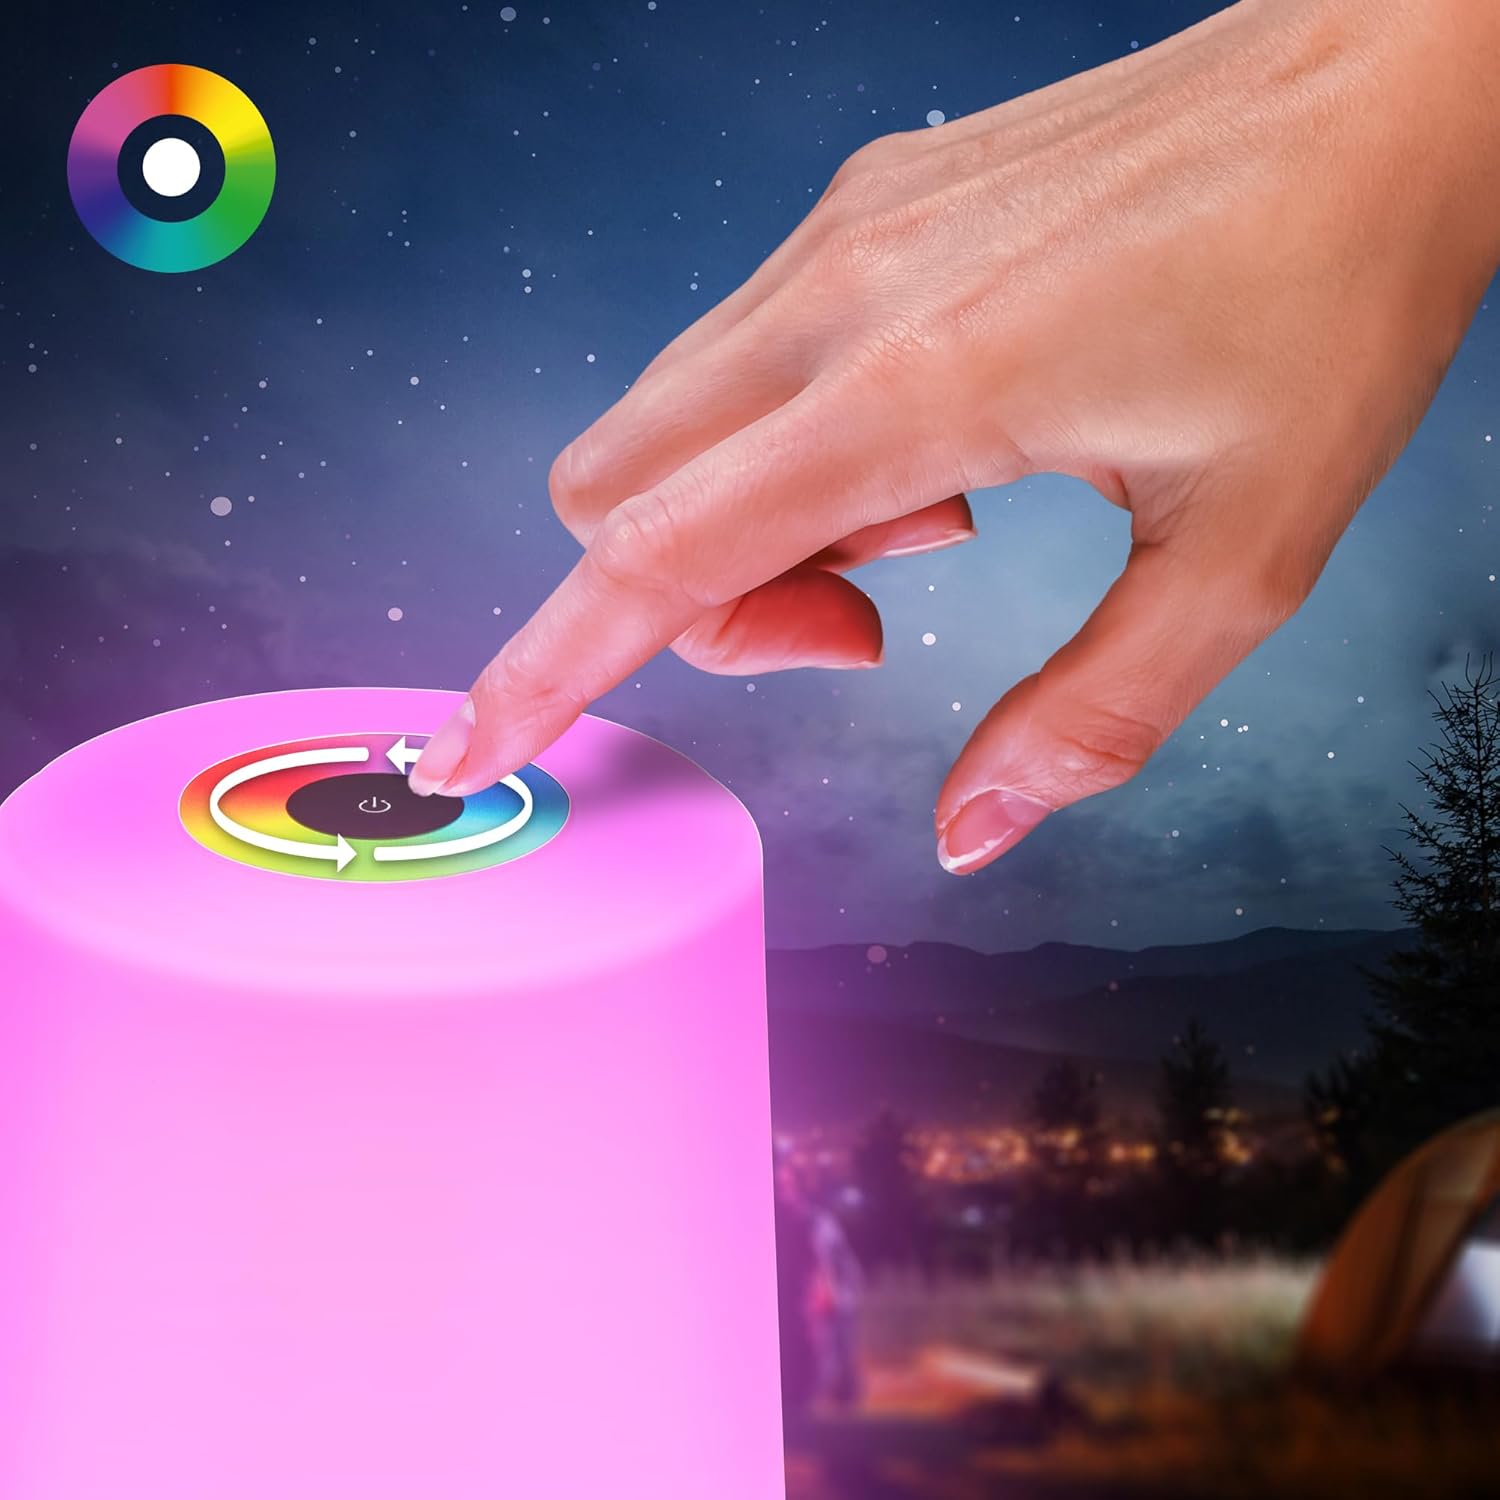
This image demonstrates the touch control interface on the top of the lamp, used for selecting different RGB colors by rotating a finger around the color wheel.
5.4 Switching Between Warm White and RGB
To switch between warm white (2700K) and RGB color modes, tap the mode switch symbol (often integrated with the power or color wheel symbol, or a separate dedicated button if present). Refer to the lamp's top panel for specific icons.
6. Maintenance
6.1 Cleaning
To clean the lamp, ensure it is turned off and disconnected from any power source. Wipe the surface with a soft, dry, or slightly damp cloth. Do not use abrasive cleaners or solvents.
6.2 Battery Replacement
The lamp features a replaceable 2600mAh battery. If the battery life significantly decreases, it may be time for replacement. Refer to the underside of the lamp for access to the battery compartment. Use only a compatible replacement battery. Dispose of the old battery responsibly.
6.3 Light Source Replacement
The LED light source in this lamp is designed to be replaceable. If the light source fails, it can be exchanged. Contact customer support for guidance on obtaining a replacement light source and instructions for safe replacement.
7. Troubleshooting
| Problem | Possible Cause | Solution |
|---|---|---|
| Lamp does not turn on. | Mechanical switch is OFF. Battery is depleted. | Ensure mechanical switch on underside is ON. Charge the lamp fully. |
| Lamp does not charge. | Mechanical switch is OFF. Faulty cable or adapter. Charging port is dirty. | Ensure mechanical switch is ON. Try a different USB-C cable and power adapter. Clean the charging port gently. |
| Touch control is unresponsive. | Mechanical switch is OFF. Lamp is off. Moisture on touch panel. | Ensure mechanical switch is ON. Tap the power symbol to turn on. Wipe the touch panel dry. |
| Short battery life. | Battery is old or damaged. | Consider replacing the battery as per maintenance instructions. |
8. Specifications
| Feature | Detail |
|---|---|
| Model Number | 7554015 |
| Dimensions (D x H) | 90mm x 130mm |
| Weight | 210 grams |
| Light Source | Integrated LED (Warm White 2700K + RGB) |
| Power Consumption | 2.8 Watts |
| Luminous Flux | 280 lumens |
| Control Method | Touch Control (Stepless Dimming, RGB Color Wheel) |
| Battery | 2600mAh (Rechargeable and Replaceable) |
| Charging Port | USB-C |
| Ingress Protection (IP) Rating | IP44 (Splash-proof) |
| Material | Plastic |
| Color | Anthracite |
| Energy Efficiency Class | F |
| Wireless Operation | Yes |

A technical diagram illustrating the compact dimensions of the lamp, with a diameter of 90mm and a height of 130mm.

This image highlights the lamp's IP44 rating, signifying its resistance to splashing water, making it suitable for both indoor and outdoor use.
9. Warranty and Support
BRILONER products are manufactured with quality and durability in mind. For warranty information, please refer to the terms and conditions provided at the point of purchase or visit the official Briloner website. For technical support, replacement parts, or any inquiries not covered in this manual, please contact Briloner customer service.
Contact Information: Please refer to the Briloner official website or your retailer for the most up-to-date contact details.